Exercise: Create a Data Form Add-In
The process of creating a Data Form Add-In is simply a matter of Adding a new Data Form Add-In Spec to your Blackbaud.CustomFx.FoodBank.Catalog project.
Note: You can choose to keep the Add-in XML specs within a catalog project while moving .NET UI behavior code to a UIModel project. Alternatively, you can keep both the spec and the code within either the Catalog or UIModel project. This exercise demonstrates moving the code to the UIModel project.
Step 1 - Create an "Add-Ins" folder to your catalog project
Right-click the Blackbaud.CustomFx.FoodBank.Catalog project and select Add\New Folder from the popup menu. Name the new folder "Add-Ins." We will store the Data Form Add-In Spec types within this new folder.
Step 2 - Add a new Data Form Add-In Spec to your catalog project.
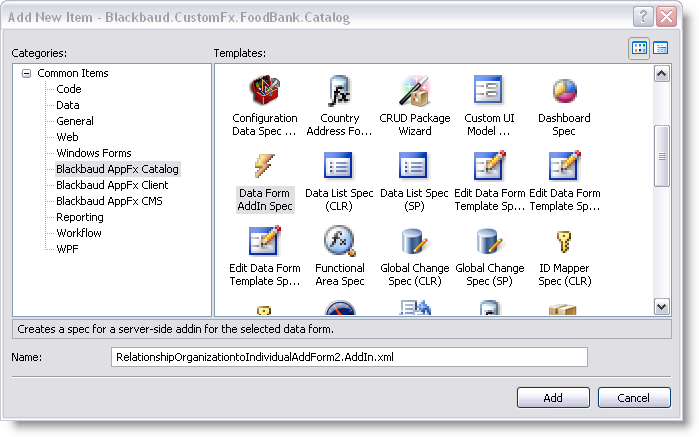
Right-click the folder created in the previous step and Add\New Item… from the popup menu.
Select Data Form Add-In Spec as the template.
Name the spec file RelationshipOrganizationtoIndividualAddForm2.Add-In.xml. I used the name of the data form that I am extending as the basis of the name for the Add-In.
Step 3 - Select the UI Model
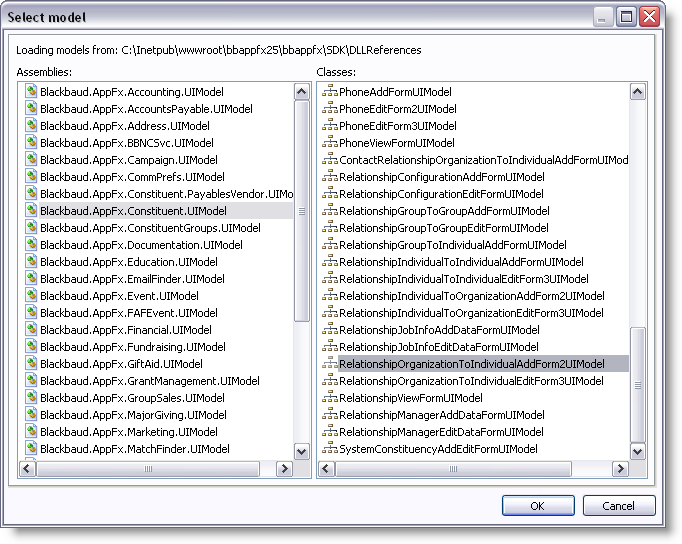
For SDK versions prior to 2.94, a wizard promptd you for the name of the UI Model assembly and class. The assembly to extend is named Blackbaud.AppFx.Constituent.UIModel, and the class name is RelationshipOrganizationToIndividualAddForm2UIModel.
For SDK version 2.94 and up, the wizard dialog screen is simplified:
Version: This material pertains to version 2.94 of Blackbaud CRM SDK.
Instead of the Select model dialog screen, the Loaded Data Form Instance Search dialog screen allows you to simply search for the data form to extend.
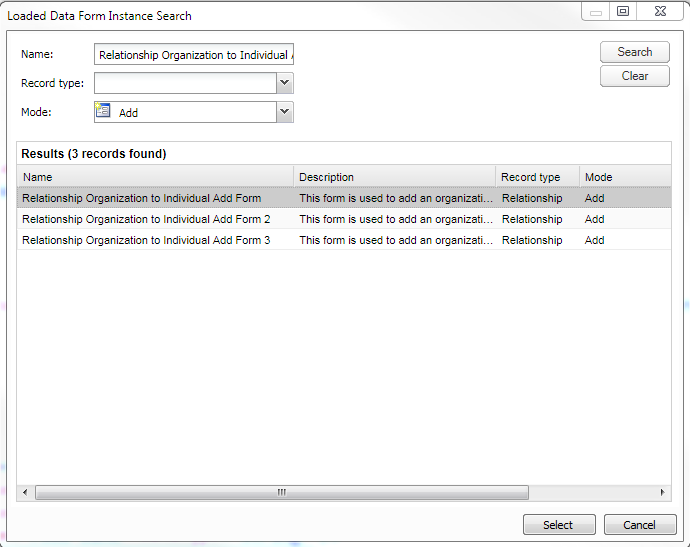
After you locate for the correct data form, the wizard performs the dirty work of selecting the appropriate UI Model assembly and class.
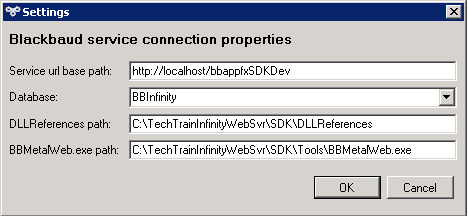
Warning: In version 2.94, the wizard leverages the BBMetalWeb.exe utility to help generate the classes needed by your Add-In. If the wizard can not locate BBMetalWeb,exe utility, it prompts you for its location. Below is a sample Settings dialog screen with sample property settings. The first Service url base path setting refers to the base URL for the AppFxWebService.asmx. DO NOT INCLUDE the "AppFxWebService.asmx" value for the service URL base path.
Note: For more information on BBMetalWeb, see the BBMetalWeb.docx document in the SDK\Documentation folder that is available when you install the Blackbaud Infinity SDK.
Step 4 - Inspect the spec and classes.
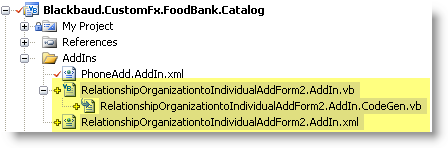
The wizard creates three programming artifacts:
-
A Data Form Add-In Spec XML file that connects the data form that we extend to our newly generated partial class file (RelationshipOrganizationtoIndividualAddForm2.Add-In.xml)
-
A partial class file where we can place our UI behavior code (RelationshipOrganizationtoIndividualAddForm2.Add-In.vb)
-
A code generated partial class that represents a model of the relationship Add Data Form (RelationshipOrganizationtoIndividualAddForm2Add-In.CodeGen.vb)
Step 5 - Create an "AddIns" folder to your UI Model Assembly project.
Right-click the Blackbaud.CustomFx.FoodBank.UIModel project and select Add\New Folder from the popup menu. Name the new folder "AddIns." We will store the partial classes that were built by the wizard from the previous step within this new folder.
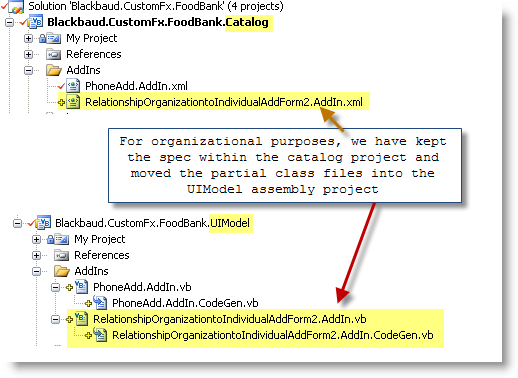
Step 6 - Move the partial class files to the UI Model's assembly project (Blackbaud.CustomFx.FoodBank.UIModel).
By default, the wizard creates the XML spec file and the partial class files within the catalog project where you added the Add-in spec. Move these class files into the Blackbaud.CustomFx.FoodBank.UIModel assembly project. This organizes our behavioral related code in one place, and we can simply rebuild our UI Model assembly and easily see our behavior changes in the application.
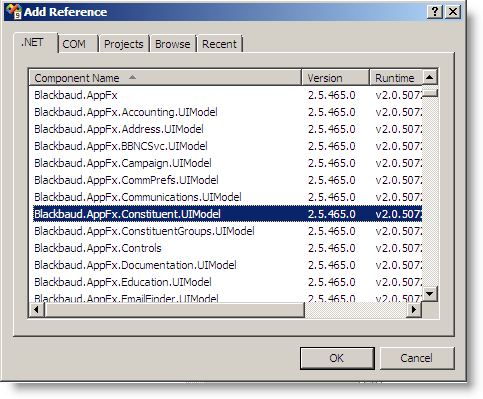
Step 7 - Remove the reference to Blackbaud.AppFx.Constituent.UIModel from the catalog project and add the reference to the UI Model project.
The Add-In code that the wizard generated depends on the Blackbaud.AppFx.Constituent.UIModel assembly. A reference to this assembly was added automatically when you ran the wizard within the catalog project. Remove this reference within catalog project and add the reference to the UI Model project.
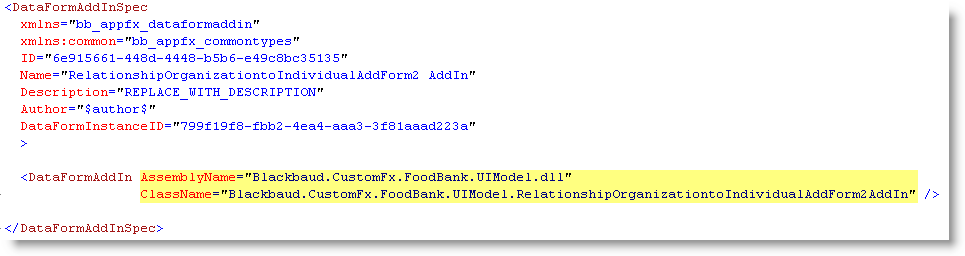
Step 8 - Modify the Add-in spec to reflect the relocation of the class files.
Modify the AssemblyName and ClassName attributes within the Data Form Add-In element to reflect the relocation of the class files to the UI Model project:
Step 9 - Add behavior to the partial class.
Now we can add the code to fulfill the following requirements:
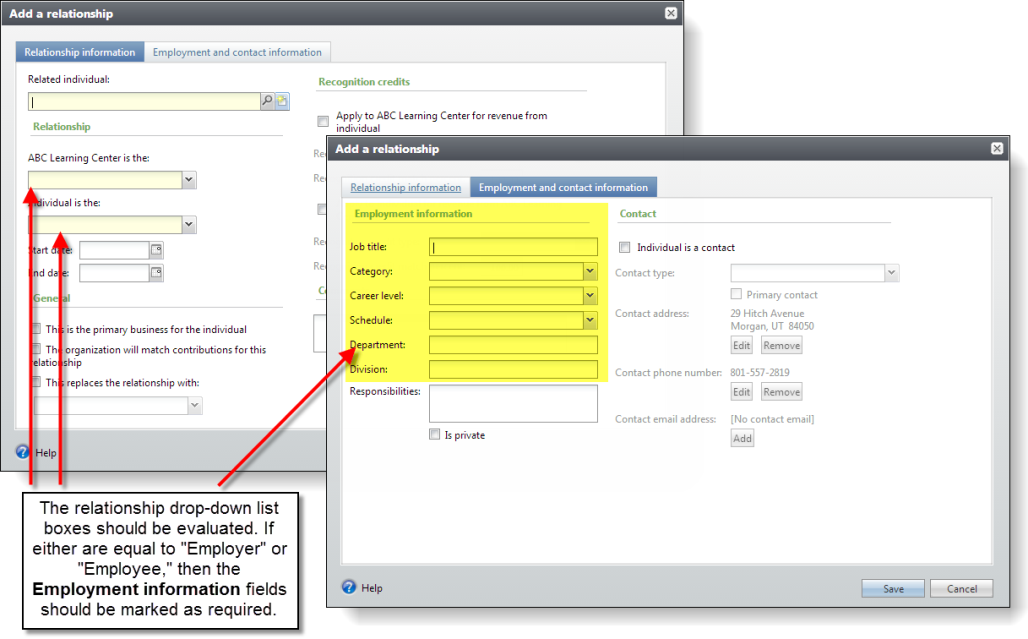
If either the organization or the individual has a relationship type equal to "employee" or "employer," then make the following job information fields required:
-
Job title (Position)
-
Category
-
Career level
-
Schedule
-
Department
-
Division
Edit the RelationshipOrganizationtoIndividualAddForm2.Add-In.vb class file.
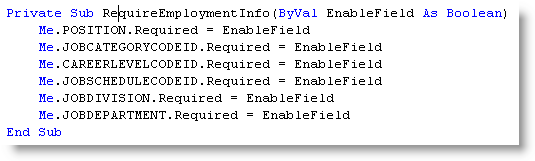
The first piece code to add is the RequireEmploymentInfo sub routine to enable or disable the employment information fields.
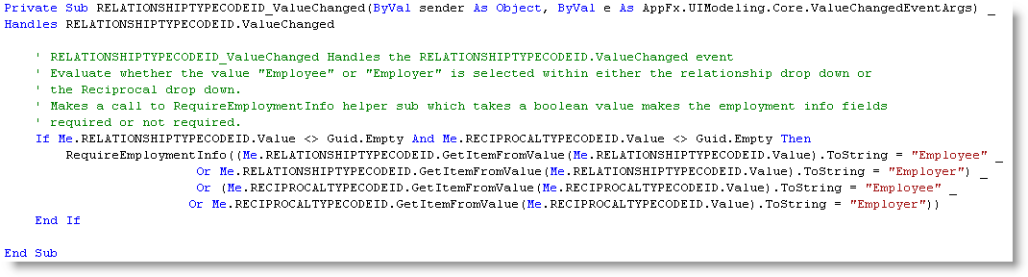
The second piece code to add is the event handler of the of the ValueChanged event of the RELATIONSHIPTYPECODEID drop-down list box. This calls a helper routine named RequireEmploymentInfo to enable or disable the employment information fields.
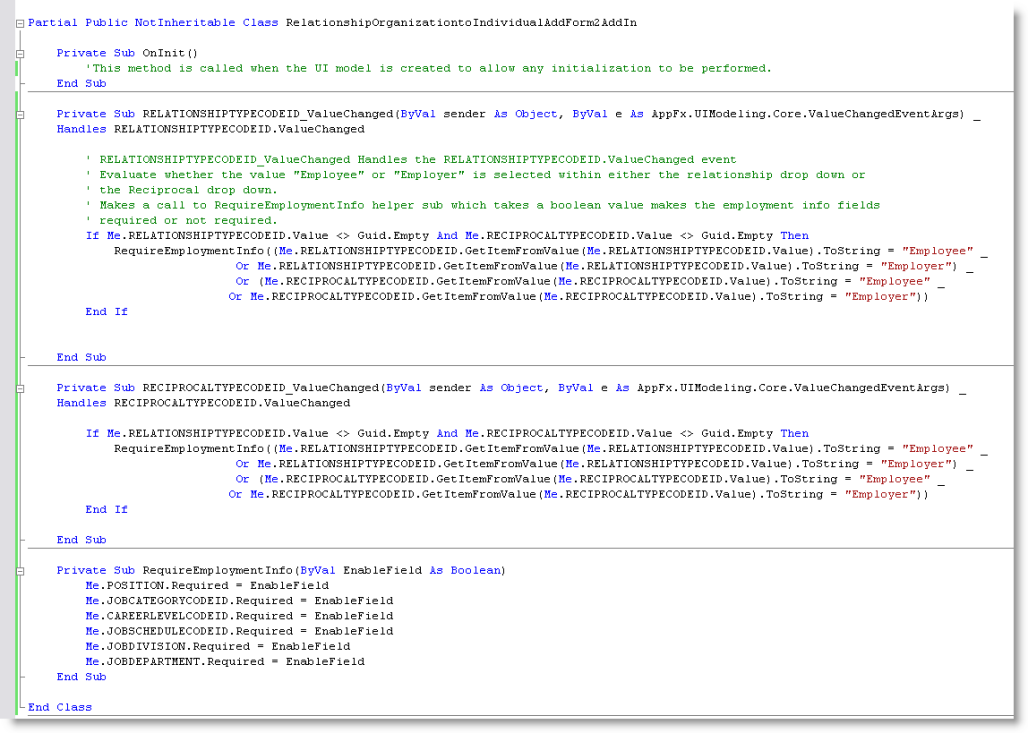
Add a third piece of code to handle the ValueChanged event of the RECIPROCALTYPECODEID drop-down list box which makes the same call to RequireEmploymentInfo.

The final code within your RelationshipOrganizationtoIndividualAddForm2.Add-In.vb partial class file should look similar to this:
Step 10 - Load the spec, and then build and deploy the UI Model assembly.
Load the RelationshipOrganizationtoIndividualAddForm2.Add-In.xml spec into the database via LoadSpec.
Next rebuild the assembly for the Blackbaud.CustomFx.FoodBank.UIModel project. Make sure the assembly resides within the vroot\bin\custom folder or sub folder on the web server.
Step 11 - Test our code.
Now that we have loaded the new spec and we have deployed the UI Model assembly to the web server, we can test the code. Navigate to an Organization page, select the Relationships tab, and click the Add\Individual action above the Relationships data list.

The Add Relationship data form appears. Select either Employee or Employer from either of the relationship drop-down list boxes. The employment information fields will display as required.
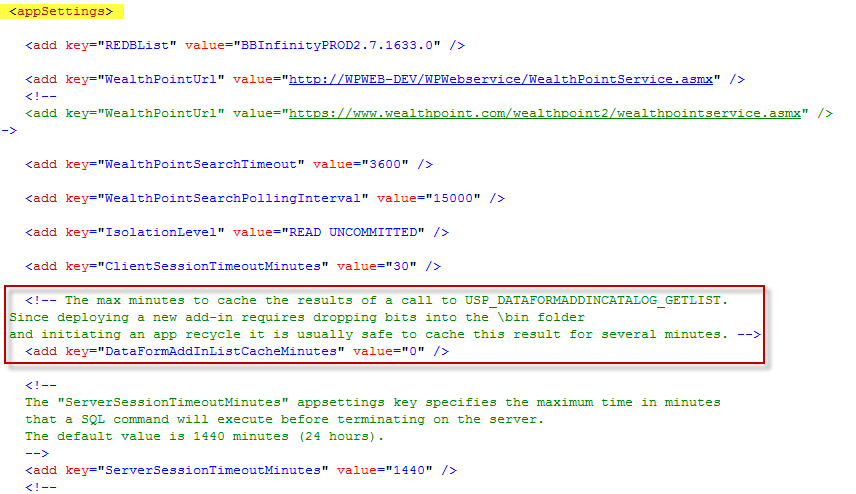
Note: If the Add Relationshipdata form was opened recently, it may be cached on the web server. If so, you will not see the add-in behavior until the Infinity web application (Blackbaud CRM) makes a call to refresh a listing of Data Form Add-Ins has been. You have a couple of options to refresh this information within the web server's cache, but both techniques are only meant for your development environment only ... NOT YOUR PRODUCTION ENVIRONMENT. Option 1 is to force an application recycle by calling IISReset.exe from a command line. Option 2 is a little more elegant. It involves adding an application setting to your web.config file which determines the max minutes the web server will wait before refreshing the list of Data Form Add-Ins. <add key="DataFormAddInListCacheMinutes" value="0" /> The web.config file can be found within your web server's .\bbappfx\vroot folder. See below for an example.