Previous: Code the SP Logic
Let’s create a Global Change instance from a custom SP Global Change.
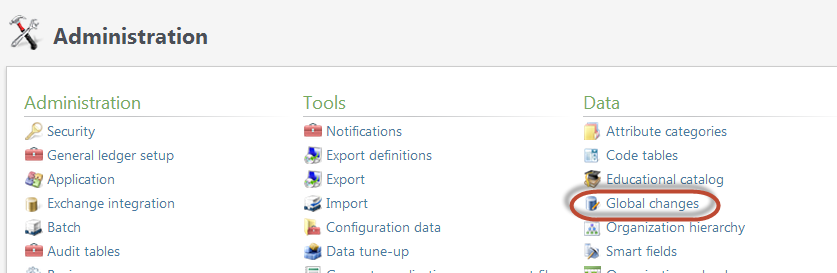
Step 1 - Navigate to the Adminitration functional area and select the Global changes task
Click the Global changes task within the Administration functional area. This opens the Global Changes page that is used to create and manage Global Changes. Remember that a Global Change definition is the template created using the SDK and Global Change instances are created from the definition.
Figure: Global changes task within the Administration functional area
Step 2 - Add a new global change instance by selecting a global change definition.
With the Global changes page open, select the Add action above the data list to add a new global change instance. The Select a global change definition dialog window appears.
From here, you select the global change definition to use as the basis for your new global change instance. Select the Delete food bank transaction history (Custom) within the Food Bank folder.
Click the OK button. The Add global change dialog window appears.
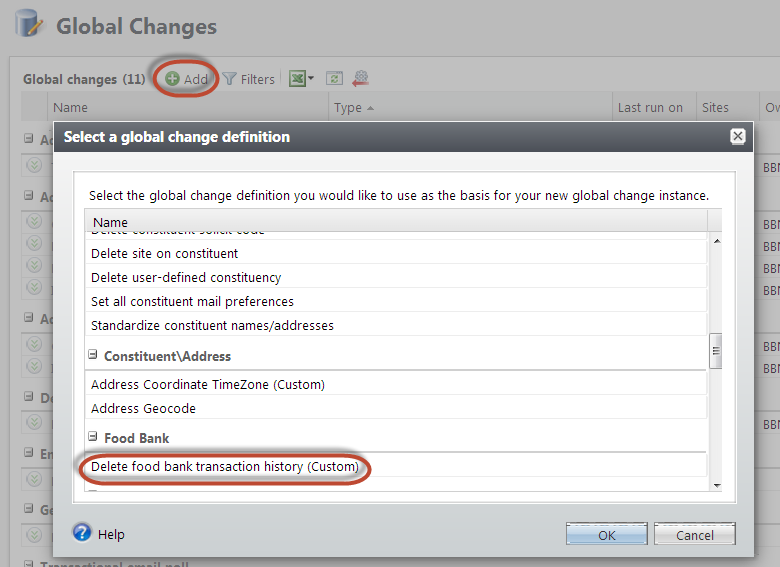
Figure: Add a new global change instance
Step 3 - Add the global change instance and supply parameter values
On the Add global change dialog window, you can provide a name, secure the global change by site, and provide parameter values. In the example below, I elected to delete transactions older than the specified date.
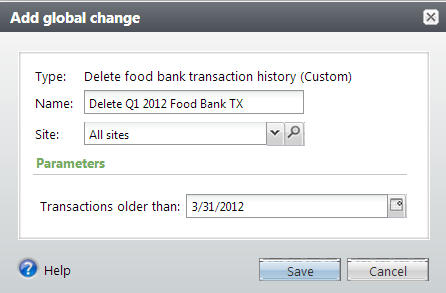
Figure: Specify parameter values for the global change instance.
Click the Save button to add the global change instance. Unlike business processes, which can be configured with multiple parameter sets, a global change can only be configured with a single set of parameter values.
Tip: After you create an instance, it is saved in the GlobalChange table. For more information, see Global Change Tables.
Step 4 - Select and process the global change
After you save the global change instance, you return to Global Changes page.
Select your new global change in the data list and click the Process global change action.
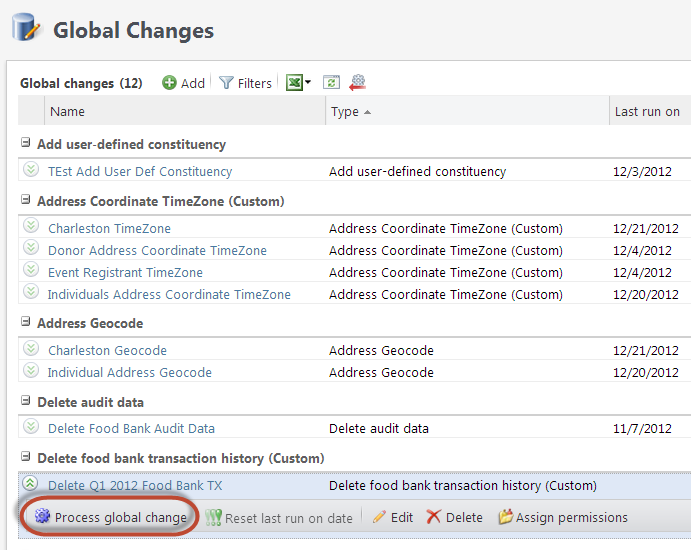
Figure: Click the Process global change button to manually start the global change instance.
After you click the Process global change button, you the page for the global change instance appears. You will see that a process has started to process your global change.
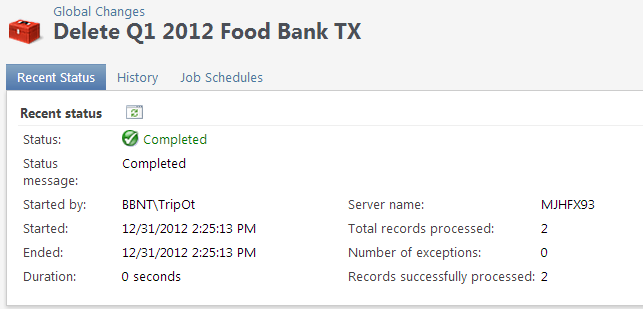
Figure: Status page
Tip: When a global change starts, a row is added to the GlobalChangeStatus and table BusinessProcessStatus tables. For details, see Global Change Tables.