Exercise: Create an Integrated Workflow Project with Visual Studio 2010
An Integrated Application Workflow (IAW) is a workflow that has deep integration into an Infinity application such as Blackbaud CRM. An IAW is implemented as a Workflow Service hosted in a Windows Server AppFabric application that is included with Infinity. So in addition to understanding the basics of authoring a External Workflow Application (EWA), you should also have a base understanding of Windows Server AppFabric.
An IAW goes a few steps farther than the simpler EWA. What is new with an IAW is that you have some additional activities in your Visual Studio workflow toolbox as well as some first class features in the application that surface information about your workflow and allow managing the flow of work being orchestrated by the IAW.
Prior to completing this exercise, you should have the Microsoft Server AppFabric installed and configured along with the Blackbaud Workflow Service AppFabric Application. Please see the document titled Infinity Workflow Installation Guide for installation instructions.
You also need to make sure your development environment has Visual Studio 2010 installed and correctly configured. If you are using a training environment provided by your instructor, the environment is set up and ready to go.
Instructions
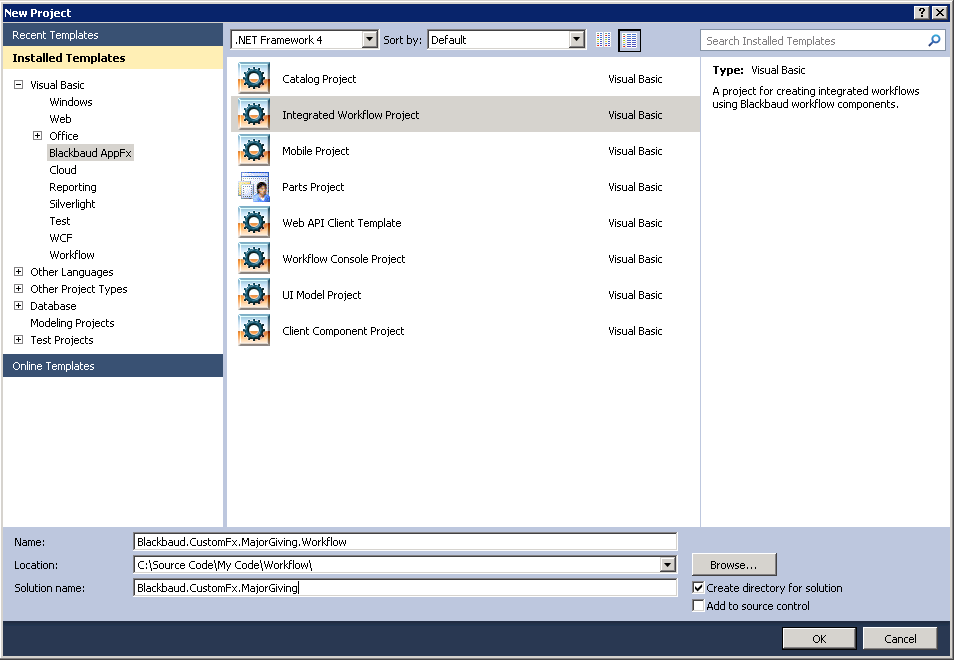
Step 1 - Open Visual Studio 2010, select File\New Project.
Step 2 - Select Blackbaud AppFx as the template category, and select Integrated Workflow Project as the template.
Step 3 - Name the project Blackbaud.CustomFx.MajorGiving.Workflow.
Step 4 - If you are using a training image provided by your instructor, the solution should be located in the following directory: C:\Source Code\My Code\Workflow.
Step 5 - The solution should be named Blackbaud.CustomFx.MajorGiving
|
Property |
Value |
|---|---|
| Name |
Blackbaud.CustomFx.MajorGiving.Workflow |
|
Location |
C:\Source Code\My Code\Workflow |
|
Solution Name |
Blackbaud.CustomFx.MajorGiving |
|
Create directory for solution |
Checked (Yes) |
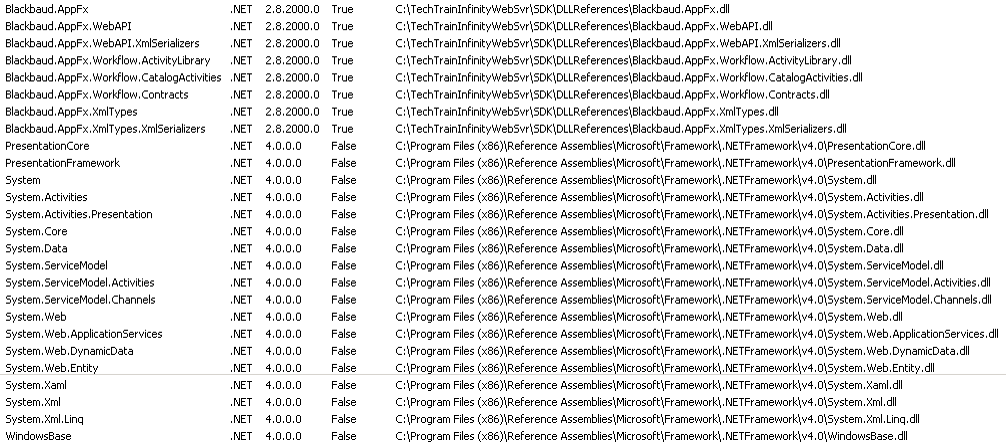
The project template creates a new class library project that contains references to the following assemblies:
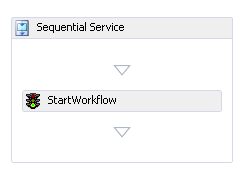
The project template also creates a default workflow.xamlx (pronounced "zammel" or "zammel x") file that contains a Sequential Service activity and a StartWorkflow activity.
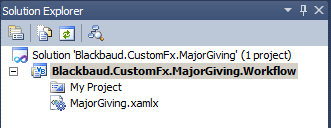
Step 6 - Within the project, rename the workflow.xamlx file to MajorGiving.xamlx.
Step 7 - In the Visual Studio Solution Explorer, double-click the MajorGiving.xamlx file.
This opens the workflow within the workflow designer. An activity named StartWorkflow is placed as the first activity in this sequential workflow service.
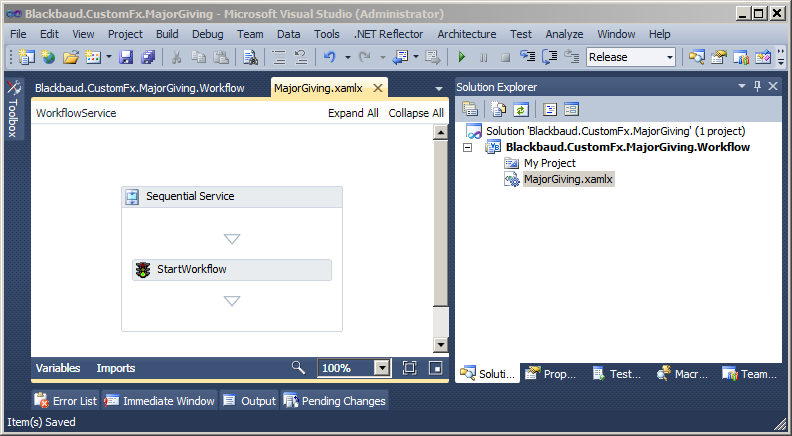
The StartWorkflow activity is part of the Blackbaud Infinity Workflow Activity library. The activities in this library take care of all of the heavy lifting and plumbing required to integrate with the Infinity application and database.
Step 8 - Name the workflow.
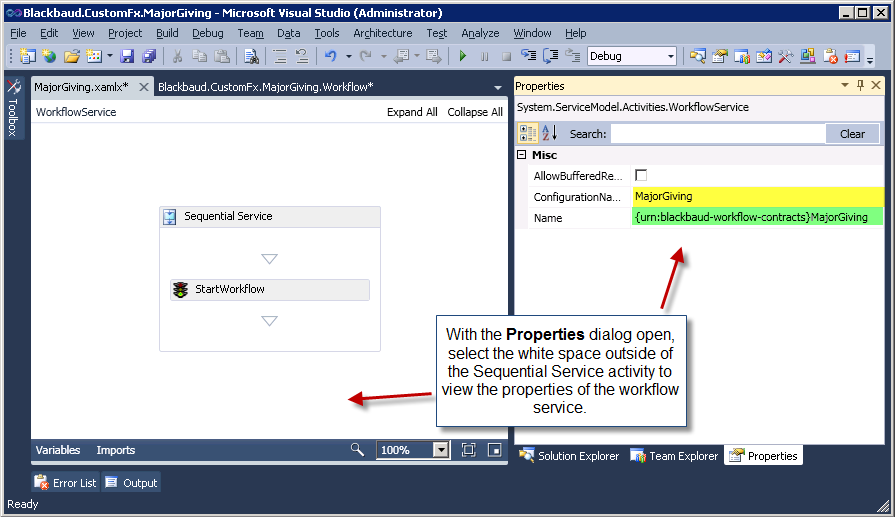
View the properties of the System.ServiceModel.Activities.WorkflowService (WorkflowService) by selecting View\Properties Window (F4) from the Visual Studio main menu. Click on the white space, outside of the Sequential Service Activity. You should see the following property sheet.
|
Property |
Value |
|---|---|
| ConfigurationName | MajorGiving |
| Name | {urn:blackbaud-workflow-contracts}MajorGiving |
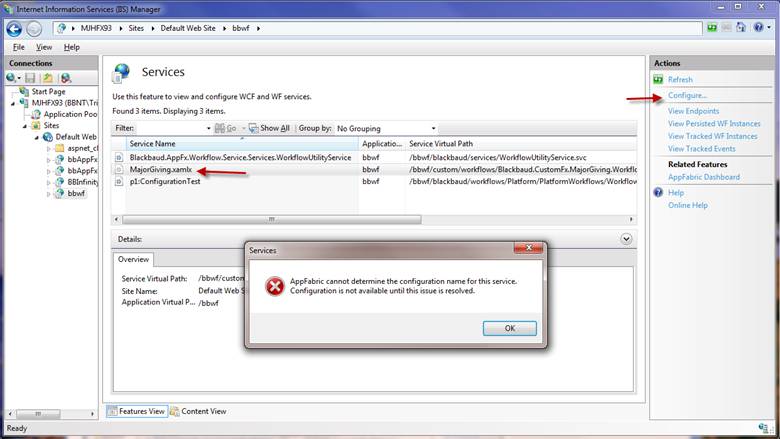
Warning: The ConfigurationName property sets the workflow service configuration name. The Name property sets the workflow service name. If these properties are not set, you cannot configure the workflow service from within INETMGR. Without setting these properties correctly, attempting to configure the service within INETMGR results in an error message. See below for a sample error message.
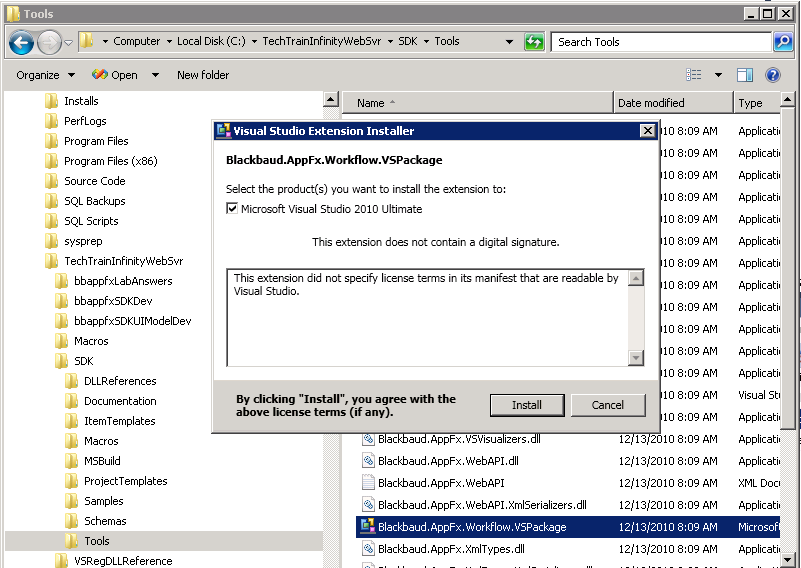
Step 9 - Install the Blackbaud.AppFx.Workflow.VSPackage.vsix.
-
Save all files and close Visual Studio.
-
Locate the Blackbaud.AppFx.Workflow.VSPackage.vsix file within your SDK\Tools folder.
-
Double-click the vsix to launch the Visual Studio Extension Installer
-
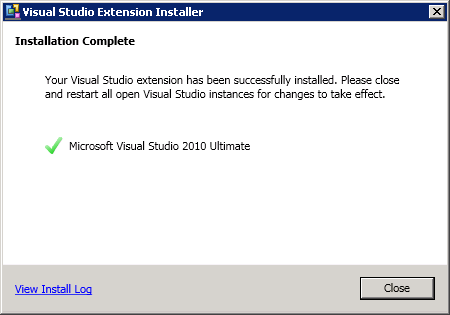
To begin the installation, click Install. If successful, the following message appears:
-
Re-open Visual Studio and select your recently created project.
-
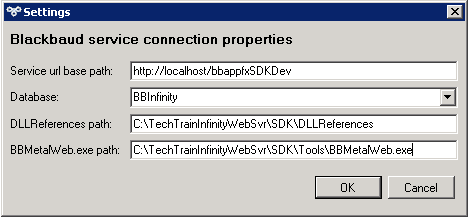
In Visual Studio, select Blackbaud Tools Configuration from the Tools menu. Be sure the Blackbaud service connection properties are accurate for your development environment. If you are using a training image provided by your instructor, check with your instructor for the appropriate settings.
-
From the Tools menu, select Blackbaud Tools Configuration. If you are using a training image provided by your instructor, enter the following settings:
-
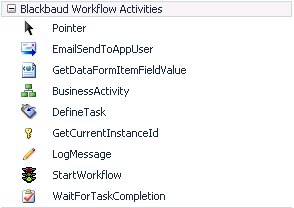
Step 10 - From the Tools menu, Select Add Standard Workflow Activities.

Your toolbox should contain Blackbaud Workflow Activities such as DefineTask, WaitForTaskCompletion, StartWorkflow, etc. See below.
For more information about how to set up your development environment for Infinity Workflow, see Preparing Your Visual Studio 2010 Development Environment for Infinity Workflow.
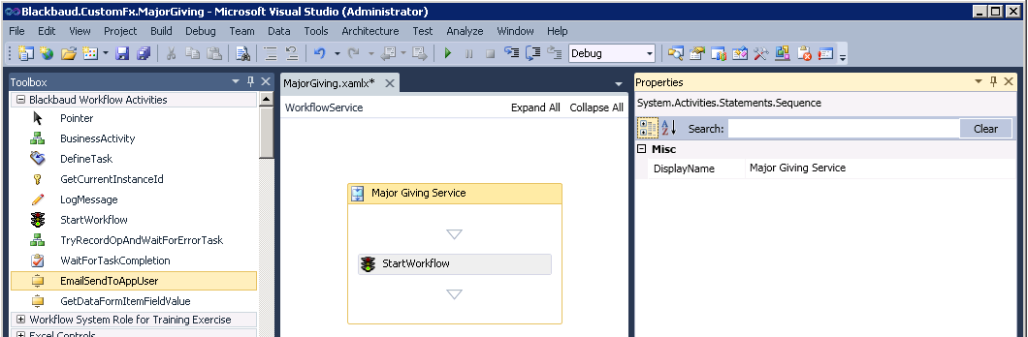
Step 11 - Provide a DisplayName for the Sequential Service.
-
Select the Sequential Service workflow activity.
-
Right-click the activity and view its properties.
-
Provide the following property value:
Property
Value
DisplayName Major Giving Service
Step 12 - Save all files.
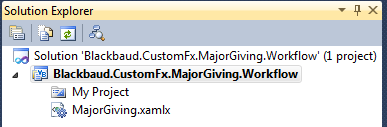
Your solution explorer should look like this: