Roles
A role combines tasks and permissions to determine a user's level of access to a feature area in a Blackbaud solution.
To learn about feature areas, roles, and how a user's level of access is determined, see Security overview.
Admins can assign a role to a single user for a specific need, or they can assign a role to multiple users who perform similar tasks. For each role, you can view its name, description, tasks, and permissions.
We recommend reviewing roles often to determine whether to adjust them for new or changed tasks and permissions. Admins can perform the following role-related tasks:
View Your Roles
The roles for a feature area appear on the Roles page. Roles are unique to their feature area and can't be shared across multiple areas. We recommend you review them regularly to make sure they are always current for your organization.
If you use multiple Blackbaud solutions, the roles for a feature area appear under their Blackbaud solution.
Add a Role
-
To add a role for a feature area, if there are no existing roles, select Create role. Otherwise, select New.
If you use multiple Blackbaud solutions, make sure to expand the solution that needs the new role.
-
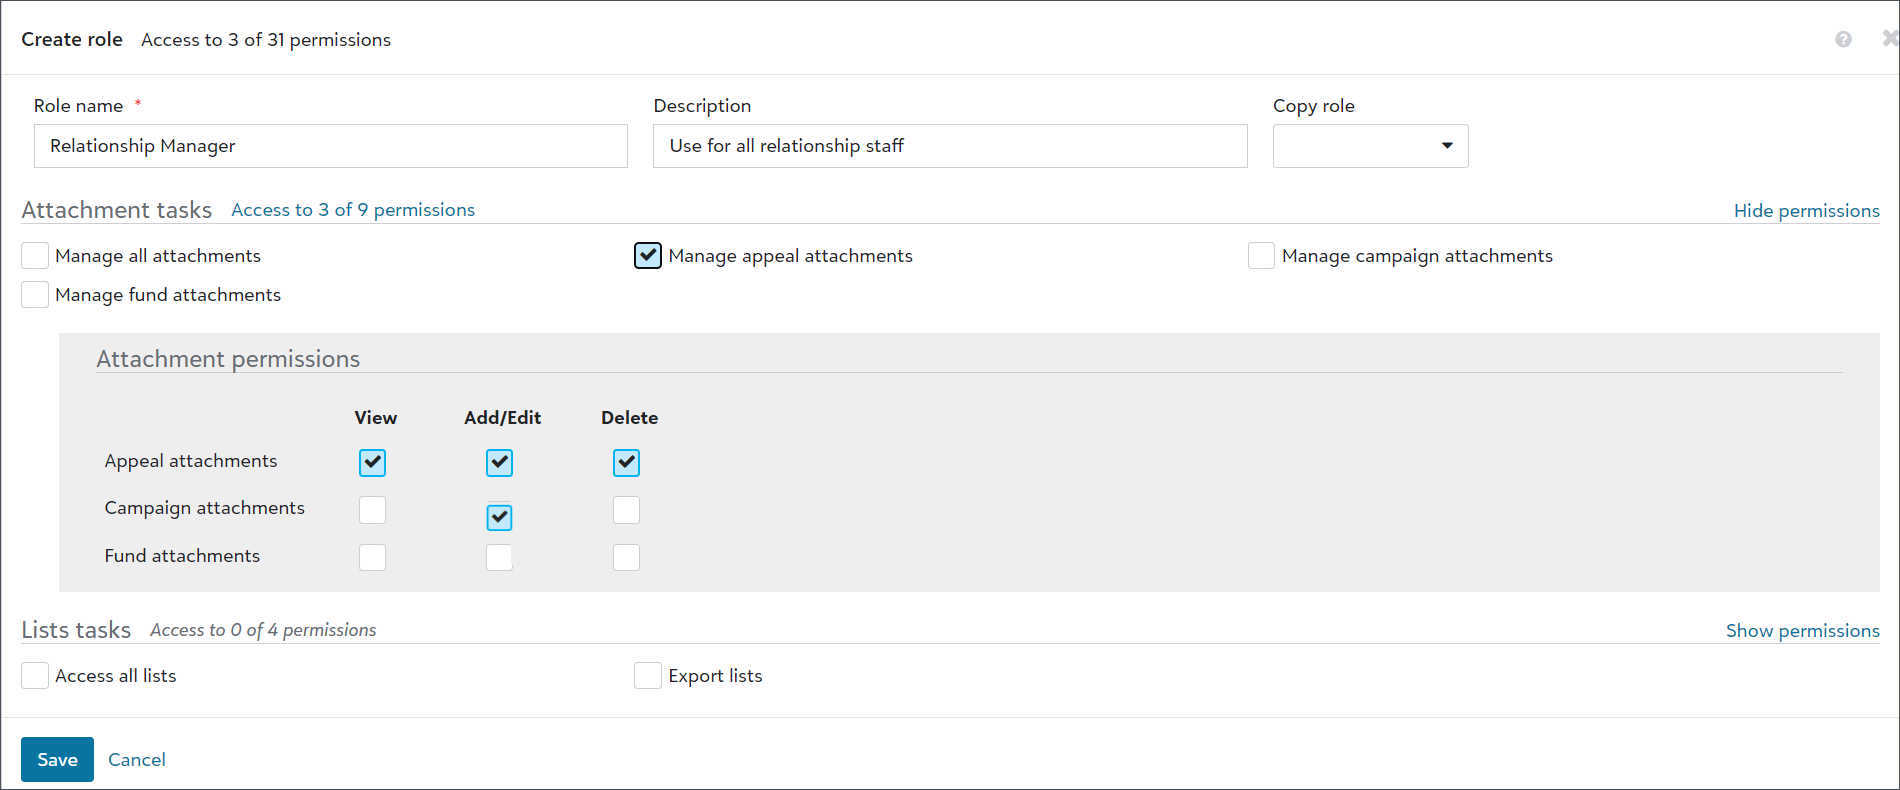
Enter a name and description that are clear and concise so that all admins can identify its purpose when selecting roles. Typically, role names and descriptions match (or are close to) job titles and descriptions.
-
Associate tasks and permissions.
-
To base the role on an existing one, select a role to copy from the Copy role field. Tasks and permissions from the existing role are applied to the new role, and you can update them as necessary.
-
To select specific tasks and permissions for the role, select the desired tasks from the listed options. Then, select Show permissions and select the desired permissions from those listed.
For more information, see Tasks and Permissions.
-
-
Select Save.
Roles are unique to a Blackbaud solution and feature area. You can't share them across multiple solutions or feature areas. We recommend you review them regularly to make sure they are always current for your organization.
Assign a Role to a User
When you add or edit a user, select the appropriate role for the feature area. For more information about adding and editing users and assigning roles, see Users.
You can only assign one role per feature area to a user. When users require access to an area in multiple Blackbaud solutions, assign a role for each solution.
Edit a Role
To modify an existing role, go to the Roles page and select the Blackbaud solution for the role. Then on the tile for the feature area, find the role and select Edit from its menu. You can edit the role's name, description, and the tasks and permissions associated with it. For more information, see Roles and Tasks.
Hide a Role
To hide an existing role, go to the Roles page and select the Blackbaud solution for the role. Then on the tile for the feature area, find the role and select Hide from its menu.
The hidden role no longer appears on the Roles page, and it isn't available when admins assign roles to users. However, the role still determines the level of access to the feature area for any users who were already assigned it. If you want to remove a role entirely, you must remove the role from all users and then delete it.
To display hidden roles for a feature area, select Show hidden roles.
Unhide a Role
To display hidden roles for a feature area, go to the Roles page and select the Blackbaud solution for the role. Then on the tile for the feature area, find the role and select Show hidden roles. To then restore the role so that it appears on the Roles page and when admins assign roles, select Unhide from its menu.
Delete a Role
To delete a role, go to the Roles page and select the Blackbaud solution for the role. Then on the tile for the feature area, find the role and select Delete from its menu.
Note: You can't delete a role that is assigned to users, but you can hide roles to prevent admins from assigning them to users.
View Role History
To view role history, select View history from its menu. Or, from Security, select Audit history, and then select Role history.
For more information on role history, see History.
Tip: What's next? Tasks