Configuration Tasks
Your first order of business is to work with general ledger setup configuration tasks in Administration. To access the General ledger setup page, from Administration, select General ledger setup. The General Ledger Setup page appears.
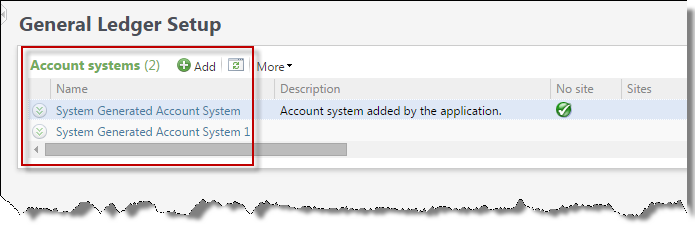
First, if your organization uses multiple general ledger account systems, you must add each account system to the program. For example, your organization may be comprised of multiple chapters where each chapter may need to use different account systems. Note that "System Generated Account System" is the default account system provided in the program. You can edit this account system or add others as necessary. When you add an account system, you can associate it with one or more sites. This ensures transactions are posted to the correct general ledger account system. If you use only one account system, you can simply rename the default system and assign all sites to it. For more information about account systems, see Ledger Account Systems.
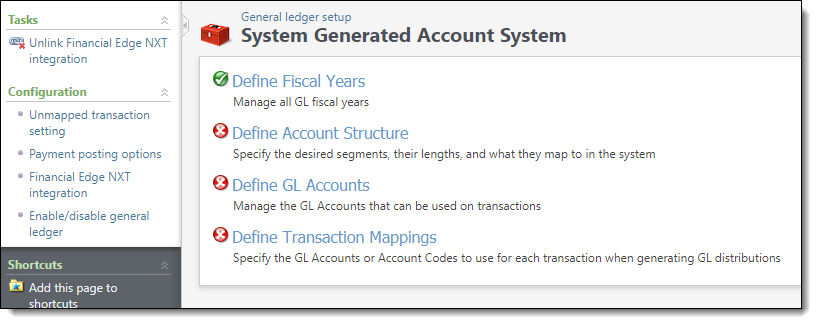
After your account systems are configured, select an account system. The General ledger setup page for an account system appears.
 Unmapped Transaction Setting
With the Unmapped transaction setting configuration task, you can specify how to handle transactions that are missing valid GL transaction mappings. You can require that all transactions must be mapped or you can associate unmapped transactions with an account that builds the GL distribution for you. For more information, see Unmapped Transaction Setting.
Enable/Disable General Ledger
General ledger is, by default, enabled and creates transactions with a post status of “Not posted.” You do not need to “turn on” general ledger unless you previously disabled it and now wish to enable it again. Note that when you enable general ledger after you previously disabled it, transactions you previously entered in the program will retain a post status of “Do not post.” For more information, see Enable or Disable Ledger.
Payment Posting Options
You can specify whether or not payments must be linked to deposits in order to successfully post to your general ledger. The Payment posting options configuration task is only available when you enable general ledger. For more information, see Payment Posting Options.
Financial Edge NXT integration - Financial Edge NXT setup
To enable the integration with Blackbaud CRM, you must set up the connection on Financial Edge NXT.
For instructions, see Add and Manage Applications.
When you add the application, you'll enter the Application ID, which is 95d879e9-b9d1-48f2-b4ba-ce49ce40914d, and then select Save. The new application will appear in your list of Connected apps.
Financial Edge NXT integration - Blackbaud CRM setup-
To enable the integration with The Financial Edge NXT, select Financial Edge NXT integration. The Financial Edge NXT integration configuration screen appears.

-
Under Environment ID, enter your Financial Edge NXT environment ID. The environment ID is the alphanumeric code that appears when you access Financial Edge NXT after "envid=" on the URL.
-
To generate a refresh token, select Authenticate and lookup in Financial Edge NXT. The Blackbaud NXT Integration screen appears.
-
Select Get auth credentials. The authorization screen appears.
-
Under From, select the database you want to authorize. If you only have one database, it will be preselected. Then, select Authorize. You return to the Blackbaud NXT Integration screen.

-
Select Show refresh token. When the token appears, select it and copy it to your clipboard, then paste it into the Refresh token field in the Financial Edge NXT integration configuration screen.
-
If you have multiple integrated account systems with Financial Edge NXT, check Financial Edge NXT source for designations if you want your designation financials to be calculated using that environment by default.
Note: You can only have one default Financial Edge NXT environment as the source for designations. If you select this option, any Financial Edge NXT environments that were previously integrated will no longer be the default.
-
On the Financial Edge NXT synchronization processes tab, you see all processes associated with an accounting system. Select the appropriate process and then select Start process. This default process will gather data from Financial Edge NXT so you can finish setting up the general ledger.
Note: While this process can be configured, we recommend that during setup you run it without any edits. You will be able to make edits later in the integration process.
Before you begin, contact Blackbaud Customer Support and request that they provide you with the correct configuration file.
Unlink Financial Edge NXT Integration
You can unlink the integration with Financial Edge NXT at any point. When you do, the synchronization processes will stop running and you will not be able to synchronize accounts, fiscal years, and projects synchronized from Financial Edge NXT and the integration will no longer be used to calculate financial information for designations.
Note: If you unlink the default source for designations, we recommend that you select a new default.
To unlink the integration, select Unlink Financial Edge NXT integration under Tasks.