Segment Builder
With the Segment Builder, you can quickly generate multiple segments from selections. You choose the selections and the Segment Builder combines them to create new segments. For example, you need segments that filter constituents based on specific gender, income, and age criteria. If you choose the twelve selections below, the Segment Builder generates 50 segments based on every possible combination of those selections, including Gender Is Female/Income between 20K and 30K/Age under 30 and Gender Is Male/Income between 30K and 60K/Age between 31 and 35.
Gender
Gender is Female
Gender is Male
Tip: Has your organization upgraded to service pack 36 or higher? It enables you to use a code table of user-defined gender values. If you've upgraded to SP 36 or higher, use uses the new gender field instead of the old one.
Income
Income between 20K and 30K
Income between 30K and 60K
Income between 60K and 95K
Income between 95K and 170K
Income over 170K
Age
Age under 30
Age between 31 and 35
Age between 36 and 45
Age between 46 and 60
Age over 60
As another example, you can create segments from five recency selections, five frequency selections, and five monetary selections. The total number of segments generated is 125 segments.
From the Segments page, under Tasks, select Create multiple segments. The Select a Source View screen appears.
Select the type of query view to use. The query view determines the types of selections available for building segments. Select OK. The Segment Builder tab appears.
If you have multiple data sources, select the Record source to associate with the new segments.
In the Group field, select how to group the segments generated by the Segment Builder.
To add segments to an existing segment group, select the group.
To create a new segment group for the generated segments, select the New group button. The Add segment group screen appears.
To keep the segments separate so you can add them individually to a marketing effort, select no group.
For more information about segment groups, seeSegment Groups.
In the Segment field, select the source code to identify the generated segments. The values available are those defined for segments on the Source Code Parts tab of the Source Codes page.
Under Selection sets, use the tabs to define sets of selections. The program combines the selections from the sets to create segments.
Set 1 appears by default. In the Name field, enter a name to identify the set. For example, based on the scenario described earlier, enter "Gender" as the name of the first set.
In the grid, use the binoculars to select an existing selection or add a new one. For our example, choose selections that filter gender by Female and Male.
The bottom of the screen displays the number of segments that will be generated by your selections. In this case, two segments so far.
The program creates names for the generated segments by combining the names of the selections you include. To prevent exceeding the 100 character limit for segment names, in the Alias column, you can enter a shorter description to use for the generated segment name. For example, enter “GenF” as the alias for “Gender:Female.”
To add more selection sets, select Add set The Set 2 tab appears. For this example, we add a set called “Income” and choose selections that filter constituents into five income brackets.
Our segment count at the bottom of the screen now increases to 10—one segment for each income bracket for males and females.
For this example, we select Add set to add a third set. We name this set “Age” and choose selections that filter constituents into five age brackets.
Our segment count at the bottom of the screen now increases to 50—one segment each for males and females, in each income bracket and each age bracket.
Note: Arrange the selection set tabs in the order you want the generated segment names and codes combined from left to right. For example, our Gender, Income, and Age sets will generate segment names in that order. You can use the left/right arrows to change the order of tabs.
Note: If you add generated segments to a segment group, it is also important to consider the top to bottom order of selections. Generated segments are added to the segment group in the same order as the selections on each tab. Keep in mind, when you add segments to a marketing effort, constituents are included in the first segment they meet the criteria for. Rather than reordering segments after the segment group is added to the marketing effort, it is better to define the preferred order in the Segment Builder before you generate the group. You can use the up/down arrows to change the order of selections.
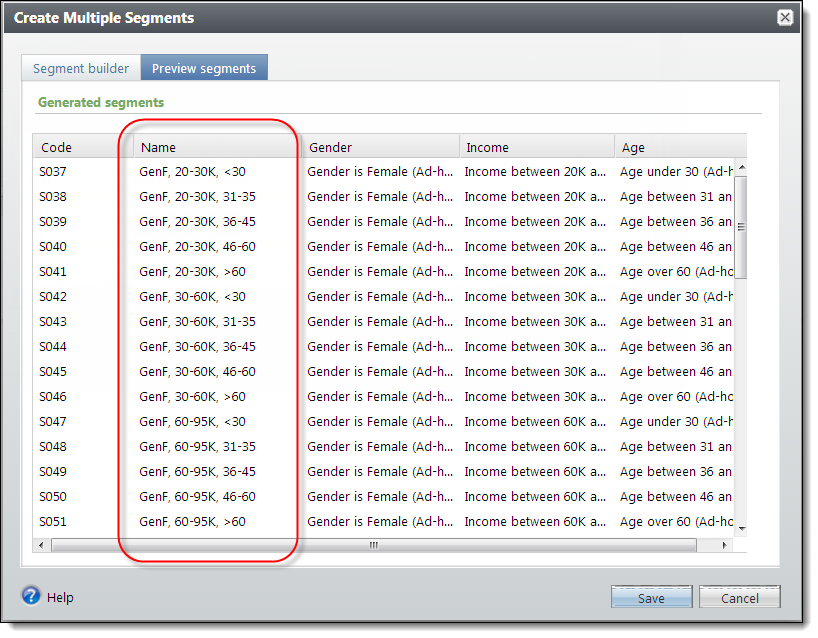
To view the list of segments that will generate, select the Preview segments tab.
Select Save to save your settings and return to the Segments page. The generated segments are now available to add to marketing efforts.