Service Pack 2
Tip: Want to review this offline? Use your internet browser's print function to save this topic as PDF file.
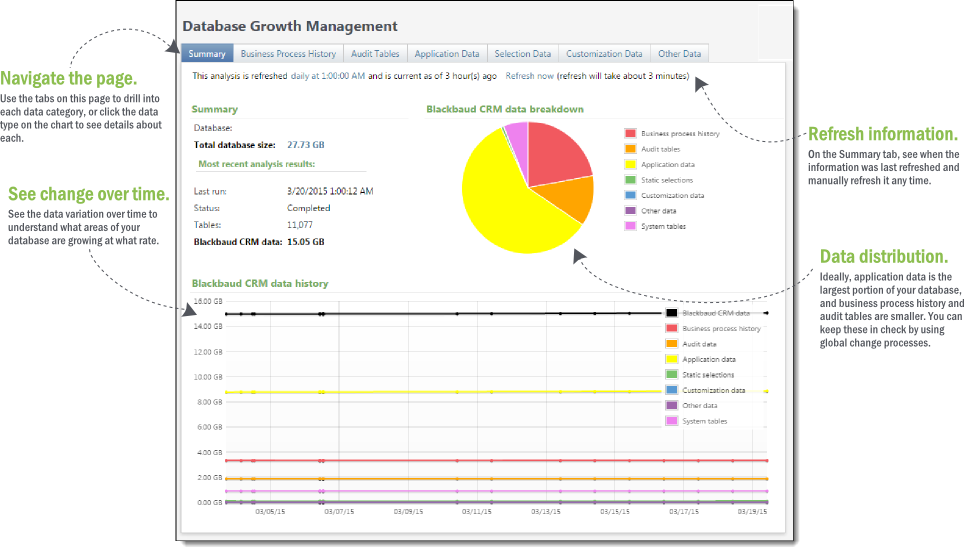
We have added a new database analysis tool that allows you to view the size of your database and the space taken by different types of data. The Database Growth Management page provides insight and tools related to business process history, audit tables, application data, selection data, and customization data.
To access the new Database Growth Management page, from Administration, select Database growth management under Administration. Use the tabs to navigate detailed information about each data type in your database.
Note: When you first view this page, you will not see any data because the process has not run yet. By default, the process runs weekly, or you can manually run it anytime by clicking Refresh now.
-
In the Summary tab, you can see the overall size of your database and the distribution of data by type and how data size has changed over time. Here, you can also see when the information was last updated and refresh it manually.
-
In the Business Process History tab you see the amount of data generated by business processes. When you run a business process such as an export in Blackbaud CRM, the program stores a copy of the output. To regularly delete these outputs when you no longer need them, you can use the "Business process output delete" global change. Blackbaud CRM also keeps copies of batch output, which you can delete using the Batch report delete global change.
-
The Audit Tables tab shows the amount of data used by audit tables. Audit tables keep details of changes made to the database by different users. You can use the "Delete audit data" global change to delete old audit table information you no longer want to keep.
-
The Application Data tab itemizes the data that you enter into Blackbaud CRM, including records, attributes you created, data related to marketing efforts, and smart field calculations.
-
In the Selection Data tab, you see the data taken up by selections, whether created by users, imported into the database, or generic selections that were created by other elements of the system.
-
In the Customization Data tab, you can see information about custom tables you created using the Blackbaud CRM SDK.
-
In the Other Data tab, you see the total amount of data that does not fall into any of the previous categories. This is usually minimal, but can show data from tables you created outside of the Blackbaud CRM SDK.
The data included in this tool is updated weekly and the last refresh time is posted on the Summary tab. To refresh the data outside of the automatic refresh process, select Refresh now on the Summary tab. The program indicates an estimated time required for the refresh to let you decide if you want to wait or refresh at another time.
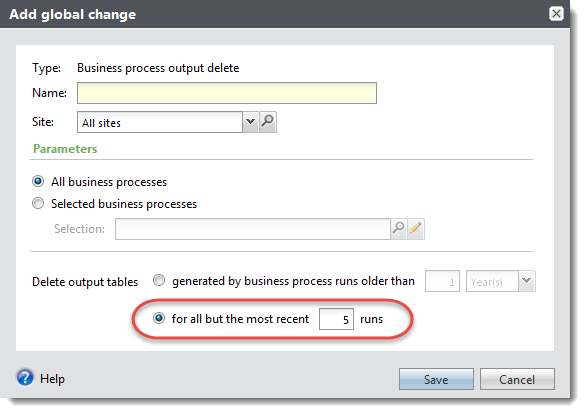
As part of this work, we have also added a new option to the "Business process output delete" global change. You can now choose whether you want to delete all output older than a certain timeframe or all output except a certain number of the most recent runs. Previously, you could only use the first option.
To use the new option, on the Add global change screen for the "Business process output delete" global change, select Delete output tables for all but the most recent and enter the number of runs you want to save.
Note: Deleting business process output does not affect your ability to view business process history. You can still see the full history of business processes even when the output for those processes has been deleted.
To access global changes, from Administration, select Global changes under Data.
To learn more about the new Database Growth Management tool, see the new Database Growth Management Guide.
With this release, we improved functionality for pledge installments to improve quality, and increase reliability, accuracy, and consistency.
These improvements ensure accurate and consistent behavior when adding or editing a pledge through a record, Enhanced Revenue Batch, or Revenue Update Batch in the following fields:
-
The value in the Installment amount field consistently reflects the most recent amount entered.
-
The values in the Installment amount, No. installments, and No. installments remaining fields are accurately calculated in the pledge installment grid.
-
The No. installments and No. installments remaining fields represent the number of installments that are not fully paid.
-
When you edit installment designations and enter different installment values, the value in the Installment amount field consistently represents the earliest installment amount that is not fully paid.
Tip: While the No. installments and No. installments remaining fields are labeled differently, both fields behave the same way throughout the program. For example, the No. installments field displays on the Add a pledge screen and represents the number of installments for a new pledge. The No. installments remaining field displays on the Edit pledge screen and represents the number of remaining installments for an existing pledge.
The constituent record now includes the Opportunities tile, which summarizes opportunity information for individual constituents who are major giving prospects. You can add and edit a constituent's opportunity information from the tile, including the opportunity's plan, the plan's primary manager, and other information about the opportunity.
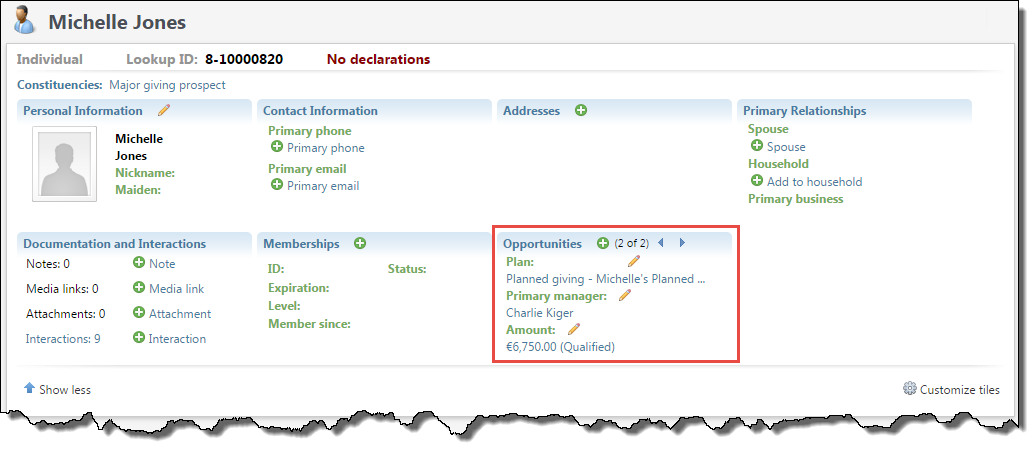
To add opportunities from the Opportunities tile, select Add. To edit opportunity information, select Edit next to the plan, primary manager, or the amount of the opportunity. If a constituent has more than one opportunity, you can use the arrows on the Opportunity tile to view each opportunity.
The amount that appears in the tile depends on the status of the opportunity. For example, if the opportunity status is qualified, response pending, rejected, or canceled, the tile displays the ask amount. If the opportunity is unqualified, the tile displays the expected ask amount. If the opportunity is accepted, the tile displays the accepted amount.
To open the related record, select the name of the plan, the name of the primary manager, or the opportunity amount.
To open the Opportunities tab of the plan the Opportunities tile is displaying, select the tile name.
To help you better sort through and find your queries, we have added the ability to expand all or collapse all query folders in the Information Library.
On the Query tab of the Information Library, you can now select Expand all and Collapse all to easily view your folders and subfolders .
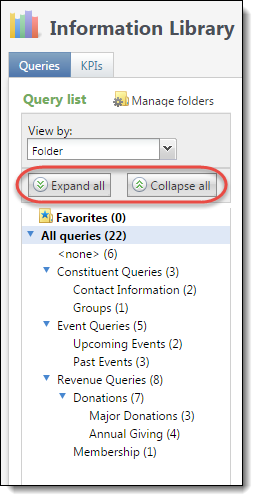
When you collapse all, only first-level folders are displayed. When you expand all, you see all your query folders and subfolders.
To access your queries, from Analysis, select Information library.
You can now customize your KPI dashboard. From the dashboard, select Customize dashboard under Tasks.
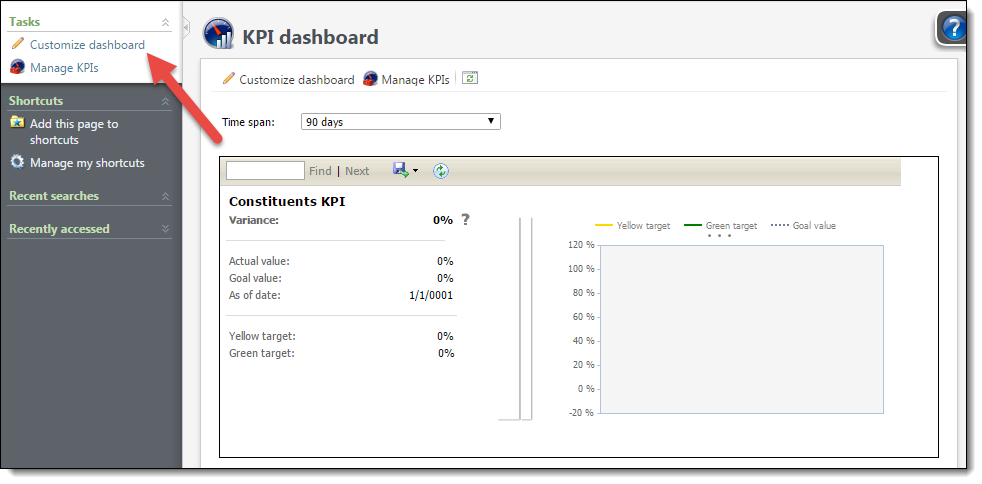
The new Customize a KPI dashboard screen appears. You can create pages and tabs within pages to organize your KPIs. To add pages or tabs, select the plus sign next to the Page or Tab fields. You can edit existing pages and tab names by clicking the pencil icon, or delete them by clicking the red X icon.
You can also reorganize tabs within a page. To do this, select the engine icon next to the Tab field. On the Reorder SKPI Dashboard tabs screen, use the up and down arrows to rearrange tabs and select OK to save the new order.
Once you have created pages and tabs, to assign KPIs to them, select the KPI and select the right arrow to add it, or the left arrow to remove it from a page or a tab.
To access your KPI dashboard, from Analysis, select KPI dashboard.
To improve the performance when users screen a group of constituents through WealthPoint, Target Analytics is making the following updates.
Going forward, we will focus on returning the key relationships from GuideStar on a group screening:
-
Known relationships (both people have been screened through WealthPoint and have a connection through a nonprofit found in GuideStar), regardless of form year
and
-
A representative sample of the other relationships from the most recent years
For some nonprofit connections, we’ve seen the total number of relationships returned could be up to 20,000. For you to sort through 20,000 relationships and get the most pertinent information is unrealistic. Therefore, we have simplified the process. These initial results will then help you determine if it is worth the effort to review the additional relationships. And, we want to ensure that you have the choice when to return thousands of relationships for a constituent. If a user does want to see all the relationships, individual WealthPoint screenings will continue to return all relationships.
Also, we added an indicator on the wealth and ratings record for constituents who have more network connections available from GuideStar. This indicator plus the initial information returned can help you decide if you want to run an individual WealthPoint screening. In addition, the known relationships will display at the top of the network connections list.
With these changes we can improve your WealthPoint group screenings without sacrificing the ability to see all relationships for a constituent. We hope these performance updates will improve your experience group screening constituents in WealthPoint.
When a program level allows multiple members, the drop down under Who else should be included on this membership now includes relationship information. This helps you easily find the relationship between an additional member and a primary member on the Enter Membership Dues page. For example, when you add the spouse of a constituent as an additional member, "(Spouse)" appears as the relation next to their name in the Name (Relation) column. Also, the Relationship column on the Members and cards screen has been removed and the relationship information now appears in the Name (Relation) column.
Sustained Giving
In Blackbaud CRM 4.0 and Service Pack 1, we introduced significant enhancements to help you effectively manage and strategically grow your sustained or recurring giving programs.
In Service Pack 2, we made further changes to the recurring gift area. With this release, you can now work with several payment handling options for recurring gifts. With these options, you can specify how the program handles payments when more than one past installment has a balance, payments you receive that overpay or underpay installment balances, as well as balances still present on past installment after applying a payment. Previously, you could only select to update installment amounts to match an incoming payment or maintain installment amounts. These new options offer more flexibility and accuracy for handling payments.
The payment handling feature affects the following areas of the program.
With this release, on the Revenue page, we replaced the Recurring gift settings configuration option with the new Recurring gift payment handling option.
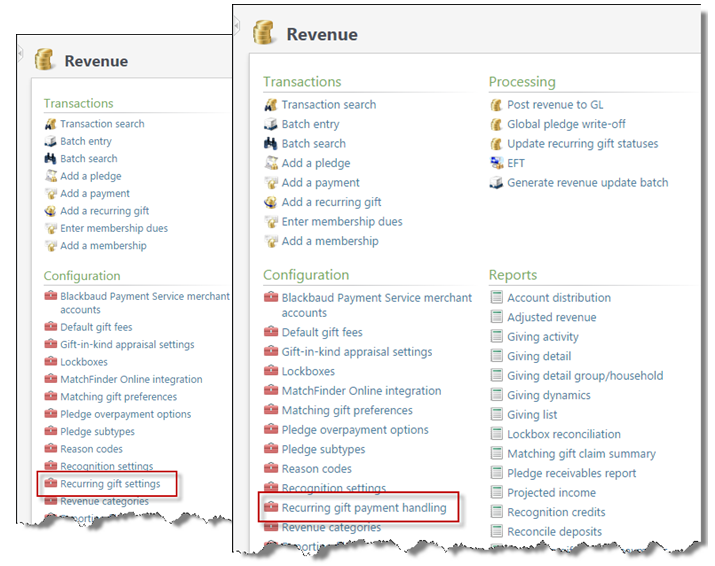
Previously, the Recurring gift settings configuration option existed and offered two choices: "Update installment amounts to match payments" and "Maintain installment amounts." With this release, the Recurring gift payment handling configuration option replaces the Recurring gift settings configuration option and offers much more flexibility when applying payments.
Select Recurring gift payment handling to access the Recurring gift payment handling screen.
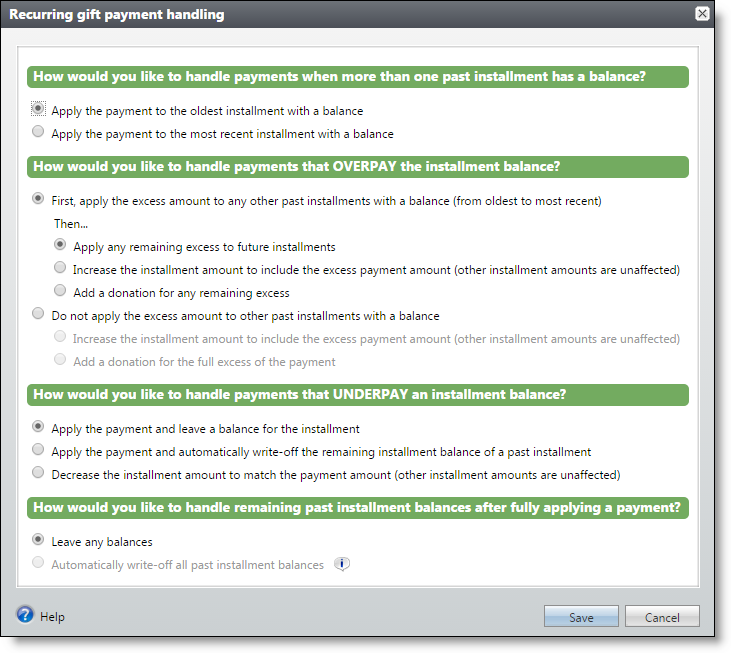
With these new configuration options, you can specify how the program handles payments when more than one past installment has a balance, payments you receive that overpay or underpay installment balances, as well as balances still present on past installments after applying a payment.
Note: Note that installments with today's date are included as "past installments" for the purposes of payment handling.
To ensure consistency across the product with the new payment handling options, we made several changes to the Add a payment and Edit a payment screens.
-
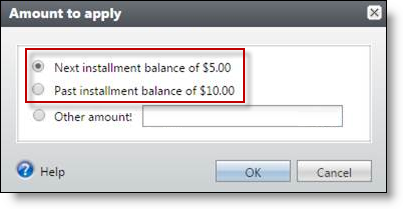
When applying an amount to a recurring gift, on the Amount to apply screen, the Next transaction amount option now displays as Next installment balance. The Past due amount option now displays as Past installment balance.
-
From the Amount to apply screen, note that Past installment balance is calculated based on the installment date. The calculation includes an installment balance that is due today or in the past. Previously, in version 4.0, this option was based on the installment status.
-
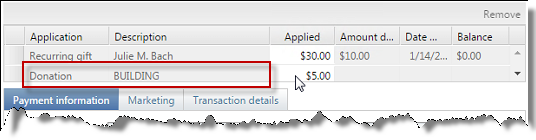
Based on payment handling configuration options, donations created from overpaying an installment are automatically added in the application grid. A new donation is also created if you increase the amount in the Applied field.
Tip: Donations created from payment handling configuration options also affect recurring gift payments added through Enhanced Revenue Batch and Revenue Update Batch.
When you edit a recurring gift payment, it is important to note the following behavior:
-
When you edit a recurring gift payment, the payment handling configuration options that existed when you initially added the payment will apply to future edits of the payment. Note that if you added a payment prior to version 4.4, the options in place prior to the upgrade will apply to all future edits of the payment.
-
Payment handling configuration options consider future and past installments in terms of the recurring gift payment date, not the date the recurring gift is edited.
Consider the following scenario as an example:
On 02/05/2015 -
-
A recurring gift has two installments due on 01/01/2015 and 02/01/2015 for $5 each.
-
The payment handling options are set to apply the payment to any past installments with a balance, and create a donation for any excess after that.
-
A payment of $10 is applied to the recurring gift which pays the installments for 01/01/2015 and 02/01/2015.
On 03/05/2015 -
-
An installment is now due on 03/01/2015 for $5.
-
The payment that was added on 02/05/2015 is increased to apply $15 to the recurring gift.
-
The additional $5 will be split off as a donation. The 03/01/2015 installment is treated as a future installment during this edit because it was considered a future installment at the time the payment was originally added.
-
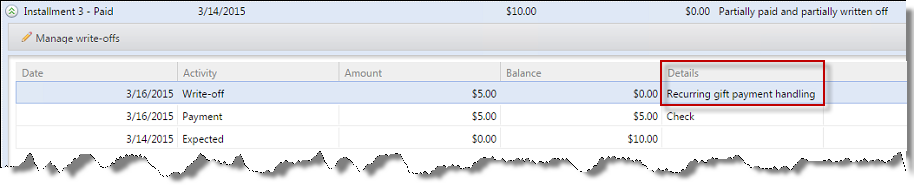
On a recurring gift record, the Details column of the Activity timeline now displays payment handling adjustment details for installments.
For example, when an installment is underpaid, and the payment handling option is set to apply the payment and automatically write-off the remaining installment balance, "Recurring gift payment handling" displays in the Details column.
Warning: When a recurring gift payment is deleted, all associated write-offs and adjustments are deleted as well.
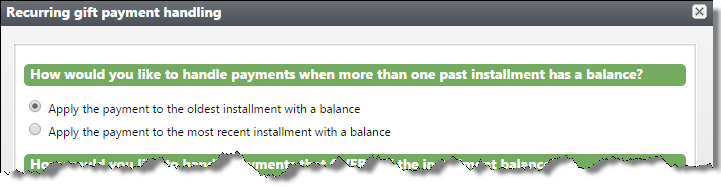
When you specify recurring gift payment handling configuration options, you can select to either apply a payment to the oldest or most recent installment with a balance.
Based on your selection, the program calculates whether to apply payments to the oldest or most recent installment. Once this is calculated, the "next" installment to be paid is defined and reflected in the following areas of the program:
-
Recurring gift transaction summary section
-
Amount and date due on the Add a payment and Edit a payment screens
-
Amount and date due in Enhanced Revenue Batch and Revenue Update Batch
-
Installments associated with credit card and direct debit events, such as credit card processing and automatically generating payments
-
Recurring gift next transaction date in Query
-
Pledge reminders
Previously, the Recurring gift settings configuration option existed and offered two choices: "Update installment amounts to match payments" and "Maintain installment amounts." With this release, the Recurring gift payment handling configuration option replaces the Recurring gift settings configuration option and offers much more flexibility when applying payments.
When you upgrade to version 4.0 Service Pack 2, you must decide how you want the program to handle payments toward recurring gift installments. The following details explain how the previous option relates to the new payment handling option.
In the previous version, when you selected "Update installment amounts to match payments," the installment balance that was due increased to match the payment received. No underpaid installment balance or future installment was affected by the overpayment.
To ensure the equivalent behavior is applied to payments using the new Recurring gift payment handling option, select the following options on the Recurring gift payment handling screen:
-
To handle payments when more than one past installment has a balance, select Apply the payment to the oldest installment with a balance.
-
To handle payments that overpay the installment balance:
-
Select Do not apply the excess amount to other past installments with a balance.
-
Select Increase the installment amount to include excess payment amount (other installment amounts are unaffected).
-
-
To handle payments that underpay the installment balance, select Decrease the installment amount to match the payment amount (other installment amounts are unaffected).
-
To handle remaining past installment balances after fulling applying a payment, select Leave any balances.
In the previous version, when you selected "Maintain installment amounts," the payment was applied toward the installment balances that were due and any overpayment amount was applied toward a later installment.
To ensure the equivalent behavior is applied to payments using the new Recurring gift payment handling option, select the following options on the Recurring gift payment handling screen:
-
To handle payments when more than one past installment has a balance, select Apply the payment to the oldest installment with a balance.
-
To handle payments that overpay the installment balance:
-
Select First, apply the excess amount to any other past installments with a balance (from oldest to most recent).
-
Select Apply any remaining excess to future installments.
-
-
To handle payments that underpay the past installment balance, select Apply the payment and leave a balance for the installment.
-
To handle remaining past installment balances after fulling applying a payment, select Leave any balances.
Blackbaud Internet Solutions
As part of our normal product improvement processes, we review our security measures, protocols, and infrastructure on an ongoing basis. Blackbaud Internet Solutions was automatically updated in this release to include security improvements which address vulnerabilities that could potentially compromise the integrity of our product.
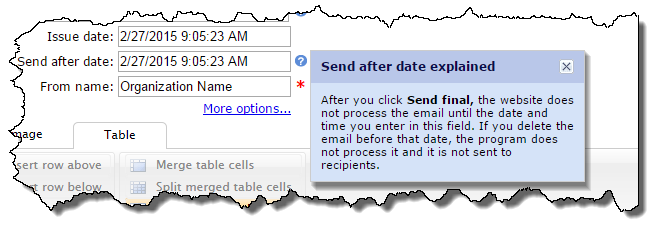
New help text is available for the Send after date field in Messages to explain that after you select Send final, the website does not process the email until the date and time you enter in the field. It also explains that if you delete the email before that date, the program does not process it and does not send it to recipients.
You can now copy parts from the Page content tab when you highlight a page in the list of pages. This change reduces the number of clicks required to copy parts when you navigate to them from the list of pages. Previously, you had to edit the pages to copy them or copy them from Parts.

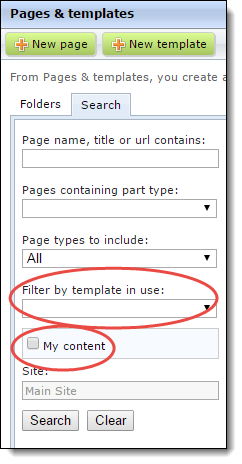
To help you quickly find the pages and parts you need, new search filters are available. From the Search tab, you can use the new My content or Filter by template options to narrow the results to pages you created or that use a specific template.
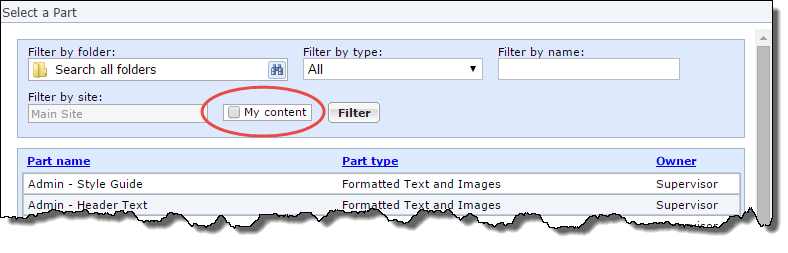
Also, when you search for parts to insert on pages, the My content filter is available so you can limit the list to the parts you created.
You can now use Page name or the new Last modified column to sort the list of pages. These changes help you to quickly find the pages you need.
Note: When you sort the list, the pages appear in ascending order. Pages that begin with the letter A, or include the oldest changes, appear at the top of the list.

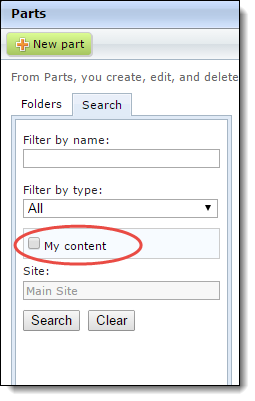
To help you quickly find the parts you need, a new search filter is available. From the Search tab, you can use the new My content option to narrow the results to parts that you created.
When you design the Profile Update Form for your Blackbaud Internet Solutions website, the Email addresses element under Contact information has changed. To improve email address privacy for website users, the new Make my primary email address private checkbox appears in the design area when you add the element to a form.
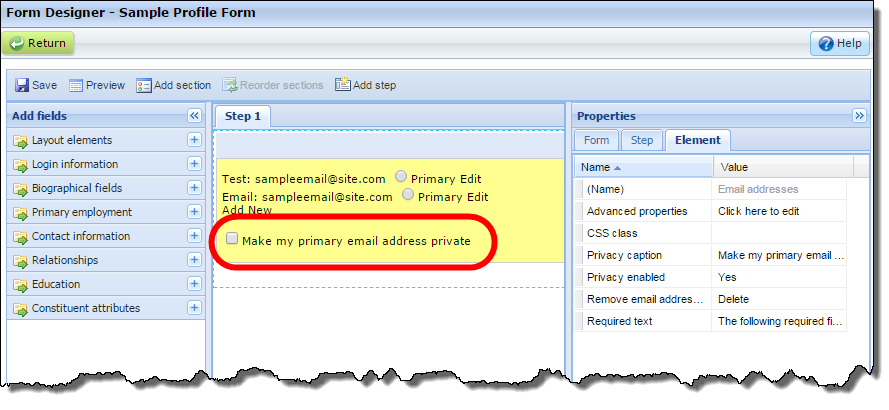
To display the checkbox on your web page so users can select whether to mark the primary email address as private, select "Yes" in the Privacy enabled row on the Properties pane. In the Privacy caption row, you can enter custom text for the checkbox to display on the page.
Note: When users select the new Make my primary email address private checkbox on your web page, it also designates their primary email address as private for the Directory and Profile Display parts on a web page.
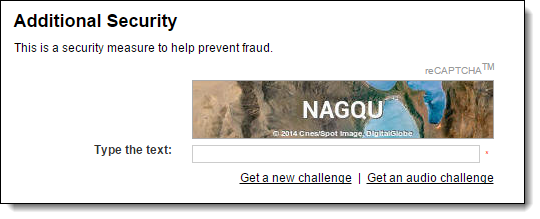
New instructional text appears on forms that include reCAPTCHA images. Previously, the text instructed users to "type the two words" shown in the reCAPTCHA image. Now, the text instructs them to "enter the text" since the images typically include characters that do not form words.
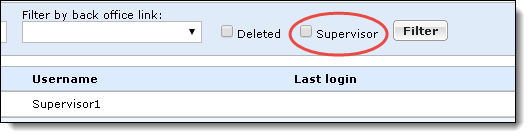
Now when you use filters in Users, you can identify the people who are site administrators. Previously, you could only filter by the roles you added to your website. This change helps you quickly identify people with administrative access when you need to change rights, such as when a person is no longer employed by your organization.