Service Pack 15
Tip: Want to review this offline? Use your internet browser's print function to save this topic as PDF file.
Search your Database
On the home screen, you can now search your entire Blackbaud CRM database for any constituent. Select the new Search all tab to display the Search screen.
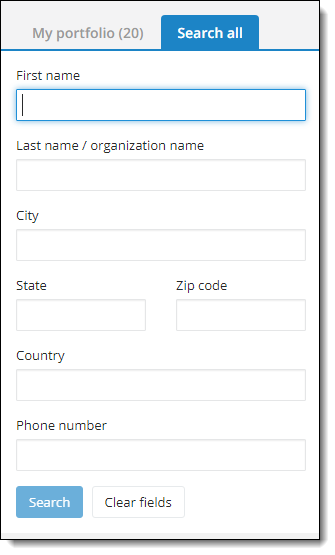
Note: The Phone number field searches primary phone numbers only, and only shows results for exact matches.
You can search by any of the fields on this form. To search by country or phone number, your administrator must enable those search options in Blackbaud CRM. If those options are not enabled, the Country and Phone number fields will not appear on this form.
Enable Country and Phone Number Search
To search by country or phone number in Fundraiser on the Go, you must enable these searches in Blackbaud CRM.
-
Toggle to Design Mode.
-
From Prospects, right select Search constituents and select Go to search list. The Search List: Constituent Search page appears.
-
Select Settings under Tasks. The Edit settings for Constituent Search screen appears.

-
Select "Country" and "Phone number" under Available filter fields and select Save.
Feature Permissions
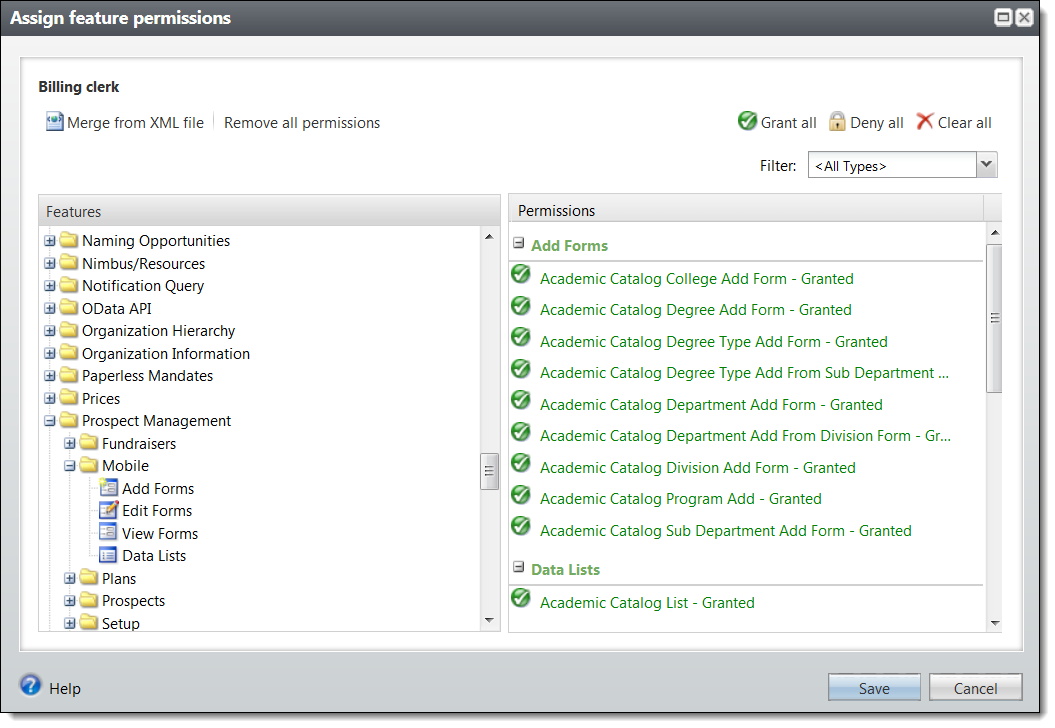
If you are using Fundraiser On The Go for the first time or you add a new system role for using the app, your administrator must grant specific rights to each user to enable prospect search. Specifically, users must have permission to the Search List Information Mobile View Data Form, the Country Format Data List, and the Country Format Data Form. These permissions are under Prospect Management, Mobile in the Assign feature permissions screen.
To access user permissions, from Administration, select Security and then Application users.
Continuing with the functionality we introduced in Service Pack 12 for Enhanced Revenue Batch, you can now update existing recurring gifts, pledges, and other payment records in Revenue Update Batch using the Bluefin® Payment Systems integration. In addition, we also now include this integration in Membership Dues Batch.
This functionality allows you to improve PCI compliance with credit card tokenization through an interface between Blackbaud CRM and the Bluefin Payment Systems and their credit card encryption device for point-to-point encryption (P2PE). This device enables credit cards to be keyed in or swiped, subsequently encrypted and tokenized through Blackbaud Merchant Services and the Blackbaud Payment Service, removing the need to store the actual credit card number at any point in the process. For more information about Bluefin Payment Systems, see https://www.bluefin.com/about/. For more information from Bluefin about the intergration with Blackbaud CRM, see the Bluefin and Blackbaud Integration Guide.
To use the integration, use the new Capture card info button on the batch toolbar to enable the integration with the Bluefin device to swipe or enter credit card details. The new button appears on the Revenue tab on the Revenue Update Batch and on the Dues tab on the Membership Dues Batch. This button is not displayed when you access the Form view of a Membership Dues Batch from Revenue, Enter membership dues. To see it, you must access a Membership Dues Batch from Administration, Batch.
Solicit Codes
Previously, you could only use one consent solicit code per channel per site. With Service Pack 15, you can now use multiple consent solicit codes for each channel and site, so that you can create a hierarchy of consent solicit codes.
When you add a new instance of a consent solicit code to a constituent record for a code that already exists with a different preference, the previous code is end dated automatically to prevent conflict between the two and maintain an audit history. This will behave the same way when using batch for data entry.
Mail Preferences
When a constituent has an active, opt-in consent solicit code, you now see a Consent tab on the Add or Edit a mail preference form. To change mail preferences based on consent solicit codes, you must link the solicit code to the mail preference in the new Consent tab.
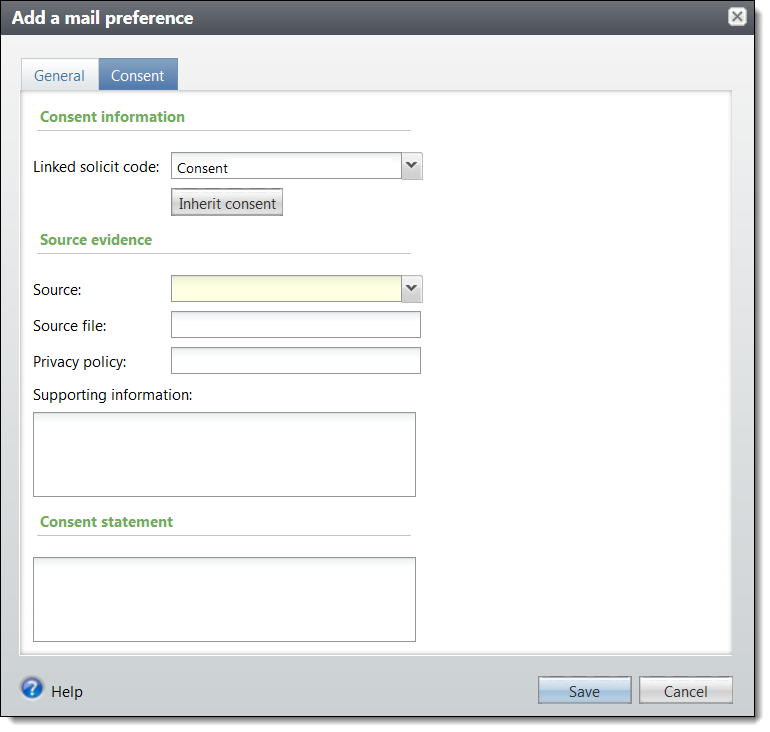
If the consent solicit code linked to the mail preference is no longer active, you will see a warning on the mail preference. You can edit the mail preference and link it to a currently active consent solicit code.
Solicit Code Channel Opt-Out
When you have an active consent solicit code on a constituent record, you now see the new Solicit code channel opt-out section under Communications, Preferences. This allows you to indicate that a constituent has opted out of all active solicit codes for a given channel. For any active consent solicit codes for that channel, this enters an end date and a comment of "Channel Opt-out" to indicate the reason the opt-in option was changed.
Constituent Merge
When performing a constituent merge, if two constituent records have the same consent solicit code with conflicting date ranges, the two records will not be merged. If you are merging multiple records, the merge process will succeed but there will be an exception created and the conflicting constituents will not be merged.
Editing Preferences and End Dates for Consent Solicit Codes
When editing consent solicit codes from a constituent record or through a Constituent Update Batch, you cannot edit the end date or the preference for any consent solicit codes.
Marketing and Communications
Consent solicit codes will only be excluded from mailings when the constituent has an active code with "No response" or "Opt-out" as a preference. This happens when you select the consent solicit code as an exclusion in a mailing process. This also applies to event invitations sent from the Events functional area.
Global Changes
We have enhanced the Add constituent solicit code global change to allow for bulk entry of consent solicit codes. The new fields appear when you select a consent solicit code, and are the same as you would see when you add a consent solicit code to a constituent manually. You can use the global change to add one code at a time.
Query
The Solicit Codes and Mail Preferences nodes in Query now include all the consent fields. These fields are also available in the Blackbaud Data Warehouse.
We have also added a new node called "Solicit Code Channel Opt-out" so you can query on opt-outs entered in the new Solicit Code Channel Opt-Out section of the constituent record.
To enable you to capture communication consent on your Blackbaud Internet Solutions forms — and to be compliant with the General Data Protection Regulation (GDPR) — we've implemented a new Communication Consent part. Your organization can use this new part to collect explicit consent from users — both in the European Union (EU) and elsewhere — for how they want to receive communication from you. In order for any non-profit organization to contact constituents residing in the EU, they must have explicit opt-in consent for any kind of communication via any channel — such as email, phone, SMS, or mail.
As an organization, you can create one Communication Consent part — or multiple versions of the part — to support the forms in Blackbaud Internet Solutions that collect constituent information and write the data to constituent records in Blackbaud CRM.
With this new functionality, you can include a Communication Consent part on any of the following forms in Blackbaud Internet Solutions:
-
Donation Form
-
Event Registration Form (Classic)
-
Events Registration Form
-
User Login Form
-
Payment 2.0 Form
Note: This form supports consent for all transactions types — donations, event registrations, memberships, and sponsorships.
-
Advanced Donation Form
When users submit the form, their constituent record is updated on the Communications > Preferences tab in Blackbaud CRM with their communication consent preferences.
Design the part
Use the Design tab for the Communication Consent part to configure the part and customize it for your organization.

Under General, you can customize the title to display on the web page for the communication consent preferences or you can use the default message. You can also include customized instructions under Consent Statement or use the default statement.
Under Consent Options, add the consent options you want to display on the web page. Select Add Option to search for solicit codes or consent solicit codes that are configured in Blackbaud CRM, then choose the ones to include on the form. For each consent option, you can modify the caption that displays on the form, specify whether the option is required, or remove the option. Optionally, you can add a divider to separate sections on the form — for example, to keep all email consent options together — by selecting Add Separator and include a caption for the separator. You can select and drag the consent options to reorder them and to move the corresponding separators.
Under Privacy Policy, select an option for including access to your organization's privacy policy on the web page. Select Create link to Blackbaud Internet Solutions page to choose an existing page on your website. Select URL to specify the web page where the privacy policy is located. If you don't want to include a link, select None.
Add the part to a form
You can add a Communication Consent part to a form by configuring the Consent section on the form's Design tab.
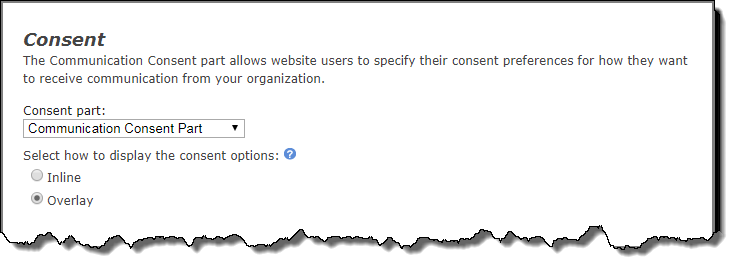
Under Consent part, select a saved Communication Consent part to include on the form, then specify how you want the consent options to display.
Depending on your organization's site design or how your forms are styled, you can select whether to use the inline option or the overlay option to gather consent.
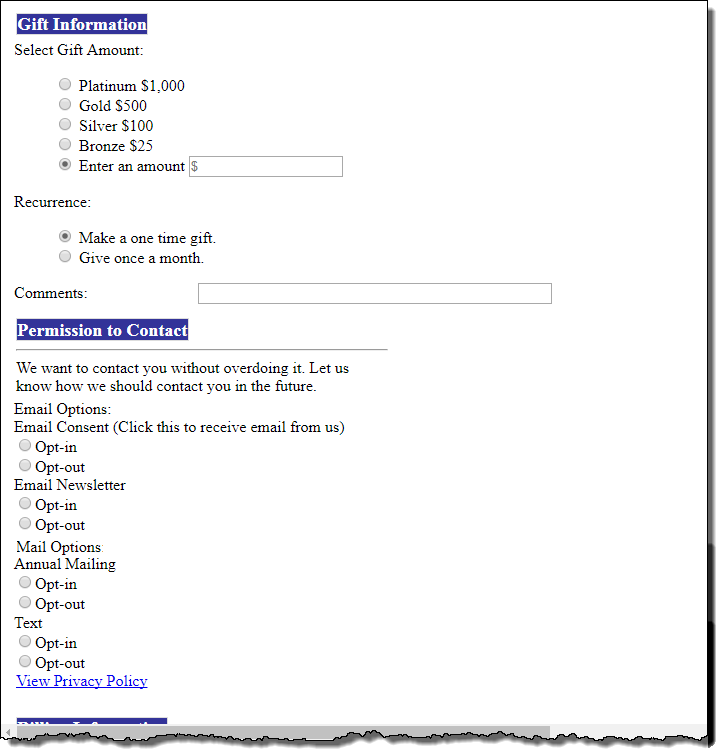
The Inline option includes the communication consent options embedded directly in the form itself.
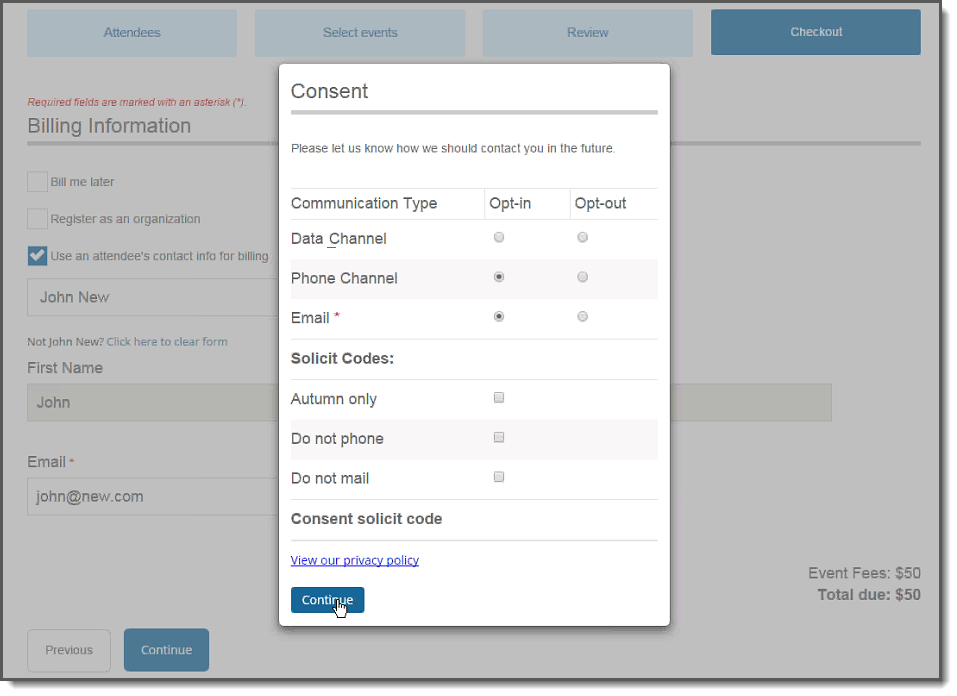
The Overlay option displays a pop-up window with the consent options when the form is submitted.
After users submit the form, their consent information is downloaded along with their transaction. After the appropriate batch is committed, their constituent record is updated on the Communications > Preferences tab in Blackbaud CRM with their communication consent preferences.
Note: You can expect a lag time of approximately 5 minutes between the time you commit a donation or membership transaction batch and the time the consent preferences are written to the constituent's record in Blackbaud CRM.
If a user has already provided consent, when they fill out a subsequent form that includes the Communication Consent part, their consent preferences are automatically populated. Users can modify their consent preferences, and the changes are then written to their constituent record when they submit the form.
If a transaction is canceled for any reason, the constituent's consent preference selections for that transaction are not written to their constituent record.
To support more configuration flexibility, we've made several enhancements to the Communication Preferences form to improve how you can configure the form to capture user consent.
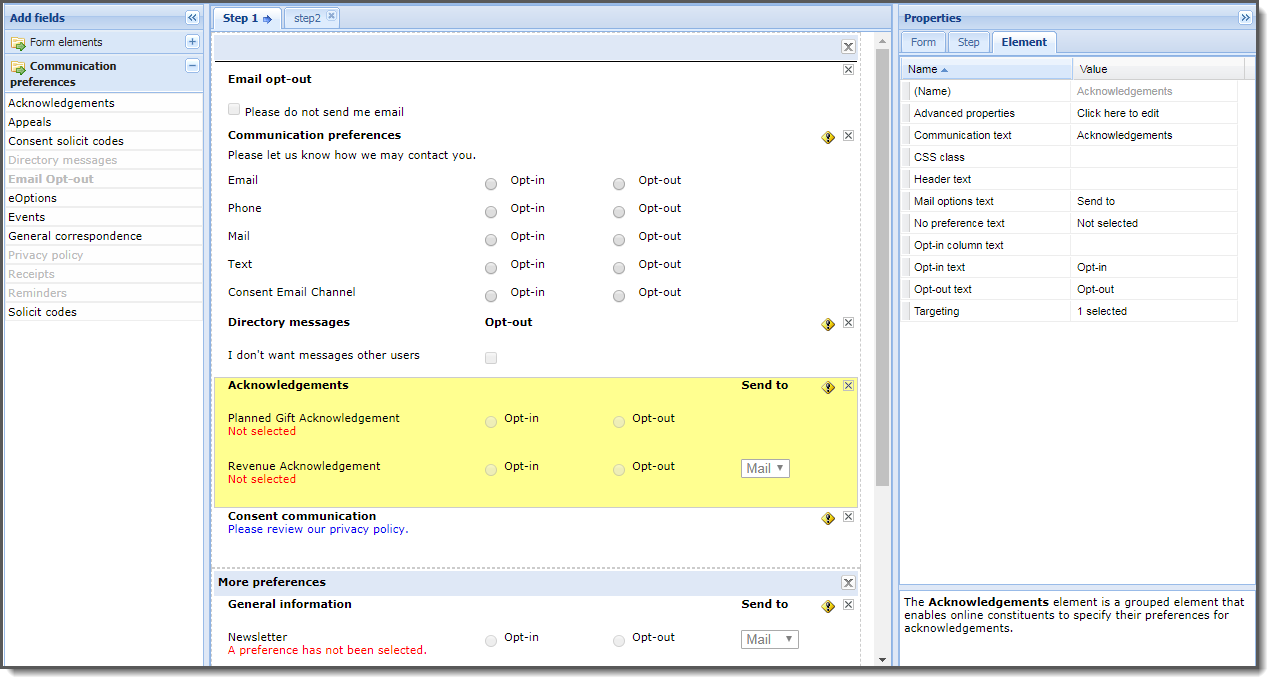
Previously, you could only include one element per type on the form. After an element was added, it was grayed out in the Add fields list so that it couldn't be added again. With this enhancement, you can now add multiple instances of the same element type to the form — for example, you can add more than one Consent solicit codes element. However, each element of the same type on the form must have different properties. Under Advanced properties, when you add a property for an element, that property cannot be added again to the same element type on the same form.
In addition, we've changed the default Opt-in text and Opt-out text for the preference options to Opt-in and Opt-out, respectively. Also, the No preference message text now displays directly below the option name when no selection has been made.
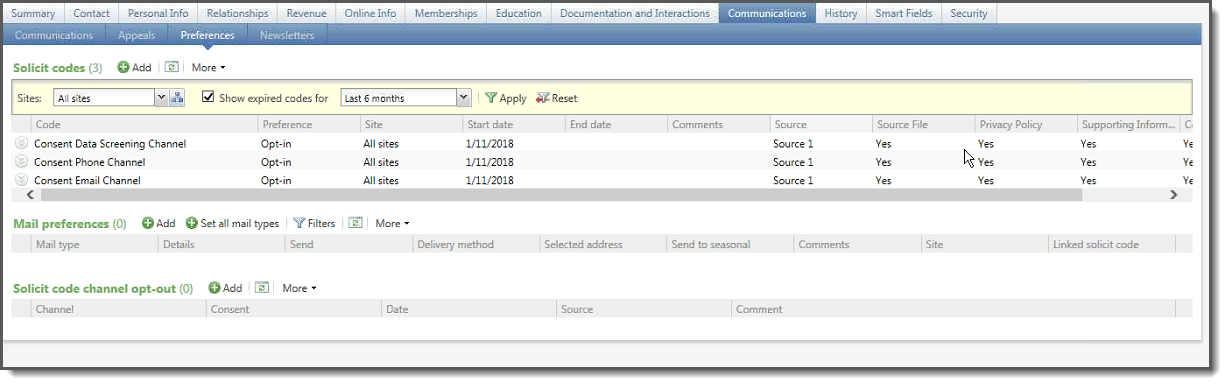
When constituents submit their consent preferences via the Communication Preferences form, those preferences are written immediately to their Blackbaud CRM constituent record and display on the Communications > Preferences tab under Solicit codes. Consent solicit codes, consent statement, privacy policy, and more consent details are included on the record.
This update fixes multiple defects and issues. For details, review the patch notes for service pack 15.