Introducing Auto-select Settings for Enrollment Management Checklists!
New Features
We recently added the new Auto-select Settings feature to Enrollment management, so let’s talk about it!
https://d3k2f0s3vqqs9o.cloudfront.net/media/314ECBC4-9678-41CF-9E352DD63C518811/1972A8C6-C06B-4A8B-A943A91B74EC80AF/webimage-7C996DAD-55BA-4BA0-A6544072543EA45A.png
June 16, 2025
As part of the June 10 release, the Enrollment management team added a new feature called Auto-select settings.
Convenience. It’s all about trying to make your life easier with the admissions process. So, while you may have seen the release notes, let’s do a deeper dive into this feature and how it works for you.
What Is It?
On a basic level, Auto-select settings lets you create rules that will automatically assign a checklist or admissions staff when the criteria is met. This works when processing inquiries, applications, and event registrations.
To get started in Enrollment management, head on over to Admissions, Admissions setup, and then Checklists. In here, look for +Auto-select settings to begin.

How Does It Work?
When the modal opens, you’ll see a ton of options, but there are two things to note first.
-
Make sure Active is enabled for the section you want to use. You don’t need to use both if you don’t want.
-
All of the settings are tied to the currently selected Entering year. You can change this as needed to allow different distinctions to be made.
The first section is for checklists and there are 4 criteria you can use. Select them to add them to your ruleset, otherwise they are left out. Define the criteria that you need for the Board type, Grade level, Program, and International/domestic as needed.
Basically, if the criteria rules you’ve established here are met, then the assigned Checklist will automatically be added.
Below this section is an identical one though its for automatically assigning Admissions Staff. The process is the same, so add the criteria you need and the staff member to be assigned.
You can then see the assigned values from places like Process Inquiries or Process Applications.
Is There Validation for These Rules?
Yes, there is! If you accidentally make a rule that has the same criteria as a previously made one, a warning message appears letting you know that there is a conflict that needs to be resolved.
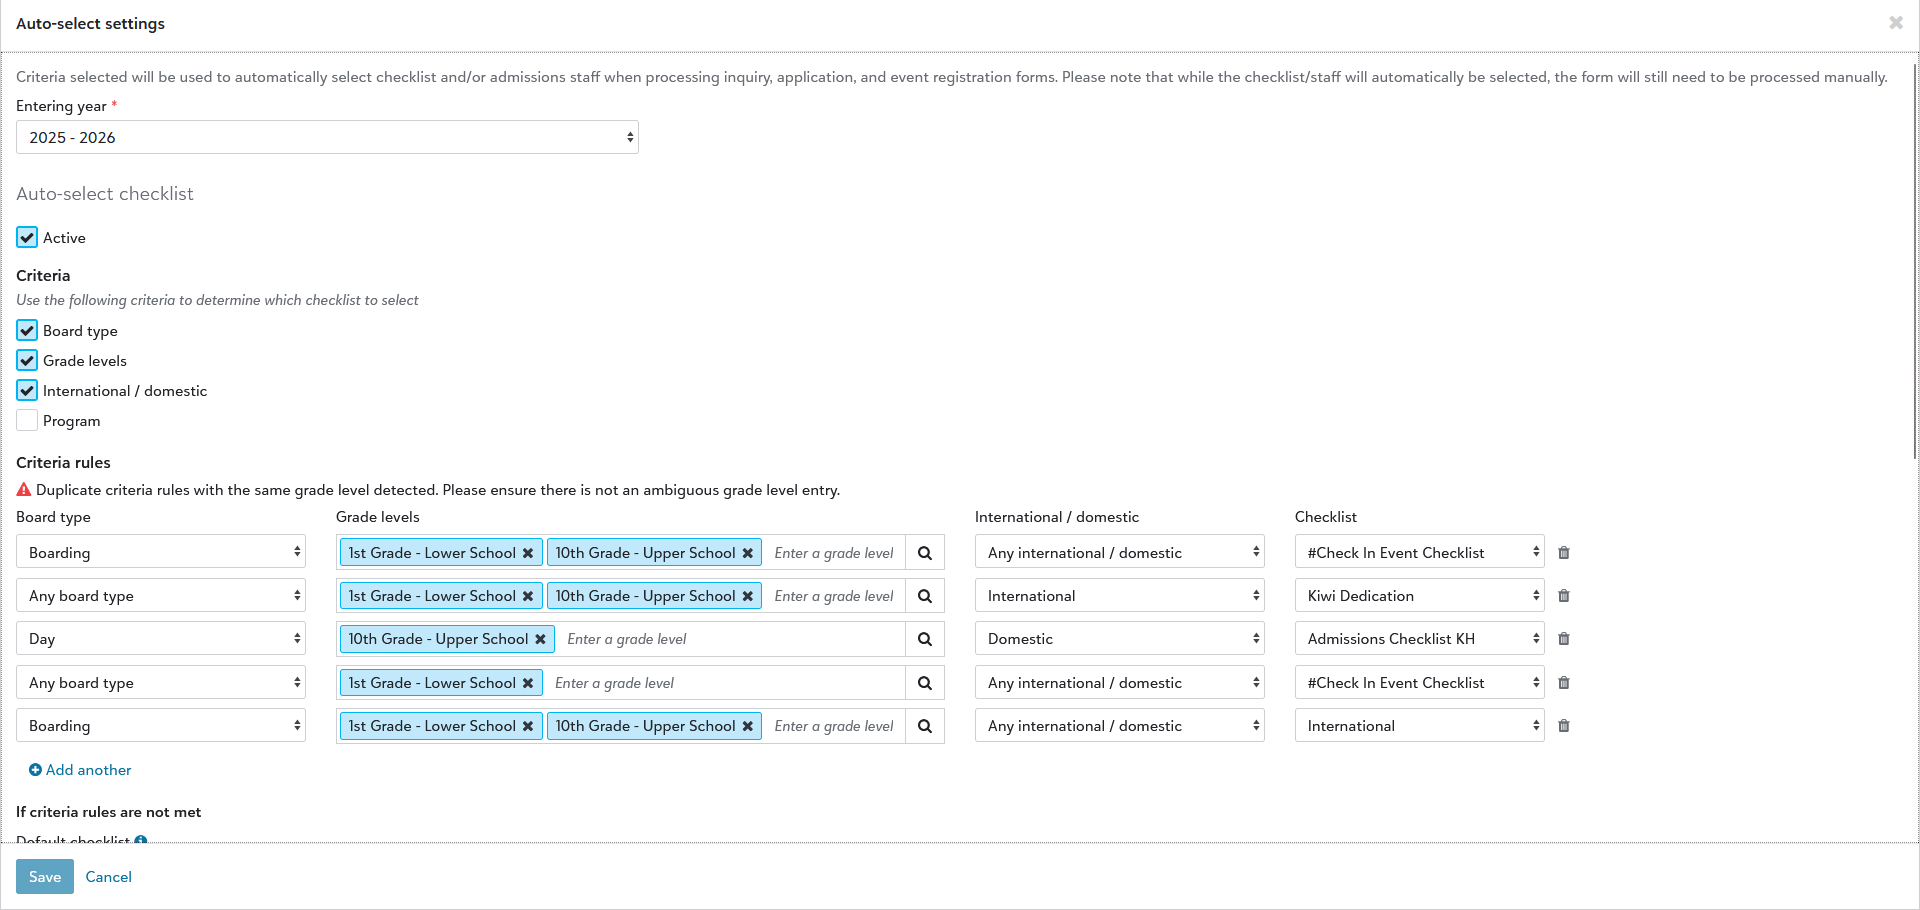
Now, what happens if you have two rules with valid criteria that overlaps the values that need to be assigned? In this situation, a note will be added to the Process inquiry/Process application user profile under the Checklist to assign or Staff to assign dropdown that indicates Auto-select could not be completed due to multiple criteria rules matching the submission.
Want More?
Thankfully, we’ve got you covered. You can read more on Auto-select settings from our online help right here.
However, if you’d like a visual overview of this new feature, check out the video below.
Thanks for tuning in this week everyone! We’ll talk next time!