User Profile Photos (Avatars)
User profile images (sometimes known as "avatars") appear throughout your school's online solutions to help users connect faces to names.
Many schools use rectangular, portrait layouts for photos in yearbook or school IDs. Many also hire professional photographers to capture photos in bulk instead of uploading singular photos for users.
These photos are automatically "cropped" for use in the round frames of the user interface.
For best results:
-
For the clearest images, upload images that are at least 200 x 200 pixels.
-
The final avatars show 100 x 100 pixels with user heads centered vertically and horizontally in each circle.
-
The original photos (up to 2400 x 2400 pixels) are not permanently altered; the originals are stored “under the hood.”
-
The original images may be rectangular, rather than squares or circles.
-
For example, your original photos might be uploaded as 300 x 600 pixels (which is rectangular but still greater than 200 x 200 pixels).
-
-
The maximum file size for user photos is 1 GB.
-
Admissions managers should instruct each family to upload a profile photo that is at least 200 x 200 pixels with the candidate’s face centered horizontally and vertically.
To export a list of user IDs see the Users without Photos or Users with Photos list template.
Platform managers can import photos in bulk. As part of the import, they can adjust how photos in the batch are cropped for use in the round avatars.
-
Select Core.
-
Select System tools.
-
Select Bulk upload.
-
Select Bulk upload user photos. Information about previous batch updates appear in a grid.
-
Select Upload photos.
-
Select Create sample file. A template for a comma separated value (.csv) file is downloaded to your local computer based on your browser settings. Use it as a sample or starting point to format the data for your upload. The file will indicate how each photofilename and userid should be connected. Save your import file as a comma separated value (.csv) file.
-
Select Upload file. Browse to and select the file you previously created.
-
Select Validate. Each photo file name is associated with a single user based on the user ID.
If there are multiple photos per user or a user can't be found, correct the comma separated value (.csv) file and then Go back to upload it again.
-
After the file names are validated for users, you're ready to upload the photos themselves. Select from your computer and choose all of the images you mentioned in the import file.
-
After you upload the photos, use arrow buttons to center faces within the round frame of the avatar circle. A preview of real images shows how profiles photos in the batch are affected as you center them.
-
Select Update.
-
From a individual’s 360 user profile, select Contact card.
-
Under General information, select Edit.
-
Choose Profile photo.
-
Drag and drop a photo from your local computer into the placeholder image’s location. Alternatively, select the placeholder image and then browse to and select an image from your local computer.
-
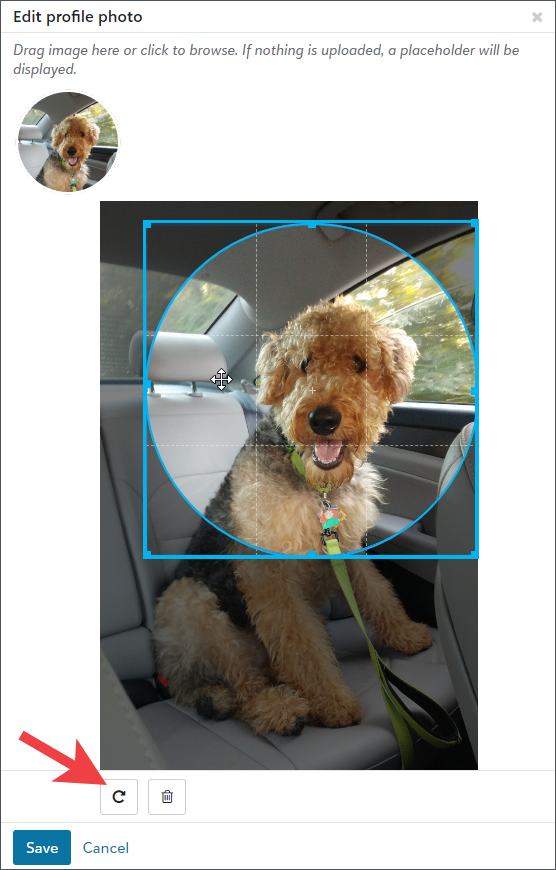
Use the circular arrow under the preview image to rotate the photo 90 degrees.
-
Then drag the edges of the selection area to resize or recenter the circle that crops the image for use as a profile image.

-
Select Save.
-
To adjust a single user’s photo, crop the photo in a third party photo editing tool. Ensure the photo is that is at least 200 x 200 pixels, with the user’s face centered horizontally and vertically.
-
Upload it to the user’s contact card.
-
From Core, select People finder.
-
In the Type a namefield, enter and select the name of the individual you want to work with. The selected individual's profile page appears.
-
Select Contact card.
-
Locate the About tile and select Edit photo.
-
Drag or upload a photo.
-
Select Save.
-
Note: Alternatively, use the bulk upload tool to upload the single file and then make the centering adjustment as you would for a batch of photos.
Some schools grant users access to upload or adjust their own profile photo. They may limit access by security role.
We recommend using an image that you've cropped using third party photo editing tool. Ensure the photo is that is at least 200 x 200 pixels, with the user’s face centered horizontally and vertically.
-
Go to your contact card.
To do so, find your name (upper right corner of the top navigation) and then select Profile from the drop down menu.
-
Locate the About tile and select Edit photo.
-
Select to upload a photo. Alternatively, drag and drop a file from your local computer.
-
Select Save.
The bulk upload tool accepts the same types of image files as the single user interface.
From a user's profile, locate the About tile and select Edit photo. Select to upload a photo. Your computer prompts you to browse to an image from your local computer. The extensions of accepted file types appear beside the File name field.
Tip: Platform managers determine which users can view and edit user profile photos. They use security roles and profile field settings to do so.