Design and create statements
Create statements by first defining statement references, which in turn format how transactions appear to payers.
Next, design a statement template using a drag-and-drop-based builder to position various sections and structure the overall layout.
Finally, configure each section to refine the data that appears.
 Define Statement references
Statement references format how charges and credits appear under the Reference column on a statement.
Note: The Reference column is optional; therefore, proceed with this step as-needed
For example, consider a charge. A charge has multiple pieces of information surrounding it, such as the due date, the fee name, and a description that expands on the charge. By configuring the charge statement reference, you specify how much or how little a payer sees regarding a charge.
To configure the Statement references:
-
Select the context menu (
 ) beside the appropriate Transaction type, select Edit.
 -
Select each part of the transaction that appears on the statement using the dropdown.
-
Add a new part by selecting Select here to add reference part, which appears as the last dropdown in the list.
-
Edit an existing part by selecting it in the list and choosing a new option from the dropdown.
-
Delete a Statement reference part (
 ) to remove it. Once deleted, it can then be added elsewhere in the Statement reference.
 -
Select Save.
Design a Statement template
Rows and sections are the building blocks comprising a statement. Rows are full-width containers that house and organize sections. Sections contain statement data, such as the statement date, amount due, school logo, and more. While rows occupy the full-width of a statement, sections occupy a defined width within a row. Sections are placed anywhere in a row to create a unique design that best expresses a payer's financial relationship with your school.
The cumulative width of each section in a row can neither exceed 8 inches nor 100%.
To add a Row
1
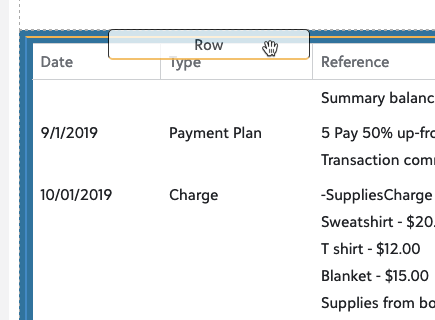
Drag the row from the tray
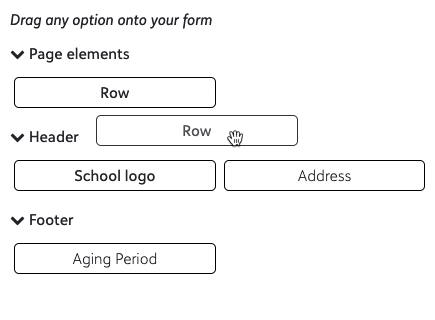
2
Drop the row onto the form
Rows cannot move once placed. Delete an existing row ( ) and add a new one.
To add a Section
1
Drag a selector from the tray
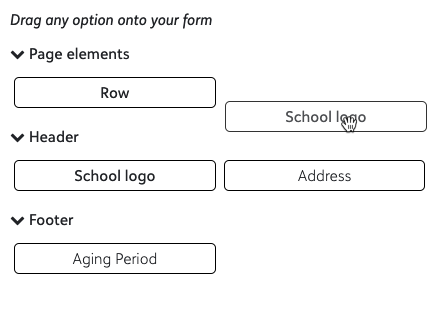
2
Drop the selector into a row
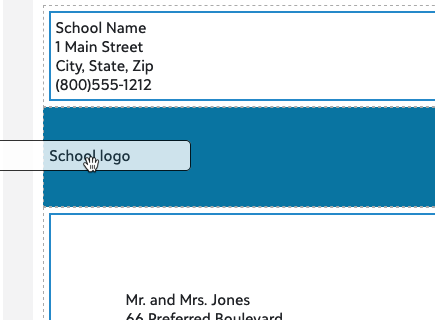
To snap a section above an existing section, drag the section above one on the form. When a yellow border appears along the section, drop the section to snap it into place. The newly dropped section has the same width as the section it is snapped to.
To move a section, hover over a section, select ( ) , and drag it to a position in a row. Sections can be moved to any position in a row, but cannot overlap a section. If overlapping occurs, consider modifying the section width.
To modify section width, hover over a section and select Edit section. Under Section width, choose between either using percentages or using inches. In the immediate text field, enter the corresponding unit. The section then occupies the percentage or amount of inches specified.
Once a statement is arranged in an adequate format, transition toward configuring each section to further refine the statement.
Configure a Statement template
Create a Statement template for each instance where a different statement format is required to present a unique set of billing activity.
Arrange and configure the following required and optional sections:
Required:
Statement block
The Statement block displays the end date for the running statement period along with the block's header title.
To modify the header to match the communication language of your school, select Edit section for the block. Under Edit Statement header, locate the Header title drop-down and choose between Statement (the default) or Invoice. When Invoice is selected, the document will display "Invoice" at the top and the date will read "Invoice date" instead of "Statement date".
To move the section, drag the block using () and drop it into a row to realign its position. It can be snapped above or below existing sections by dragging it over a section until a yellow border appears.
Charges for
Payer charges for a specified statement period are tallied and communicated under Charges for. This balance is either unique a payer or the sum of multiple related payers if the statement is configured to display related payers.
To modify the Charges for section, select Edit Section.
-
Calculate the Section width, either using percentages or using inches.
-
Select or deselect the following fields to show or hide the student and payment-related information.
-
Select Save.
To move the section, drag Charges for using () and drop it into a row to realign its position. The Charges for section can be snapped above or below existing sections by dragging it over a section until a yellow border appears.
Transaction details
Transaction details include account credit and incurred charges during a statement period.
The Reference column is directly impacted by the settings under Statement reference; configure the formatting for each transaction type if you intend to include this column.
To modify the Transaction details section, select Edit Section:
-
Select the Section organization, which adjusts the default statement format when handling related students tied to a payer.
Note: The family situation affects statement distribution, which means that statements may be distributed to Statement recipients individually based on this setting.
-
Separate statement for each student:
Each student receives a statement with billing activity specific to them.
-
Include all students in the family with separate student sections:
Payers with related students appear on the same statement. Billing activity specific to a student is categorized under each student name.
-
Include all students in the family:
Payers with related students appear on the same statement and have their billing activity combined.
-
Select the Details format, which impacts how charge and credit amounts appear to payers:
-
Amount/Balance only:
Charges and credits appear under the Amount column alongside the resulting balance. -
Charge/Credit columns:
Charges and credits appear under their own respective columns.
-
Amount column only
Charges and credits both appear under the Amount column.
-
-
Select from the following:
-
Show summary line for balance from previous statement periods:
The summary balance for previous transactions that occurred outside the statement dates appears at the top of the statement.If Include all students the family with separate student selections is selected, the previous summary balance appears at the beginning of each student section. Otherwise, the balance appears as a single consolidated amount.
-
Show line item details for detailed charges:
Detailed charges appear as itemized.
-
Show transaction comments below each transaction:
Comments entered by Billing clerks appear below each billing item.
-
-
Select which Columns to include, noting that each column is optional.
-
Select how the transactions are sorted, opting between Transaction date (i.e., chronological), Transaction type, (i.e., categorized), Student (i.e., alphabetical). Student sorting orders multiple payers on a statement alphabetically. The credits and charges therein are ordered chronologically.
-
Select Only include open transactions to have only unpaid charges appear on the statement.
To move the section, drag Transaction details using () and drop it into a row to realign its position. The width of Transaction details cannot be edited, but the section can be snapped above or below an existing section which, in turn, adjusts the section width to match the snapped-to section.
Optional:
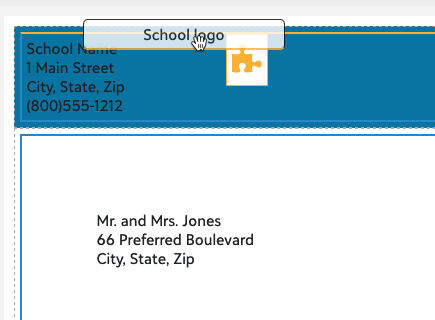
School logo
The School logo section displays an image on a statement. Images that are uploaded to the
The Logo size either corresponds to the Actual (image) size, or is scaled to Fit the section dimensions. The latter option may result in stretching and distorting the image if the original dimensions vary immensely from the requirements of the section width.
To move the section, drag School logo using () and drop it into a row to realign its position. The School logo section snaps above or below existing sections by dragging it over a section until a yellow border appears.
Recipient Address
Recipient address displays the payer address and salutation. By default, the payer
To modify the Recipient Address section, select Edit section.
-
Calculate the Section width either using percentages or using inches.
-
Select the Address to use.
-
Select the Salutation to use.
Each option under Salutation to use corresponds to the following:
-
Formal:
Mr. and Mrs. Brown -
Household:
The Brown Household -
Informal:
John and Linda Brown
To move the section, drag Recipient address using () and drop it into a row to realign its position. The Recipient address section snaps above or below existing sections by dragging it over a section until a yellow border appears.
Aging Periods
Aging periods display the number of days a balance is past due by assigning the balance to an aging period column. Each column header and the aging period calculation criteria derive from the Aging calculations settings. Specifically, the Description for each Aging period value determines the Aging Period column headers on the statement.
To move the section, drag Aging periods using () and drop it into a row to realign its position. The Aging Periods section snaps above or below existing sections by dragging it over a section until a yellow border appears.
Once complete, select Properties. Enter the Template name and Description. Select Use this statement when printing templates online if this is the sole template used for online statement printing. Only one template is used to print statements online.
Select Save to finalize the creation of the new template.
Account Summary
Account Summary communicates the financial aid information for the current year and session to payers.
The section includes their current balance as of the end of the statement period, the anticipated and awarded financial aid for the session, and the difference between the current balance and the aid.