Attendance Thresholds
Schools can use Attendance Thresholds to trigger an action once a specific trigger has been reached. Thresholds are highly customizable to allow schools the freedom to track specific targets, as well as what happens once these thresholds are reached.
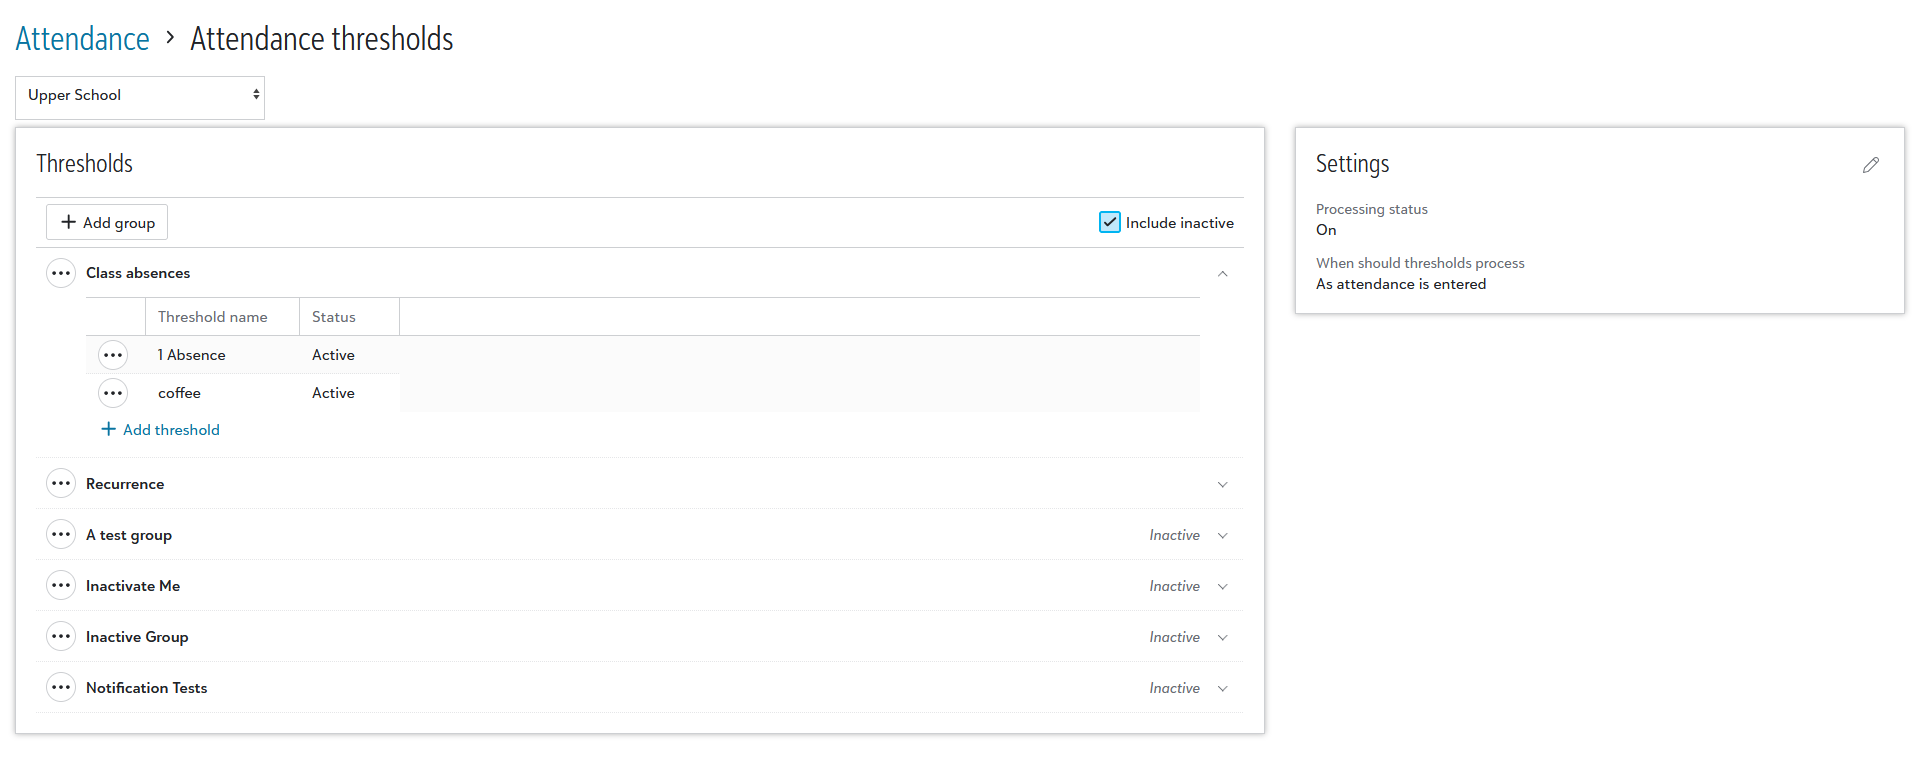
Thresholds are organized into groups and from the page, you have the option to include inactive groups in the list or only display currently active ones. In addition, each group can be expanded or collapsed to improve visibility on the page.
 Setting Up Attendance Thresholds
To get started with Attendance Thresholds, you’ll need to first set them up from the Attendance Hub. Under Settings, select Thresholds to start customizing them for use.
Schools can select the School Level which establishes where created Thresholds will be applied to. The thresholds created and modified within that school level will only be used for students within that specific school level, unless an Entire School option is selected.
Note: Keep in mind that school levels are custom fields so the naming will be different for everyone.
If needed, you can also adjust the global Threshold settings, turning off processing as a whole as well as alter when thresholds are processed.If this is turned off, thresholds will no longer be triggered and if you need to, you can also set it so thresholds are processed as soon as attendance is entered or set it for a specific time each day.
To Create a New Threshold
-
Select +Add group.
-
Add a name for the group to then add it to the Threshold list. We recommend using the name to describe what the threshold will be used for, such as Class absences.
-
Under the group, select +Add threshold to open a new modal with customizable settings.
-
The modal displays the group this Threshold will be attached to and you can set the Threshold name
-
Next, you'll need to set how the attendance is counted with three different options:
-
Overall - Triggers when a student reaches a specific count.
-
Recurrence - Will trigger every time a student reaches a specific count.
-
Recurrence starting at - Similar to the recurrence option, this will trigger every time the count is reached but only after the starting entry number set below the field is met.
-
-
You'll also need to select the count of attendance entries that trigger and can be between 1 and 999. In addition, set which Attendance reasons to count. Use the search function to link previously created options and you can bulk select the ones needed.
-
The Enrollment scope can be set for All enrollments or specific options like Academic classes or Per attendance of record only. The former option separately evaluates each academic class the student is enrolled in while the latter option only includes attendances marked as the “Attendance of record.”
-
Next up, set the time frame if you selected Academic classes or Per attendance of record only. Options include for the Term, Week, Month, or the entire School year.
-
If you selected All enrollments, you'll also need to select which group types should be included. You can pick from Academics, Activities, Advisories, and Athletics.
-
Finally, you can also select what happens when a threshold is hit. By default, you have 4 options available to pick from though you can select as many or as little as you want from the list.
-
Notify student – Add a notification that will be sent to the student, which you can configure right from here.
-
Notify parent – This option allows you to customize an email that will be sent to the parent once the threshold is reached.
-
Notify attendance manager – With this option, you can send a notification to an administrator regarding the attendance threshold.
-
Add an infraction – The final option here is to add an infraction for the student. Selecting this option allows you to select an infraction from the list, add yourself or another faculty member as the assigner, and add a description that can be seen externally.
-
-
Once set, select Save to confirm the new threshold rule and go back to the list, Save and add another, or Cancel to go back without saving.
The new threshold is then added to the Group within the list. If needed, you can use a context menu to Edit the group or the threshold, inactivate it, or delete it. Keep in mind that if something is deleted, it can’t be recovered so be careful. Thresholds can also be copied from the context menu, letting you save time by not recreating everything from scratch if you plan on using similar settings.
Working With Attendance Thresholds
After attendance thresholds are set up, they are available from a student’s profile as long as that school level has attendance thresholds assigned to it.
From the Progress tab of the Student Profile, look for the Attendance summary section and select Work with attendance entries. Thresholds will have its own tab and selecting it will display any applied to the student. Use Columns to further refine the data being displayed within the list. You can also sort the data displayed by selecting any of the column names as well or use the search option to find something specific.
Note: The thresholds tab on the student's profile will only show the threshold results that are applied to the student after processing is done