Edit Auto-Pay settings
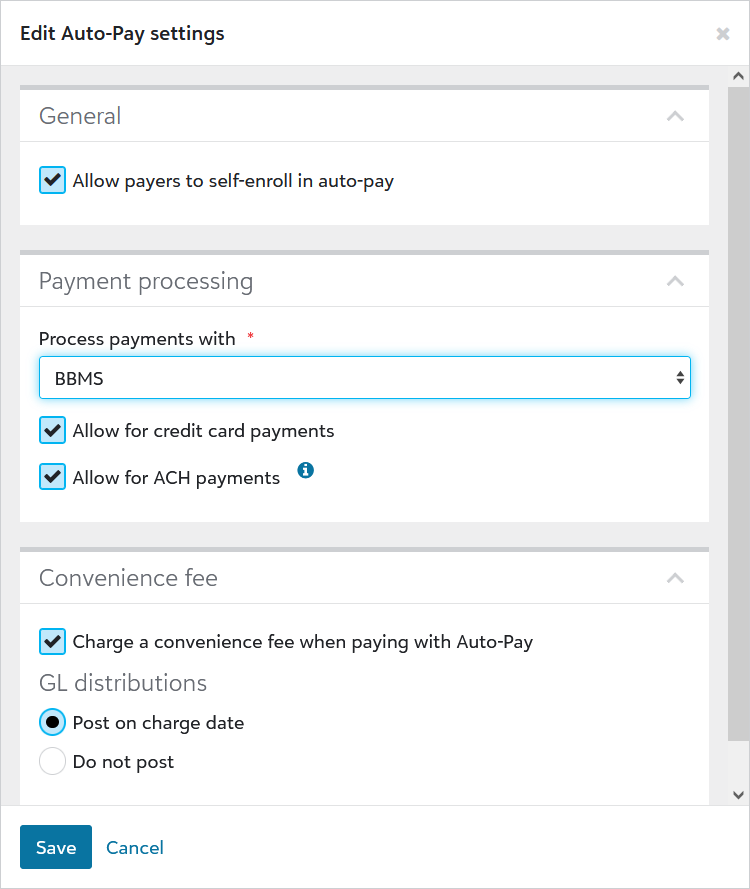
General payment settings, such as the payment processor, accepted payment methods, credit card convenience fee, and GL distribution, are editable. Additionally, the custom messaging for upcoming payment notifications can be modified.
Note: Once enabled, Auto-Pay cannot be disabled.
To get started, navigate to Billing > Settings > Online payments > Auto-Pay.
 To edit Auto-Pay payment settings:
-
Under Auto-Pay, select either Payment plans or Incidentals.
Note: Incidental Auto-Pay is currently available only as a limited release through the Early Adopter Program (EAP).
-
Select Edit settings.
-
Change any of the available settings.
-
Select Save.
Changes take effect immediately. Note that disabling an existing payment method (e.g., credit card payments) will prevent payers from seeing that option during enrollment. However, payers who were previously enrolled will retain access to the disabled payment method, which remains active.
To disable payer Auto-pay self-enrollment :
Schools trialing Auto-Pay have the flexibility to restrict payer enrollment through the Payer portal. In such cases, billing clerks enroll payers in Auto-Pay on a case-by-case basis.
To manage Auto-Pay payer self-enrollment:
-
Under Auto-Pay, select Edit settings.
-
To prohibit payers from enrolling in Auto-Pay in the Payer portal, unmark Allow payers to self-enroll in auto-pay.
-
To allow payers to enroll in Auto-Pay in the payer portal, mark Allow payers to self-enroll in auto-pay.
-
Select Save.
To edit the custom messaging tied to the Auto-Pay notification, click here.