DIY Forms
Use online forms to receive donations, handle event registrations, sign up volunteers, and add contacts to your mailing list. In this tutorial, see how easy it is to cream a new form, personalize it, and go live!
Need more help?
Check out this video on how to create, edit, and publish DIY forms.
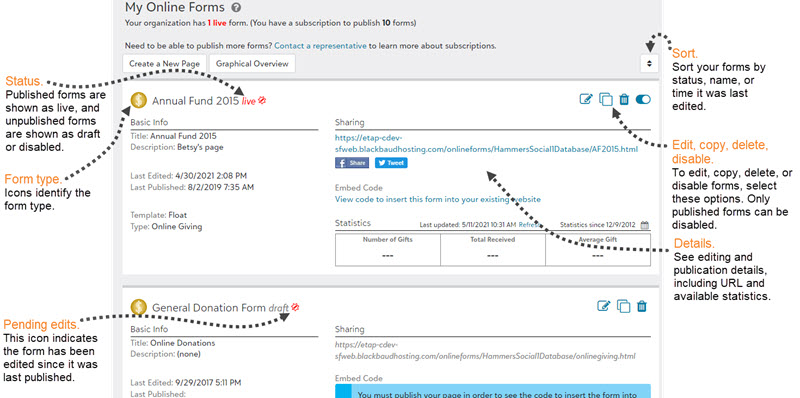
Create a new DIY form
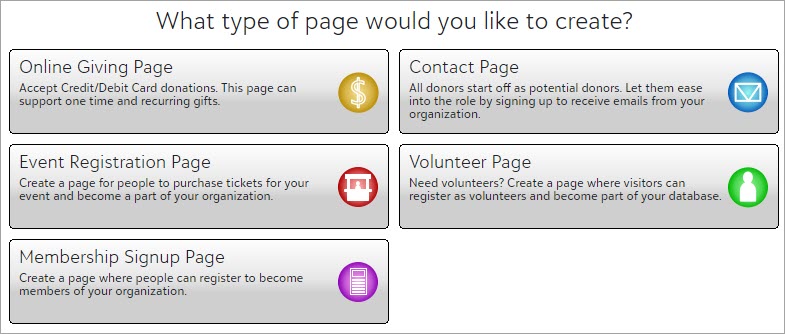
To access your DIY forms, from Management, Online Presence, select DIY Forms. Select Create a New Page and choose the type of form you wish to set up based on your needs.
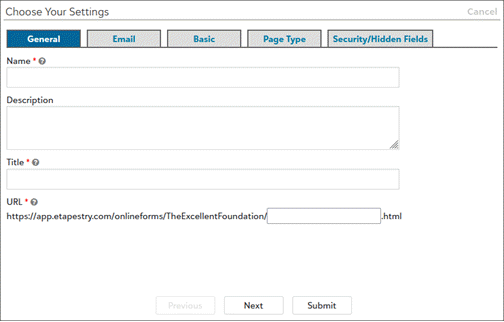
Choose your DIY form settings
After you select a style template:
-
From Choose Your Settings, enter a name, title, and URL for your page.
-
Under Email, decide if you want to send confirmation emails to your constituents and to yourself.
-
From Page Type, select at least one fund for donations made through the form, and choose a campaign and approach if you would like.
-
To create your form, select Submit.
Journal contact subject
When a constituent submits a donation or event registration form, eTapestry creates a gift in that constituent's journal. When a constituent submits a volunteer or contact form, eTapestry creates a contact in that constituent's journal, so those form types include a required journal contact subject when you create a form.

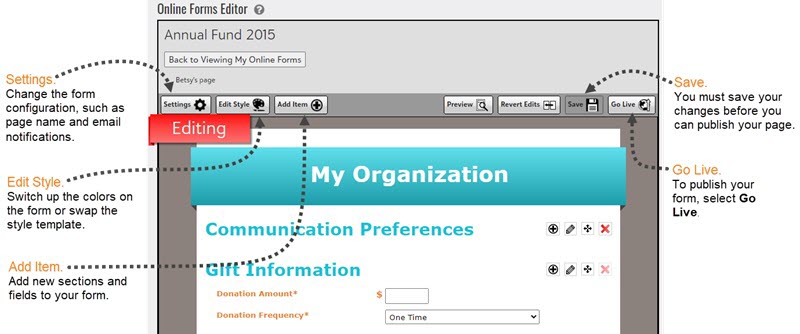
Edit and publish your DIY forms
Edit your DIY form to update the look-and-feel, change templates, adjust form configurations and more. Edits are not live until you re-publish your page. After you have made your edits to a DIY form, you can save, preview, and publish the changes.
Problems publishing?
Anyone can create and edit forms, but you must have the DIY Module to publish them. You might have also reached your forms limit. Try to disable forms you no longer use to make room.