Consent
The General Data Protection Regulation (GDPR) is an EU law that will be enforceable from 25th May 2018, and in the UK will replace the ageing Data Protection Act. It is designed to both strengthen and harmonise data protection across EU member states, and is directly applicable to all organisations ‘established’ in the EU, irrespective of whether the actual data processing takes place in the EU or not.
Note: Even if not established in an EU country, certain organisations with substantial activities in the EU will need to comply with GDPR. Please refer to our infographic Could You Be Subject to GDPR? for further guidance on whether or not GDPR may apply to your organisation.
Such organisations that are subject to GDPR and collect, store or process personal data must comply with GDPR’s Data Protection Principles and other conditions of processing. New obligations on data controllers include expanded data subject rights, mandatory data breach notification, an enhanced focus on accountability and the appointment of Data Protection Officers. Personal data must still be processed fairly and lawfully, justified by one of six legal bases that have remained substantially similar between the Data Protection Act and GDPR, including with the data subject’s consent.
Arguably the most significant change, however, is the requirement that a data subject’s consent to process their data must now be "unambiguous" and given via a "clear, affirmative action". The penalties are also set to change, standing at a maximum of €20,000,000 or 4% of global revenue; whichever is higher.
For a more in depth discussion of GDPR’s operational effects, please read Blackbaud’s datasheet Important Impacts of GDPR. GDPR requires organisations processing personal data to implement significant operational reform. Blackbaud has designed the following solution functionality to assist our customers in achieving this reform.
For more information about GDPR, see Blackbaud GDPR.
In order to capture a constituent’s consent to your organization’s processing activities in eTapestry, we recommend the use of user defined fields to track communication preferences for different channels.
These fields should reflect the current status of a constituent's consent. The constituent's Journal can be used to track historical consent. Additionally, though perhaps not required for compliance with existing privacy laws, you may wish to collect further preferences from constituents, such as specific communication pieces they want to receive, frequency of communication, or preferred channel.
The consent and communication preferences can then be used in eTapestry queries to select which constituents to send communications to.
 Import Consent Fields Defined Field Set
Defined field sets allow you to create groups of user-defined fields without the need to manually set up each field. Defined field sets are pre-populated according to database management best practices. You can use these sets as they are, or personalize them to better fit the needs of your organization.
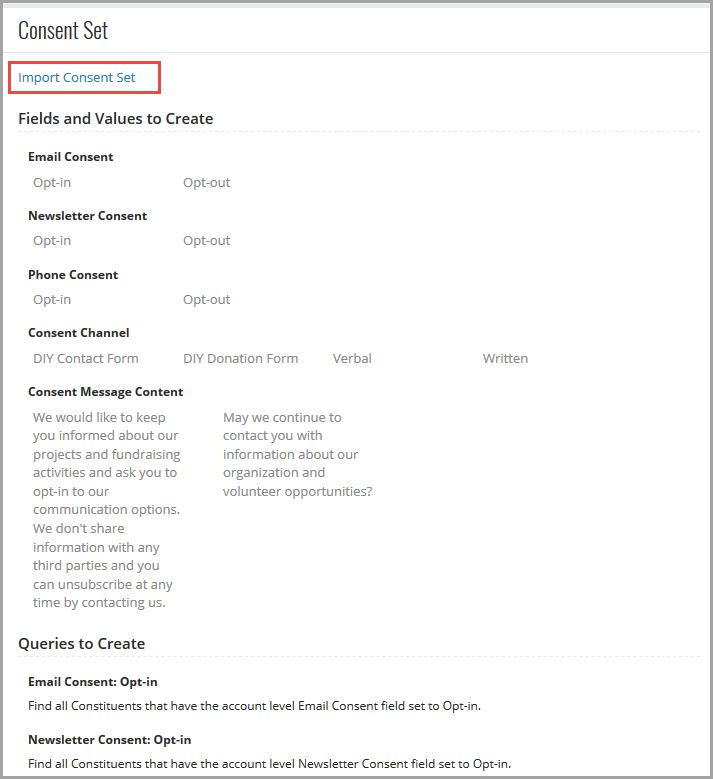
Under Management, User Defined Fields, select Add Defined Field Sets. On the Defined Field Sets screen, select Consent Fields under Advanced. A list of all the defined fields and queries for the Consent Field set appears.
To add the defined field set, click Import Consent Set.
Create User Defined Fields that comply with Consent settings
-
From Management, select User Defined Fields. The Edit User Defined Field Categories page appears.
-
Once you have chosen or created the category for the new field, click New Defined Fields under Tasks.
Note: You cannot edit an existing field and apply Consent settings. You must create a new user defined field.
-
Complete the information on the Basic Information step. For more information, see Add a user-defined field.
-
On the Field Application step, select the checkbox on the Consent tile.
-
Once you select the Consent checkbox, the areas of application for this field will be limited to Constituents, Contacts, Notes, and Transactions, as well as Participations for organizations with Personal Fundraising enabled. You will not be able to change this option once the field is saved.
-
Click Next. On this step, select the attributes you would like your field to have.
A Consent field cannot be marked as a required field. Consent fields should only be populated when a constituent expressly communicates consent preferences.
-
Select Would you like to display this field's name when included in the Account Header if you would like to view the name of the Consent field if you select to include the value in the header.
-
Click Next. On the Display Types step, if you have selected the Consent checkbox, then the Allow assignment of only one item option is automatically selected, and you will not be able to select another display type. Fields marked as Consent fields are setup to only allow you to select one value from your field. The field displays a drop down and allows you to select from a list of values that you add to the database.
-
To continue to the next step, click Next.
-
If you use advanced security, in Step 5 make any necessary security selections to control which users can see the field.
-
To continue to the next step, click Next.
-
On Step 6, you add values to fields of selectable types (selection from a set of values and allow assignment of only one item). A selectable field must have some values listed in it in order to appear on screen for data entry.
To create a value, type the value name into the Name field. For example, you may way to enter "Yes" and "No" if you create this field to gather a user's consent to send communication to them. Enter a description if you like, and click Add Value.
Continue adding values following those steps until you have all the values you need for the field. If you make a mistake on a value, click Delete underneath the value. Once you save this field, you will not be able to delete any values, although you will be able to rename them or disable them if needed. To change the order of the values, drag and drop the values from the list to your desired order.
-
To create the field, click Save and Finish.