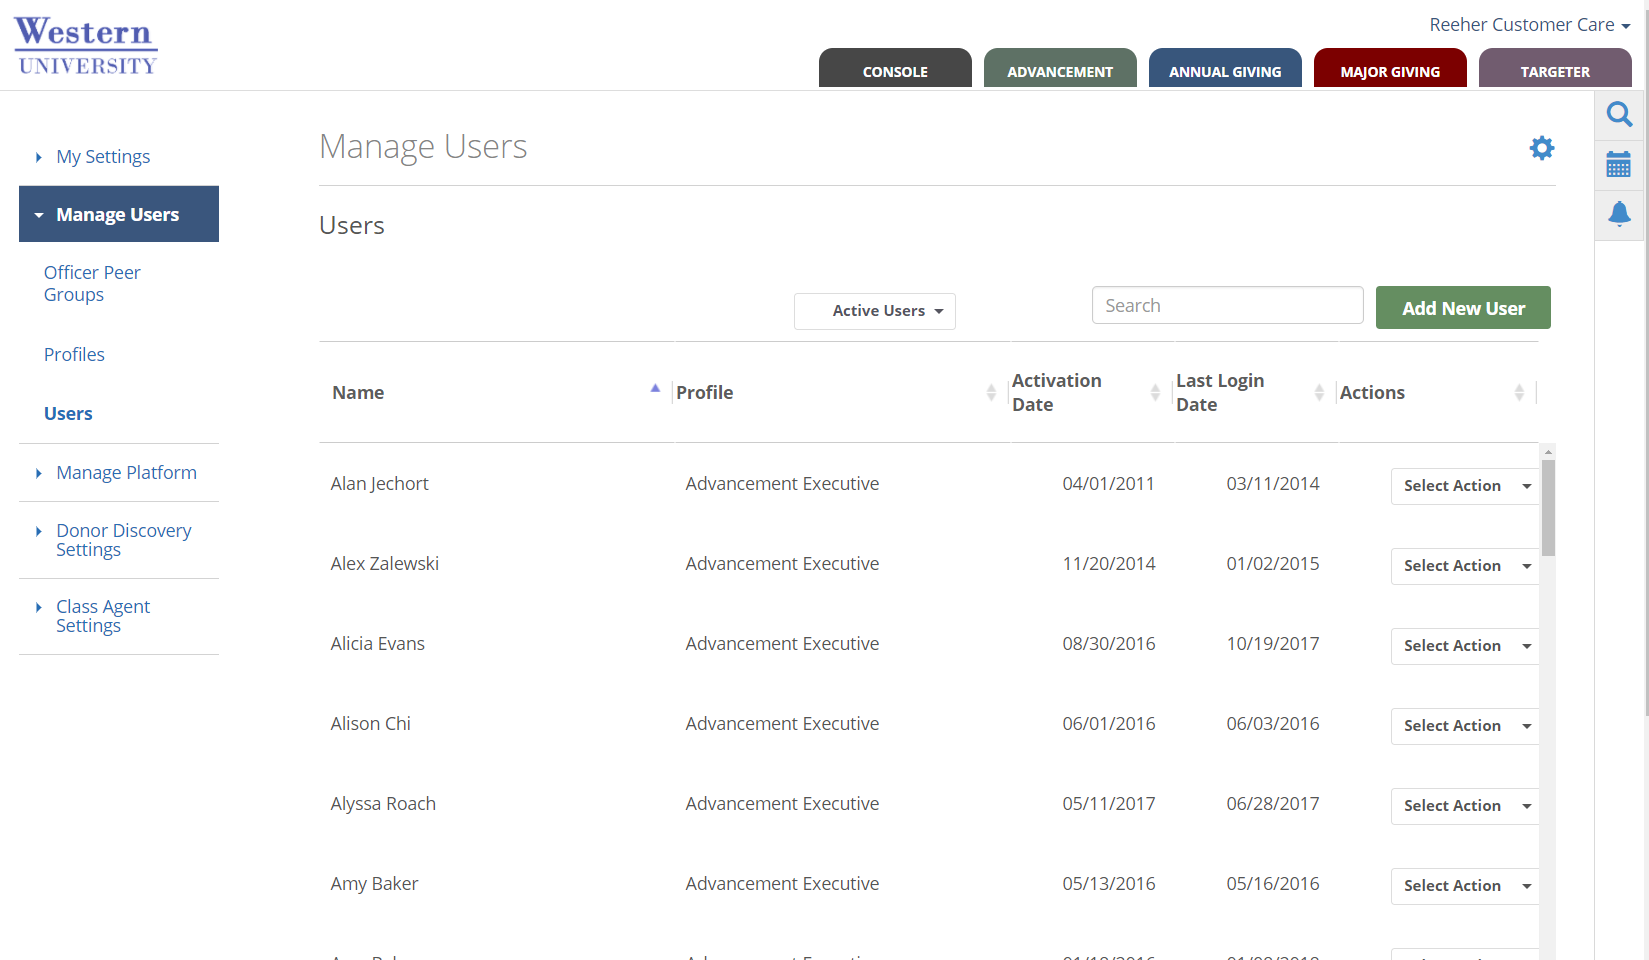
Users
The Users tool allows you to manage individuals access to the Blackbaud Platform. From this to tool, you can create new users, edit information on existing users, deactivate users, and reset passwords. Users can be managed by individuals with access to the Manage User tools within Control Panel.
 Creating and editing a User
To create a new user, click on the Add New User button located at the top of the table on the Users tool’s page. If you wish to edit an existing user, you can select Edit within the Select Action drop down next to the user’s account. This will open the User dialogue box.
User Dialog Box
The User Dialog Box is organized into three sections:
-
The first section contains the general user information.
-
The next section, User Profile Permissions, displays all of the Layer and Tab access this user has access to (based on the User Profile that has been selected).
-
The Set Additional User Permissions section allows you to specify additional access and rights at the user level. When creating a new user you will not see the User Profile Permissions or Set Additional User Permissions sections until you have selected a User Profile for the record.
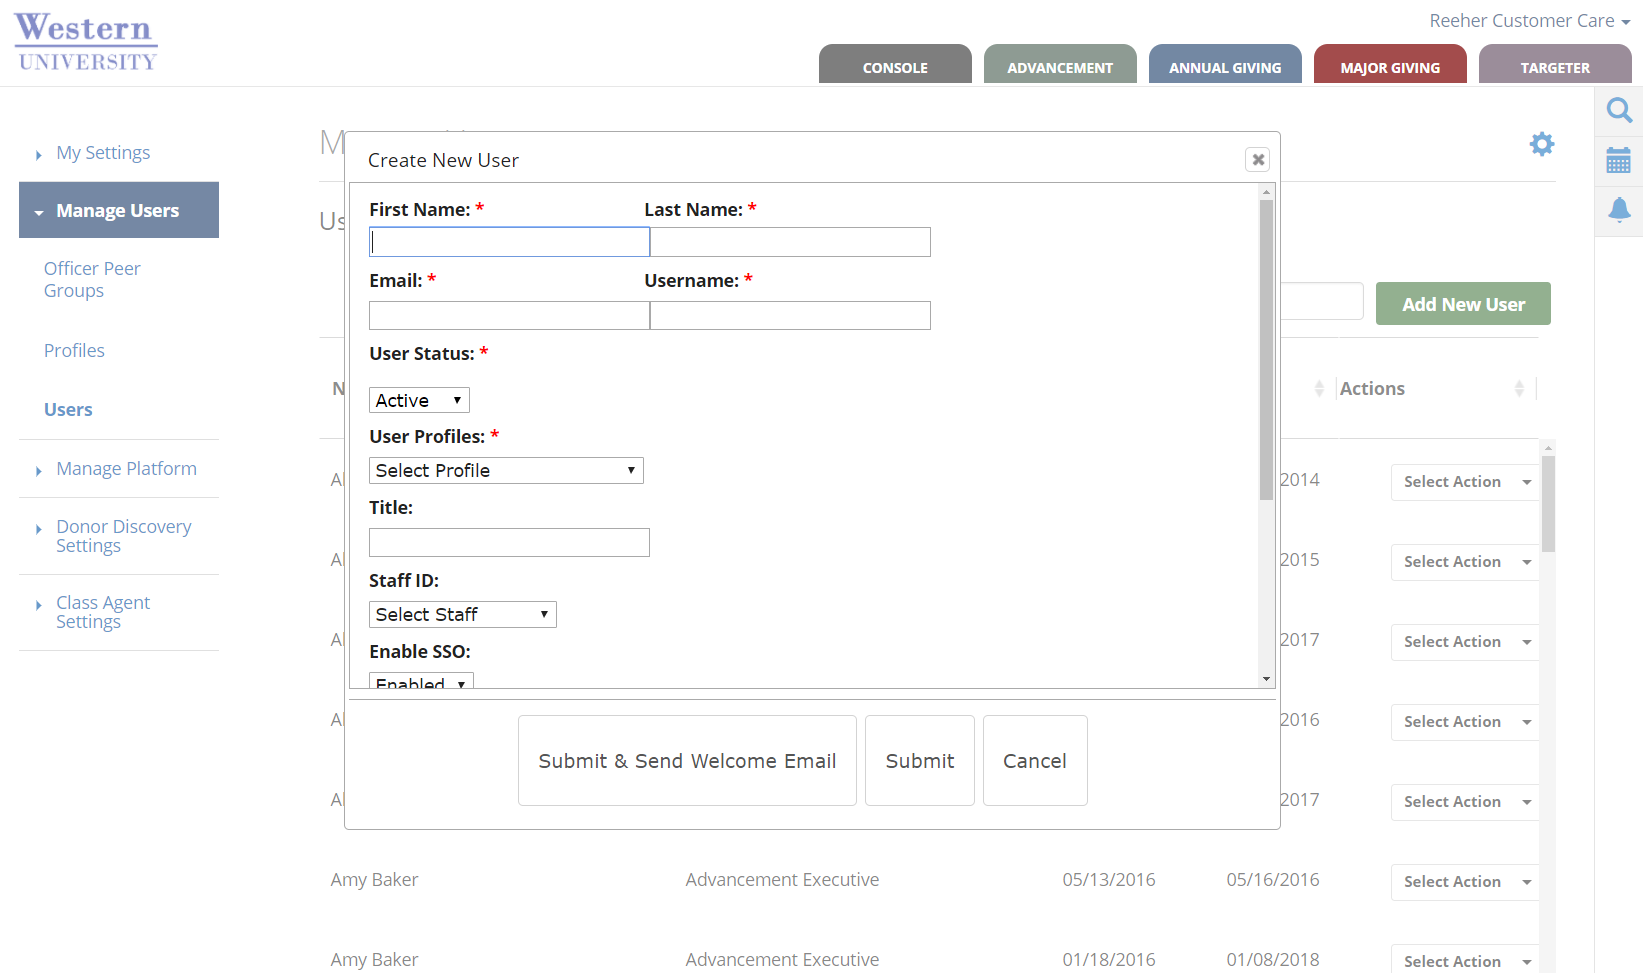
The following list provides an overview of the definition of each field and how it is used within the general information section of the User dialogue box.
-
First Name - This is a required field.
-
Last Name - This is a required field.
-
User Status - This defines whether or not the user will have access to the Blackbaud Platform. Active users will be able to access the Blackbaud Platform and Inactive Users will not be able to log into the Blackbaud Platform. This is a required field.
-
Email - This email address will be used as the default user name for the user's log-in credentials. A valid email address must be entered in order to access the Blackbaud Platform. This email address will be what Blackbaud uses to communicate to users about password resets, training opportunities, system maintenance, new features, etc. This is a required field.
-
Username - This field contains the username that a user will use when logging into the Blackbaud Platform. By default, the username field is automatically populated with the email address that is entered. However, the System Administrator can change an individual's username. This is a required field.
-
User Profiles - The Profile selected will provide the user with the default access to the Layers and Tabs within the Blackbaud Platform. Once a Profile is selected you will see the User Profile Permissions section appear in the dialogue box that summarizes the user access. This is a required field.
-
Title - This field defines the user’s job title and is an optional field.
-
Department - This field defines the user’s department and is an optional field.
-
Officer ID - This field is required if you are setting up a user that is a gift officer, but otherwise is not required for any other type of user. This drop down allows you to connect the user in the Blackbaud Platform to the gift officer’s data (i.e. contacts, proposals, assignments, etc.) that are being provided from your institution’s system to the Blackbaud Platform.
-
Officer Peer Group - This field allows you to define the Peer Group that a gift officer should be associated with. It is a requirement if you want to benefit from the officer benchmark reporting the Major Giving layer. Each officer can only be assigned to one Peer Group.
-
User Groups - This field allows you to associate the user with one or more User Group. This field is optional.
You can also limit which officers a user has access to view performance information within the Major Giving Layer by using the drop-down that reads "Select additional officers this user can view". This drop down allows you to specify which particular officers or groups of officers each user can see with the Major Giving Layer. The officers are organized by Peer Group.
-
If you select “Check all”, the user will have access to all officers that are currently in the Platform or will exist in the future.
-
If you select on the name of the Peer Group(s) within the drop down, it will select all of the officers in the Peer Group.
By clicking on the Peer Group name it will allow the user to see all officers in the Peer Group(s) that exist now or as they are added to the Peer Group(s) in the future. Finally, you can also select individual officers. However, as new officers are added you will then need to update each user’s account to add the individual officers to their list. It is recommended that you allow users to see all officers or all within selected Peer Group(s) to minimize the administration.
If your institution has subscribed to the Blackbaud Platform’s best practice module called Activity Center, you can provide users with the ability to edit any contact or task record that was created within the Blackbaud Platform. Click on the check box that is titled Allow user to edit activity information and then click on Submit to provide a user with this permission.
Note: After completing the creation of a new User ID or editing an existing user, Click on the Submit button at the bottom of the dialogue box to SAVE changes. Click Submit & Send Welcome Email to save and generate an email with a link that will let the user create their password.