Create New Table Fields
A Table field is a collection of form fields that can be completed multiple times and displays in a table-like format.
Note: This field can be used in Applicant forms only. This is not available on Grant Manager forms.
Tip: Before creating a new field, it is recommended to first check the standard product fields to determine if it is already in the system. Learn more.
-
Navigate to the Program Setup > Custom Forms area.
-
Select the Form Fields tab.
-
Click on the Manage form fields button and then the Add new option.
-
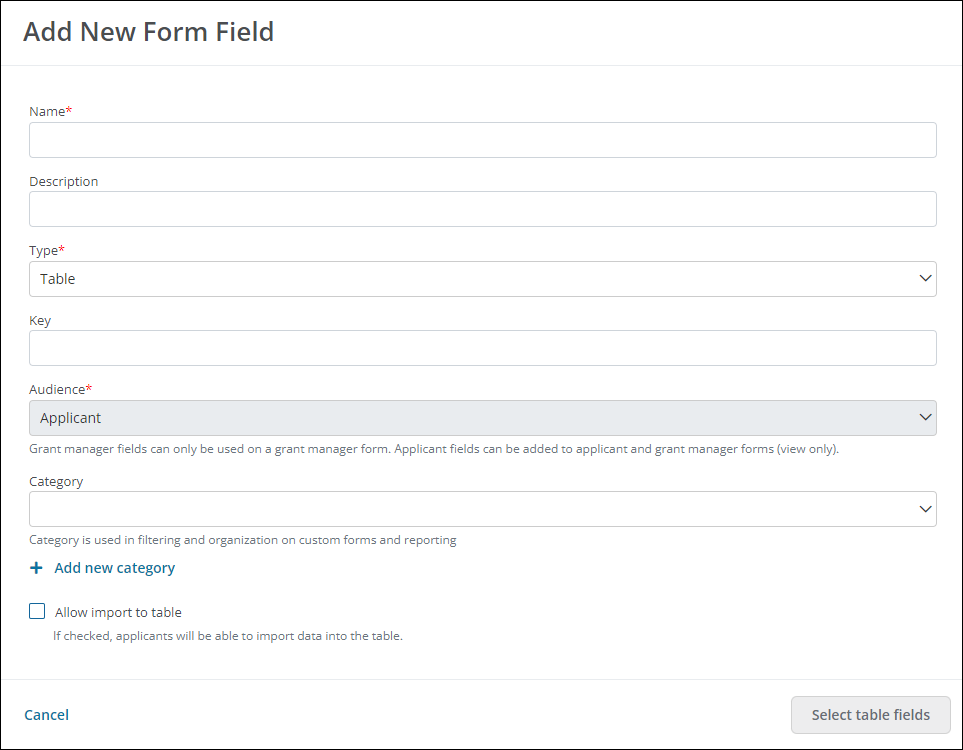
In the Add New Form Field screen, provide the following information.
-
Enter a name for the field.
-
Optional - Provide a brief description.
-
Select Table as the Type.
-
Provide a unique key for the field.
-
Optional - Choose a category to be used when filtering and organizing the field on custom forms and reports.
Note: If the category has not yet been created, click on the Add new category button to create it. If no category is selected, then the new field will appear under the default category Other.
-
Select the Allow import to table option to give Applicants the ability to import data into the table.
-
-
Click Select table fields to continue.
-
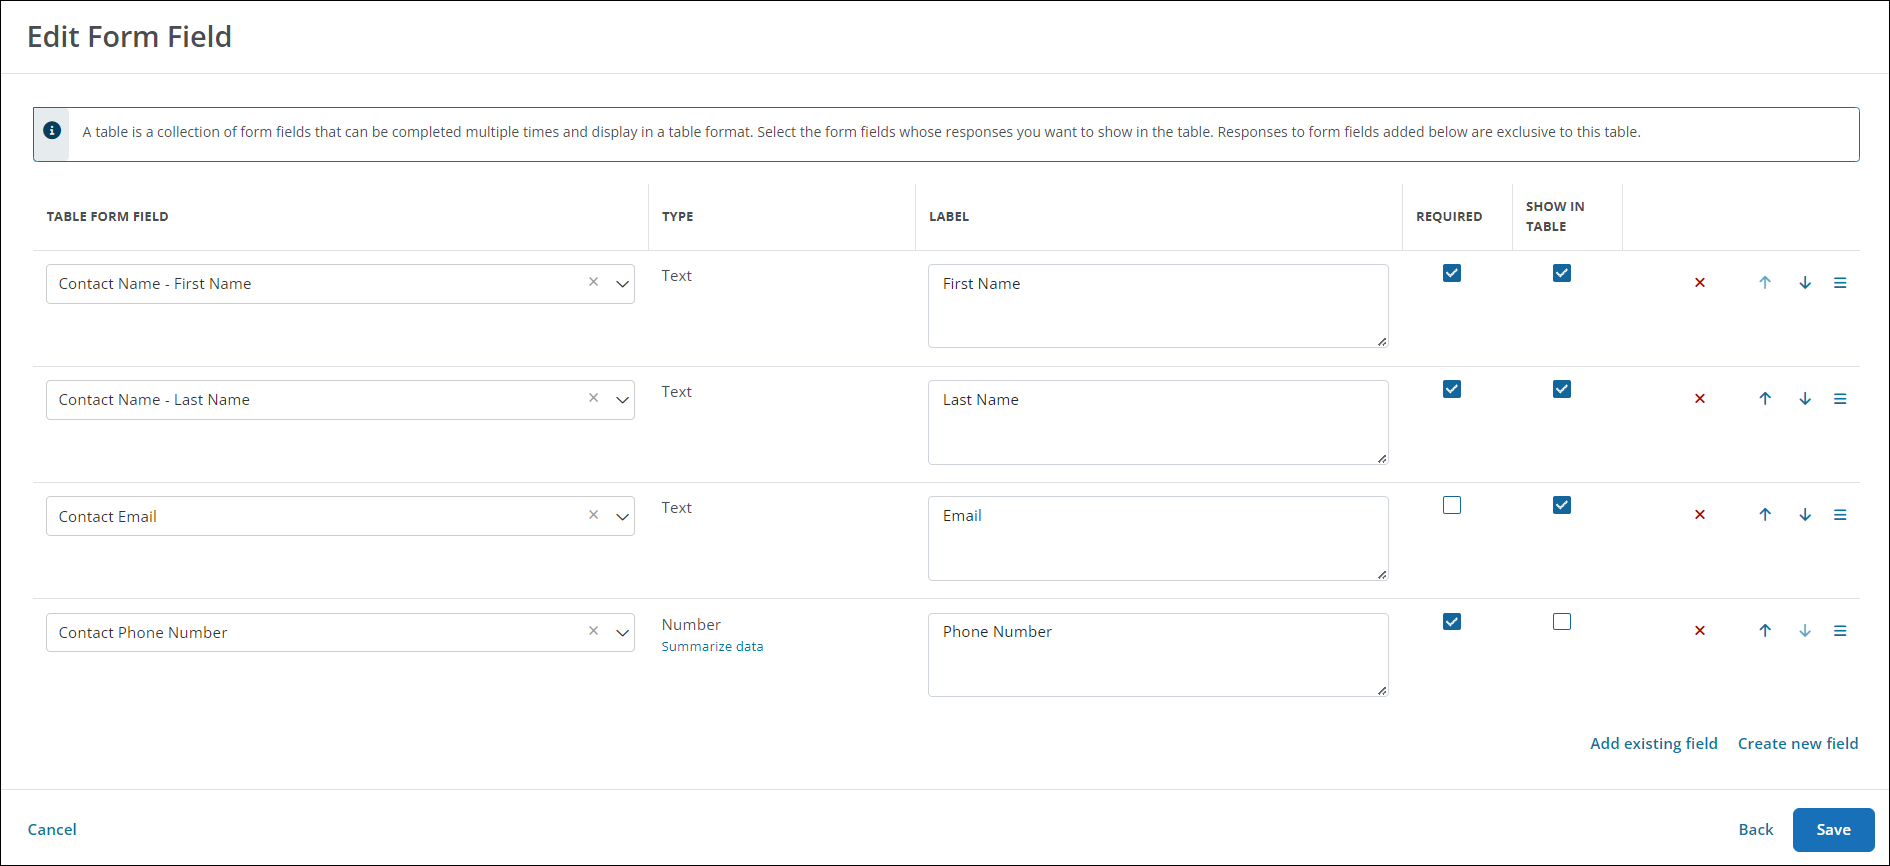
In the next screen, you'll be prompted to choose the fields to include in the Table field.
Note: You can choose existing fields or create new fields. The label for each field can be updated, allowing you to customize how the options display in the form.
Tip: If using a Currency or Number field, you can click on the Summarize data link to enable the option to total the data in this column and make it available for reporting and forms.
-
Click on Add existing field or Create new field to add fields to the table.
-
Optional - Update the text in the Label column to customize how the field is shown in the table and Add new modal.
-
Optional - Enable the Required checkbox next to any fields to make required.
-
Enable the Show in table checkbox next to any fields to display as columns in the table on the form. Any fields not selected will made available in the Add new modal when completing the form.
-
-
Click Save to create the new field.
-
Navigate to the Program Setup > Custom Forms area.
-
Create a new form or edit an existing one.
-
In the Form Builder toolbox, select the Capture group and then Applicant responses.
-
Click on the field you created and drag it onto the form.
Tip: Search for the field's name to find it quickly.
-
Save your updates to the form.
-
In the Form Builder, hover over the field and click on the pencil icon (i.e., Edit component).
-
In the Configuration screen, update the field's settings by selecting the tabs below.
 Details
-
In the Details tab, make any of the following changes:
-
Update the field's label. By default, this is set to the field name.
Note: If you don't want to display the label in the form, enable the Hide label option.
-
Provide a description.
Note: The description is stored with the field. However, it will not be visible on the form.
-
Include a tooltip.
-
Specify the number of rows to display before the table becomes paginated in the Rows per page field.
-
Validation
-
In the Validation tab, make any of the following changes:
-
Provide a custom error message that appears if they try to submit the form without completing the field.
Note: The error message only appears if the minimum number of responses are not completed when the applicant submits the form.
-
Specify a minimum number of responses.
Note: This number will appear in the field's header as Minimum number of responses. This automatically sets the field to Required so the applicant cannot submit the form until this field has been completed.
-
Specify a maximum number of responses to limit the entries the applicant can include.
-
Add advanced validation by creating conditional logic rules.
Note: For more information, see Add Conditional Logic for Custom Validation.
-
API
-
In the API tab, update the property name to use for API integration.
Note: This defaults to the key that's defined when the field was created.
Display
-
In the Display tab, define when this field will be visible in the form.
-
Always show component (default)
-
Always hide component
-
Show component when
-
Hide component when
-
Note: The Show component when and Hide component when options require you to define conditional logic to determine when the field will be shown or hidden. For more information, see Show or Hide Fields.
Columns
-
In the Columns tab, select the fields to make available for the user to fill out.
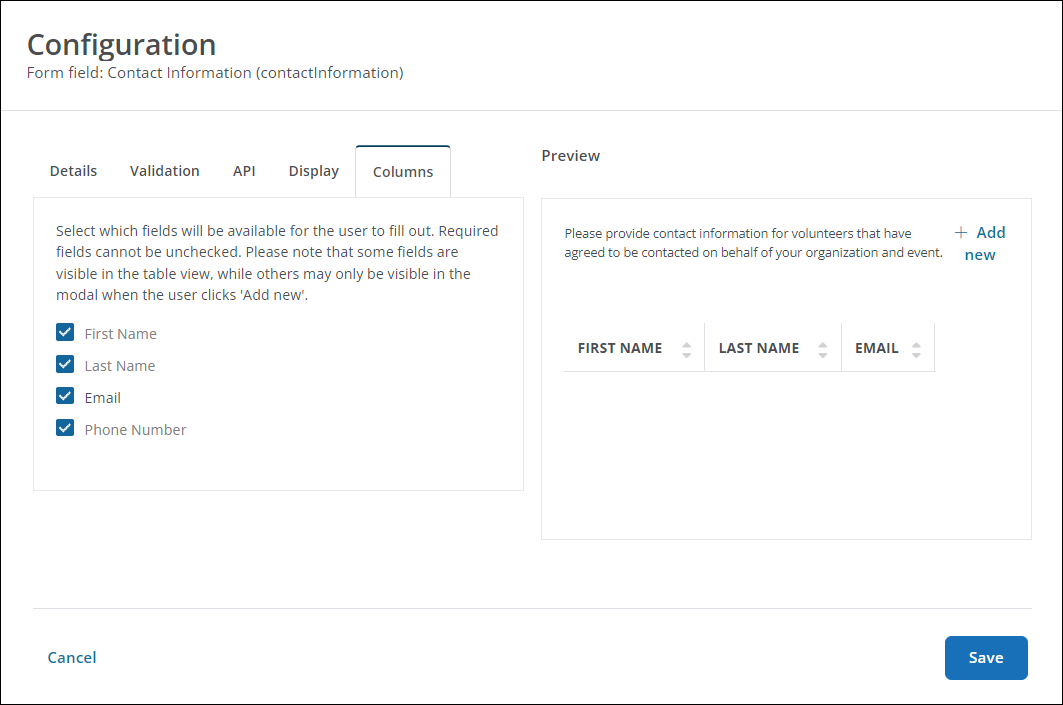
Note: Fields left unchecked will not be presented to the user to complete. Fields set to Required cannot be unchecked. Please note that only those fields that are configured to Show in table will be visible as columns in the table while others will only be visible in the modal when the users clicks Add new.
-
-
Save your updates to the form.
Frequently asked questions (FAQs)
No, this field cannot be masked.
No, there is no additional field encryption available for this field.
No, this field cannot be used for automation.