Import Budgets with Funding Sources in Bulk
Multiple budgets can be created by importing them from a spreadsheet. This process involves building a Budget Import File and uploading it into the system when complete.
Step 1 - Download Budget Import File template for specific funding sources
-
Navigate to the Program Setup > Budgets area.
-
Select the Create budget button followed by the Bulk import option.
-
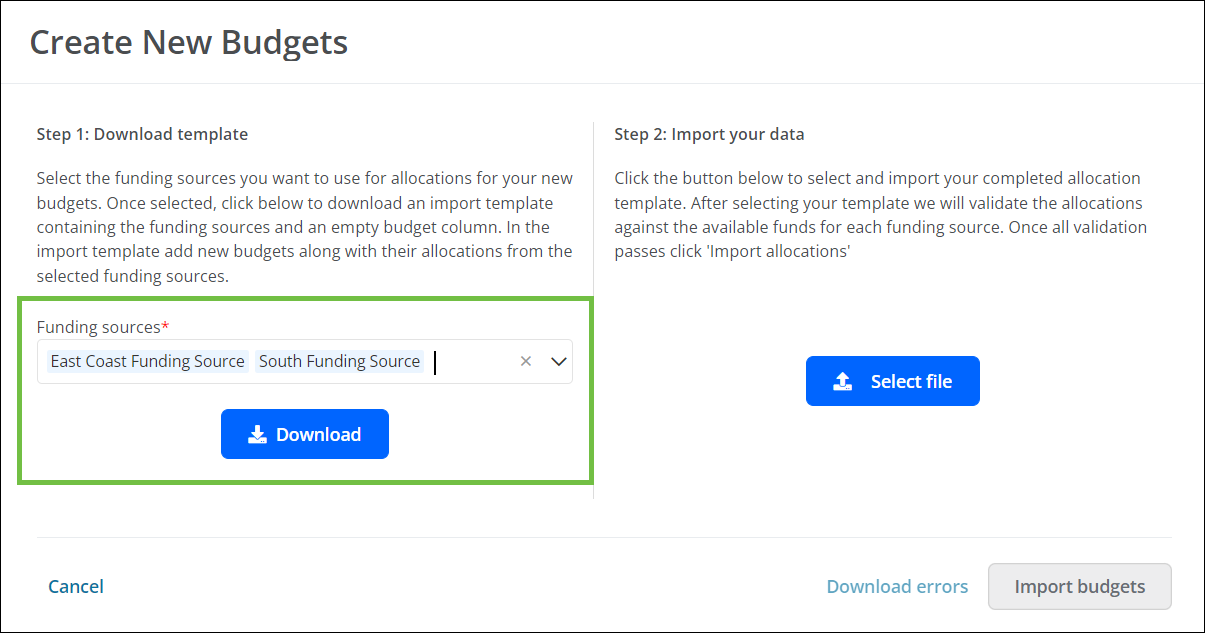
In the Create New Budgets screen, take the following actions.

-
Select the funding sources that will be made available for these budgets.
Tip: Multiple funding sources can be selected for a single import.
-
Select the Download button to download a
CSVfile with the required columns and specified funding sources.
-
Step 2 - Complete the Budget Import File
-
Provide the details for each budget in the
CSVfile, including:
-
Budget Name - This is required.
Note: Budget names must be unique and cannot already be present in the system. A maximum of
50characters is allowed. -
Budget Description - This is required.
-
Funding Source Name - There will be one column for each source selected.
Note: The value entered in each column should be the total amount (numeric value) allocated from that funding source.
Tip: If a budget is being imported that doesn't use one or more of the funding sources listed, you can either leave that column empty or include a value of
0. The system will only associate budgets with the funding sources in the same row that have values greater than0.
-
Step 3 - Upload Budget Import File Into GrantsConnect
-
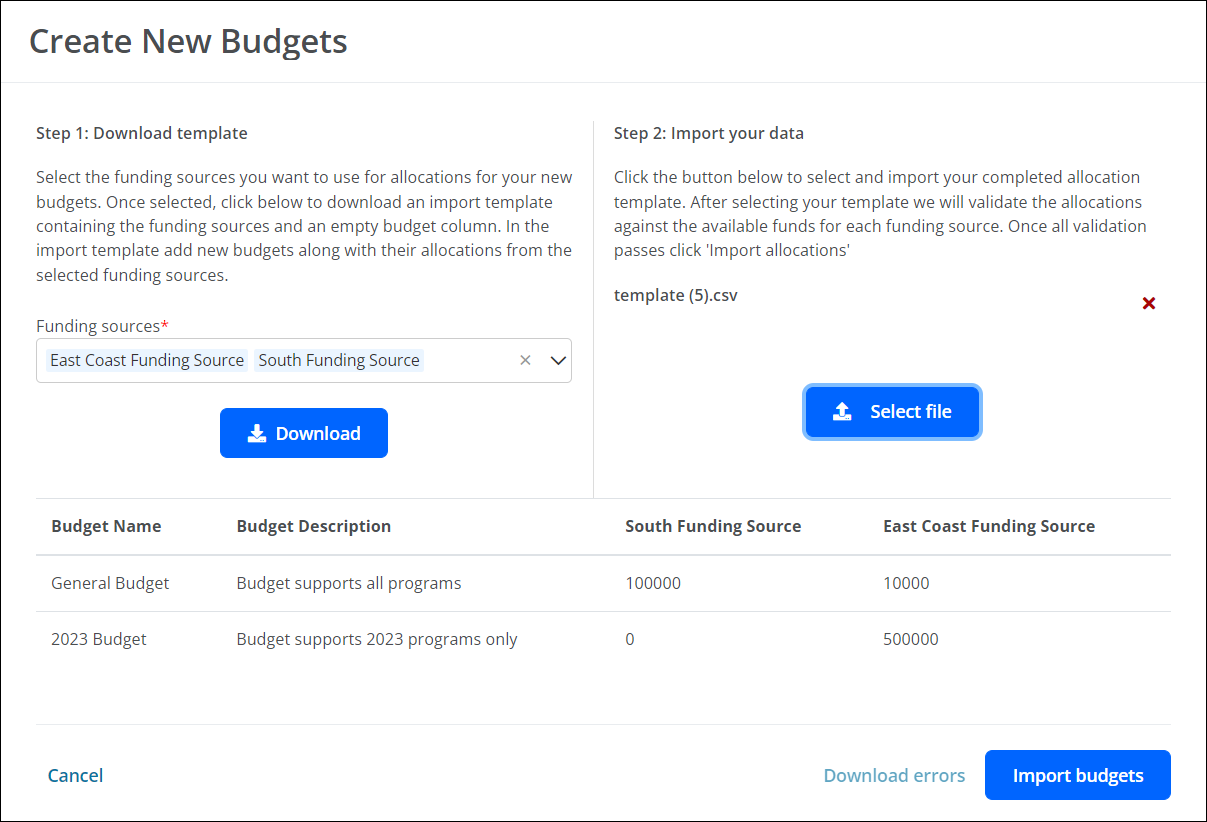
Return to the Create New Budgets screen and take the following actions.

-
Select the funding sources in Step 1 that match those in the Budget Import File.
-
Select the Select file button to find and select the completed
CSVfile to upload. The file will be automatically validated for proper formatting and required fields upon upload. -
Correct any errors that appear, including any stating the allocation exceeds available funds.
Note: Errors will be listed on the screen and can be downloaded by selecting the Download errors button.
-
If any changes were made, reupload the corrected file and verify the information before importing the items.
-
-
Select the Import allocations button to finalize the import.
The new budgets with their allocated funding sources will be available in the Open Budgets tab.