Custom domain setup
Blackbaud Guided Fundraising helps you incorporate email into a multi-channel person-to-person fundraising strategy. The system sends emails to prospects in coordination with your other outreach, including phone and direct mail, based on the play you've set up. Blackbaud Guided Fundraising also sends emails for donation receipts and pledges.
By default, emails are sent from yourinstution@give.reeher.com, but you can also set up a custom domain for sending emails. For example, Western University could set up their emails to come from annualgiving@give.westernuniversity.edu. Follow the steps below to set up a custom domain for your emails.
1. Submit your Custom Domain
Choose a subdomain to use for sending emails through Blackbaud Guided Fundraising. This subdomain should not use any other applications for sending emails – Blackbaud Guided Fundraising should be the only application sending emails from this subdomain. You may already have a subdomain available, or may need to create a new one to use for Blackbaud Guided Fundraising emails.
A subdomain is a domain that is a part of your main domain. For example, give.reeher.com is a subdomain of reeher.com. Decide which subdomain you’ll use for sending emails. Usually, adding “give” or “giving” to the front of your main domain is a good option.
Once you have decided on the custom domain, navigate to Admin > Custom Domain in Blackbaud Guided Fundraising. Type in your subdomain in the input box, then select next. For example, if you want your custom email address to be annualgiving@give.westernuniversity.edu, you would type in give.westernuniversity.edu in the input box.
Note: You will need to be an Administrator in Blackbaud Guided Fundraising to access the Custom Domain settings in the Admin section.
2. Update your DNS records
After you submit your custom domain, you will see a set of DNS records displayed on the screen. Your IT team, or someone who manages your website, will need to create the subdomain and add the DNS records provided on the screen. How you add these records will depend on the DNS provider used for your website.
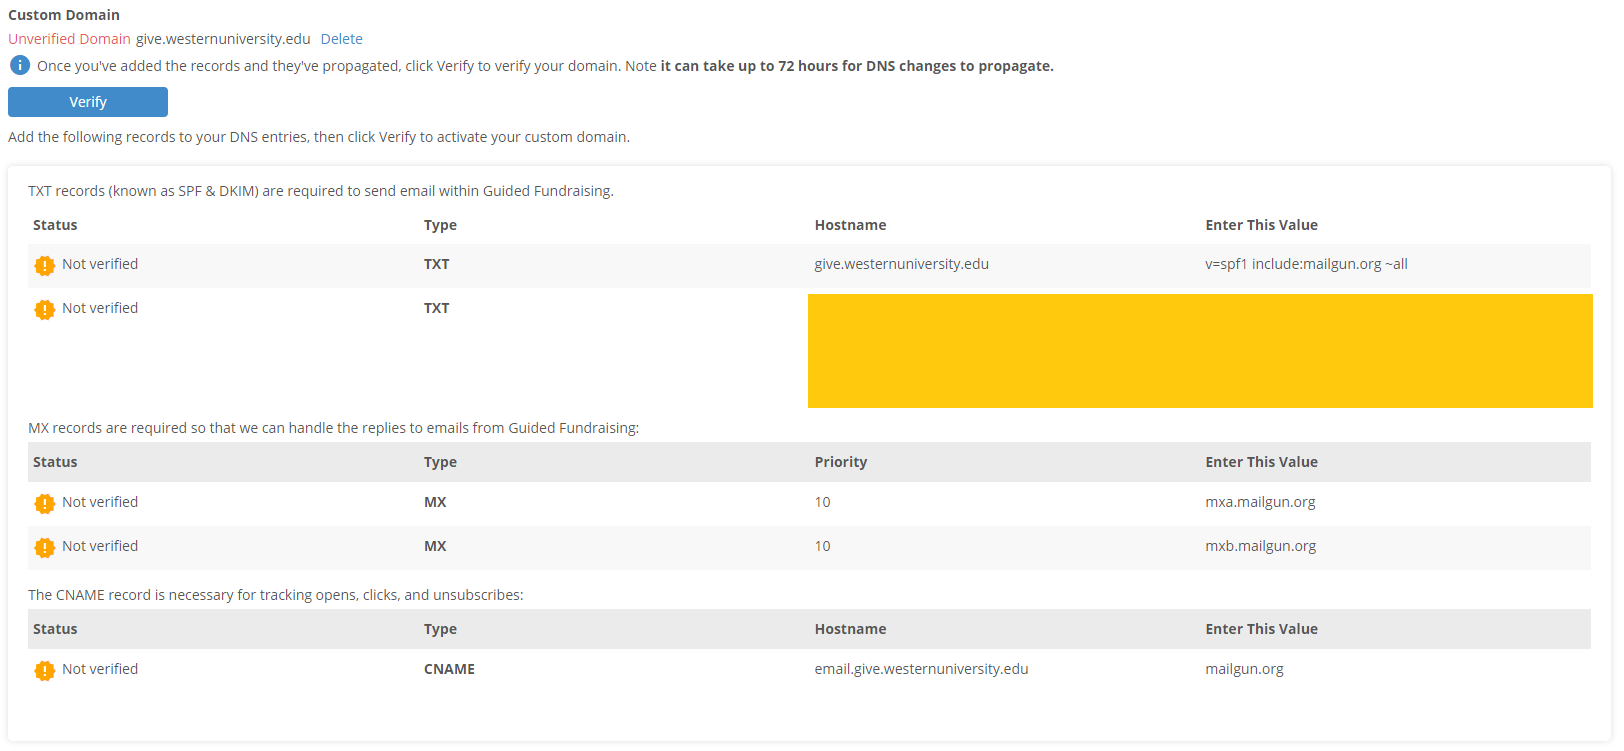
3. Verify your Custom Domain
After the DNS records have been added for your subdomain, return to the Admin > Custom Domain section and select the Verify button. If all of the DNS records are able to be verified, you will see a confirmation and your custom domain will start being used right away for Guided Fundraising emails. If any of the records are not able to be verified, the status will remain as Not verified. Note that it can take up to 72 hours for DNS changes to propagate across the web. If your changes are not detected, you may need to wait longer for the changes to propagate.