Install Blackbaud Data Warehouse
-
Run the Blackbaud Data Mart Deployment Wizard from the database server. The utility is available in the \MSBuild\Datamarts\bin folder of your installation directory.
Run the Blackbaud Data Warehouse Deployment Wizard from the database server. The utility is available in the \MSBuild\Datamarts\bin folder of your installation directory.
Tip: Before you deploy the data warehouse, make sure that you all deployment requirements in place. For information, see Deployment Requirements.
Copy the \bbappfx\MSBuild\Datamarts folder to the database server from the installation directory on the web server, and then run the Blackbaud.AppFx.ReportDB.Installer application file as an administrator. For example, if you copy the \bbappfx\MSBuild\Datamarts folder to C:\Deploy, go to C:\Deploy\Datamarts\bin, then right-click Blackbaud.AppFx.ReportDB.Installer.exe and select Run as administrator from the dropdown menu.
Warning: Some actions performed by the installer require administrative access, so the deployment may fail if you run Blackbaud.AppFx.ReportDB.Installer as a standard user. We recommend that you run the installer as an administrator.
-
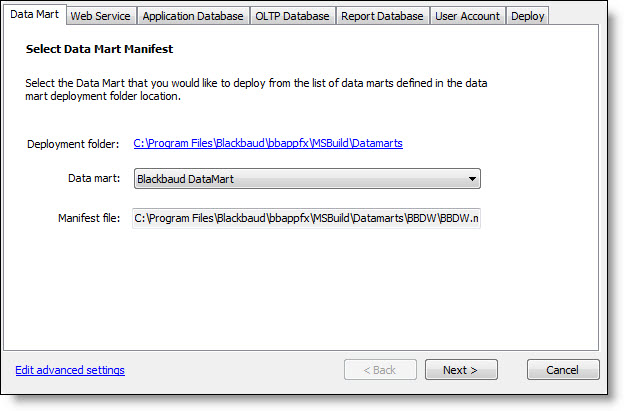
On the Data Mart tab, enter information about the data warehouse.
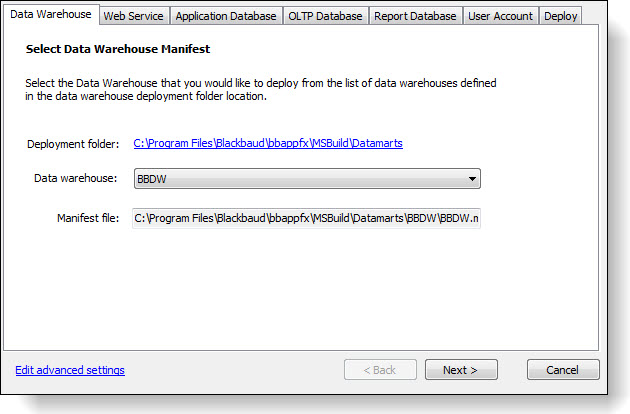
On the Data Warehouse tab, enter information about the data warehouse.
-
In the Deployment folder field, a link appears to the folder that the data warehouse deploys from. Make sure this points to the \bbappfx\MSBuild\Datamarts folder in your installation directory. If it does not, click the link and on the Browse For Folder screen, select the \bbappfx\MSBuild\Datamarts folder in your installation directory.
Note: If you change the deployment folder and you have a distributed deployment where the CRM installation directory is on a different server than the data warehouse, you must verify that the file path for the extend folder that contains extensions for the warehouse. To access this property, click Edit advanced settings to open the Edit Advanced Data Mart Settings screen and scroll down to the Extensibility section. The OLAP Extensions Path property displays the path for the extend folder. By default, this property uses the same path as the warehouse, but it is not automatically updated when you edit the Deployment folder field. The extend directory must be within the \Datamarts\BBDW subdirectory that you specify in the Deployment folder field.
-
In the Data mart field, select a data warehouse to deploy. Select "BBDW" for the Blackbaud CRM warehouse, or select "Blackbaud Data Mart for The Raiser's Edge" for The Raiser's Edge warehouse.
In the Data warehouse field, select a data warehouse to deploy. Select "BBDW" for the Blackbaud CRM warehouse, or select "Blackbaud Data Mart for The Raiser's Edge" for The Raiser's Edge warehouse.
-
In the Manifest file field, the location of the manifest file appears. This XML file contains metadata about the data warehouse installation.
-
-
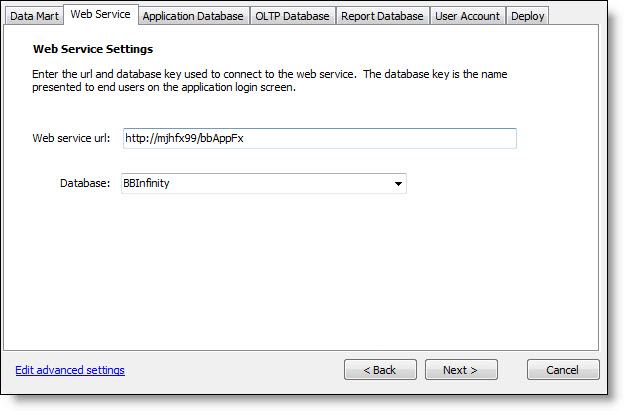
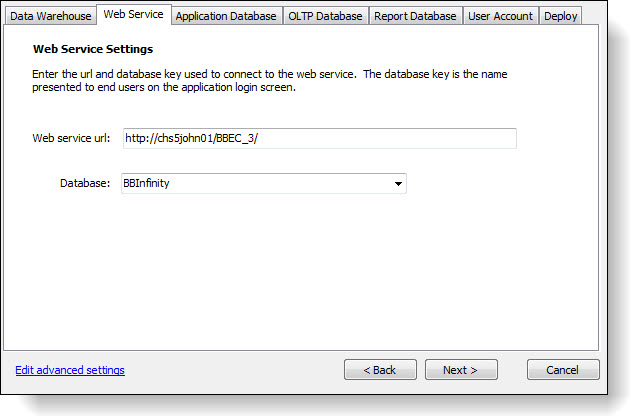
On the Web Service tab, enter information about the application.
-
In the Web service url field, enter the URL for the application web server. This is the virtual directory for the web application. Generally, the format is “http://[Server name]/[Virtual directory name].”
-
In the Database field, select the database key. This is the value that you select in the database prompt of the application login screen. It may be the same as the database name, but it is not necessarily the same. You define the database key in Web.config file in the installation directory's vroot folder. Within the Web.config file, you can provide a semicolon-separated list of database keys to present on the login screen within the DBList or REDBList AppSettings.
-
-
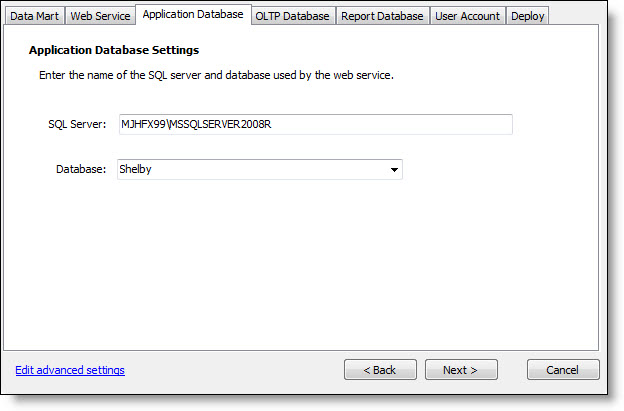
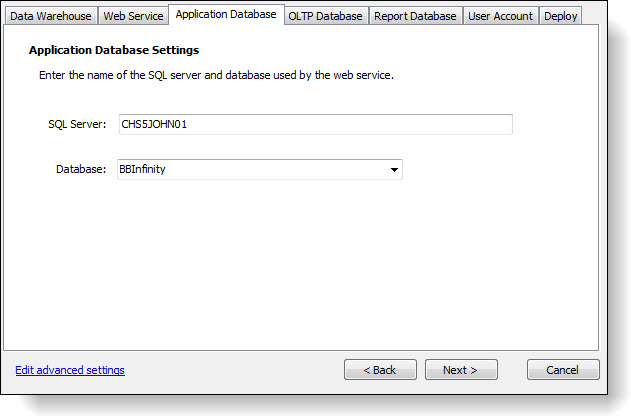
On the Application Database tab, enter information about the application’s database.
-
In the SQL Server field, enter the SQL Server instance for the application.
-
In the Database field, enter the name of the application database.
-
-
On the OLTP Database tab, enter information about the transactional database.
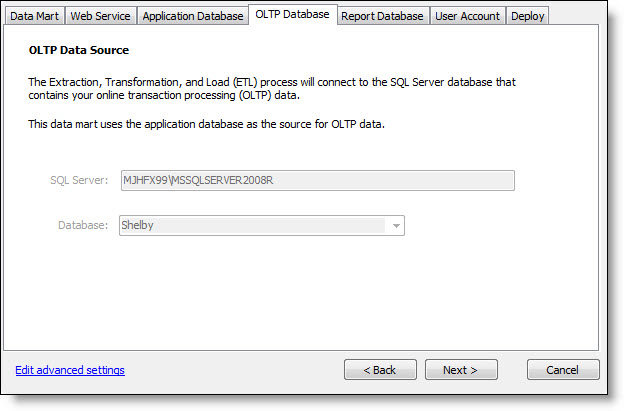

Note: You only enter data on the OLTP Database tab when you deploy the data warehouse for The Raiser's Edge. For Blackbaud CRM, the application database and the transactional database are the same, so the fields on this tab inherit their values from the corresponding fields on the Application Database tab.
-
In the SQL Server field, enter the SQL Server instance for the source database.
-
In the Database field, enter the name of the source database.
-
-
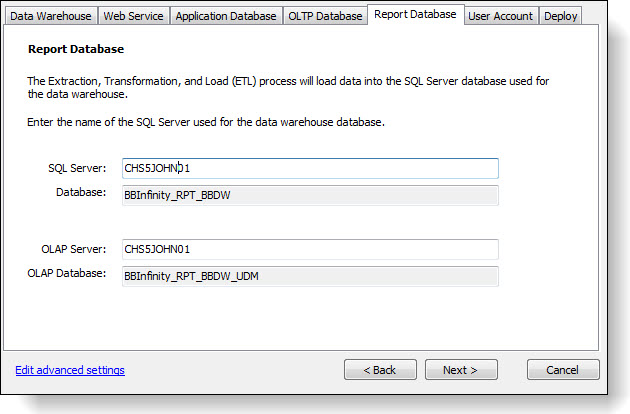
On the Report Database tab, information appears about the ETL process that creates and updates records in the data warehouse.
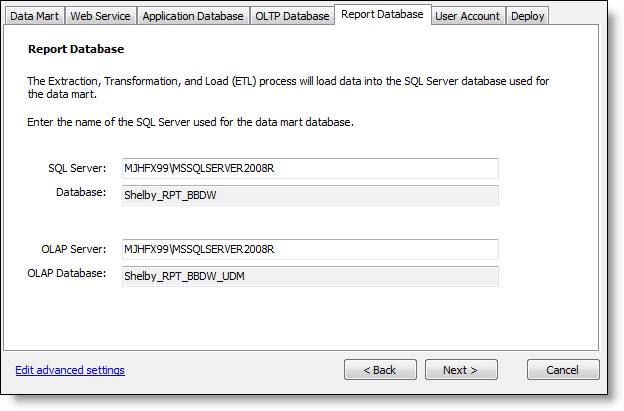
Note: You only enter data on the Report Database tab when you deploy the data warehouse for Blackbaud CRM. For The Raiser's Edge, the application database and the data warehouse database are the same, so the SQL Server and Database fields inherit their values from the corresponding fields on the Application Database tab and you cannot edit them. And since the OLAP cube is not available for The Raiser's Edge, the OLAP Server and OLAP Database fields do not appear.
-
In the SQL Server field, enter the SQL Server instance for the data warehouse database.
-
In the Database field, the name appears for the database that contains the data warehouse tables. You cannot edit this name.
-
In the OLAP Server field, enter the SQL Server instance for the OLAP database.
-
In the OLAP Database field, the name appears for the database that contains the OLAP cubes for the data warehouse. You cannot edit this name.
Note: If you set the Deploy OLAP cube setting to "False" under Deployment Options on the Edit Advanced Data Warehouse Setting screen, the OLAP Server and OLAP Database fields do not appear.
-
-
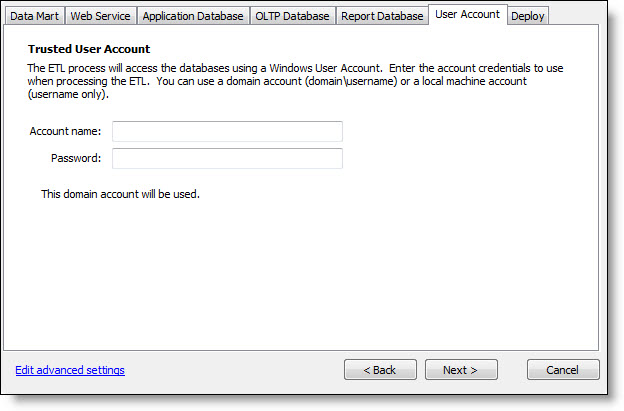
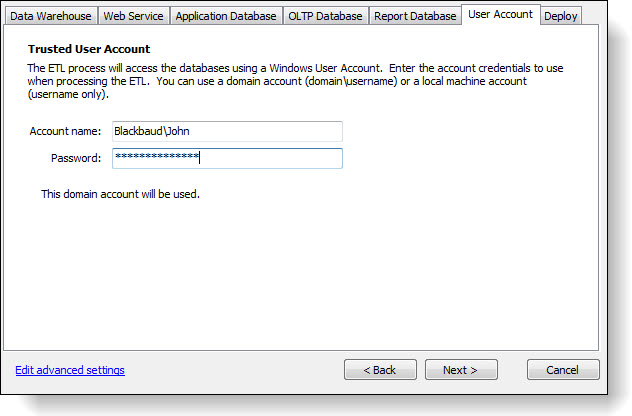
On the User Account tab, enter credentials for a Microsoft Windows user account that will access the application database and the data warehouse database and run the ETL process. You can enter a domain account or a local machine account.
-
In the Account name field, enter a user account. If the account does not have rights to communicate between the application and the data warehouse’s source, the deployment wizard will grant the necessary rights. If you enter a local machine user account that does not exist, the deployment wizard will create it.
-
In the Password field, enter the password for the user account. The deployment wizard does not save this password. If you redeploy the data warehouse, you must re-enter the password.
Tip: If you change this password after you deploy the data warehouse, the application cannot access the data warehouse and the ETL process and any process that relies on data from the warehouse will fail. To restore access to the data warehouse, you must return to the deployment wizard, enter the new password, and then deploy the warehouse again.
-
If you use a local machine user account, a Synchronize local machine accounts on these computers box appears. Enter a comma-separated list of the computers where you want to synchronize the account name and password. For example, enter the names of the application server and web server.
-
-
To edit additional settings, click Edit advanced settings. The Edit Advanced Data Mart Settings screen appears.
To edit additional settings, click Edit advanced settings. The Edit Advanced Data Warehouse Settings screen appears.
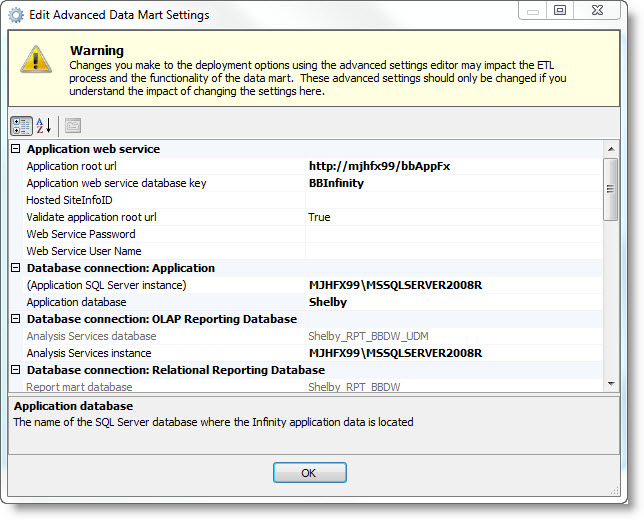
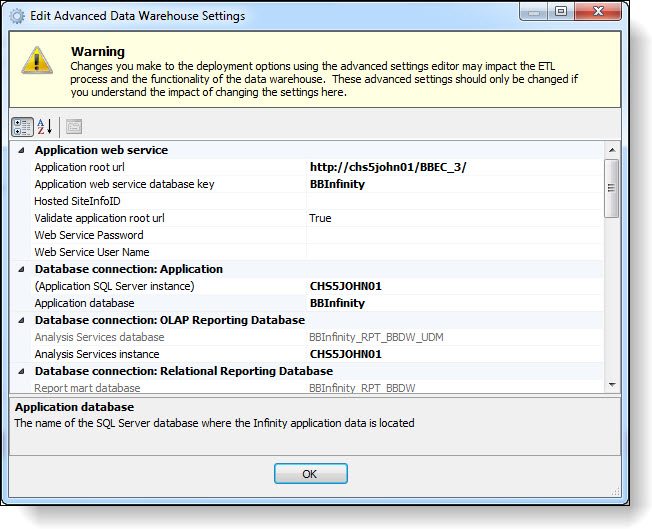
This screen includes all the settings from the deployment wizard as well as additional advanced settings. Some of the more commonly used settings include:
-
The Deploy OLAP cube setting under Deployment Options allows you control whether to deploy the OLAP cube. If you don't plan to use the cube, you can set the property to "False" to improve the performance of the ETL process and remove the need for Analysis Server. For information about the web server configuration necessary for the OLAP cube, see Web Server Configuration.
-
The Max ETL Parellelism setting under Deployment Options allows you to run up to 4 ETL packages at the same time. By running multiple ETL packages concurrently, the ETL process runs much faster. However, this is resource-intensive and uses more CPU, memory, and disk resources. To speed up the ETL process, you can increase the number for this setting, but if the ETL process runs simultaneously with many other processes, you may want to set a lower number for this setting.
-
The Include Selections setting under Deployment Options allows you to select whether to include static selections from the Infinity database in the warehouse. When you include static selections, you can then filter your data warehouse query views against these static selections.
Starting with version 4.0, this deployment wizard includes static selections by default.
For a detailed description of the settings on this screen, see Edit Advanced Data Mart Settings Screen.
-
-
On the Deploy tab, click Deploy to deploy the data warehouse. The deployment begins, and a status log appears.
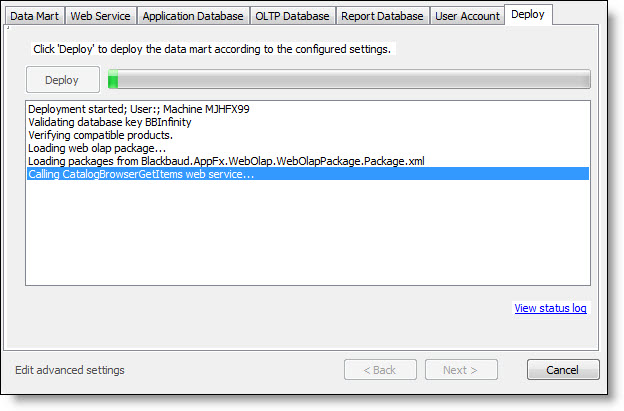
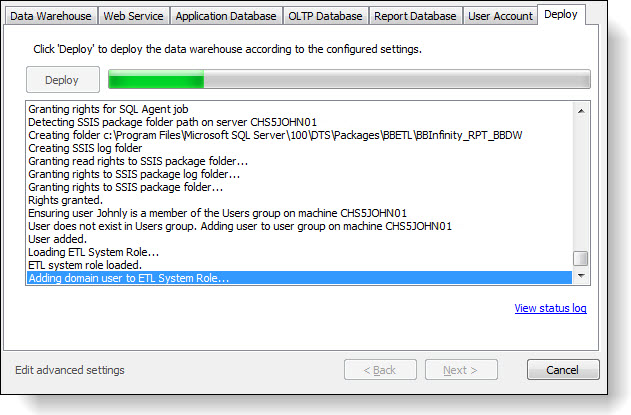
A log file that describes installation activity is created regardless of whether errors occur. You can find the installation log file in the \Local Settings\Temp folder for the user who installs the data warehouse. For example, if the administrator installs the data warehouse, the log is created in the C:\Documents and Settings\Administrator\Local Settings\Temp folder.