Select your user interface:
Exercise: Build a Data Form Extension
Here is a link to the Food Bank Source Code.
In the source code for the food bank customization, we created the ability to add a food bank into the USR_FOODBANK table via the Food Bank Add Form. Below is the spec for this Add Data Form.
<AddDataFormTemplateSpec
xmlns:c="bb_appfx_commontypes"
ID="B103D941-F9CC-47A2-9419-6B90FF22BA15"
Name="Food Bank Add Form"
Description="Used for adding a new Food Bank"
Author="Technical Training"
RecordType="Food Bank"
DataFormInstanceID="D580ABBD-2974-4ADB-BD8A-8CF6F76DE8E6"
c:SecurityUIFolder="Constituent\Food Bank"
xmlns="bb_appfx_adddataformtemplate"
>
<SPDataForm>
<SaveImplementation SPName="USR_USP_DATAFORMTEMPLATE_ADD_FOOD_BANK">
<c:CreateProcedureSQL>
<![CDATA[
create procedure dbo.USR_USP_DATAFORMTEMPLATE_ADD_FOOD_BANK
(
@ID uniqueidentifier = null output,
@CONSTITUENTID uniqueidentifier = null,
@CHANGEAGENTID uniqueidentifier = null,
@DESCRIPTION nvarchar(max) = '',
@MISSIONSTATEMENT nvarchar(max) = '',
@FOODBANKTYPECODEID uniqueidentifier = null
)
as
set nocount on;
--if @ID is null
set @ID = @CONSTITUENTID
if @CHANGEAGENTID is null
exec dbo.USP_CHANGEAGENT_GETORCREATECHANGEAGENT @CHANGEAGENTID output
declare @CURRENTDATE datetime
set @CURRENTDATE = getdate()
begin try
-- handle inserting the data
insert into dbo.USR_FOODBANK
(ID, CONSTITUENTID, DESCRIPTION, MISSIONSTATEMENT, FOODBANKTYPECODEID, ADDEDBYID, CHANGEDBYID, DATEADDED, DATECHANGED)
values
(@CONSTITUENTID, @CONSTITUENTID, @DESCRIPTION, @MISSIONSTATEMENT, @FOODBANKTYPECODEID, @CHANGEAGENTID, @CHANGEAGENTID, @CURRENTDATE, @CURRENTDATE)
--set @ID = @CONSTITUENTID
end try
begin catch
exec dbo.USP_RAISE_ERROR
return 1
end catch
return 0
]]>
</c:CreateProcedureSQL>
<c:ExpectedDBExceptions>
<c:Constraints>
<c:Constraint Name="FK_USR_FOODBANK_FOODBANKTYPECODEID" Field="FOODBANKTYPECODEID" Type="ForeignKey" />
</c:Constraints>
</c:ExpectedDBExceptions>
</SaveImplementation>
</SPDataForm>
<!-- describe the context ID for this form (if applicable), which corresponds to a parameter in the SP.
<Context ContextRecordType="Food Bank" RecordIDParameter="CONTEXTID"/> -->
<c:FormMetaData FixedDialog="true" >
<c:FormFields>
<c:FormField FieldID="CONSTITUENTID" Caption="Constituent" DataType="Guid" Required="true">
<c:SearchList SearchListID="ef1da4e7-0631-49de-bd60-7d084cb7cb2b" EnableQuickFind="true">
<c:FormFieldOverrides>
<c:FormFieldOverride FieldID ="ONLYPRIMARYADDRESS" DefaultValueText="False"/>
</c:FormFieldOverrides>
</c:SearchList>
</c:FormField >
<c:FormField FieldID="DESCRIPTION" Caption="Description" DataType="String" Multiline="true" />
<c:FormField FieldID="MISSIONSTATEMENT" DataType="String" Caption="Mission Statement" />
<c:FormField FieldID="FOODBANKTYPECODEID" DataType="Guid" Caption="Food Bank Type" Required="true">
<c:CodeTable CodeTableName="USR_FOODBANKTYPECODE" />
</c:FormField>
</c:FormFields>
<!-- Switching over to the default WebUI instead of the Win Form UI-->
<c:WebUIComponent>
<c:WebUI>
<c:DefaultWebUI/>
</c:WebUI>
</c:WebUIComponent>
</c:FormMetaData>
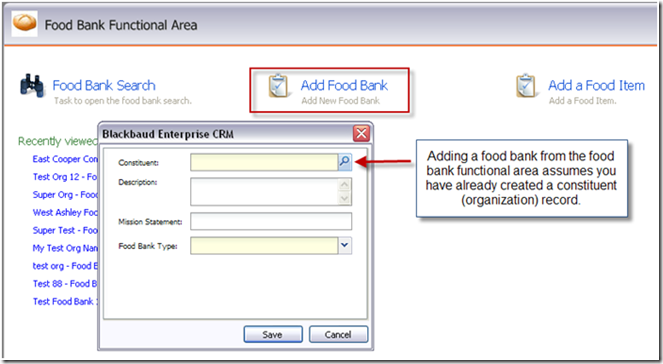
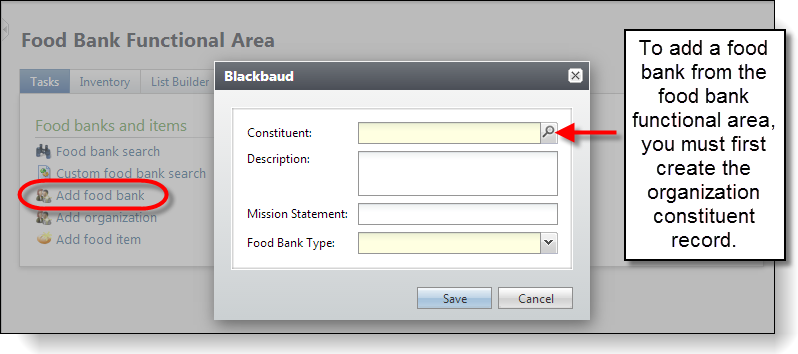
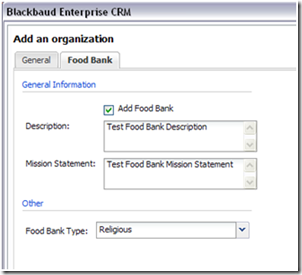
</AddDataFormTemplateSpec>Currently, adding food bank is a two-step process. A user will have to create an organization (constituent) record first and then use the functionality below to select the organization to signify that it is a food bank. Below is a screen shot of the Food Bank Add Form in action.
Currently, adding food bank is a two-step process. First, a user creates an organization (constituent) record. Then the user selects the organization on the Food Bank Add Form while adding a food bank in the Food Bank functional area.
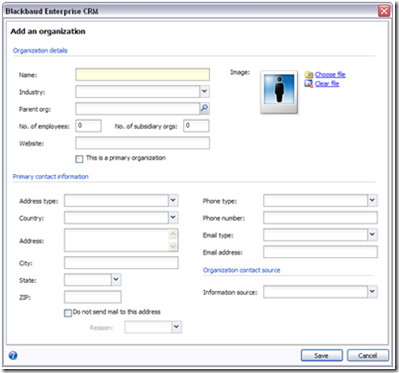
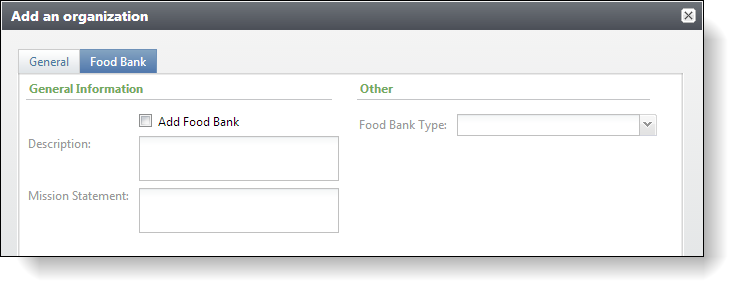
In this example, we will extend the Organization Add Data Form (below) with a data from extension that includes fields to add a food bank.
Before we walk through the steps to create the data form extension, let's take a peek at the completed exercise and define the requirements along the way.
-
When we create an organization, we want to give the user the option to create a food bank while they enter the information for the organization. We want to extend the Organization Add Data Form to include a new tab with the following food bank fields: ◦ Add Food Bank Check box
-
Add Food Bank checkbox
-
Description text box
-
Mission Statement text box
-
Food Bank Type drop-down list box
-
-
We want the addition of the food bank data to be optional. That is, if the organization is not a food bank, the user can just skip the new tab and the food bank-related fields.
-
To add the organization as a food bank, the user can select an Add Food Bank checkbox. This should enable the food bank fields and make the Food Bank Type field required.
-
Saving the food bank data should add a row into the USR_FOODBANK table as well as a user-defined constituency named "Food Bank."
-
We want to group the Add Food Bank checkbox, Description text box, and Mission Statement text box controls within a group named General Information.
-
We want to place the Food Bank Type drop-down list box within a group named Other.
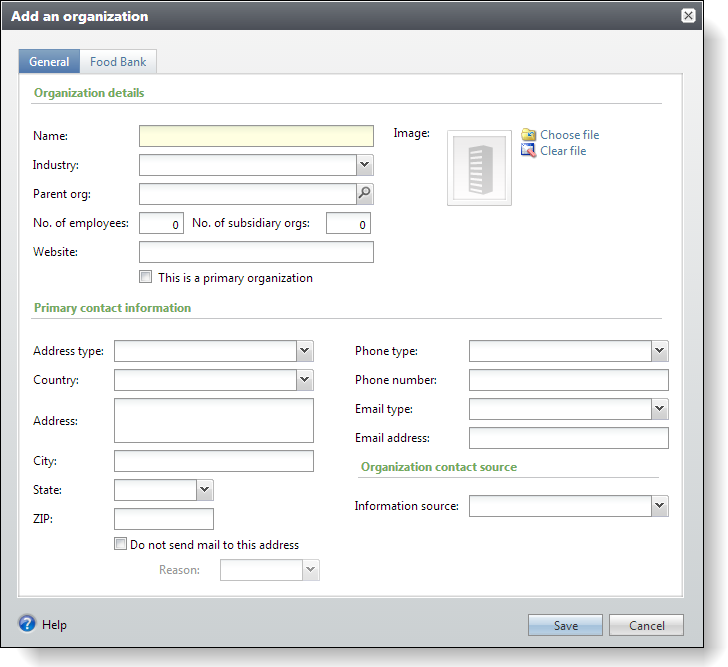
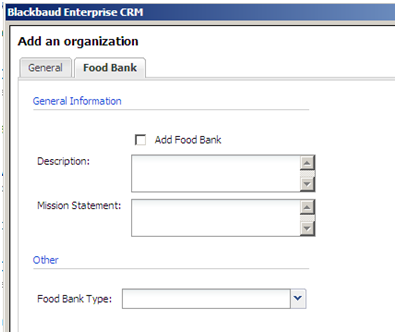
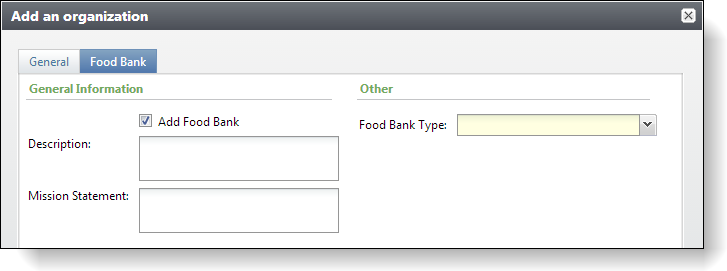
The data form extension will look like this:
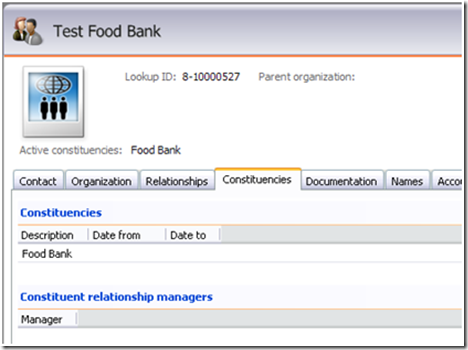
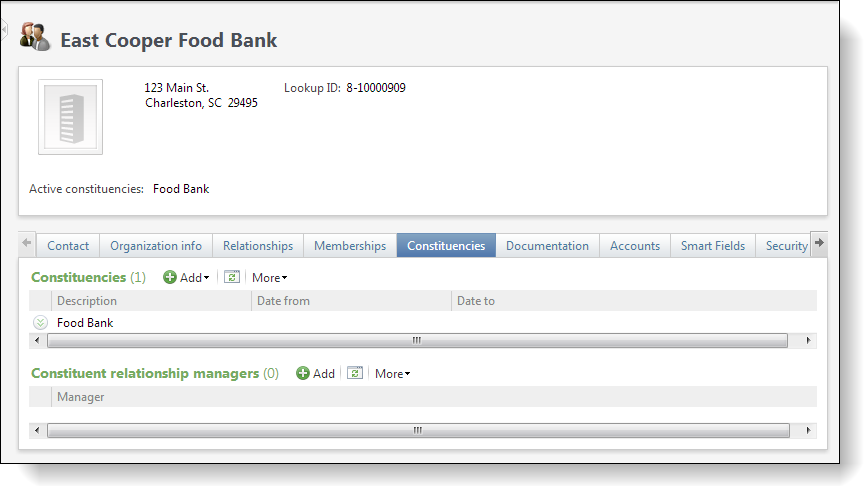
After users click the Save button on the Organization Add Data Form, we will redirect them to the constituent page. Here we can see the user-defined constituency on a new constituent record.
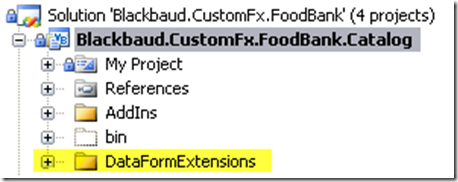
Step 1 - Create a folder named DataFormExtensions within the Blackbaud.CustomFx.FoodBank.Catalog project.
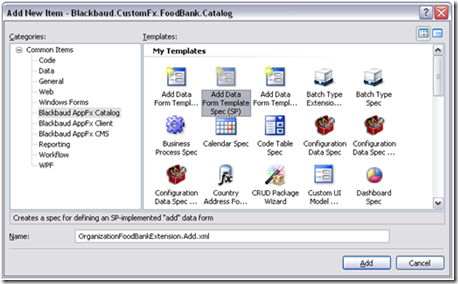
Step 2 - Add a new Add Data Form to the catalog project.
Before we extend the Organization Add Data Form with our custom data form, we need to create the custom data form. Right-click the new DataFormExtensions folder and select Add\New Item… from the popup menu.
Select Add Data Form Template Spec (SP) as the template and enter "OrganizationFoodBankExtension.Add.xml" as the XML file name.
Step 3 - Add the header for the spec.
Add the following XML metadata for the spec. The GUIDs for your ID and DataFormInstanceID attributes will differ.
<AddDataFormTemplateSpec
    xmlns:c="bb_appfx_commontypes"
    ID="89025448-7cab-430e-8b9a-b057bf4966cb"
    Name="Food Bank Organization Extension Add Form"
    Description="Used for Adding a new Food Bank to an organization"
    Author="Technical Training"
    RecordType="Food Bank"
    DataFormInstanceID="735c77b6-bb12-4298-b76d-aa811da97584"
    c:SecurityUIFolder="Constituent\Food Bank"
    xmlns="bb_appfx_adddataformtemplate"
    >
Step 4 - Add the save implementation stored procedure.
Add the following XML metadata for the stored procedure.
Notice that we use the CONSTITUENTID from the Organization Add Data Form.
Notice that we skip the INSERT to the food bank table if the @ADDFOODBANK parameter is equal to zero.
Also notice we add the user-defined constituency:
<SPDataForm>
       <SaveImplementation SPName="USR_USP_DATAFORMTEMPLATE_ADD_ORGFOOD_BANK">
<c:CreateProcedureSQL>
<![CDATA[
CREATE procedure dbo.USR_USP_DATAFORMTEMPLATE_ADD_ORGFOOD_BANK
(
@ID uniqueidentifier = null output,
@CONSTITUENTID uniqueidentifier,
@ADDFOODBANK bit = 0,
@CHANGEAGENTID uniqueidentifier = null,
@DESCRIPTION nvarchar(max) = '',
@MISSIONSTATEMENT nvarchar(max) = '',
@FOODBANKTYPECODEID uniqueidentifier = null
)
as
set nocount on;
DECLARE @CURRENTDATE datetime
DECLARE @CONSTITUENCYCODEID as uniqueidentifier
set @ID = @CONSTITUENTID
if @CHANGEAGENTID is null
exec dbo.USP_CHANGEAGENT_GETORCREATECHANGEAGENT @CHANGEAGENTID output
set @CURRENTDATE = getdate()
begin try
IF @ADDFOODBANK = 1
BEGIN
-- handle inserting the data
insert into dbo.USR_FOODBANK
(ID, CONSTITUENTID, DESCRIPTION, MISSIONSTATEMENT, FOODBANKTYPECODEID, ADDEDBYID, CHANGEDBYID, DATEADDED, DATECHANGED)
values
(@CONSTITUENTID, @CONSTITUENTID, @DESCRIPTION, @MISSIONSTATEMENT, @FOODBANKTYPECODEID, @CHANGEAGENTID, @CHANGEAGENTID, @CURRENTDATE, @CURRENTDATE)
--set @ID = @CONSTITUENTID
-- MAKE SURE WE HAVE A FOOD BANK USER DEFINED CONSTITUENCY IN THE CONSTITUENCYCODE TABLE
SELECT @CONSTITUENCYCODEID = ID
FROM CONSTITUENCYCODE
WHERE DESCRIPTION = 'Food Bank'
-- IF WE DONT, ADD ONE TO THE CONSTITUENCYCODE TABLE
IF @CONSTITUENCYCODEID IS NULL
BEGIN
SET @CONSTITUENCYCODEID = NEWID()
EXEC dbo.[USP_CONSTITUENCYCODE_CREATEENTRY] @DESCRIPTION=N'Food Bank',@ACTIVE=1,@CHANGEAGENTID=@CHANGEAGENTID, @ID=@CONSTITUENCYCODEID
END
-- ADD THE NEW ORGANIZATION/CONSTITUENT TO THE USER DEFINED CONSTITUENCY
EXEC dbo.USP_DATAFORMTEMPLATE_ADD_CONSTITUENCY
@CHANGEAGENTID= @CHANGEAGENTID,
@CONSTITUENTID= @CONSTITUENTID,
@CONSTITUENCYCODEID = @CONSTITUENCYCODEID
END
end try
begin catch
exec dbo.USP_RAISE_ERROR
return 1
end catch
return 0
]]>
</c:CreateProcedureSQL>
<c:ExpectedDBExceptions>
<c:Constraints>
<c:Constraint Name="FK_USR_FOODBANK_FOODBANKTYPECODEID" Field="FOODBANKTYPECODEID" Type="ForeignKey" />
</c:Constraints>
</c:ExpectedDBExceptions>
</SaveImplementation>
</SPDataForm>
Step 5 - Add the context and form metadata
Add the following XML metadata for the context and the form metadata.
Notice that we use the <c:DefaultWebUI/> to start with. This will change when we run the UI Model wizard in future steps.
Also notice that we use <c:FieldGroups> to group our form fields on the user interface.
<!-- describe the context ID for this form (if applicable), which corresponds to a parameter in the SP.-->
  <Context ContextRecordType="Constituent" RecordIDParameter="CONSTITUENTID" />

    <c:FormMetaData FixedDialog="true">
        <c:FormFields>
      <c:FormField FieldID="ADDFOODBANK" Caption="Add Food Bank" DataType="Boolean" />
            <c:FormField FieldID="DESCRIPTION" Caption="Description" DataType="String" Multiline="true" />
            <c:FormField FieldID="MISSIONSTATEMENT" DataType="String" Caption="Mission Statement" Multiline="true" />
            <c:FormField FieldID="FOODBANKTYPECODEID" DataType="Guid" Caption="Food Bank Type">
                <c:CodeTable CodeTableName="USR_FOODBANKTYPECODE" />
            </c:FormField>
        </c:FormFields>

   <c:WebUIComponent>
      <c:WebUI>
        <c:DefaultWebUI/>
      </c:WebUI>
    </c:WebUIComponent>
<c:FieldGroups>
      <c:FieldGroup ID="GENERALINFORMATIONGROUP"  Caption="General Information">
        <c:Fields>
          <c:Field>ADDFOODBANK</c:Field>
          <c:Field>DESCRIPTION</c:Field>
          <c:Field>MISSIONSTATEMENT</c:Field>
        </c:Fields>
      </c:FieldGroup>
      <c:FieldGroup ID="OTHERGROUP"  Caption="Other">
        <c:Fields>
          <c:Field>FOODBANKTYPECODEID</c:Field>
        </c:Fields>
      </c:FieldGroup>
    </c:FieldGroups>

 </c:FormMetaData>
Step 6 - Add the DataFormExtension element before the AddDataFormTemplateSpec element.
The value for the DataFormInstanceID attribute points to the Organization Add Data Form.
Notice that we render our data form as a new tab on the Organization Add Data Form via the RenderStyle="Tab" attribute. Optionally, we could enter RenderStyle="AfterParent" to display our fields after the existing fields of the Organization Add Data Form.
<!-- Extending the Organization Add Data Form -->
  <c:DataFormExtension DataFormInstanceID="ca3ed110-a5f0-4b5b-8eb7-0616e0a82e8e"  RenderStyle="Tab"  TabCaption="Food Bank"/>
</AddDataFormTemplateSpec>
Step 7 - Load the spec into the database.
Step 8 - Test the Data Form Extension and the default web user interface.
Navigate to the Organization functional area and click the Add an Organization task. You should see the Organization Add Data Form with a new Food Bank tab that includes our custom data form.
You can see that the default web user interface provides formatting for the form header and the grouping of the fields on the data form.
Step 9 - Create a UI Model for our custom data form using the UI Model Wizard.
We now have to create a UI Model for our data form to fulfill the following requirements:
-
We want the addition of the food bank data to be optional. That is, if the organization is not a food bank, the user can just skip the new tab and the food bank-related fields.
-
To add the organization as a food bank, the user can select an Add Food Bank checkbox. This should enable the food bank fields and make the Food Bank Type field required.
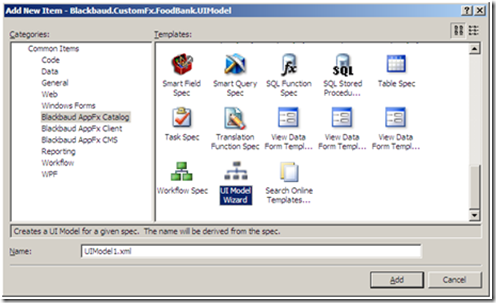
Select and right-click the Blackbaud.CustomFx.FoodBank.UIModel project.
Select Add/New Item… from the popup menu.
Select the UI Model Wizard template. Keep the default name for the name of the xml file. See below:
The UI Model Wizard launches..
-
Select the OrganizationFoodBankExtension.Add.xml as the spec file.
-
Select the Generate Html for the model checkbox.
-
Accept the defaults in the HTML file name and Folder fields.
-
Select the Generate model from the database checkbox.
-
Enter your database server name in the Server field.
-
Enter your Infinity database name in the Database name field.

The wizard adds the following files to the UI Model assembly project:
-
FoodBankOrganizationExtensionAddFormUIModel.vb (Your behavior code goes here)
-
FoodBankOrganizationExtensionAddFormUIModel.CodeGen.vb (Code-generated partial class)
-
FoodBankOrganizationExtensionAddFormUIModel.xml (File that holds the wizard settings you selected)
-
FoodBankOrganizationExtensionAddForm.html (The HTML "Snippet" you can edit to alter the layout of your form fields)
-
OrganizationFoodBankExtension.Add.xml (Linked spec)
The wizard will alter the OrganizationFoodBankExtension.Add.xml Data Form Spec within the catalog project. Check out our WebUIComponent element within the spec. It changed to reference our new UI model assembly and class.

Step 10 - Add behavior code.
Within the UI Model assembly project, open the FoodBankOrganizationExtensionAddFormUIModel.vb class and add the following code:
Private Sub EvaluateControls()
  Dim EnableFoodBankFields As Boolean = False

  EnableFoodBankFields = Me.ADDFOODBANK.Value
  If EnableFoodBankFields = False Then
    Me.FOODBANKTYPECODEID.Required = False
  Else
    Me.FOODBANKTYPECODEID.Required = True
  End If

  Me.DESCRIPTION.Enabled = EnableFoodBankFields
  Me.MISSIONSTATEMENT.Enabled = EnableFoodBankFields
  Me.FOODBANKTYPECODEID.Enabled = EnableFoodBankFields
End Sub
The EvaluateControls() sub is called when the new data form opens and users select the Add Food Bank checkbox. The sub determines if the drop-down list box should be required and enables or disables the controls.
Step 11 - Reload the Data Form Spec, build and deploy the UI Model assembly, deploy the HTML file, and check out our new UI behavior.
Within Blackbaud CRM close the Organization Add Data Form if it is open.
Reload the OrganizationFoodBankExtension.Add.xml spec to account for the updated WebUIComponent element that points to our new UI model.
Rebuild the UI Model assembly project.
Copy the FoodBankOrganizationExtensionAddForm.html file to the vroot\browser\htmlforms\custom\blackbaud.customfx.foodbank folder.
Reopen the Organization Add Data Form and test the new behavior. When the checkbox is selected/cleared, you should see the other controls become enabled/disabled along with the drop-down list box become required/not required.

Here is a link to the Food Bank Source Code.