Create a Data List from an Ad-hoc Query
Data lists display data in a tabular form. You can display data lists in a "grouped view" format such as the Relationships tab on a constituent record. The Addresses section of the Contact tab of a constituent record shows a good example of a "repeater view" of a data list. The Names tab on a constituent record displays rows within a "standard grid" view. In addition to the data lists within the application, you can create new data lists from an ad-hoq queries.
Step 1 - Create a copy of the 2008 Annual Fund Big Spenders ad-hoc query.
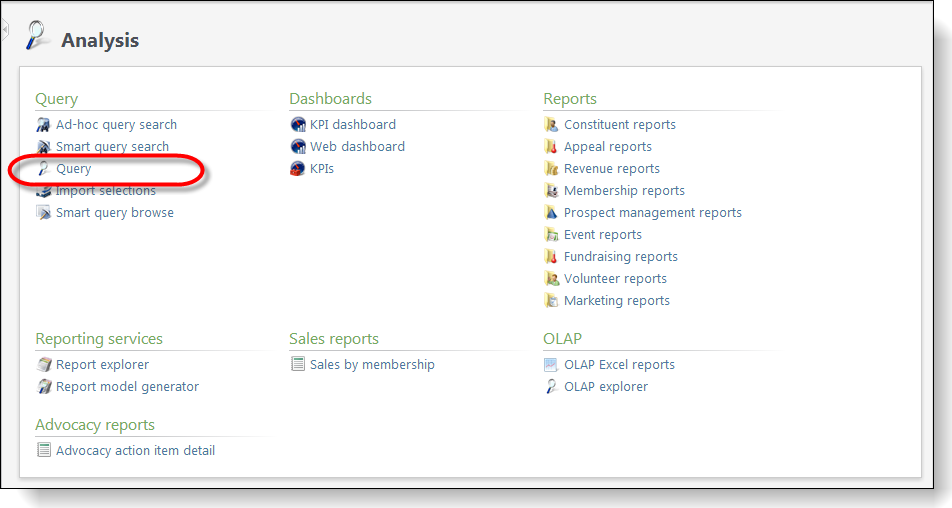
Navigate to the Query page within the Analysis functional area.
Navigate to the Information library page within the Analysis functional area.

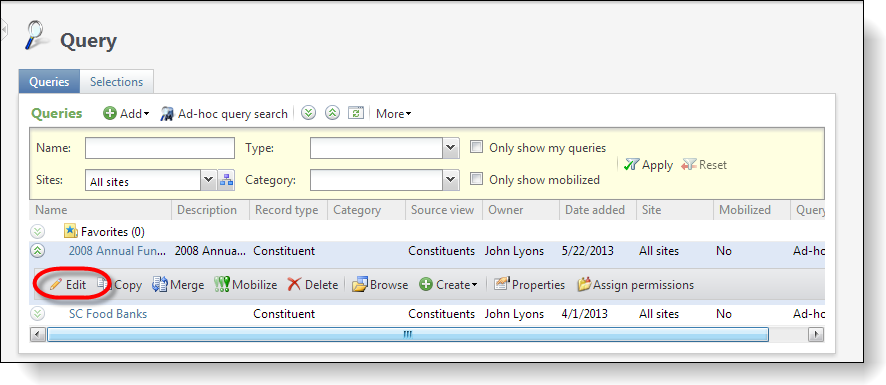
Select the 2008 Annual Fund Big Spenders ad-hoc query and click the Edit action.
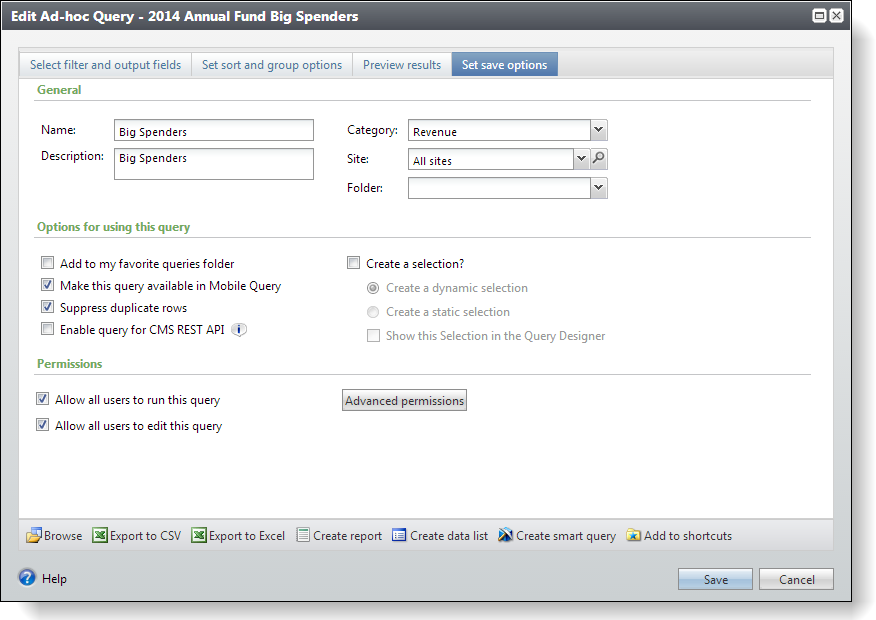
Select the Set save options tab on the query editor. Use the table below to save the query as a new ad-hoc query named Big Spenders.
| Property | Value |
|---|---|
| Name | Big Spenders |
| Description | Big Spenders |
| Category | Revenue |
| Site | All sites |
| Make this query available in Mobile Query | False (Unchecked) |
| Folder | <None> |
Step 2 - Modify the new Big Spenders ad-hoc query.
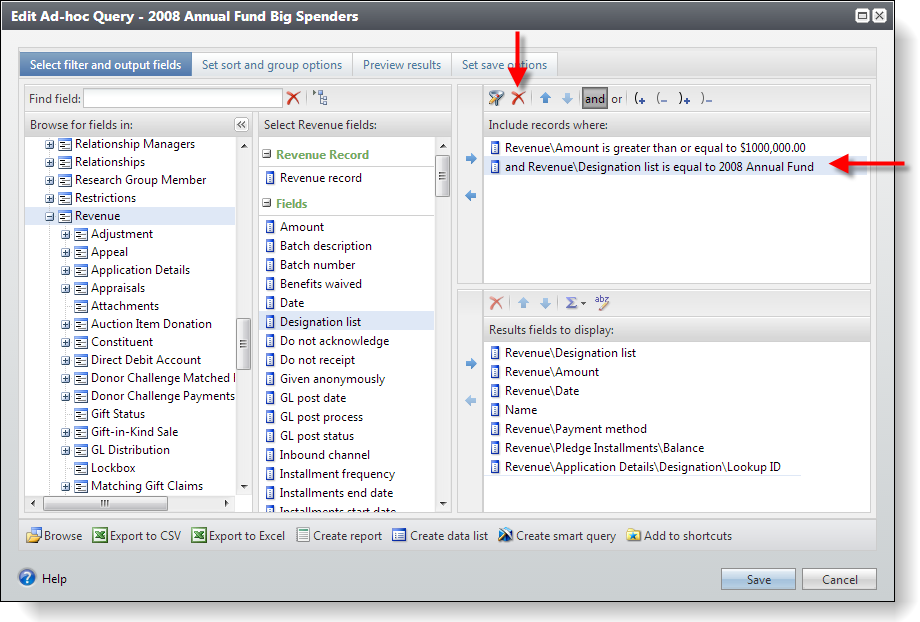
After we create the Big Spenders query, we need to remove Designation List is equal to 2008 Annual Fund filter (highlighted below) from the Filters pane, which leaves only the Amount is greater than or equal to $100,000.00 filter. This results in a query that displays large gifts to any designation.
Step 3 - Add unique identifiers for the designation and revenue.
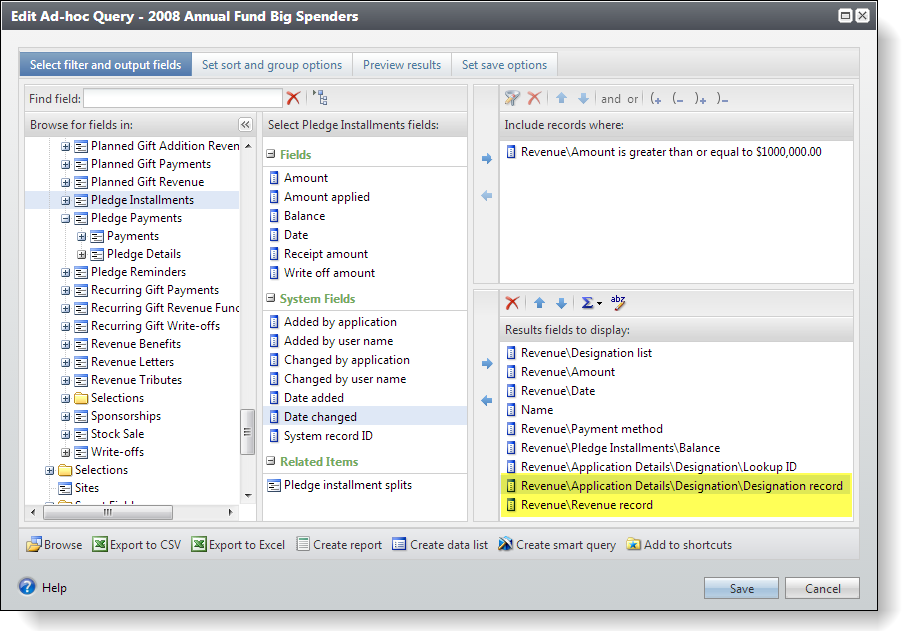
Next, add the following output fields (yellow highlight below) to the query:
-
Application Details\Designation\Designation record
-
Revenue record
Since we are creating an ad-hoc query to spawn a user-defined data list, we need a way to relate the rows in the data list to a designation. The Designation record field contains the unique identifier for a designation. We will ultimately configure the Designation page to include the data list created from this ad-hoc query. This unique identifier will restrict the rows on the data list to only those that match the Designation page's context (Page Context). We will delve more in to context later on is this example.
As for the Revenue record field, we add this row to make sure we have a unique identifier for each row in the data list. The Revenue record field contains the unique identifier for a revenue transaction. We need this for the RSS feed we create in future exercises!
Step 4 - Create a user-defined data list from the ad-hoc query.
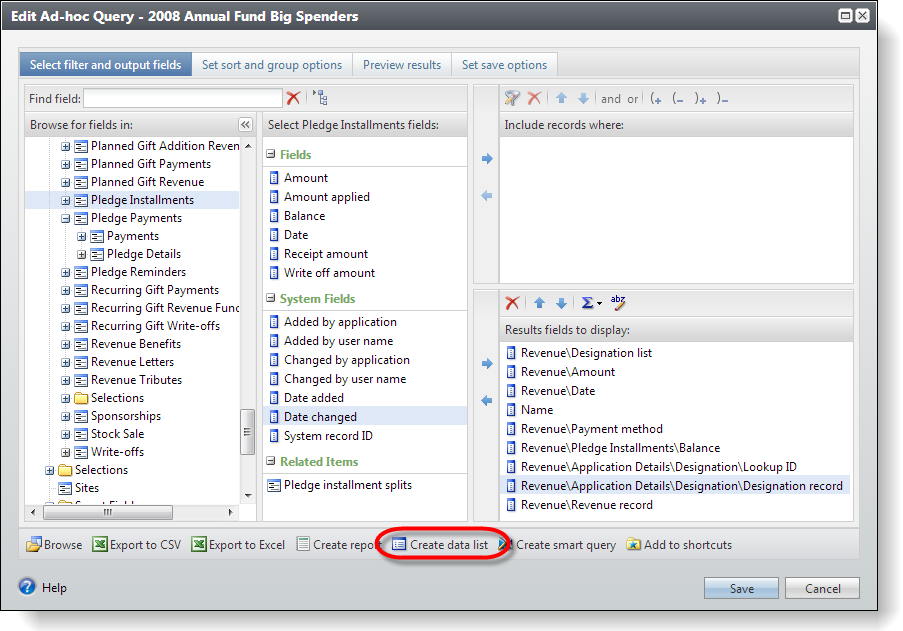
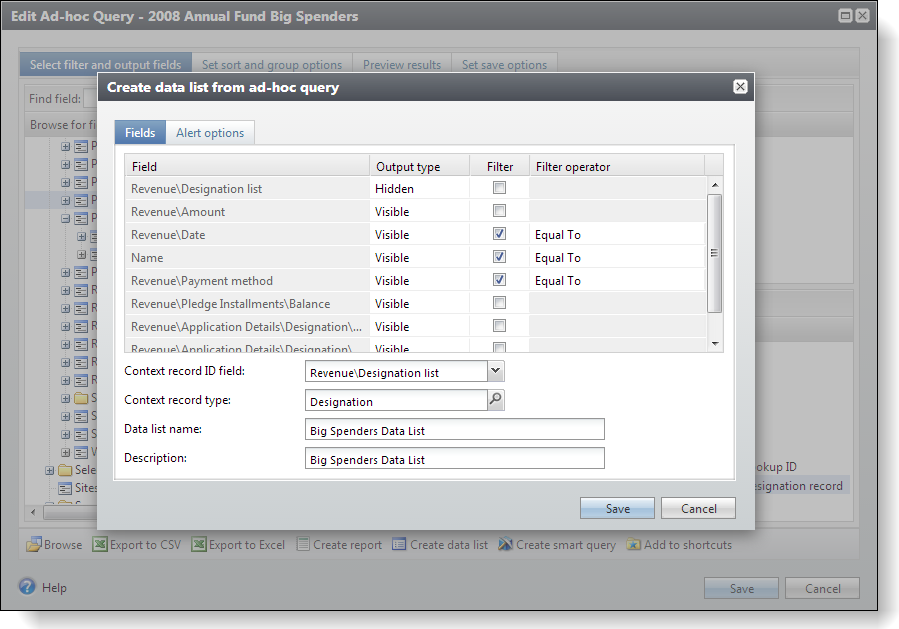
It is a simple process to create a data list from an ad-hoc query. Click Create data list along the bottom of the query editor.
Output Type
The next step is to select the fields from the ad-hoc query to include in the data list. Within the Output type column, you can select Visible, Hidden, or None. Select Visible to include the column in the data list and make it visible to the end user. Select Hidden to include the column in the data list behind the scenes but hide it from the end user. This option is helpful when the data in the column is redundant from the end user's point of view but you need to use it for other purposes. Select None to exclude the column from the data list.
Filter
To let end users use the built-in filter functionality for the data list, select the checkboxes in the Filter column. For each checkbox you select, Infinity allows end users to filter the rows in the data list. For more information, see Filters.
Context ID Field
Data is typically represented in a parent to child relationship. A parent can have one-to-many children. For example, a constituent record (parent) can have one to many phone number records (children). A data list typically displays the child side of the parent-to-child relationship. When this is the case, we need to be able to restrict the rows returned on the data list for the current parent that is displayed within the user interface. In other words, when we view phone numbers in a data list for Robert Hernandez we ONLY want to see the phone numbers in the context of Robert Hernandez. In our Big Spenders ad-hoc query, we return ALL big money revenue rows (children) for ALL designations (parents). And here is the important part: when we create a data list from the Big Spenders ad-hoc query, we only want to display the revenue rows (children) in the context of the current designation (parent).
This takes us to the Context ID field drop-down list box (see below) that allows us to designate a field in the data list to represent the context/parent. Pick the field that will match a value on the page (parent) that will display the data list rows (children). In this case, we will choose Designation record that is a unique identifier for the designation. Infinity uses this field to "link" the designation from the page that contains the data list to the values within the data list and thereby restrict the rows displayed in the data list to just those for the currently displayed designation.
Use the figure below as your guide to select the options for your data list: Make sure the Designation list field's Output type value is equal to "Hidden." Make sure you check the filter for the Date, Constituent\Name, and Payment Method fields.
Click the Save button to save the data list.
Save and close the Big Spenders ad-hoc query.
Step 5 - Check out the new Big Spenders data list on the Shell Design page
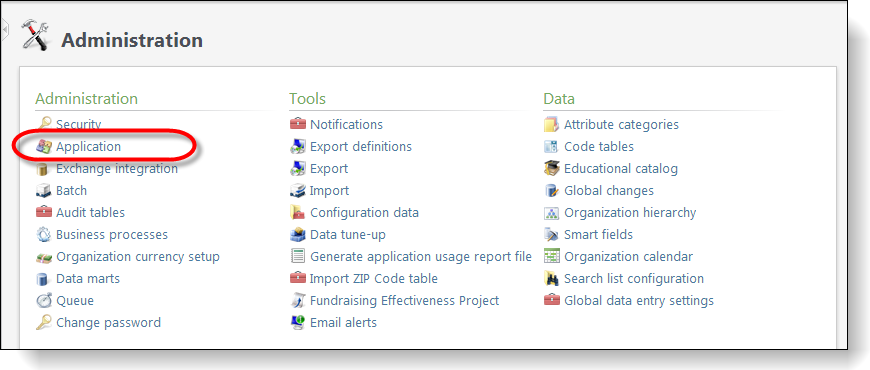
Navigate to the Administration functional area and click the Application task.
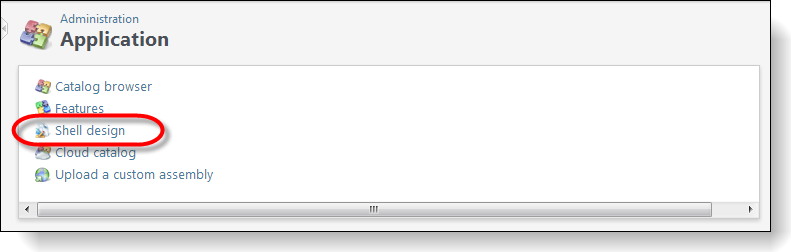
Click the Shell design task to navigate to the Shell Design page.
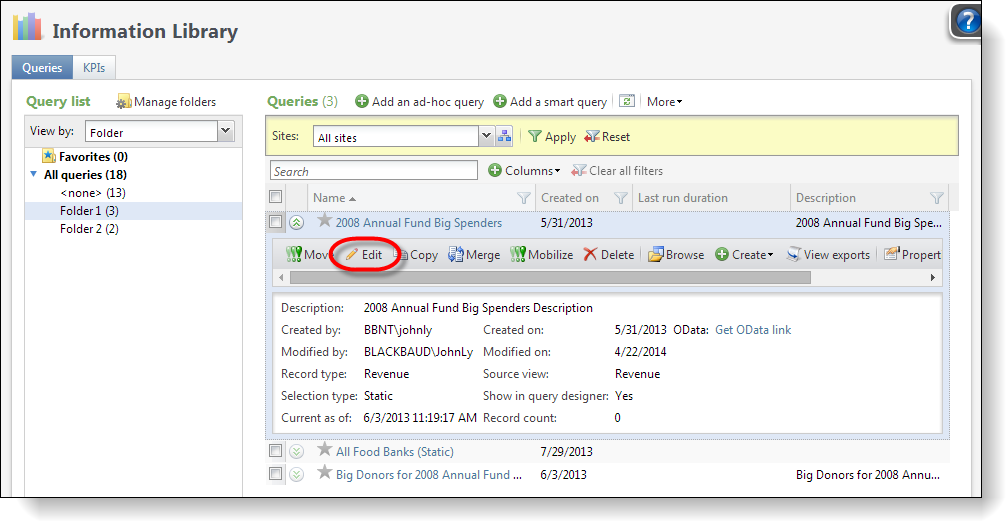
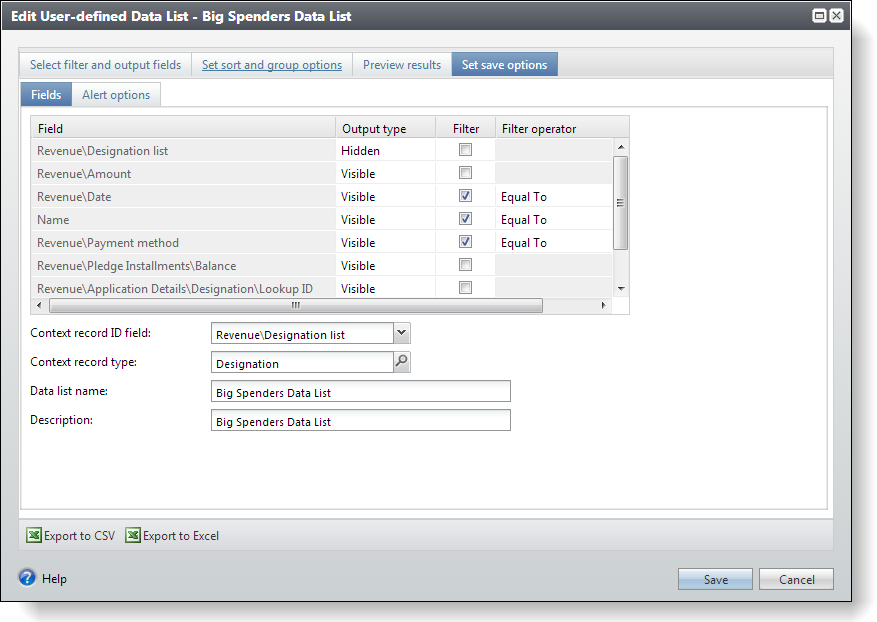
On the User-defined Data Lists tab, select the Big Spenders data list we created in the previous step and click the Edit action.

When we configure a user-defined data list from an ad-hoc query, the system copies the ad-hoc query and uses it as the basis of the user-defined data list. Notice how we can edit the query that makes up the data list independently of the original query.
We can also select File\Save Data List… from the editor's menu and tweak the properties of the data list.
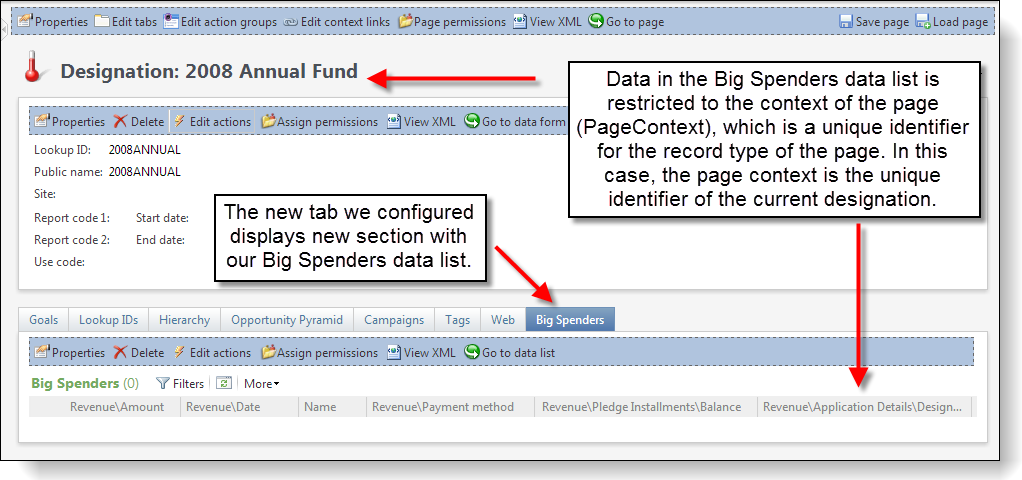
Step 6 - Configure the Designation page and add our new data list.
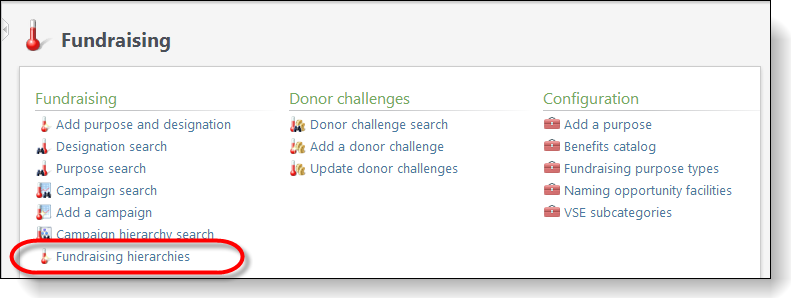
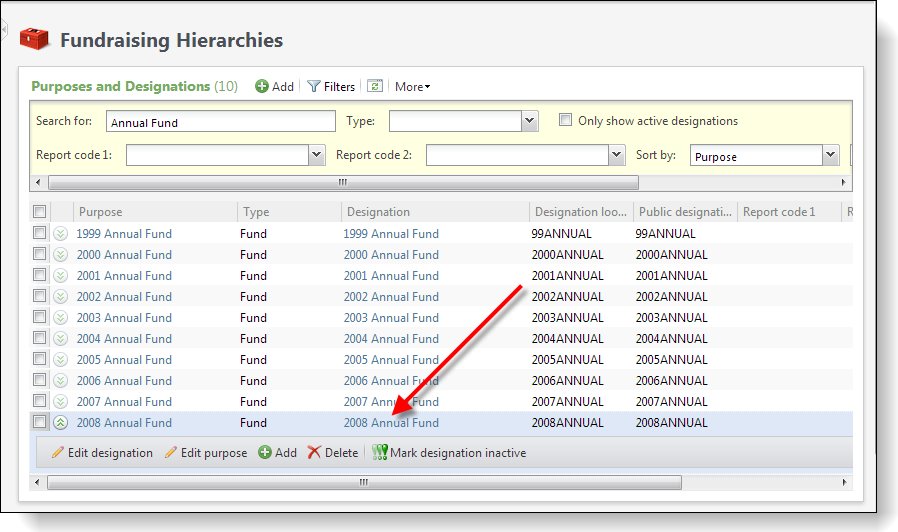
Navigate to the Fundraising functional area and click the Fundraising hierarchies task.
In the row for the 2008 Annual Fund, click the designation link.
Step 7 - Configure the Big Spenders data list on the Designation page.
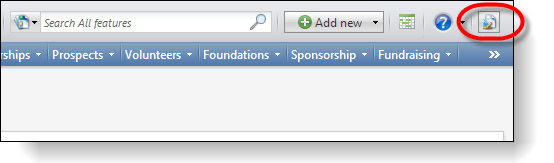
To place the shell into Design Mode, click the toggle button in the top right. This allows you to configure pages within Infinity and customize the application to your needs.
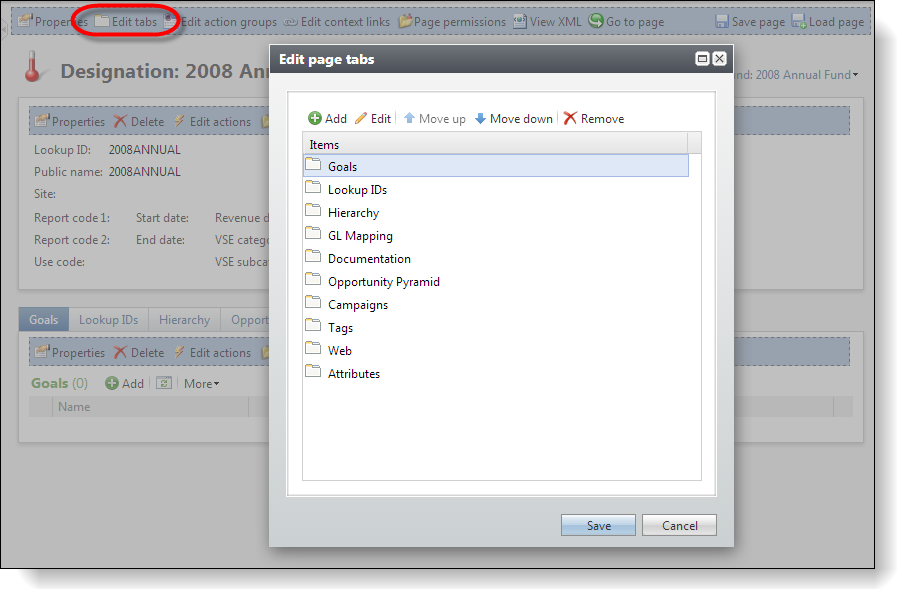
In Design Mode, we will click the Edit tabs action and then click the Add button to add a new tab.
Use the table to add the properties for our new tab.
| Property | Value |
|---|---|
| Caption | Big Spenders |
| Visible | True |
A tab can contain one-to-many sections. Each section can contain a data list, among other things.
Click the ellipsis button in the Sections field to open the Sections screen and then click the Add button to open the Edit section screen and add a section to our new Big Spenders tab.
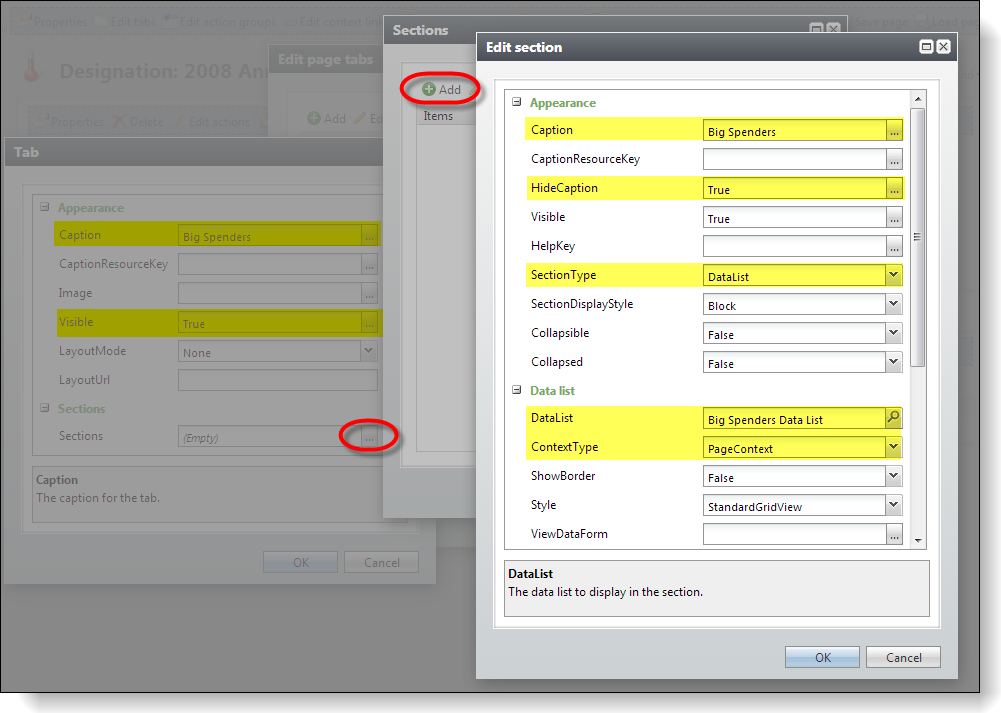
Use the table below to add the properties for our section.
| Property | Value |
|---|---|
| Caption | Big Spenders |
| Hide Caption | True |
| SectionType | DataList |
| DataList | Big Spenders Data List |
| ContextType | PageContext |
Step 8 - Save the configuration and view the glory!
Click OK on the Edit section, Sections, and Tab screens, and then click Save on the Edit page tabs screen to save our configuration settings. The page refreshes and our new tab displays our data list. The data list is filtered by the context, which is the name of the designation.