Add the Project and Global Change Spec
Previous: Overview
Step 1 - Get started... Add a catalog project to a solution
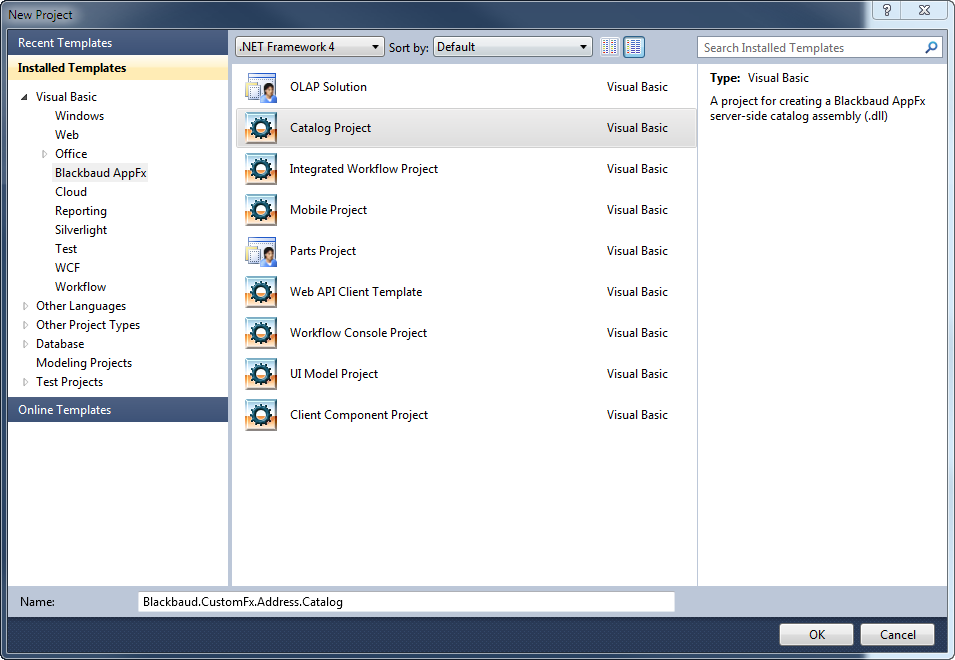
If you do not already have a Visual Studio solution, create one now. To create a new project in the solution, by selecting File\New\Project… from the main menu. A New Project dialog box appears. Select Blackbaud AppFx as the project type and then select Catalog Project from the list of templates.

Step 2 - Add a Global Change Spec (CLR) catalog item to the catalog project.
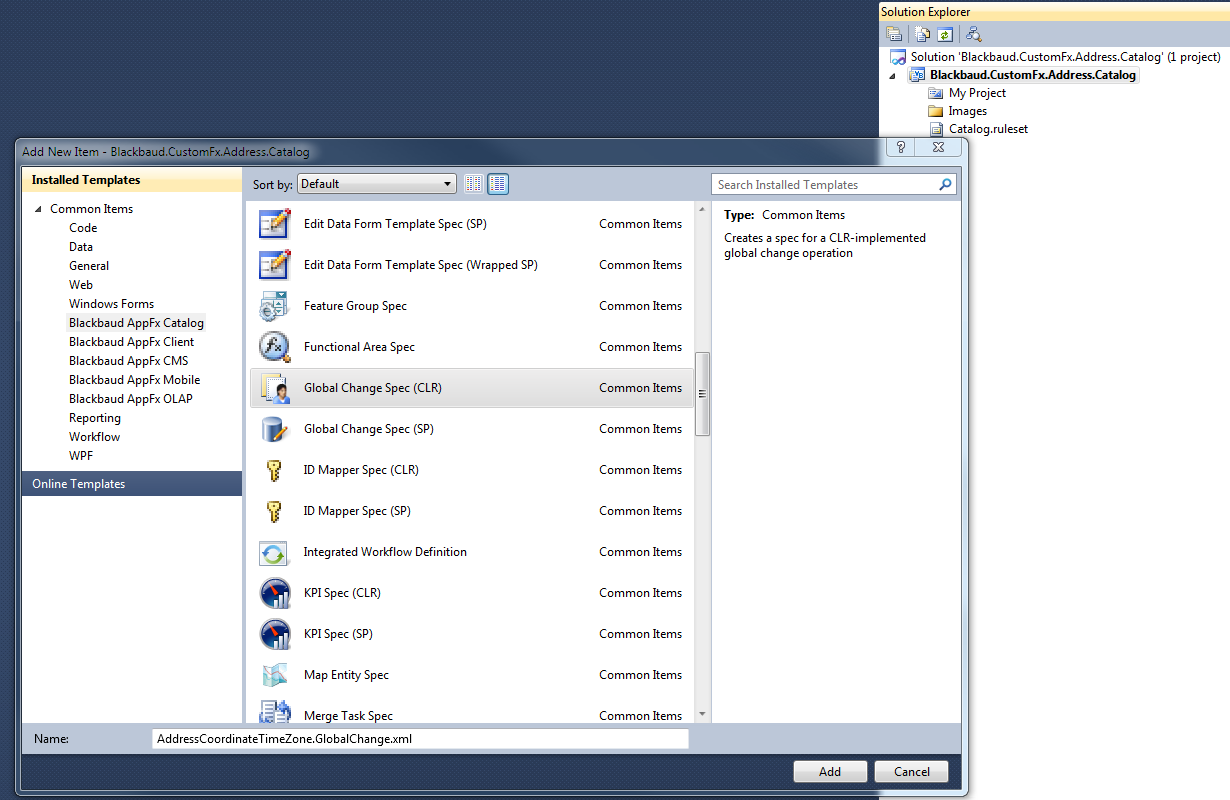
Right-click the catalog project within the Solution Explorer and select Add\New Item... from the context menu (Ctrl + Shift + A).
On the left side of the dialog window, select Blackbaud AppFx Catalog from the list of Installed Templates.
Select the Global Change Spec (CLR) catalog item and give the spec a name. I named the spec file: AddressCoordinateTimeZone.GlobalChange.xml.

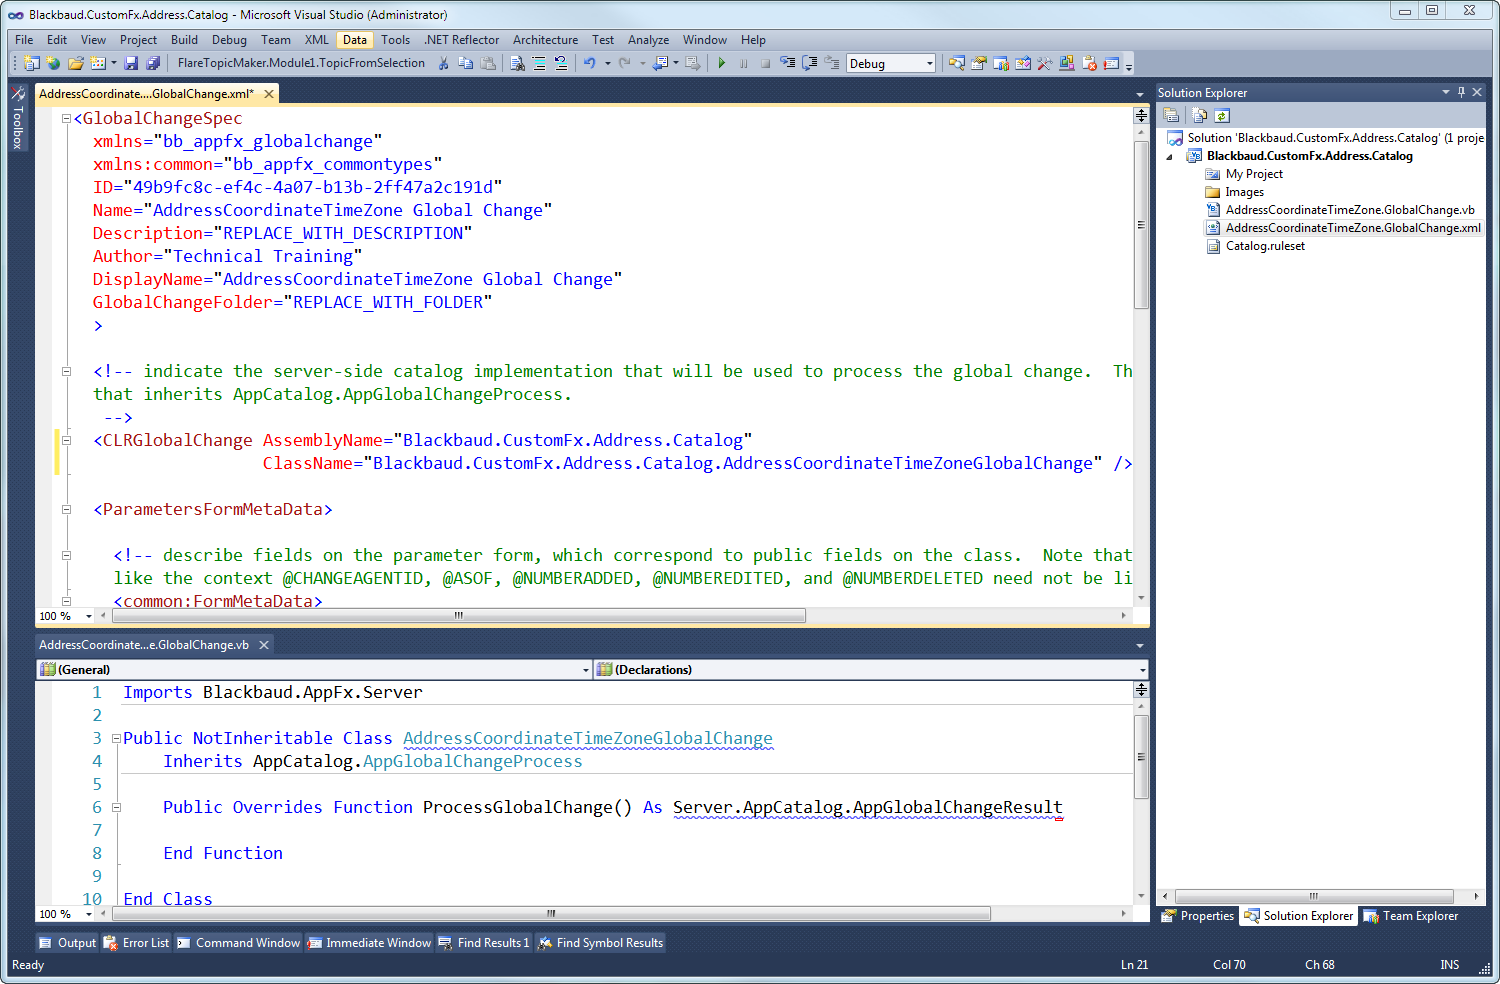
Click the Add button to add a GlobalChangeSpec XML file (catalog item) to the project along with a CLR class file.

Tip: For more details, see Add a CLR based Global Change.