This service pack includes a new Event Registration Form part with functionality improvements and usability enhancements to both the Edit Part screen and the web pages that the part generates on your website.
New functionality improvements for the part include increased support for appeal and campaign data and integration with event preferences. Usability enhancements include better organization of the part's design options to avoid scrolling, and help text improvements to clarify what appears on the page. For website users, usability enhancements include a simplified registration process that has been reduced to three steps and numerous quick links so users can autofill registrant data.
Show Me: Watch a video about the new Event Registration Form part.
The original Event Registration Form part is now called Event Registration Form (Classic). It does not upgrade to the new event part and remains available to use on your website with its original design. There are a few features the Event Registration Form (Classic) includes that the new Event Registration Form Edit part does not, such as Payment 2.0 part integration and the ability to link to another page from the event. You may want to consider this when you create the new part.
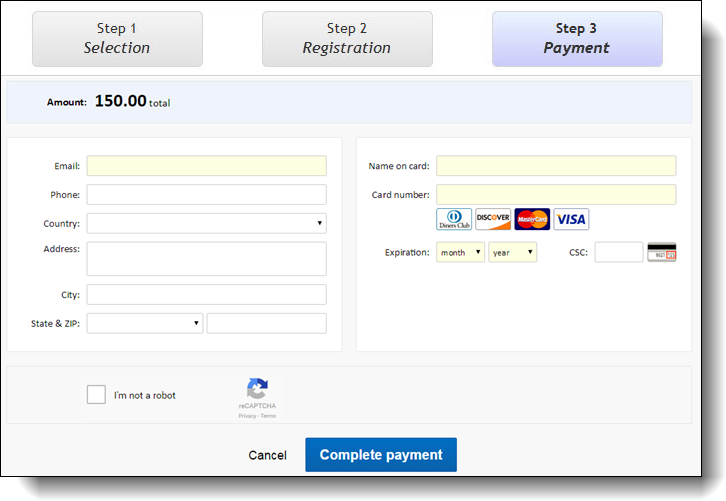
When you include the new Event Registration Form part on a page in Site explorer, the registration options appear on three separate pages on your website. Each page includes a status bar so website users can view their progress as they complete the event registration process. Users can click the button in the status bar to go to the previous or next page.
Note: The Step 3 Payment button appears when a user selects a paid event type on the Step 1 Selection page and then clicks Continue.
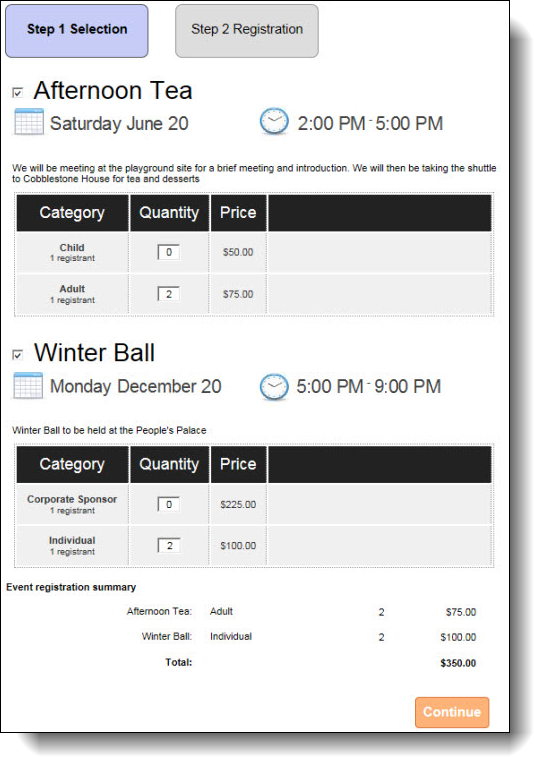
Step 1 Selection — The first page of the event registration process displays event details from Blackbaud CRM such as the descriptions, start dates, and times for events. Website users select events to attend and the number of registrants, and if you include a field for donations, they can also make additional gifts. The summary of the user's selections displays at the bottom of the page and dynamically updates as the user enters information.
Step 2 Registration — On the second page, website users enter details for all registrants. To copy contact information, users can select Use this address for all registrants and click Apply to all registrants for certain fields. After users enter registrant information for an event, links for the registrants appear on the next event, and users can click the links to autofill registrant information.
In the following screenshot, you can view the checkboxes and links that allow users to autofill additional registrant information.
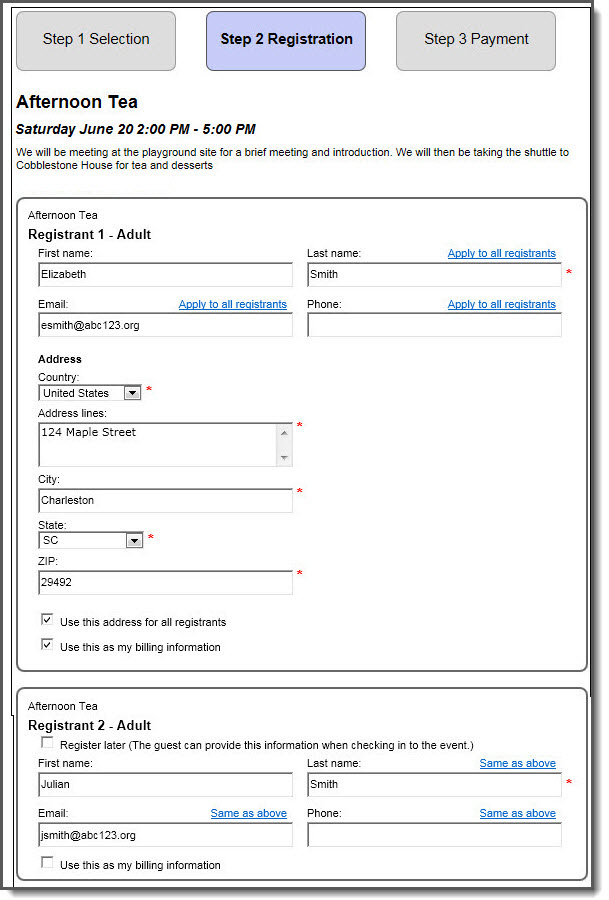
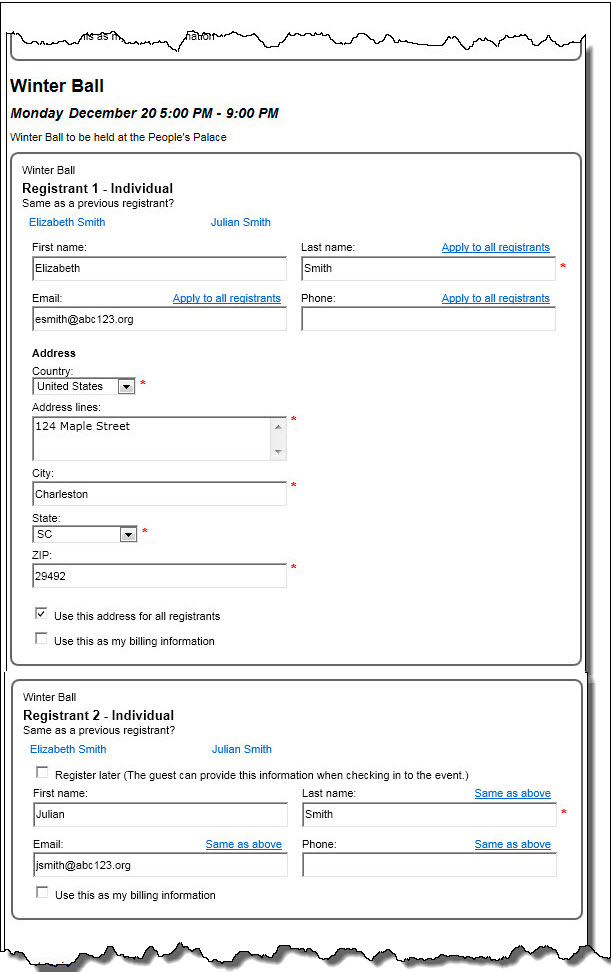
In the following screenshot, you can see that in addition to the checkboxes and quick links that are available on the first event, the next event also includes links for previously entered registrants. When users click these links, registrant information autofills in the registrant's box.
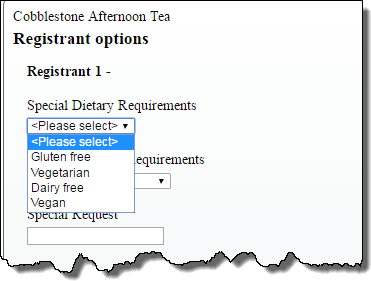
The user also selects applicable options for the event depending on the details you select to include on the part. For example, if you select to include an event preference for dietary requirements, the user may select vegetarian.
Step 3 Payment — On the third page of the event registration process, the program renders the secure payment page on the Blackbaud server to process transactions for event registration payments. When website users select multiple events with multiple charges, the total cost automatically defaults on the secure payment page. For information about the secure payment page, refer to the Parts Guide.
Note: When you include free events on the part and a website user only registers for free events, this page does not appear.
When users submit event registrations, event transactions download into the BBIS Event Registration Transaction Batch type in Blackbaud CRM. After you process transactions, event registration data appears on the applicable records in Blackbaud CRM. For information about event registration transactions and where data maps to in Blackbaud CRM, refer to the Web Transactions Guide.
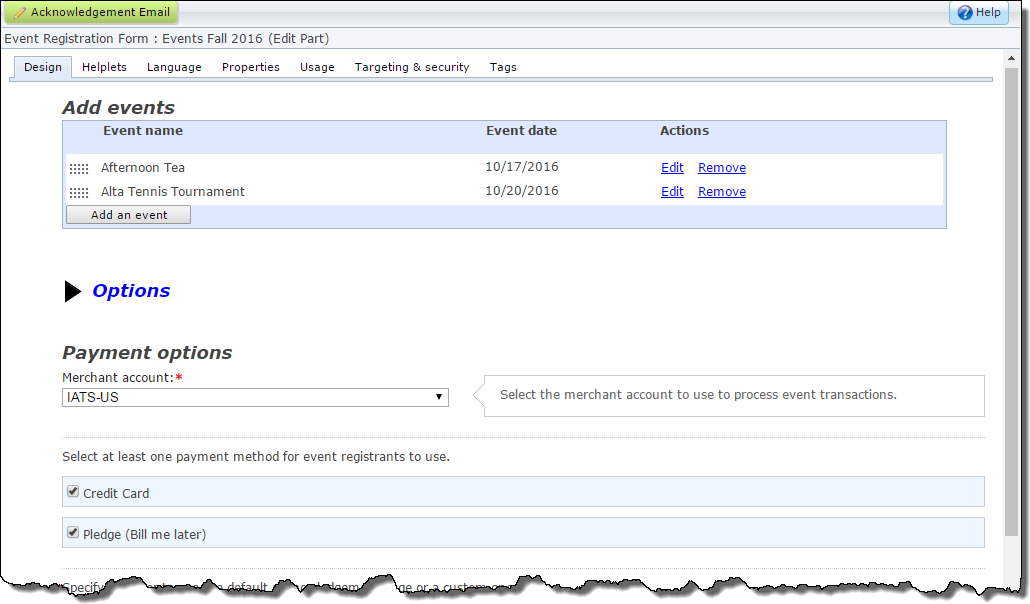
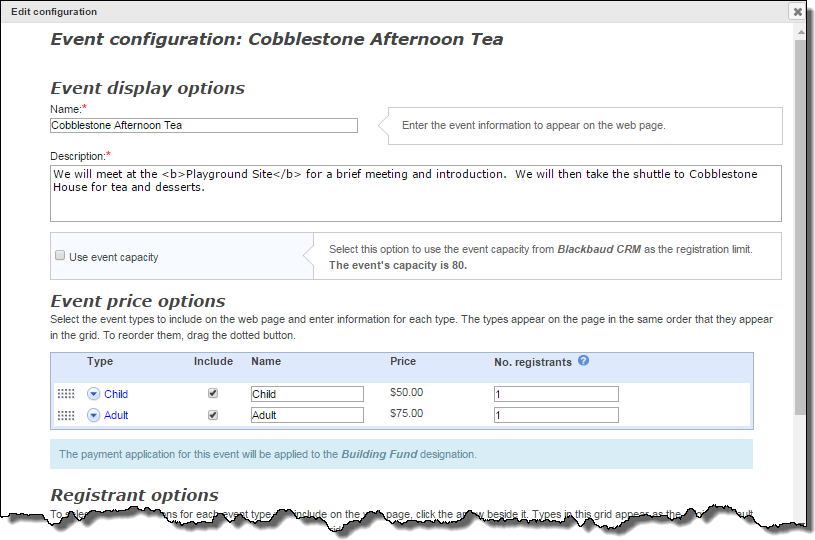
When you design the new Event Registration Form part, you now configure each event's options in its own configuration screen. You can enter text and HTML in the Description field and select Use event capacity to limit the maximum number of registrations based on the event record’s capacity in Blackbaud CRM. The Event price options grid includes new column headers and help text to clarify what appears on the web page. You can also sort the event types in the order you want them to appear on the page.
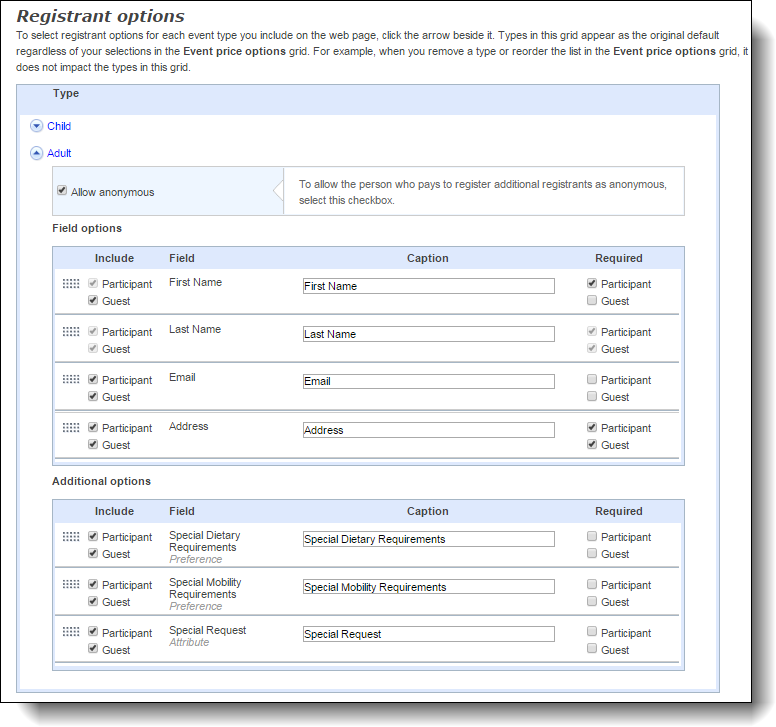
Under Registrant options, you can expand each event type and select whether to let users register additional guests as anonymous. You can also select and reorder biographical fields and additional options that will appear on the registration page. In response to your feedback in the idea portal, the part now also integrates with preferences from the event record in Blackbaud CRM. Event preferences are listed with participant attributes under Additional options. In both grids, you can change the text that displays in the Caption field. In the Include and Required columns, select which fields to display and require for primary registrants and their guests.
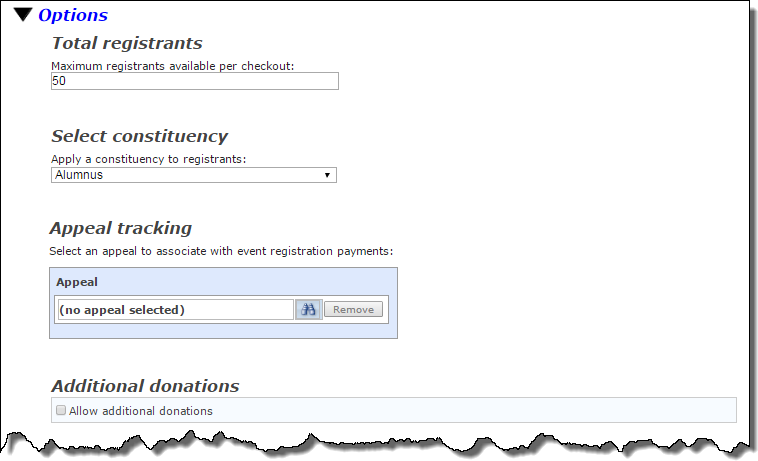
When you click Options, important options appear for the part such as how many people can be registered in one web transaction and which constituent code to apply to registrants. You can also select an appeal to associate with registration payments and specify whether to include a field for additional donations on your registration page. In this section, you also select how you want free events to appear on the page.
When you create a new Event Registration Form or edit it, the Edit Part screen is condensed by the event configuration screen and the Options link. This greatly enhances your ability to view the part so you can quickly identify the area to make your changes.