After locating the Luminate Online ID, you will need to cross-reference that ID to the offline database value.
-
Choose Data Management on the navigation bar and then select Import/Export from the drop-down menu. The Data Sync Operations list page opens.
-
Click the Cross-Reference Types tab at the top of the application area to open the list of Cross-Reference Types.
Note: The standard cross-reference tables may appear in the list, or your site may have custom cross-reference entries in which case this page will show a different list. Regardless, the process for maintaining the cross-reference tables is similar.
-
Click on the Transaction Campaign link to display a list of the currently defined campaign cross-references.
-
Click the Create a new cross-reference button.
-
On the New Cross-Reference details page that opens, provide the following:
-
Luminate Online Value - enter the Luminate Online Campaign ID
-
Foreign Value - enter the campaign value from the offline database
-
Security Category - select a security category to associate with this cross-reference using the drop-down menu provided; this category will determine which administrators can see and work with this cross-reference
-
Description - enter a word or phrase to identify this new cross-reference
-
-
Click Save. The screen refreshes and records your new cross-reference at the bottom of the page.
-
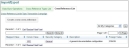
Click Cancel to return to the cross-reference list for campaigns. Your new cross-reference should now be listed as shown:
In this example, the next time a Transaction Download data sync is run, you should not receive an error entry regarding your campaign cross-reference.
