Donation Forms - Extras Tab
On the Extras tab, you set up suggested gift amounts, enable recurring gifts and pledges, allow anonymous gifts, and more.
Configure options on the Extras Tab
-
Set up the suggested gift amounts in the grid:
-
Rearrange the amounts by dragging and dropping.
-
Enter a name to display on the donation form in the Display Name field if needed.
-
Select which amount should be selected by default on the donation form in the Pre-selected amount column.
Tip: Blackbaud’s research indicates that you can significantly increase your average gift amount by selecting a default giving level.
-
Click Add suggested gift to add additional amounts.
-
Click Remove in the right-hand column if necessary.
-
To allow donors to enter their own amounts, select Allow other gift amounts and entering a minimum amount.
Note: To offset fees associated with credit card transactions, the minimum must be at least $1.
-
-
To allow donors to add comments on the donation form, select Include Comments.
Note: Comments download to The Raiser’s Edge as gift attributes.
-
To display a progress bar on the donation form that shows how much has been raised, select Include a goal and enter the dollar goal amount. As online donations are made, the progress bar will automatically adjust.
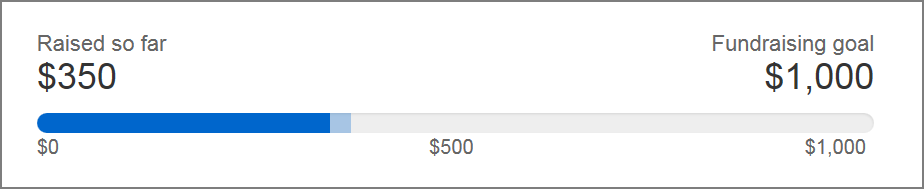
Note: Offline donations must be entered manually to be included in the count.
-
To allow donors to make sustaining gifts, select Include the recurring gift option.
-
Click Add a Gift Frequency to enable different payment options. Frequencies include, Weekly, Monthly, Quarterly, Semi-Annually, and Annually.
Note: If your organization does not use a US bank account or The Raiser's Edge 7.93 Patch 10 or higher, you must set up the Electronic Funds Transfer module.
-
-
Select Include the tribute gift option to allow donors to designate gifts as tributes.
Note: To use the Tribute option, you must set up the Honor/Memorial tracking module in The Raiser’s Edge for processing tributes.
-
Select Allow donors to notify someone of their gift to collect the acknowledgee’s mailing information from the Honor/Memorial tracking module in The Raiser’s Edge. This allows you to send acknowledgement letters for gifts given in someone’s honor or memory. For more information, see How to prepare Honor/Memorial Acknowledgement Letters.
-
To let users select a tributee, select Allow donors to honor whomever they want with tribute gifts and then select the tribute types.
-
To set up a tribute for a specific individual, select Allow donors to honor a specific individual that you specify. Then select the individual to honor and tribute text to display on the form.
-
-
To allow donors to give anonymously, select Allow anonymous gifts. When you select this option, a checkbox appears on the donation form to allow donors to choose not to be recognized for their donations.
-
To allow corporations to donate, select Allow corporate gifts. When you select this option, an Organization name field appears on the donation form allowing you to link the donation to the appropriate organization in Raiser’s Edge.
-
In the next section, select whether to include additional fields on your donation form and whether to require them to be completed.
Tip: Exercise caution when adding extra fields to your form. Lengthier forms often result in fewer transactions per page view.
-
Click Add Attribute to add gift attributes to the donation form. Gift attributes are added to the Attributes tab of the gift record in Raiser’s Edge and allow more sophisticated tracking of the donor’s gifts. When you click Add Attribute:
-
Select the type from the drop-down menu in the Attribute column.
Note: If you don’t see the gift attribute you want, you can add it in Raiser’s Edge by clicking Config > Gifts > Attributes.
-
Change the name if needed in the Display Name column.
-
Select the checkbox in the Require column if necessary.
-
Drag and drop the attributes to reorder them.
-
Click remove if needed.
-
-
Select Create mobile version to create a version of the donation form that can be viewed on mobile devices.
Note: This option is selected by default as it is highly recommended.
-
Click Save & Continue to open the Look & Feel tab.