Get Started with Tables
This tutorial reviews tables and table entries in Raiser’s Edge NXT and how to maintain them. You’ll also review how to use system record IDs to look for table entry uses in Query.
In Raiser’s Edge NXT, drop-down lists are referred to as tables. Options in the drop-down list are table entries. From Settings, Tables, you can standardize table entries for all your users, thereby making the information easy to retrieve from your database in queries and reports.
For more information on how to add tables and table entries, see Tables.
View table entries
If you have multiple table entries that represent the same thing, such as Phone Call and Telephone Call, your queries and reports might not show all the records you want them to include. To find tables that may need clean up, use the Code Tables report in database view. This report lists all table entries for each table.
To access the report in database view, from Configuration, Tables, select a table. From File, select Code Tables Report.
Note: Though Tables is moving to web view, the Code Tables report remains available in database view.
Clean up table entries
To tidy your entries, navigate to Settings, Tables, select the name of the table, and select Table cleanup.
Note: Table cleanup is not supported for all tables, so this option may be disabled.

 Replace table entries
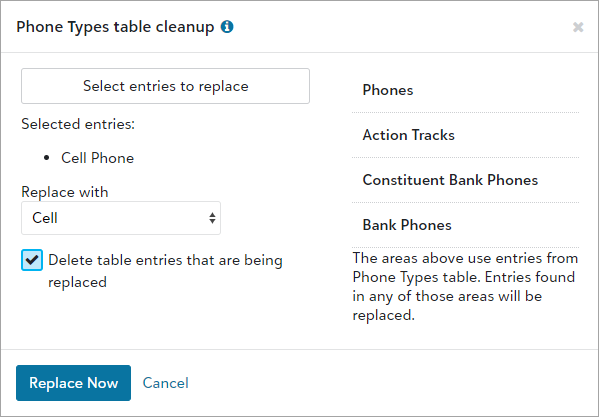
To replace duplicate table entries, select the entry to replace and the entry to replace it with. For example, replace Cell Phone with Cell to update all records that include Cell Phone.
Note: Select Delete table entries that are being replaced to also remove the table entry option from the table entry list so that users can't add it to new or edited records.
Select Replace Now and review your table entry list.
 Delete a table entry
 To remove a table entry without merging it, select Delete from the menu next to the table entry in the table entries list. You can only delete a table entry if it's not in use on a record.
View table entry usage
To track where a table entry is in use, navigate to Settings, Tables, select the name of the table, and select View uses from the table entry menu.
Note: View uses is not supported for all tables, so this option may be disabled.
Record types that include the table entry appear. Select each type to view the identifiers for the records where the entry is in use.
Record identifiers
To make saving and accessing data consistent, each record has unique identifiers associated with the field, such as constituent and gift IDs. You can use the identifier for some record types when you create queries in the database view.
Query on record identifiers
To use the identifiers to find records, copy the list in the web view and then paste it when you select the criteria for a query in the database view.
 Copy record identifiers
From View uses, select a table entry to see its identifiers. To copy the list for the table entry, select Copy.
Note: Each record type contains a unique set of records. Copy the list and query records for each record type separately.
 Query on identifiers in database view
In the database view, from Query, create a new query.
Note: Choose a query type based on the record type you copied. For example, if your table entry is used in an action record, select the action query type.
Under Available fields, select the node that contains the fields and set the operator to One of.
In the input field, scroll down to paste the copied list into the last row. Scroll up to see the list of identifiers.
Select OK.
Choose the output fields.
Select Run Now.
Note: If the field isn’t available for the query type you selected, you can manually look through records to find entries. Use the record count from the View uses results to confirm that your manual search results are complete.