Instructions
If you use the VMware image provided by your instructor, the lab is saved to the following location on the file system within the image:
E:\Training Class Support Material\SDK\UIModel\My Code\
-
Create a sub-folder named Labs on your local machine. Within the Labs folder, create a folder named ‘Blackbaud.CustomFx.FoodBank’.
Do this within the folder listed above or the folder location provided by your instructor.
Ex: E:\Training Class Support Material\SDK\UIModel\My Code\Labs\Blackbaud.CustomFx.FoodBank
-
Within this folder, create a Visual Studio solution named Blackbaud.CustomFx.FoodBank and save the solution to the Blackbaud.CustomFx.FoodBank folder.
-
Create a Visual Basic project named Blackbaud.CustomFx.FoodBank.Catalog containing 5 completed TableSpec catalog items used to create the following tables:
-
USR_FOODBANKTYPECODE (CodeTableSpec)
-
USR_FOODITEM (TableSpec)
-
USR_FOODBANK (TableSpec)
-
USR_FOODBANKTXHEADER (TableSpec)
-
USR_FOODBANKTXDETAIL (TableSpec)
-
-
After the specs have been created, load the spec into the catalog using the LoadSpec.exe utility. Load the spec’s in the following order:
-
USR_FOODBANKTYPECODE
-
USR_FOODITEM
-
USR_FOODBANK
-
USR_FOODBANKTXHEADER
-
USR_FOODBANKTXDETAIL
-
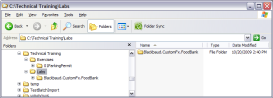
Figure: Visual Studio Directories and Files for the Food Bank Lab