Deprecated - ADFS Manual Configuration
Warning: The options to set up single sign-on (SSO) have changed. Organizations that use SSO will now see a New single sign-on tab on the Authentication settings page in Security and must set up new SSO connections by Oct. 31. This archived guidance for the now-obsolete configuration process will remain available to manage existing connections until the Oct. 31 deadline and will then be removed. For updated guidance to create or migrate SSO connections, see Single Sign-on Setup.
 Archived single sign-on setup guidance for existing SSO connections only
To ease the configuration of single sign-on (SSO) through Microsoft Active Directory Federation Services (ADFS), you can run commands in the ADFS Powershell Snapin to connect to Blackbaud's secure authentication service. If you prefer, you can also manually set up the connection in the ADFS Management Console, such as to alleviate any security concerns.
Tip: For information about how to run commands to configure your ADFS connection, see Deprecated - ADFS Setup.
 Manually set up an ADFS connection
-
In your ADFS Management Console, select Add Relying Party Trust and Start.
-
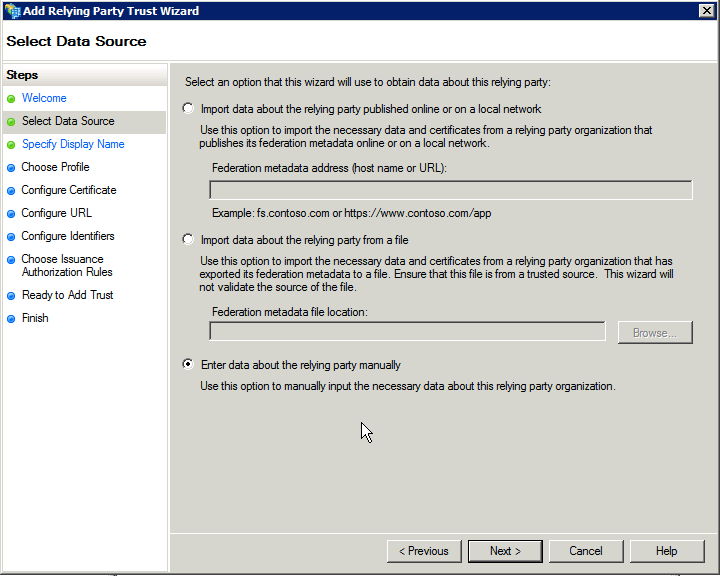
Under Select Data Source, select Enter data about the relying party manually and Next.
-
Under Specify Display Name, enter a unique name — such as Blackbaud ID — to help identify the connection, and select Next.
-
Under Choose Profile, select the default ADFS 2.0 profile, and select Next.
-
Under Configure Certificate, select the default No encryption certificate, and select Next.
-
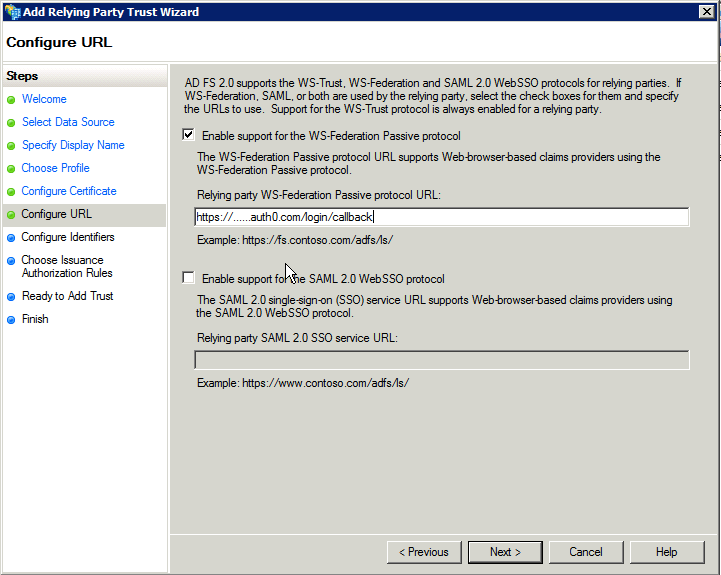
Under Configure URL:
-
Select Enable support for the WS-Federation Passive protocol.
-
Under Relying party WS-Federation Passive protocol URL, enter https://blackbaudinc.auth0.com/login/callback
-
Select Next.
-
-
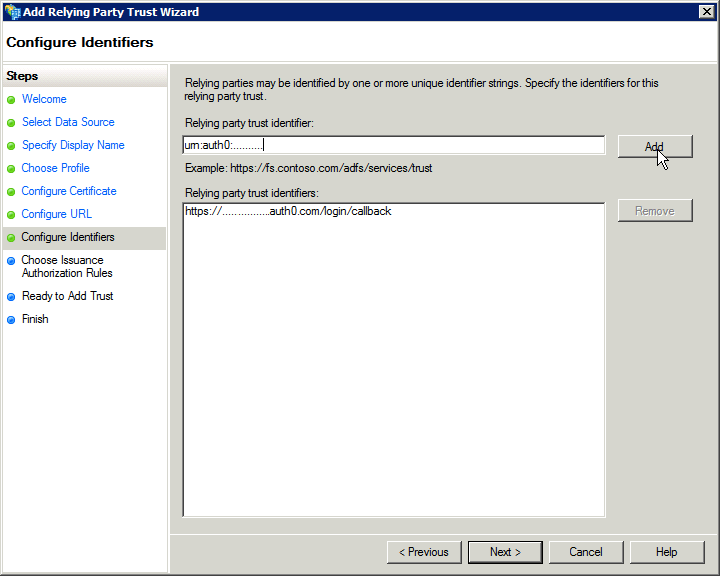
Under Configure Identifiers:
-
Under Relying party trust identifier, enter urn:auth0:blackbaudinc
-
Select Add and Next.
-
-
Under Choose Issuance Authorization Rules, select the default Permit all users, and select Next.
-
Under Ready to Add Trust, select Next.
-
Under Finish, select Close.
-
Select Add Rule.
-
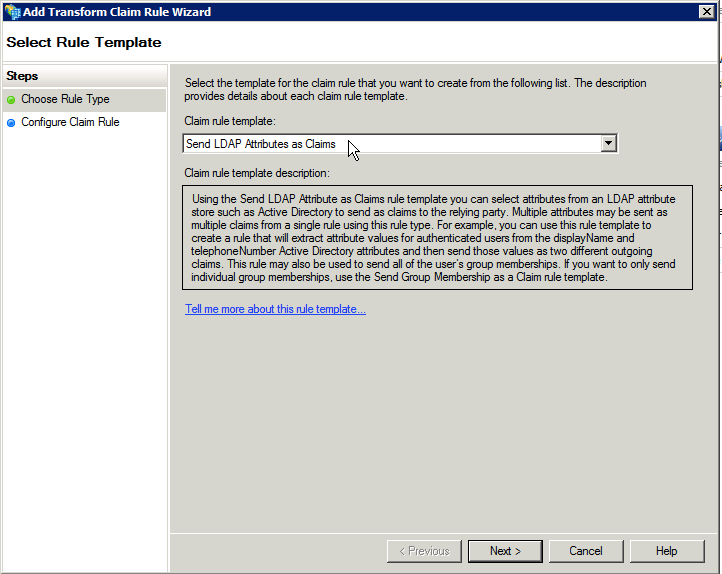
Under Choose Rule Type, select the default Send LDAP Attributes as Claims, and select Next.
-
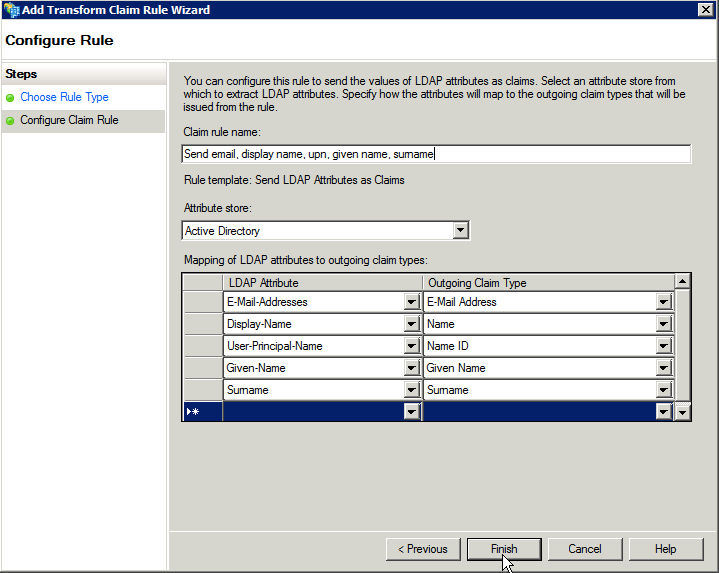
Under Configure Claim Rule:
-
In the Claim rule name field, enter a unique name to help explain what the rule does.
-
In the Attribute store field, select the default Active Directory.
-
Map the LDAP attributes to outgoing claim types.
-
Map the E-Mail-Addresses attribute to the E-Mail Address claim type.
-
Map the Display-Name attribute to the Name claim type.
-
Map the User-Principal-Name attribute to the Name ID claim type.
-
Map the Given-Name attribute to the Given Name claim type.
-
Map the Surname attribute to the Surname claim type.
-
-
-
Select Finish.