Deprecated - SAML 2.0 Setup for OneLogin
Warning: The options to set up single sign-on (SSO) have changed. Organizations that use SSO will now see a New single sign-on tab on the Authentication settings page in Security and must set up new SSO connections by Oct. 31. This archived guidance for the now-obsolete configuration process will remain available to manage existing connections until the Oct. 31 deadline and will then be removed. For updated guidance to create or migrate SSO connections, see Updated - Single Sign-on Setup.
To enable members to sign in to their Blackbaud IDs with their managed OneLogin account credentials, set up a custom Security Assertion Markup Language (SAML) 2.0 app in your OneLogin administrator dashboard, and configure its connection on the Authentication settings page in Security.
Warning: To help prevent an inadvertent lockout, ensure you have another Blackbaud ID outside of your claimed domains with access to the Authentication settings page.
-
In Security, select Authentication and then select Manage SSO settings under Single sign-on.
-
In a separate browser tab, sign in to your OneLogin administrator dashboard with an administrator account.
-
In your OneLogin administrator dashboard, set up a SAML test connector:

-
Select Apps, Add Apps.
-
Under Find applications, search for and select SAML Test Connector (IdP).
-
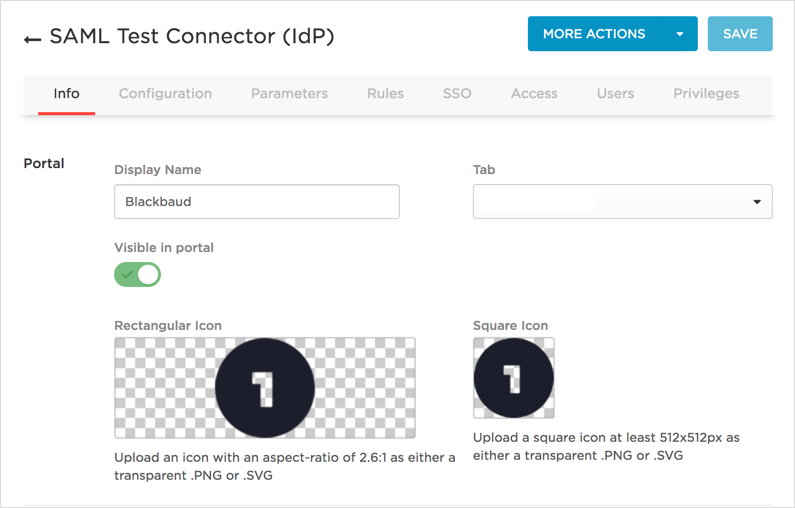
Under Display name, enter a unique name — such as 'Blackbaud' — to identify the connector in your OneLogin portal, and select Save.
-
Enable Visible in portal.
-
For Rectangular icon and Square icon, select Upload and browse to and select the PNG or GIF to use as the app's icon.
-
-
In your OneLogin administrator dashboard, enable single sign-on:

-
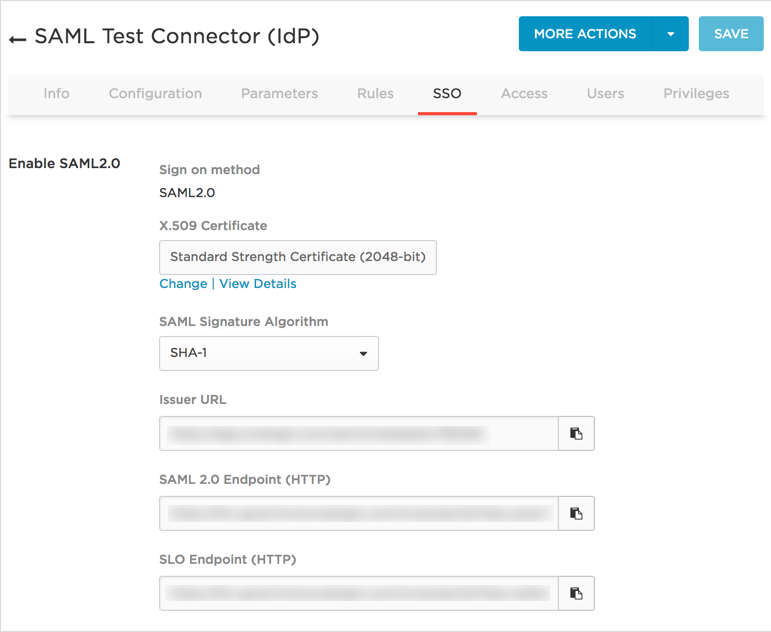
Select SSO.
-
Under the X.509 certificate field, select View details, and then select Download and return to the SAML test connector.
-
Under SSO, copy the SAML endpoint URL in the SAML 2.0 endpoint (HTTP) field.
-
-
On the Authentication settings page in Security, set up the SAML connection:
-
Under Single sign-on, select Use SAML 2.0.
-
Under Configure your connection, select Get started or Edit connection details.
-
In the Organization display name field, enter how your organization's name should appear to your members when they sign in.
-
In the SAML sign-in URL field, paste or enter the SAML endpoint URL from your OneLogin administrator dashboard.
-
With a bookmark app, users can sign in to their Blackbaud solution directly from your IdP. To set up a bookmark app, in the IdP-initiated SSO URL field, enter the URL for your Blackbaud solution.
Tip: Your IdP-initiated SSO URL must use a Blackbaud ID-supported domain, such as blackbaud.com. For more information, see Redirect Settings.
-
Under Signing certificate, select Choose file, and then browse to and select the privacy-enhanced electronic mail (PEM) file downloaded from your OneLogin administrator dashboard.
-
Enter the parameters OneLogin will use to permanently identify member details:
-
In the NameID field, enter http://schemas.xmlsoap.org/ws/2005/05/identity/claims/nameidentifier
-
In the Email address field, enter Email.
-
In the First name field, enter First name.
-
In the Last name field, enter Last name.
Note: You'll create these parameters when you configure your OneLogin IdP.
-
-
Select Save.
-
-
On the Authentication settings page, under Single sign-on, select Continue under Configure your IdP.
-
In your OneLogin administrator dashboard, set up the application:

-
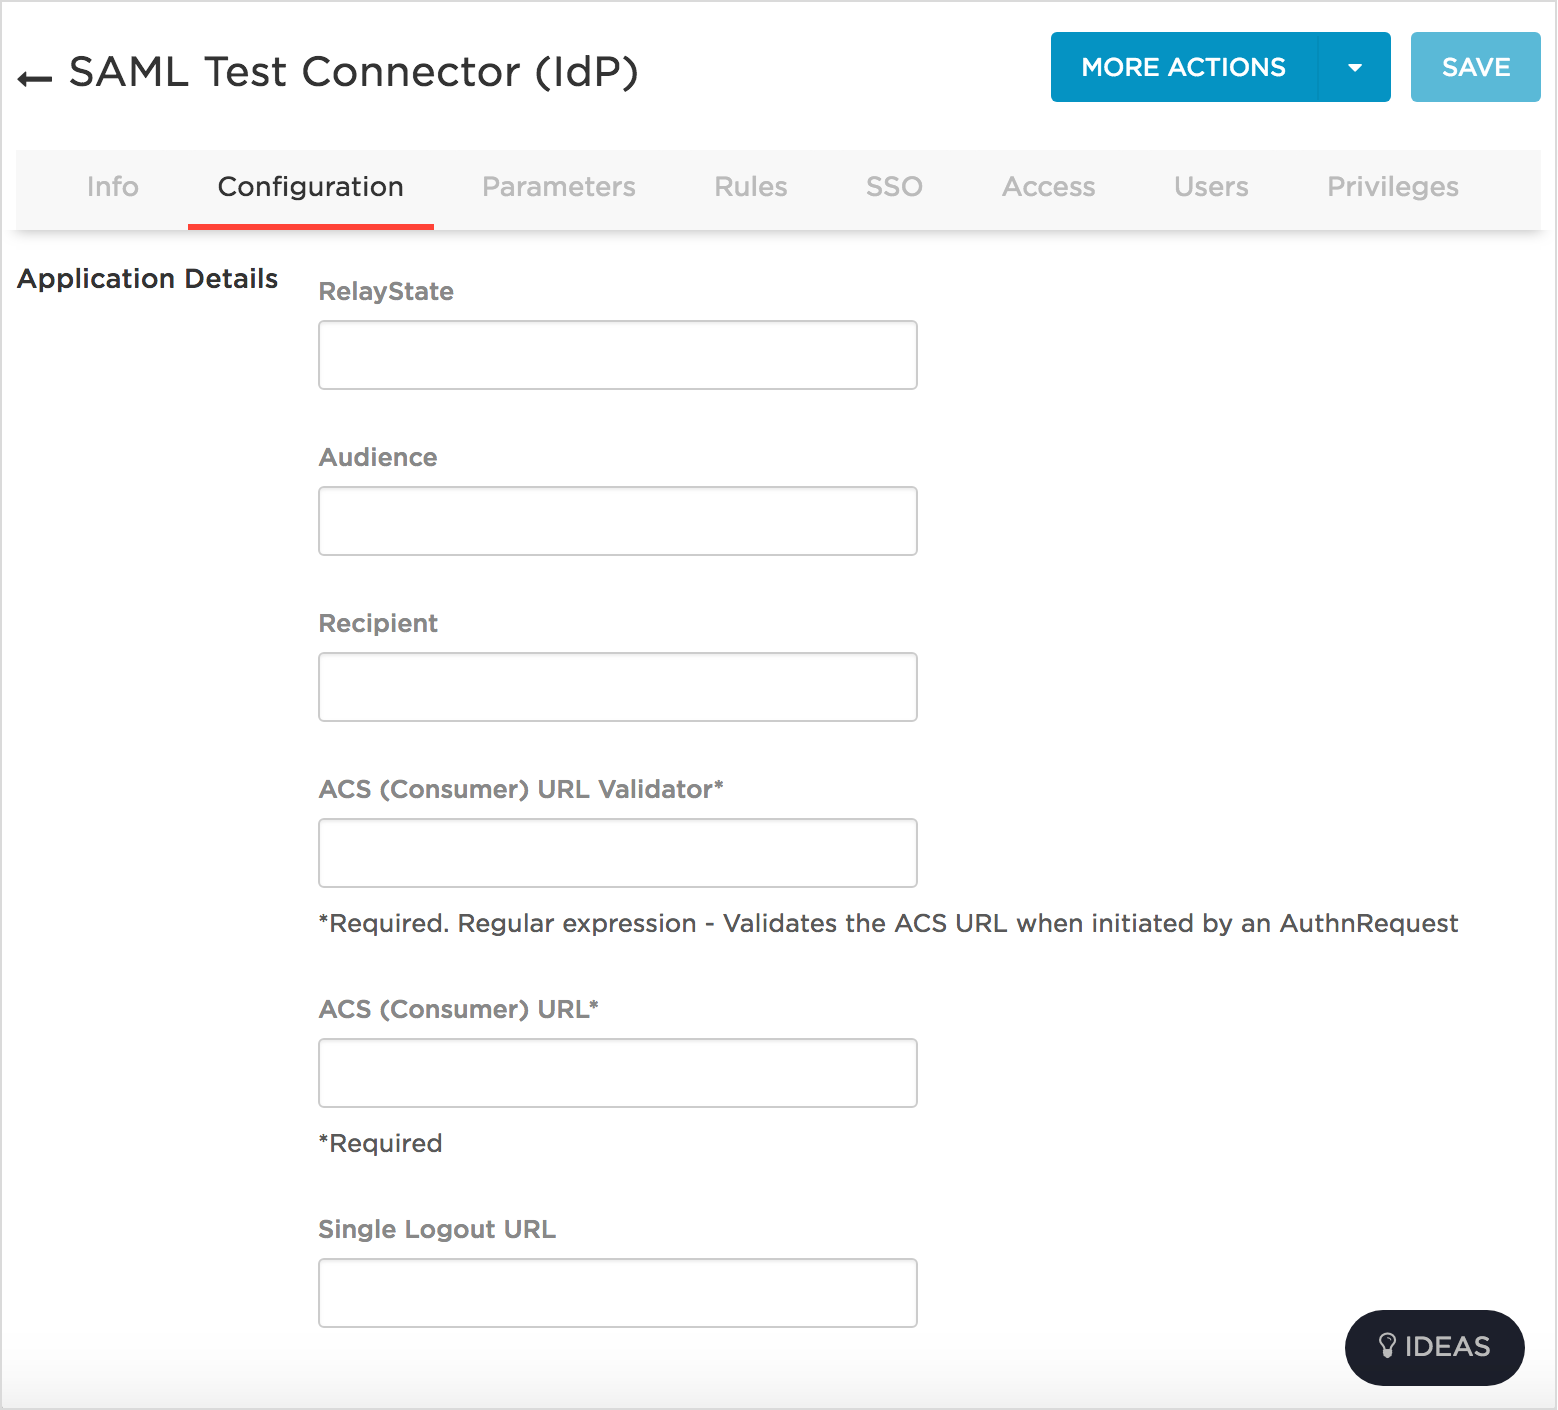
Select Configuration.
-
In the Audience field, paste or enter the entity ID from Authentication.
-
In the Recipient and ACS (consumer) URL fields, paste or enter the assertion consumer service (ACS) URL from Authentication.
-
In the ACS (consumer) URL validator field, enter https:\/\/blackbaudinc.\.auth0\.com\/login\/callback
-
-
In your OneLogin administrator dashboard. set up the parameters used to identify users:
-
Select Parameters.
-
Under Credentials are, select Configured by admin.
-
Select Add parameter, and create and map custom parameters for each field name used to identify user details.
Note: The SAML test connector automatically includes the NameID (fka Email) field, with a value of Email.
-
For NameID, select OneLogin ID in the Value field, and select Save,
-
For email, select Include in SAML assertion, select Email in the Value field, and select Save,
-
For firstname, select Include in SAML assertion, select First Name in the Value field, and select Save,
-
For lastname, select Include in SAML assertion, select Last Name in the Value field, and select Save,
Warning: Your IdP may require different OneLogin parameters. If your connection is unsuccessful, consult your IdP to determine which parameters you should use to identify member details.
-
-
Select Save.
-
-
On the Authentication settings page, select Save.
To properly recognize and redirect members to OneLogin when they sign in, identify which email domains your organization uses. For more information, see Claimed Email Domains.
After you set up your connection and claim your email domains, test the connection to verify your organization can now use OneLogin to sign in to Blackbaud solutions. For more information, see Test Mode.
After you set up your connection, you can turn on SSO. When you turn on SSO, anyone who signs in to their Blackbaud ID with one of your claimed domains is redirected to your organization's OneLogin login. After they authenticate with their managed OneLogin account credentials, their Blackbaud ID:
-
Automatically redirects to your organization's OneLogin login for future sign-ins
Tip: By default, members redirect to their Blackbaud ID profile when they sign in through your OneLogin login. To instead open a different Blackbaud solution, edit the redirect. For more information, see Redirect Settings.
-
Uses your OneLogin administrator dashboard for password updates, lockouts, and similar authentication management
To complete the connection to OneLogin, select Learn about connecting SSO and Connect with SAML.
Note: After you enable SSO, resend any pending invitations sent before the connection to OneLogin.
Tip: To clear your setup and start over, select Erase all single sign-on settings. For more information, see Deprecated - Single Sign-on Setup.