Complete Your IRS Income Verification
Financial Aid Management's IRS integration allows Blackbaud to securely receive information from your Form 1040 - U.S. Individual Income Tax Return, directly from the IRS. Depending on your school's requirements, you may still need to upload additional documents.
Note: Not sure if you need to complete the IRS income verification? After you submit your financial aid application, check the Verification section on your Home page to see whether your school offers or requires IRS income verification.
To complete IRS income verification, you must complete both parts of the process:
-
E-sign the Halcyon Consent Form and Form 8821 - Tax Information Authorization.
-
Approve the data transfer authorization request on IRS.gov using your ID.me account.
Start the Verification Process
-
On your Home page, select Start verification.
-
Continue based on your school's requirements:
-
If IRS income verification is required: The Dropbox Sign page opens. Continue to Part 1: E-Sign and Complete Authorization Forms.
-
If IRS income verification is optional: Choose one of the following:
-
Upload all documents: Manually upload the income verification documents required by your school. See Documents for more information.
-
Allow IRS data transfer: Allow Blackbaud to securely receive your Form 1040 data directly from the IRS. Depending on your school's requirements, you may still need to upload additional documents.
-
-
-
If IRS income verification is optional, select Submit and continue to Part 1: E-Sign and Complete Authorization Forms.
Part 1: E-Sign and Complete Authorization Forms
If you select Allow IRS data transfer, or if your school requires IRS income verification:
-
On the Dropbox Sign page, select Get started to go to the first action item in the forms.
-
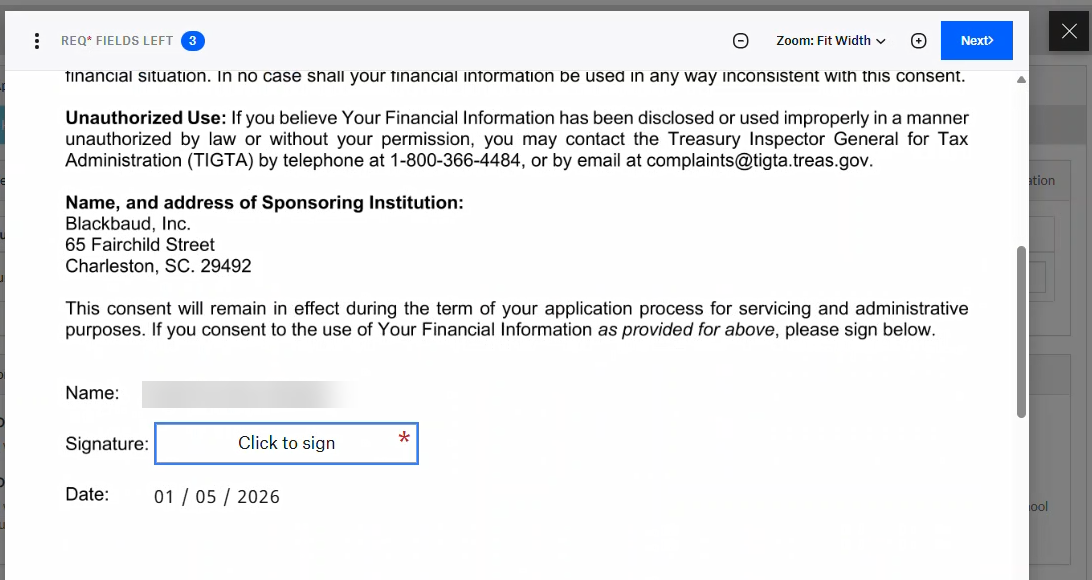
Select Click to sign.
-
Draw, type, or upload your signature.
-
Select Insert to add your signature to the form.
-
Select Next to move to the next required field.
-
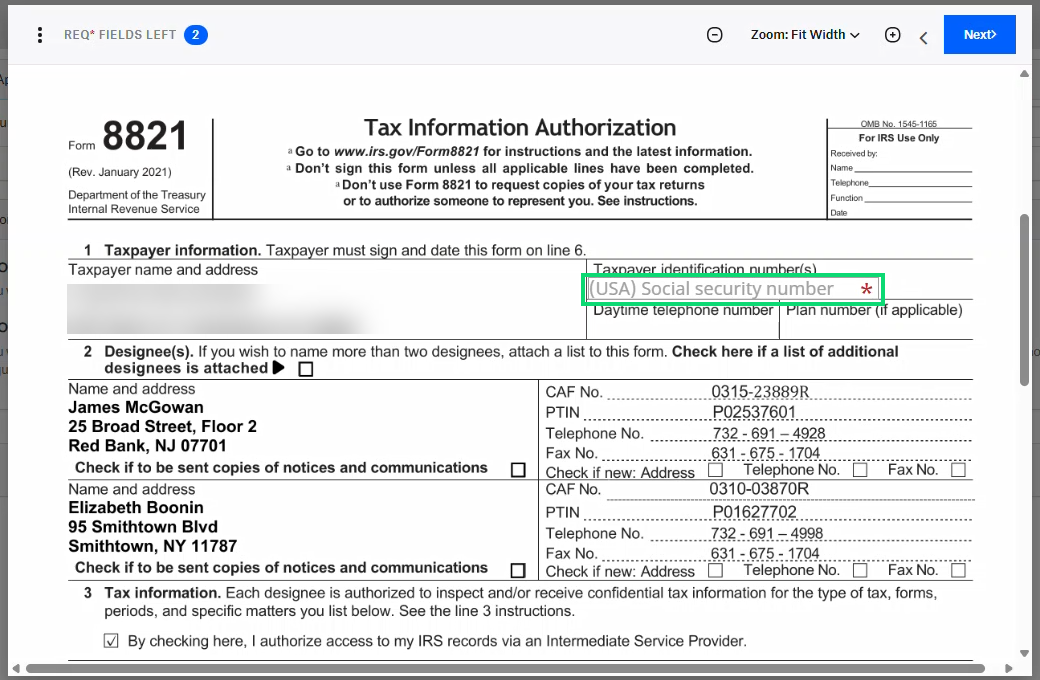
In Section 1 of Form 8821, enter your Social Security Number.
Note: Blackbaud Financial Aid Management does not store or save your Social Security Number within the system.
-
Select Next.
-
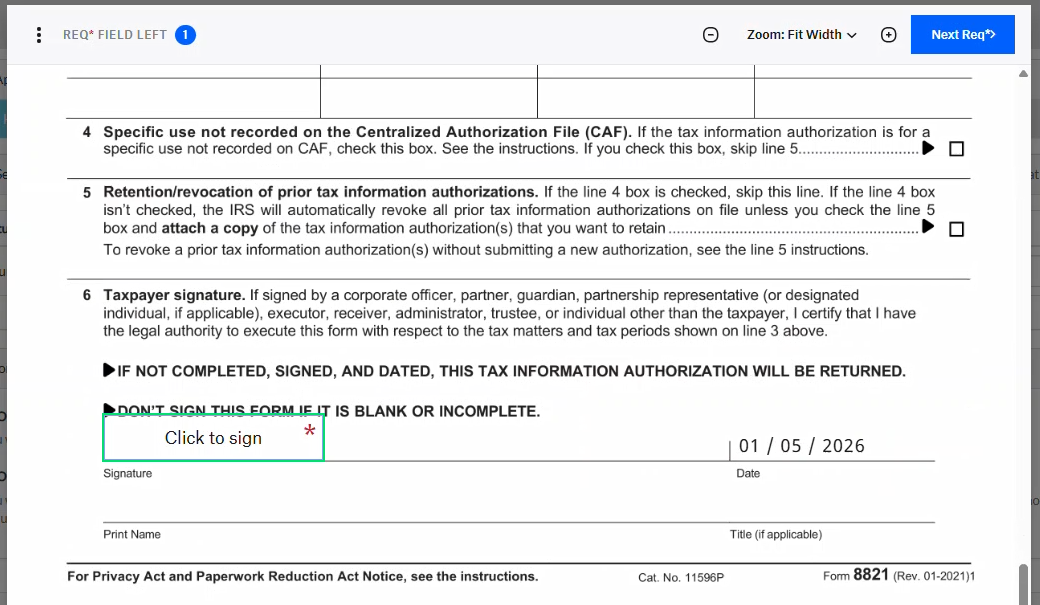
In Section 6, select Click to sign to insert your signature again.
-
Select Continue at the top of the page.
-
Select I agree to consent to the terms of service and confirm that you are legally bound by the signed documents.
-
Select Close to return to your financial aid application.
-
Select Submit.
Important: The Verification section on your Home page displays Completed, but you are not finished yet. You must complete Part 2 to finish IRS income verification.
Part 2: Approve Data Transfer Authorization Request on IRS.gov
After you submit the Halcyon Consent form and Form 8821, Halcyon sends you an email with instructions for approving the IRS data transfer request.
Look for an email with the following information:
-
Sender: Halcyon Solutions (taxwallet@halcyonsw.com)
-
Subject: Important: Action Required for Your Financial Aid Application with BLACKBAUD
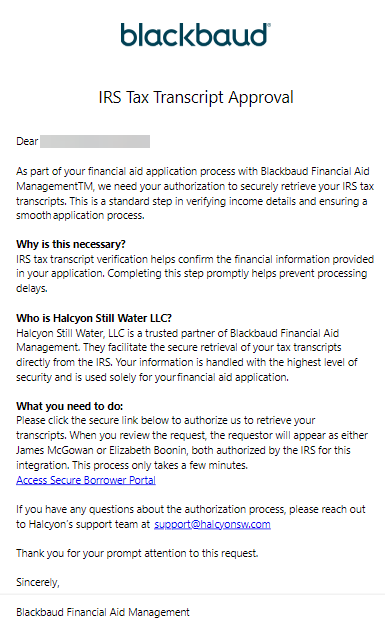
Note: If you have any questions about this authorization process on IRS.gov, contact Halcyon's support team at support@halcyonsw.com.
Approve the Tax Information Authorization Request:
-
Open the email from Halcyon and select Access Secure Borrower Portal.
-
Follow the prompts to create or sign in to your ID.me account.
Note: The IRS uses ID.me for secure authentication and identity verification. See the ID.me help center for more information.
-
Follow the prompts to generate the request.
-
Under Power of Attorney and Tax Information Authorizations, locate the TIA request and select Approve/Reject.
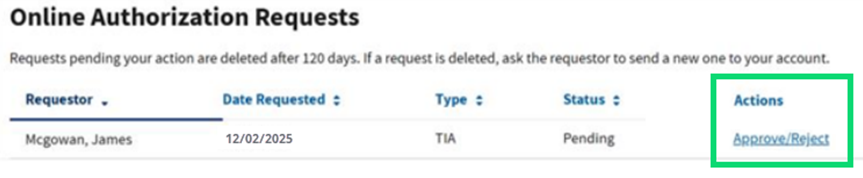
Tip: The request will display Mcgowan, James or Boonin, Elizabeth as the Requestor. Both are authorized by the IRS for this integration.
-
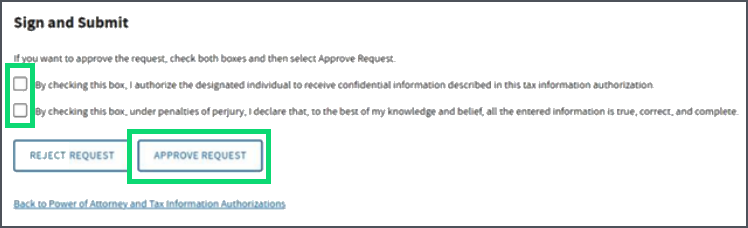
Select both checkboxes, then select Approve Request.
Tip: When finished, return to your Home page in Financial Aid Management and check for any required documents.