Translate Customized Emails
Default system templates are translated automatically based on the recipient language setting. Customized email copies are not translated automatically, so each language version must be created and maintained manually.
Use translations to deliver clear, localized communication to international users while keeping your program messaging consistent.
Before translating, make sure your base custom copy is finalized. If needed, see Customize Emails for setup steps.
Add a translation to a custom email copy
-
Go to Settings > System Emails.
-
In the System Emails table, find the template copy you want to translate.
-
Select the Show copies arrow to expand the template and view available copies.
-
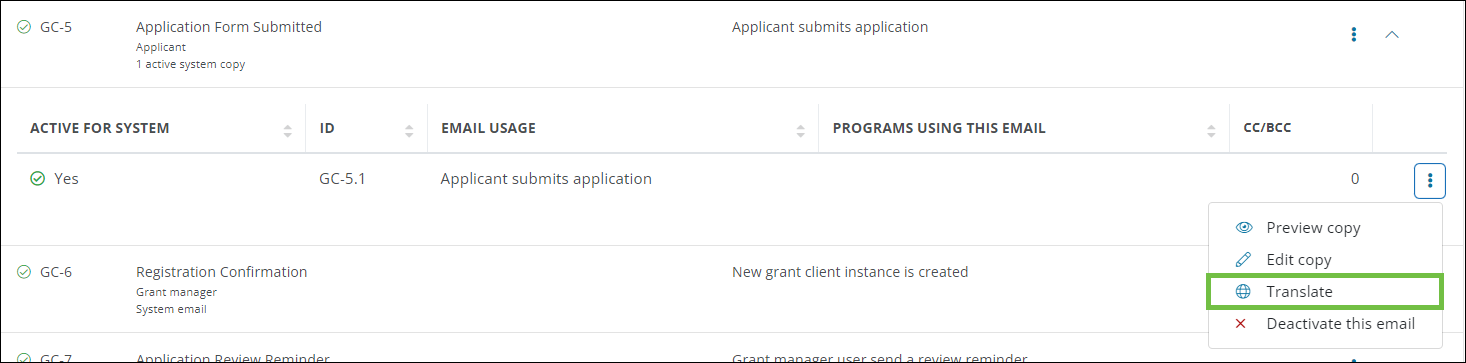
Select the ellipsis next to the target copy, then select Translate.
-
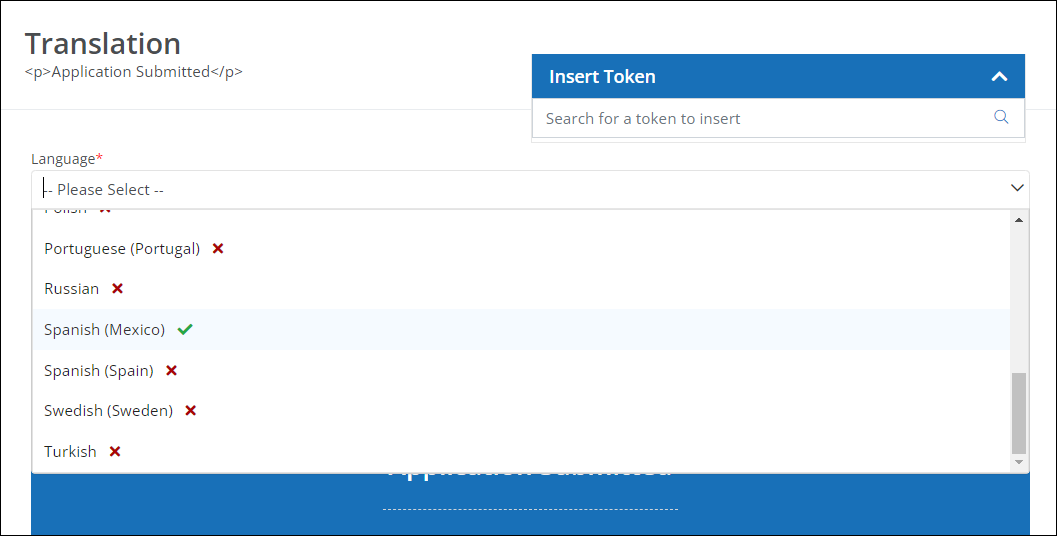
In Translation, select the language to edit.
Note: A checkmark indicates a translation already exists. An x indicates the language has not been translated.
-
Enter translated text for the subject, banner, and content fields.
-
Save your changes.
Token behavior in translated emails
Note: Tokens such as {{FIRST_NAME}} and {{ORGANIZATION}} are inserted as token values and are not automatically translated by the system.
For token usage patterns and formatting guidance, review How to Add Tokens to Content.
Preview and maintain translations
After adding translations, you can preview each language option when managing custom copies. Start from Manage Custom Emails and select the language in preview.
Tip: Return to the Translation screen any time you update source content so translated versions stay aligned.