Add Form Fields to Reports
Fields can be quickly added to your reports using the Add Form Fields tool. This allows you to choose available fields from the forms tied to your report, update the name of the column, and specify their order.
-
Navigate to the Reporting > Ad Hoc and Data Feeds area.
-
Create a new report or edit an existing one.
Note: You must have at least one form selected to include in the report.
-
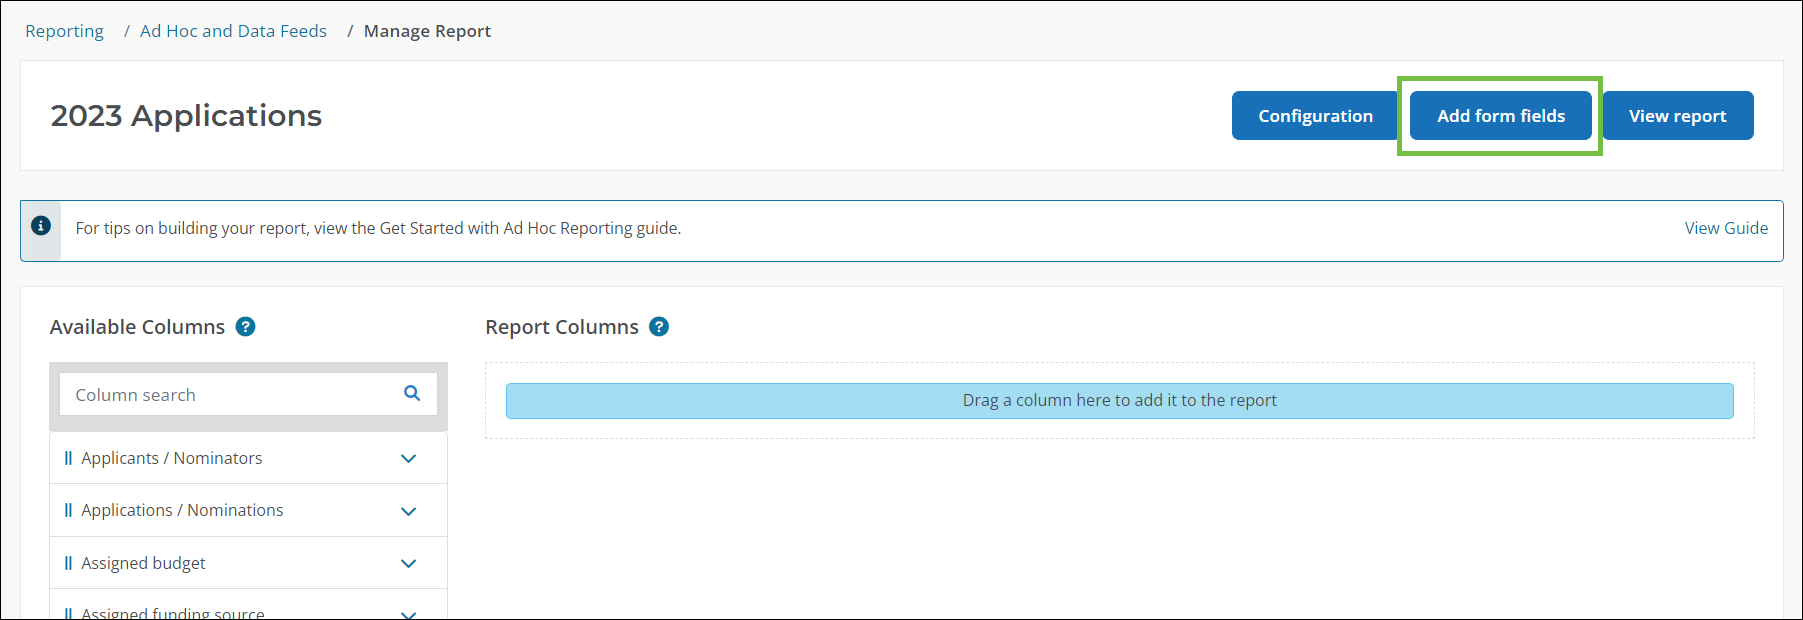
In the Report Builder, click on the Add Form Fields button.

-
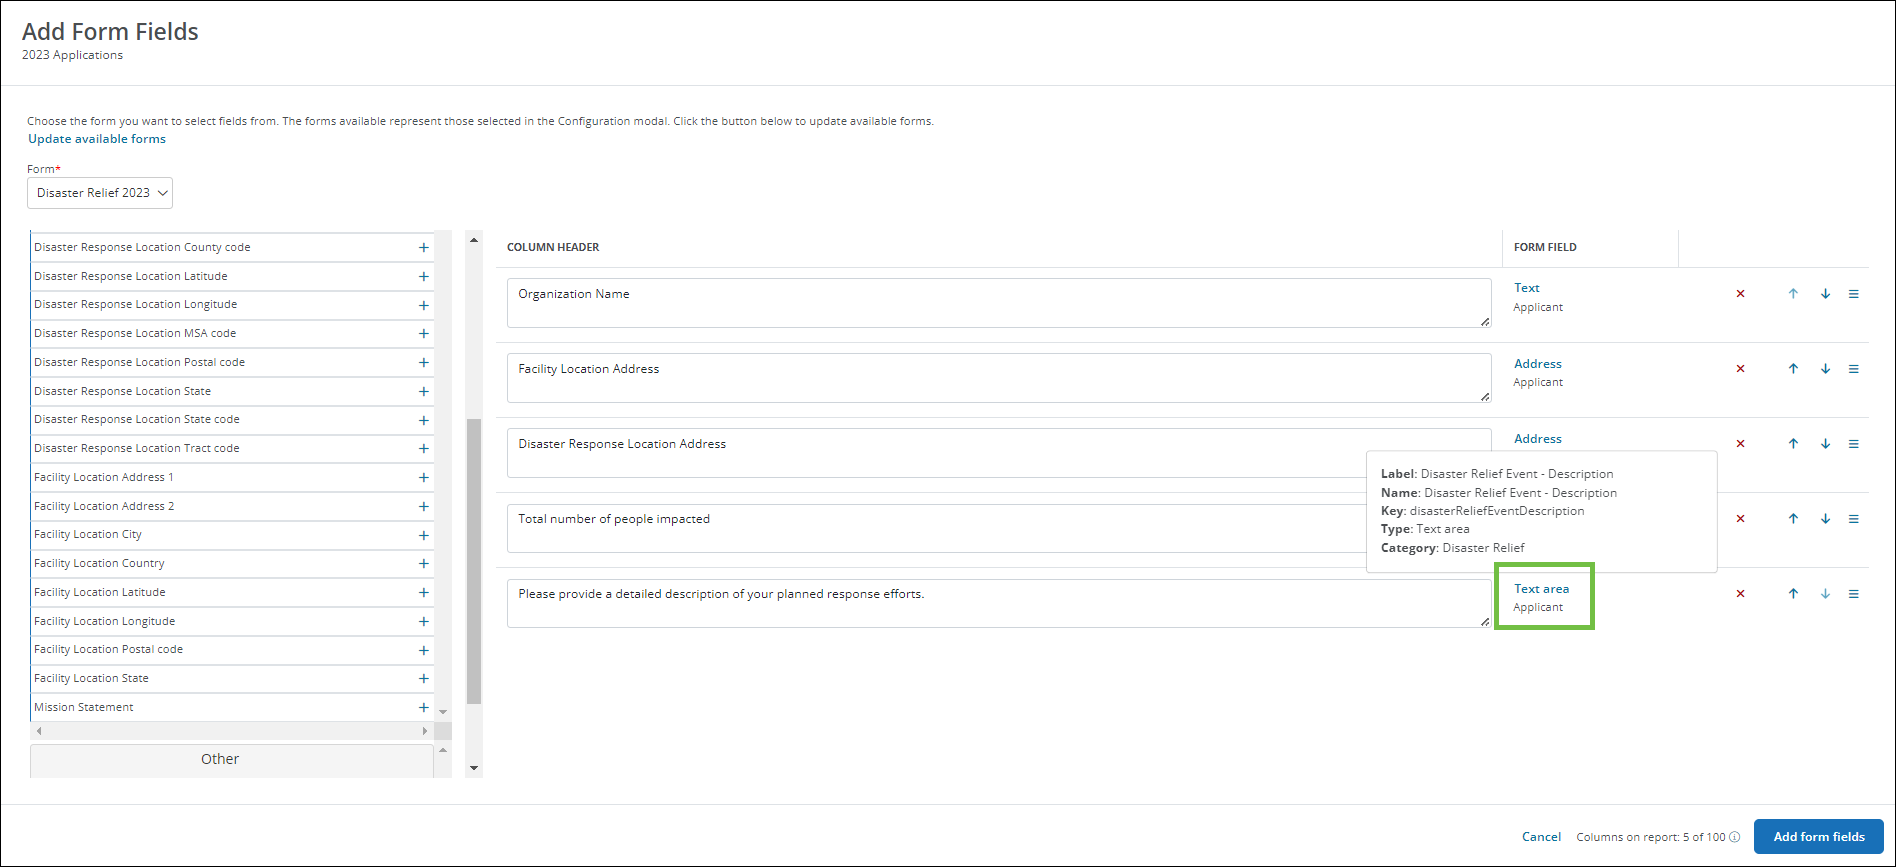
In the Add Form Fields modal, select the form you want to choose fields from in the Form dropdown. You can then take the following actions.
-
Search for available fields by field name or key.
-
Click on the plus sign icon to add a field to the preview.
-
Edit the text in the Column Header to change how its label in the report.
-
Remove fields by clicking on the x icon.
-
Change the order of columns using the arrows or by dragging and dropping them in place.
-
Click on the field type in the Form Field column to confirm you've added the correct field. As shown below, this shows a pop-up with the field's label, name, key, type, and category.

Note: Only those fields not already added to the report will be shown in the panel on the left.
Tip: If you want to change which forms are tied to this report, you can click on the Update available forms link in the Add Form Fields modal or click on the Configuration button in the Report Builder.
-
-
Click Add form fields to append the fields to the end of the report and return to the Report Builder.
