Add and Manage Filters in Application Manager
Filters can be created and saved in the Applications area, allowing you to return to the same view later.
Tip: An example of filter configuration can be found in How do I apply filters to customize what data is shown?.
Create and apply filters
 Create a new filter and apply it to the Applications table
-
Navigate to the Applications area.
-
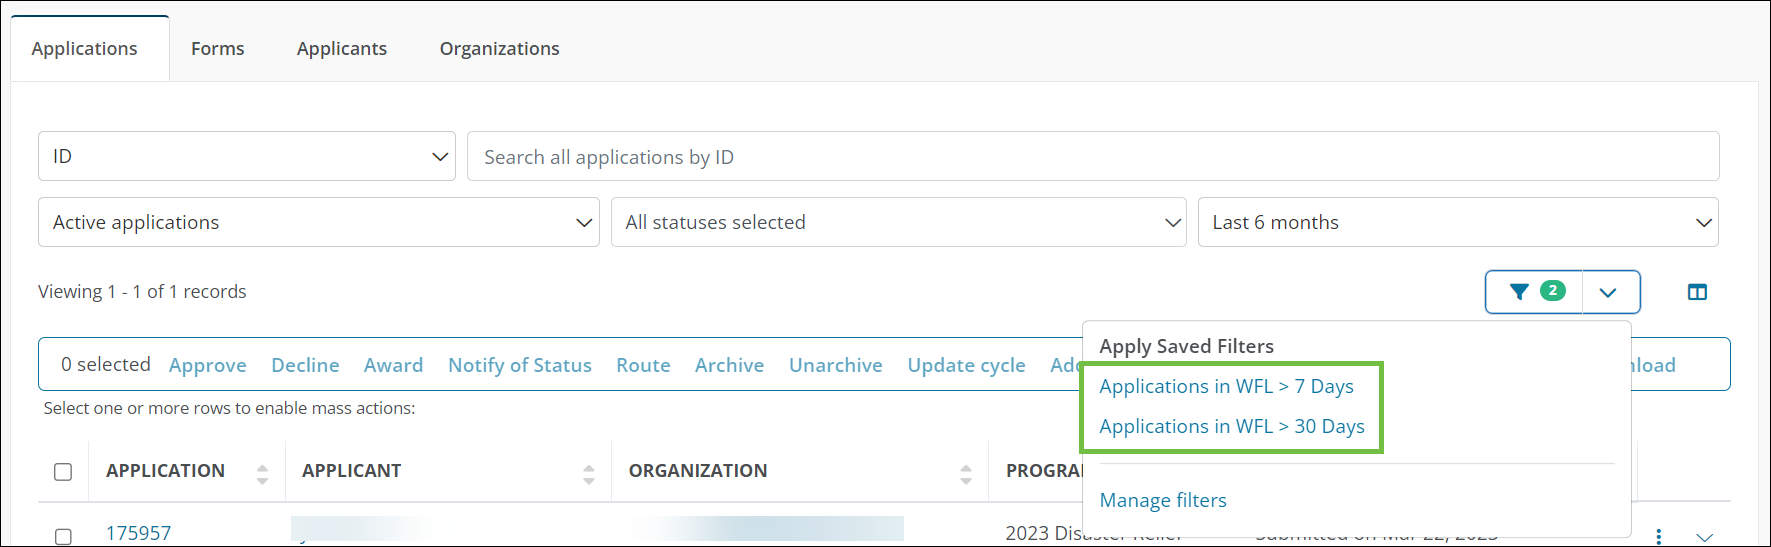
Click on the filter icon located above the Applications table.
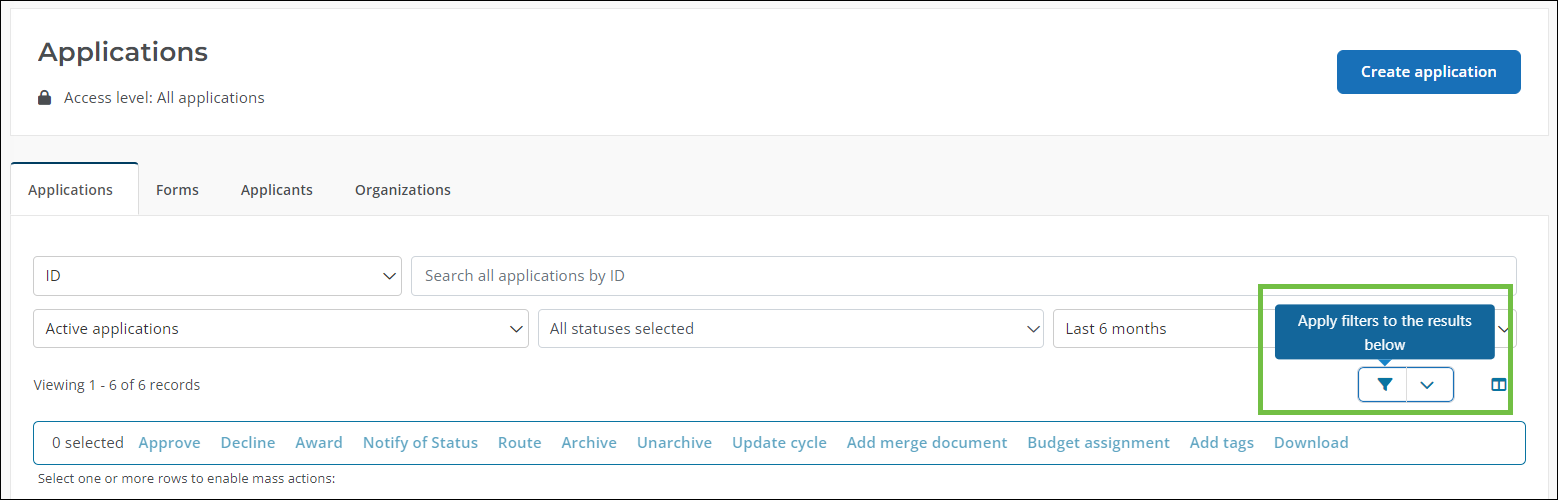
Tip: You can also create a new filter by clicking on the dropdown next to this icon and then the Create new filter button on the Manage Filters page.
-
In the Filter Columns screen, enter a name for the filter.
-
Click on Add Filter to begin adding the criteria you want to apply to the view.
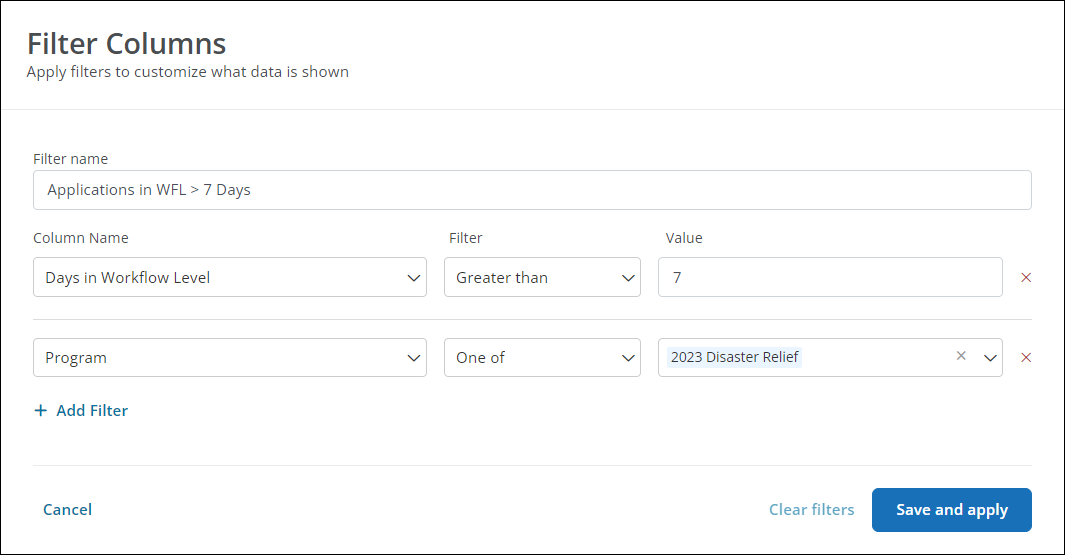
Note: When adding multiple columns, only applications that meet all criteria defined will be returned.
-
Select Save and apply to return to the Applications table.
Once applied, only those applications that meet the criteria outlined in your filter will appear.
Create a copy of a saved filter
-
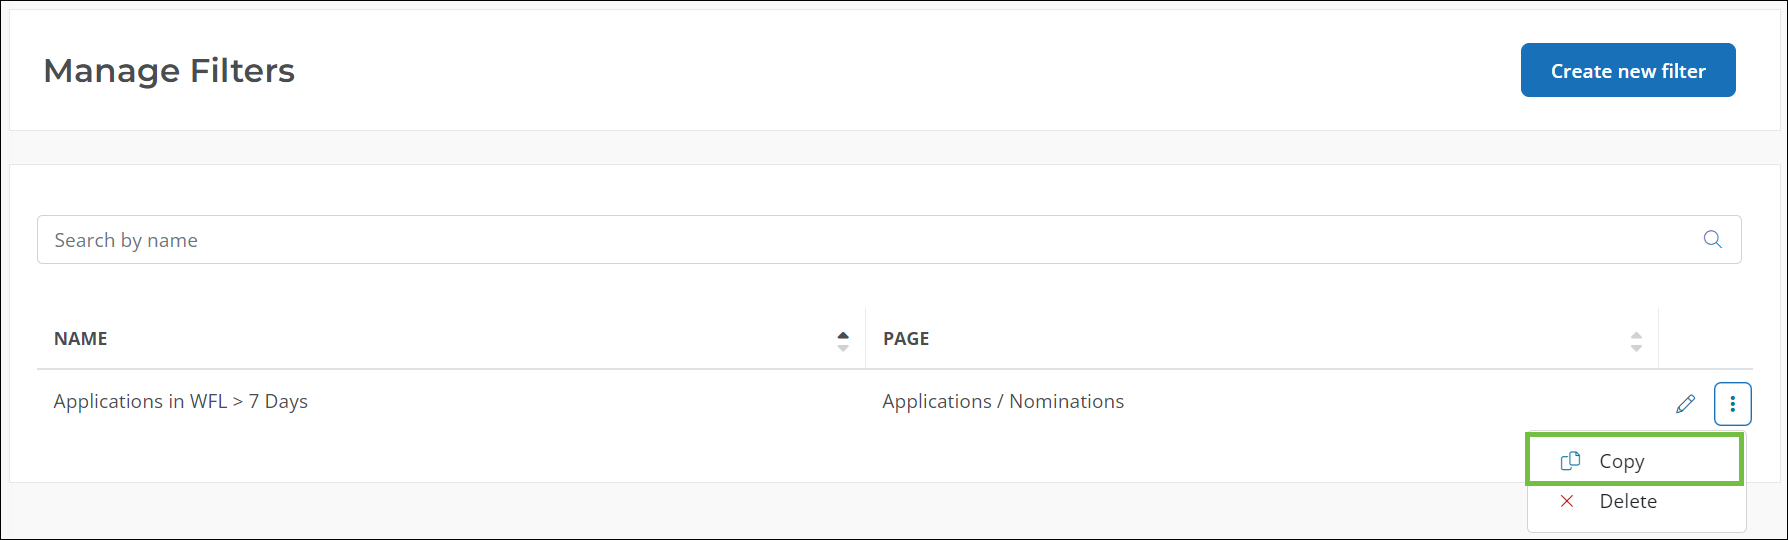
Navigate to the Manage Filters page.
-
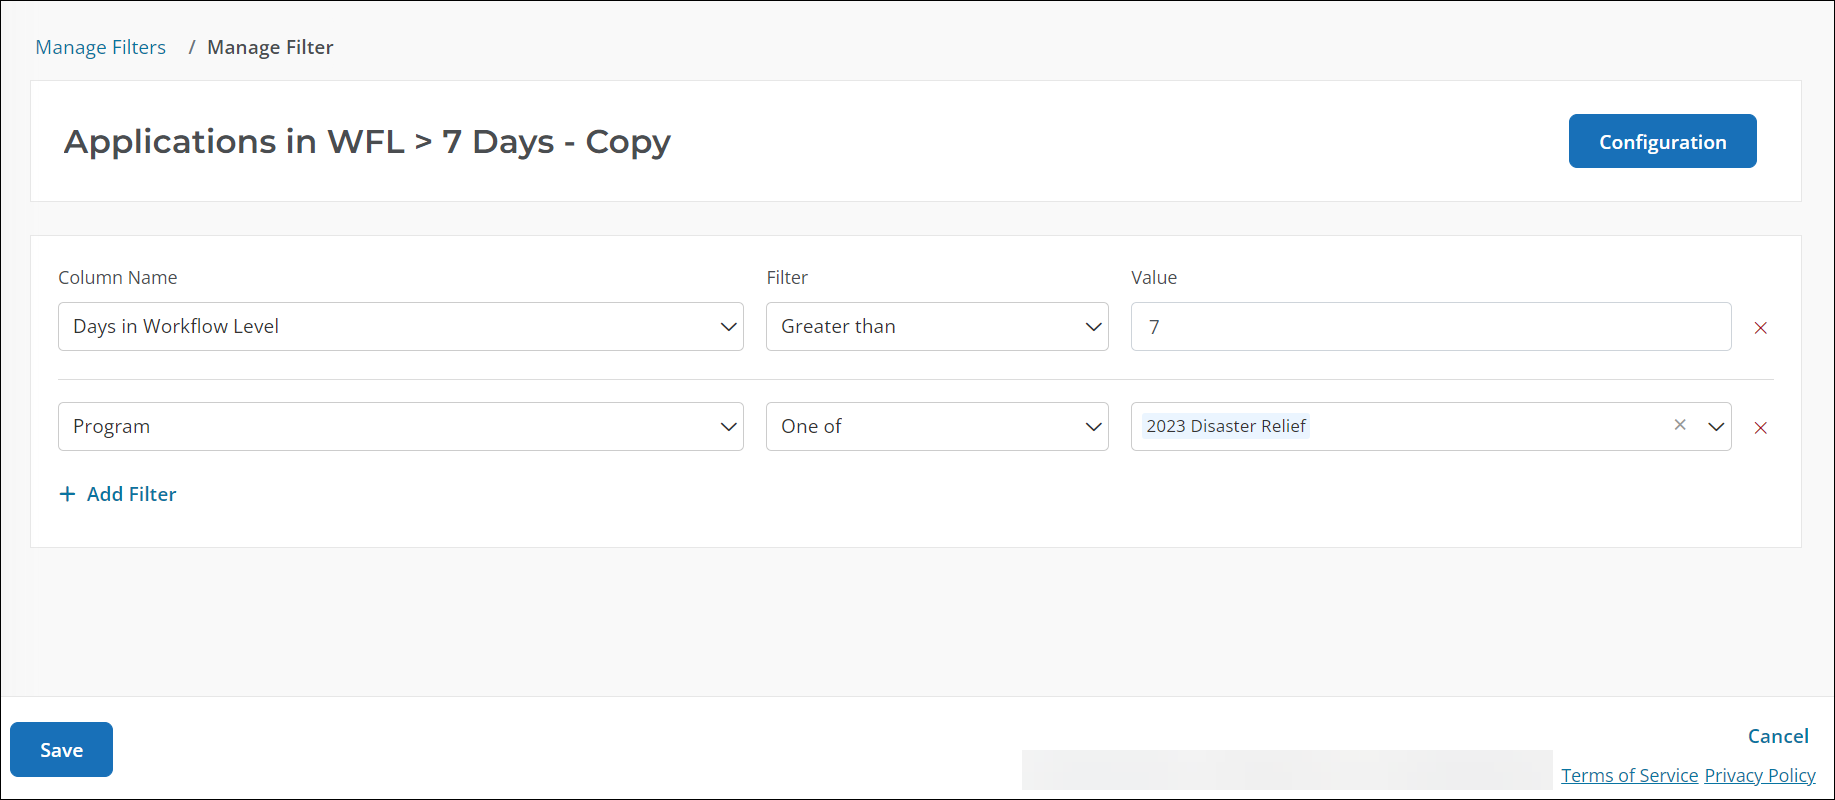
On the Manage Filters page, click on the ellipsis icon next to the filter and then Copy.
-
Click Copy in the Copy Filter screen to confirm.
The new filter will automatically open in Edit mode. From here, you can update its configuration, including criteria and name.
Change the filter applied to the Applications table
-
Navigate to the Applications area.
-
Click on the dropdown next to the filter icon.
-
Click on the filter you want to apply to the view.
Clear filters applied to the Applications table
-
Navigate to the Applications area.
-
Click on the filter icon to open the Filter Columns screen with the current filter applied.

-
Click on Clear filters to clear the view.
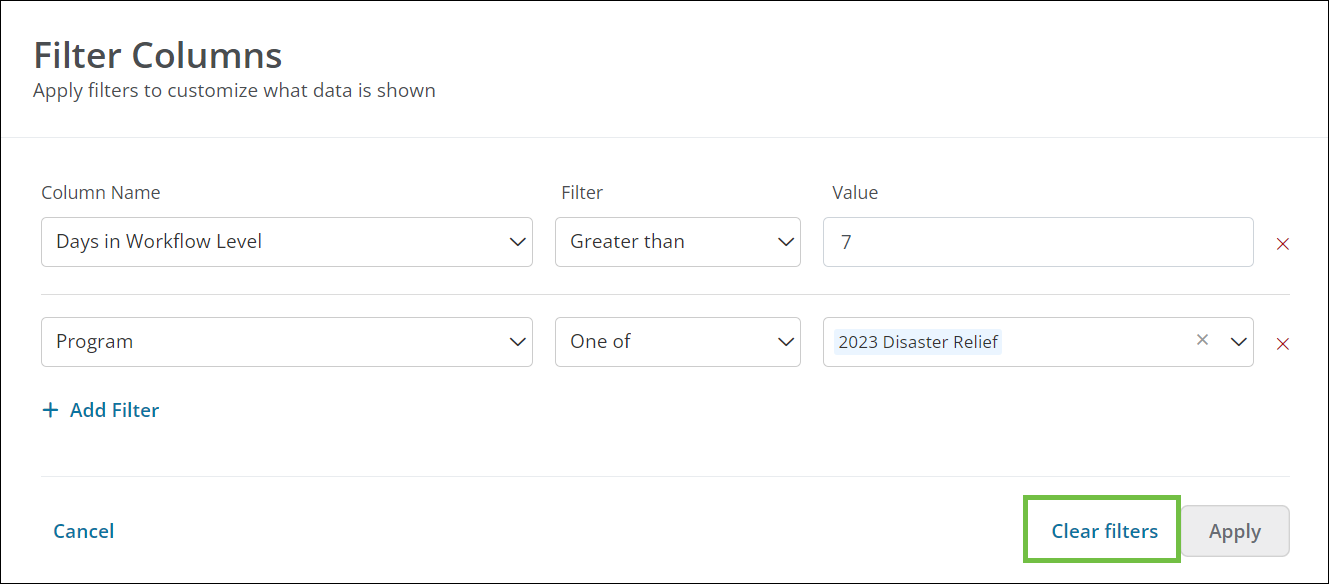
Once cleared, the Applications table will show all applications based only on the search and dropdowns. The number indicating the filter criteria will no longer appear next to the filter icon.
Manage saved filters
Update a filter's configuration
-
Navigate to the Manage Filters page.
-
Click on the ellipsis icon next to the filter and then Edit.
-
In Edit mode, you can:
-
Optional - Update the columns and criteria defined in the filter.
-
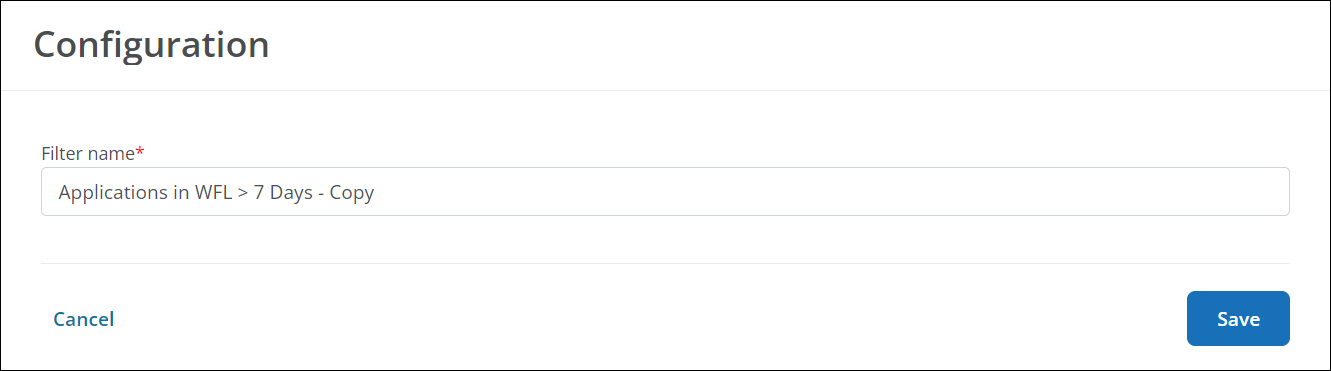
Optional - Click on Configuration to update the name.
-
-
Save your changes.
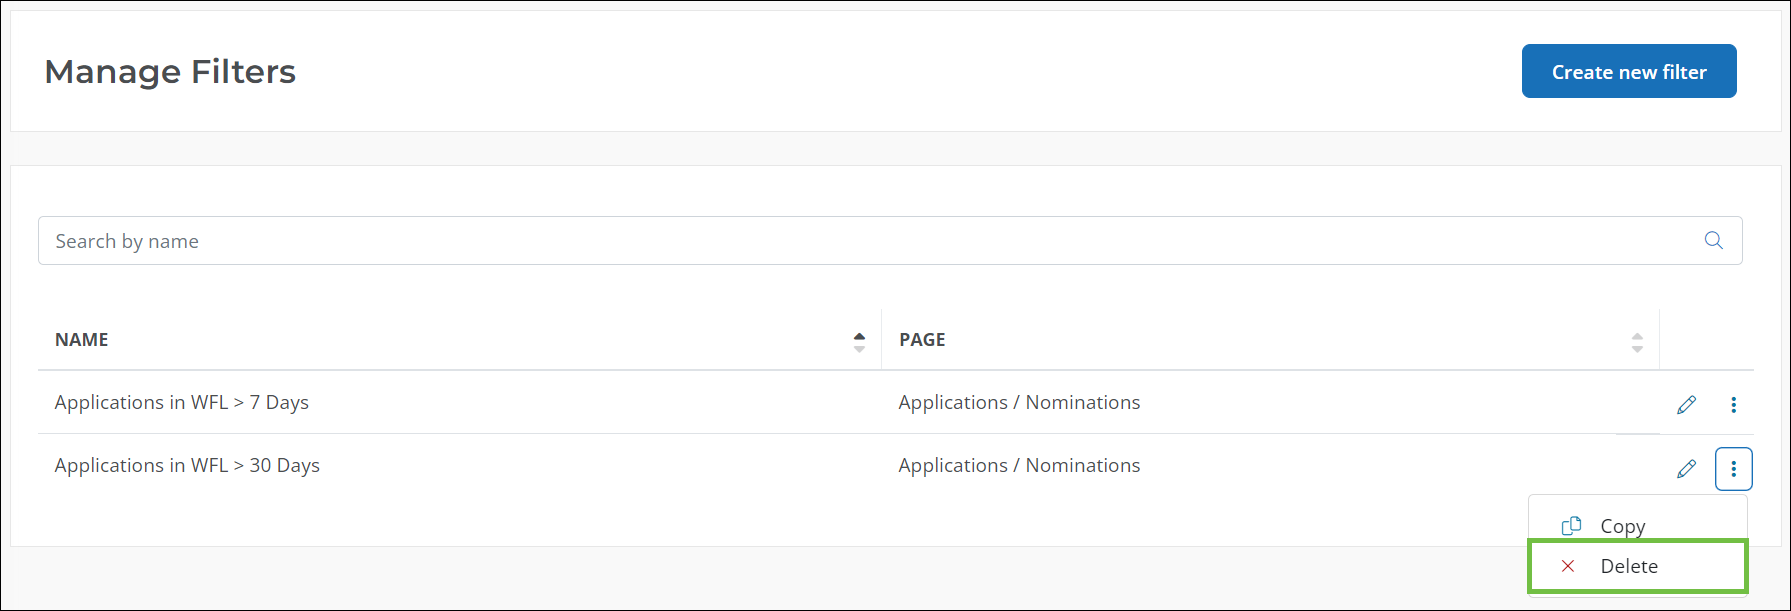
Delete filters
-
Navigate to the Manage Filters page.
-
Click on the ellipsis icon next to the filter and then Delete.
-
Click Delete in the Delete Filter screen to confirm.
Frequently asked questions
What columns can applications be filtered by?
When creating a filter for the Applications area, you can select any of the following columns in the Filter Columns screen to include:
-
Amount requested
-
Cycle
-
Date Added to Workflow Level
-
Days in Workflow Level
-
Form Response
-
Program
-
SSO
-
Submitted date
-
Declined date
-
Tags
-
Workflow level
-
Workflow level name
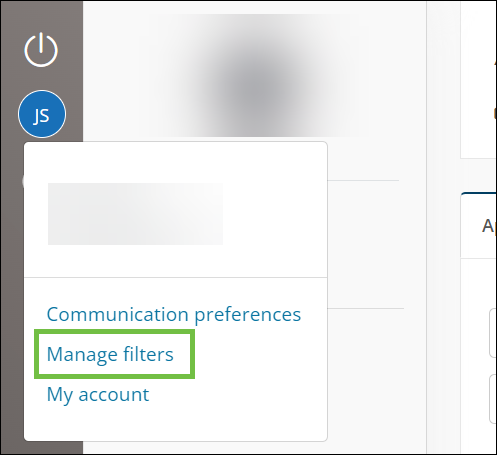
How do I access the Manage Filters page?
There are several ways to get to the Manage Filters page, including:
-
In the Applications area, click on the dropdown next to the filter icon and then select Manage filters.

-
In the navigation, click on your account icon and then select Manage filters from the options.