How do I apply filters to customize what data is shown?
Many areas allow you to create and apply filters, making it easier to find items that match your specific criteria. To do so, click on the filter icon that appears at the top of the table.

In the Filter Columns screen, click on Add Filter to add your criteria. This criteria is built using the Column, Filter, and Value.
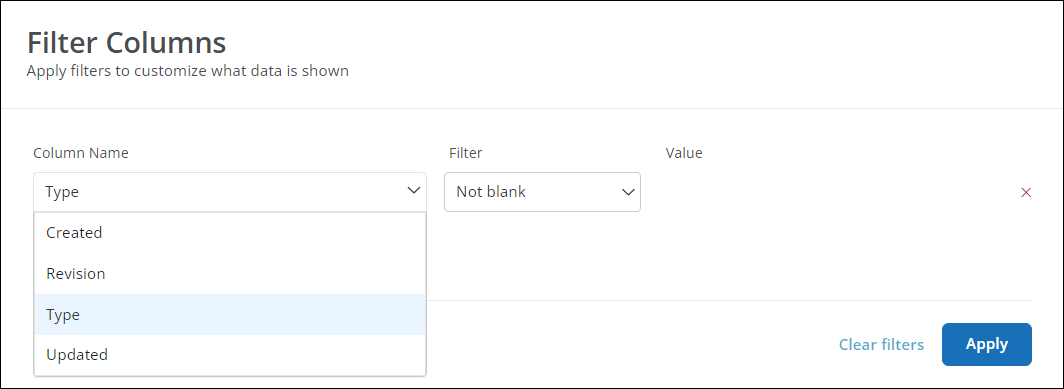
Note: The columns available for filtering vary based on the area. This example uses the Custom Forms > Forms table in the Program Setup area.
|
The Column is the type of information you want to see. For example, when filtering forms, you can select Type to filter based on form type. |
|
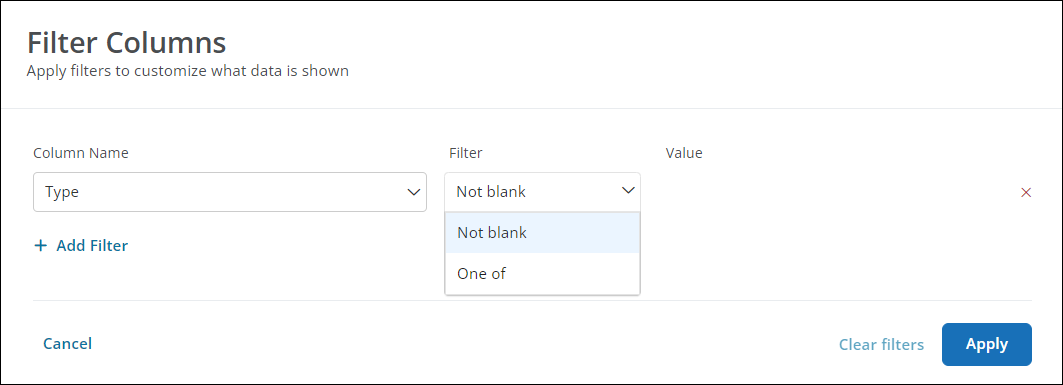
The Filter will vary based on the data type of the Column. For example, for Type, you can select Not blank to return only forms with a type or One of to specify which form types to return. |
|
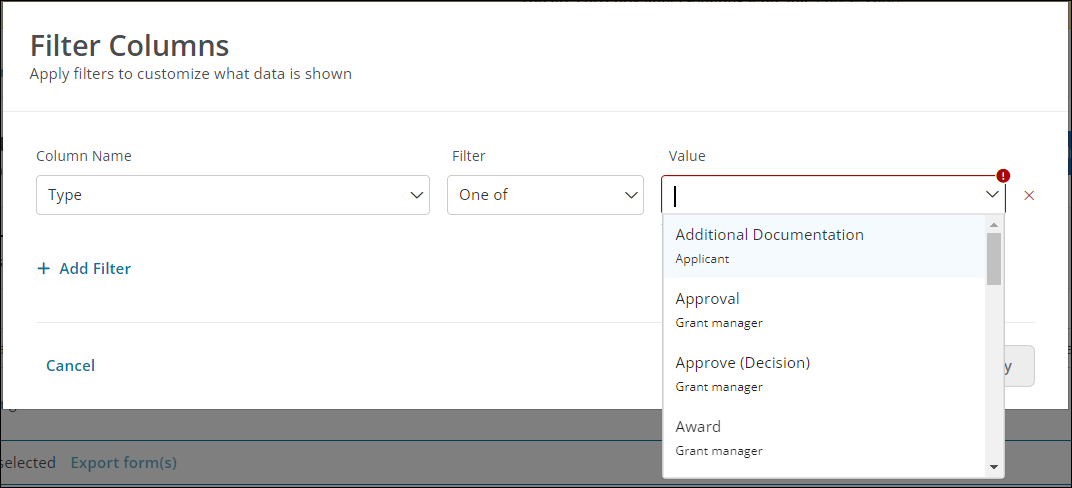
The Value will vary based on the Column and Filter. For example, you can select Request (Applicant) to return only Request Forms. |
You can continue to add multiple columns to your filter, further customizing your results. Once finished, click on Apply to apply it to the table or area you are working in.

Note: If your filter contains multiple columns, only those results that match all of the criteria will be returned.
Tip: Filters are automatically cleared at the end of your session. With that said, the filters you create in the Applications area can be saved to view later. For more information, see Add and Manage Filters in Application Manager.