Create New Program Automations
 Step 1 - Create Routing Form
The first step to setting up program automation is to create a form to be used as the Routing Form. You will be prompted to select this form when creating a new automation. This form is completed by the applicant to determine the program to which they should apply.
Note: When creating the form, ensure that Routing form is specified as the form type. Additionally, the form must be published before it will be available in the Program Automation Builder.
Tip: For more information on creating custom forms, see the Create and Manage Custom Forms resources.
 Step 2 - Create New Automation
-
Navigate to the Program Setup > Grant Programs area.
-
From either the Programs or Automation tab, select the New button and then the Automation option.
-
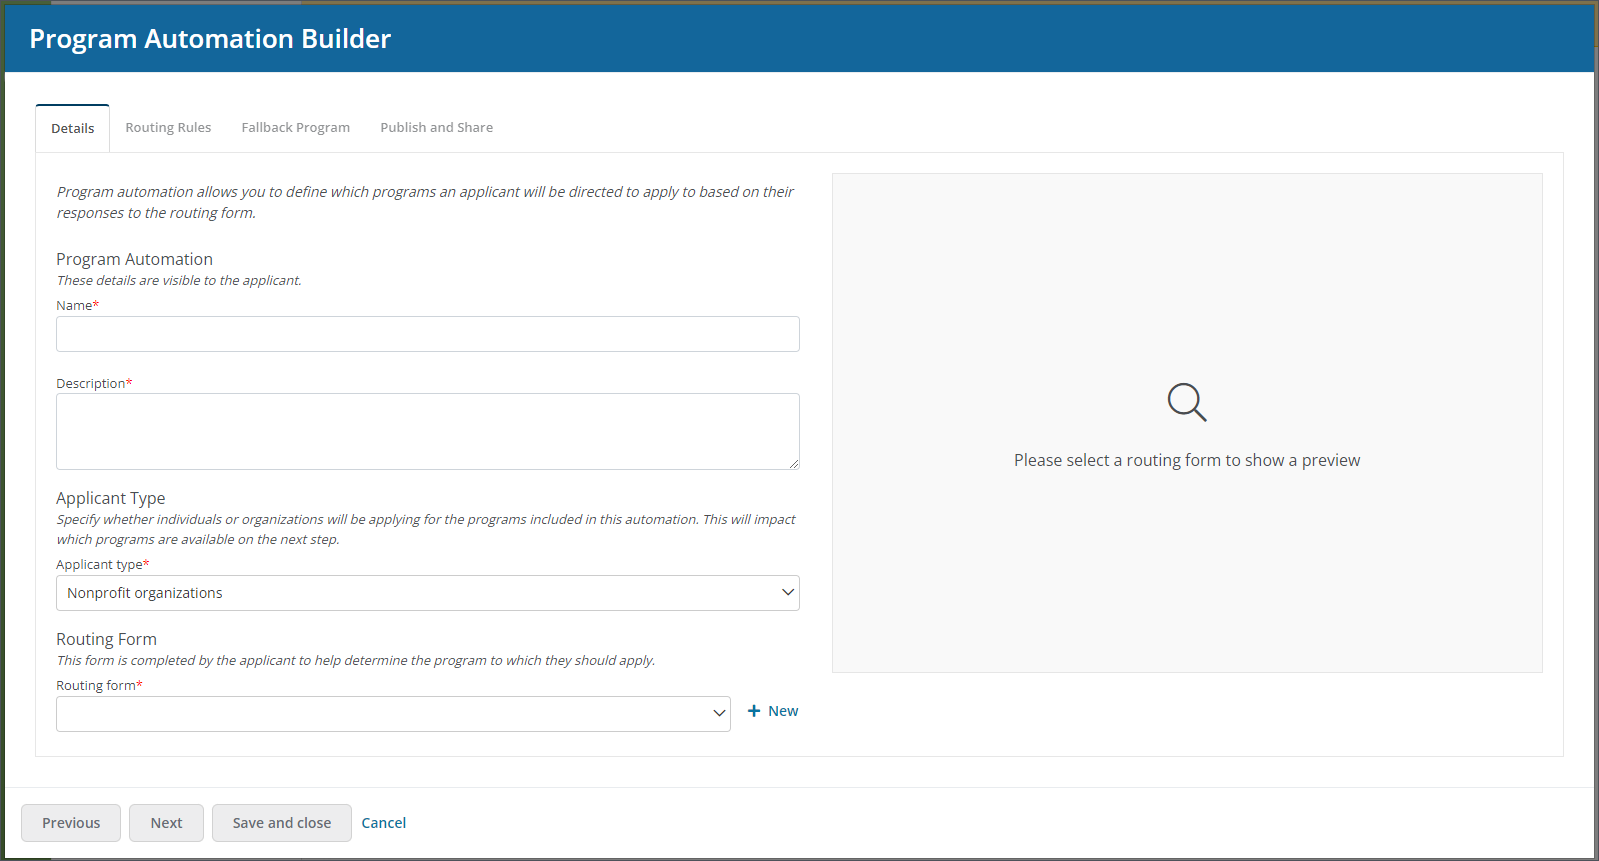
In the Program Automation Builder, complete the fields available in the Details tab.
-
Enter a name for the automation. This will be visible to the applicant.
-
Provide a brief description of the automation. This will be visible to the applicant.
-
Specify who (i.e., Nonprofit organizations or Individual applicants) will be applying for programs in this automation in the Applicant Type field.
Note: This selection will dictate which programs appear in the Routing Rules section.
Tip: The available options correspond with the program's Recipients value in the Program Details > Settings. Learn more.
-
Select the form to use as the Routing Form. A preview of the form will appear in the Program Automation Builder.
Tip: If no form is available, select the New button to open the Create Custom Form modal in a new window. After creating and publishing the form, close the window and select Refresh in the Program Automation Builder.
-
-
Select Next to proceed.

 Step 3 - Define Routes for Automation
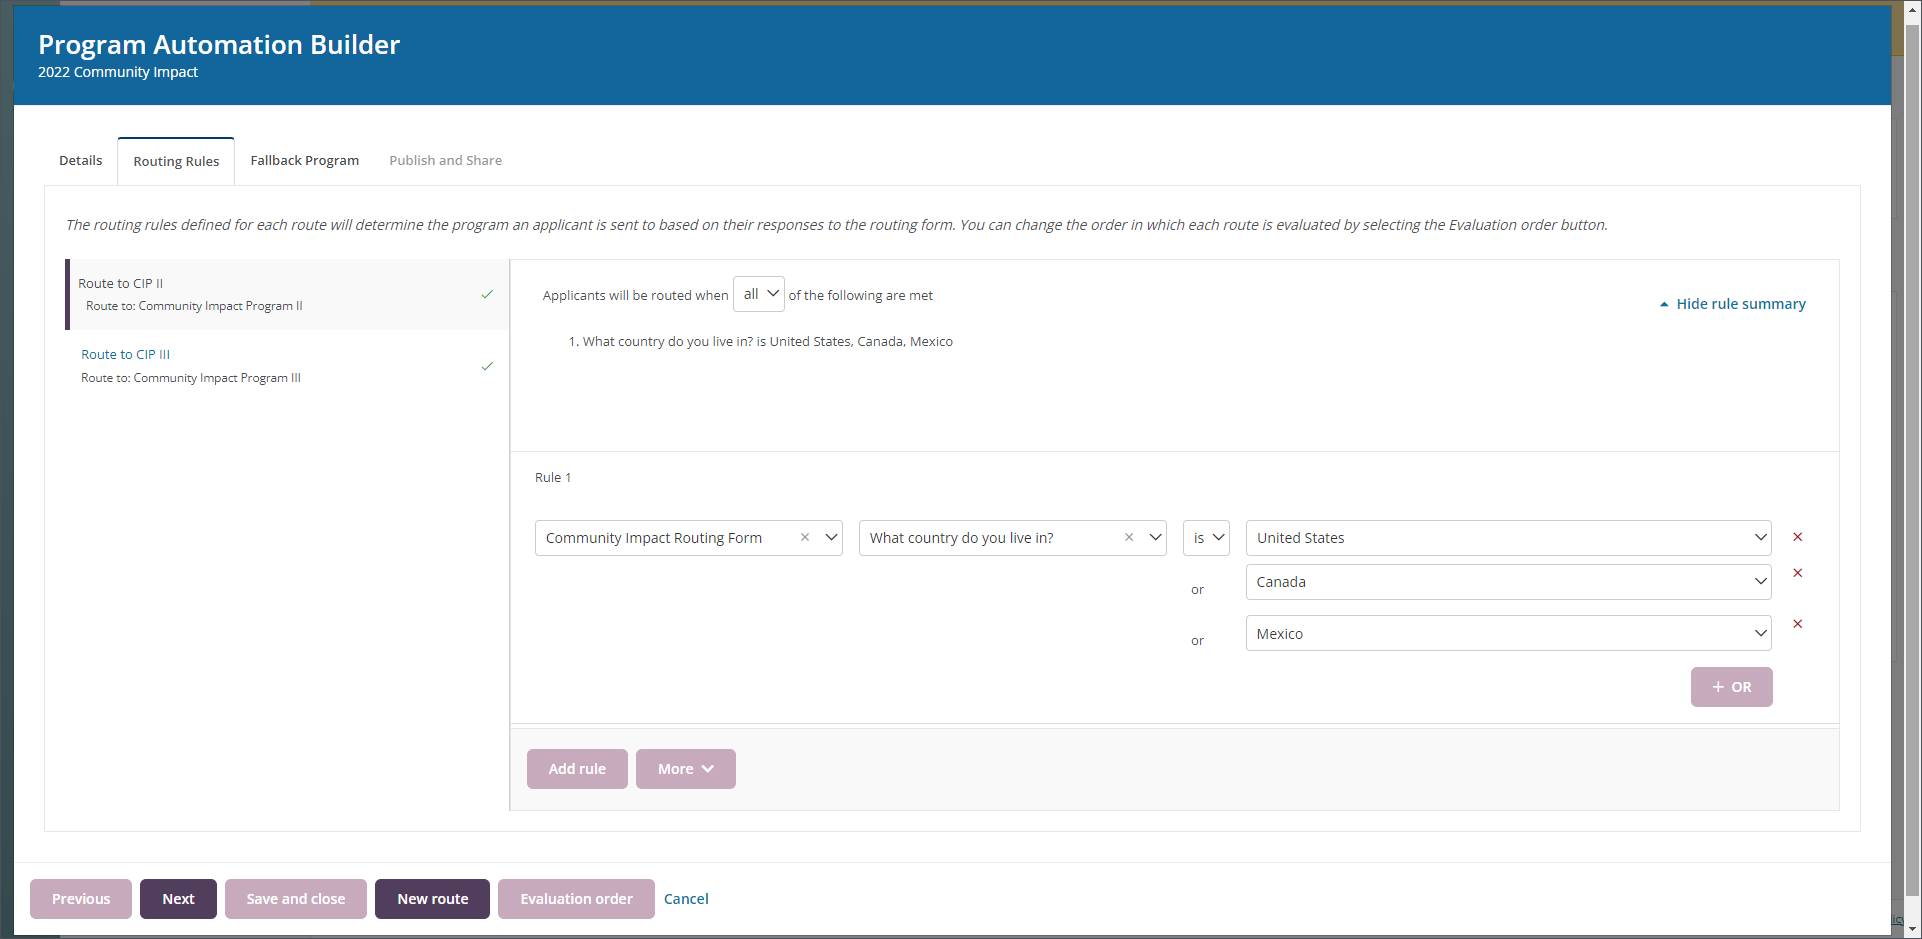
After providing the basic details of the automation, you will define the routing rules that will be used to evaluate the applicant's responses and determine the program to which they will be directed. These rules are created in the Routing Rules section of the Program Automation Builder.
-
From the Routing Rules tab, select the New route button.
-
In the New Route screen, provide the following information.
-
Select the program the applicant will be routed to based on their responses.
-
Provide a name for the route.
Note: This name is not shown to the applicant. However, it should be unique and easily identifiable, especially if you plan to include multiple routes in the automation.
-
-
Select Create to add the route and return to the Routing Rules tab.
-
Select the route to edit it.
-
Select the Add rule button to start building rules for the program's route.
Note: Rules can be created based on Applicant, Employee, and Organization data as well as the Routing Form itself. Learn more.
-
Continue adding rules to this route by selecting the Add rule button.
-
Configure the logic of these rules.
Tip: A green checkmark will appear next to the route's name if the logic is valid.
-
-
Select the New route button at the bottom of the Program Automation Builder to continue adding routes to other programs.
-
Select the Evaluation order button to change the order in which the applicant's responses are compared to each route. The first route whose criteria are met will be the program to which the applicant will be directed to apply.
-
After adding and configuring all routes for the automation, select the Next button to proceed.

 Step 4 - Specify Fallback Program
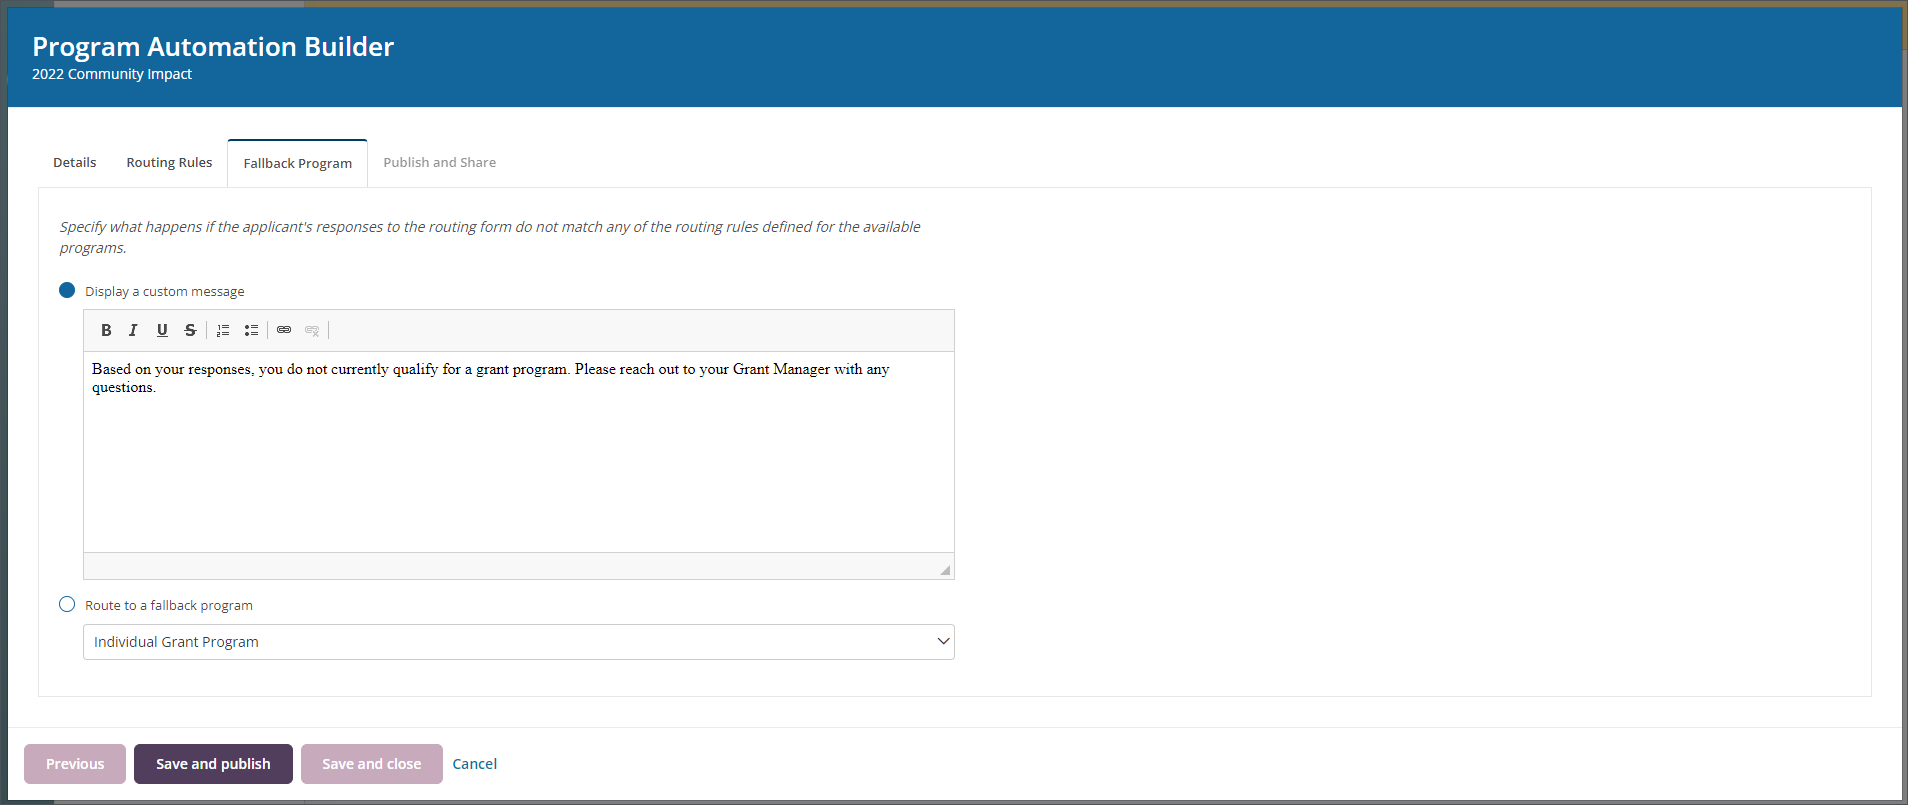
In case the applicant does not qualify for any programs based on their responses, a fallback program or message must be in place. This is specified in the Fallback Program tab of the Program Automation Builder.
-
From the Fallback Program tab, determine what will happen if the applicant's responses to the Routing Form do not match any of the routing rules defined for the available programs.
-
Display a custom message - Customize a message to be presented to applicants.
-
Route to a fallback program - Select a program applicants will be routed to instead.
-

After specifying the fallback program, you can take any of the following actions:
-
Select Previous to go back to your routes, make changes to automation details, etc.
-
Select Save and close to save the automation as a Draft and close the Program Automation Builder.
-
Select Save and publish to set the automation's status to Published and generate the share links.
Note: You will be directed to the Publish and share section of the Program Automation Builder.
 Step 5 - Publish and Share
After publishing the automation, you can access the links to distribute internally or externally.
-
Internal Share Link - Share this link with applicants who will be signing in via SSO, such as employees of your organization.
-
External Share Link - Share this link with applicants who will be applying externally, such as nonprofits.
