Grant Program Settings
Default settings for Recipients, Collaboration, Program Emails, and more are automatically configured when a program is created. They can be updated to further customize each program.
Note: All changes made to Program Details are saved automatically.
-
Navigate to the Grant Manager Portal by going to yourcausegrants.com or your client URL. Sign in with your Blackbaud ID (BBID) or Single Sign-On (SSO) credentials.
-
After signing in, select Program Setup in the side navigation and then Grant Programs.
-
In Grant Programs, select the ellipsis icon next to the program and then Edit program.
-
In Program Detail, select Settings.
 Specify the grants recipient
Note: The recipient determines who can apply for the program. Depending on what's selected, additional settings may be available.
-
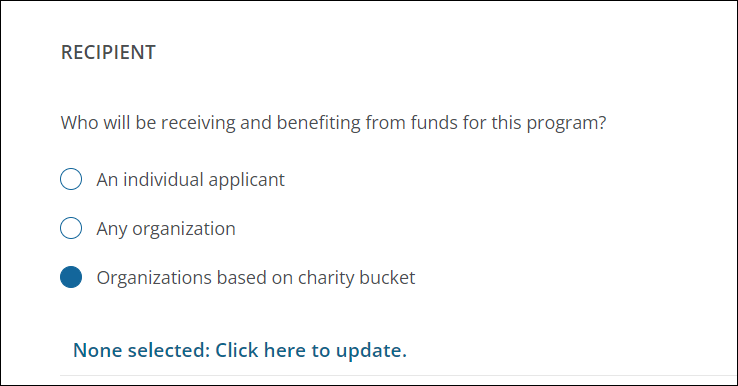
In Recipient, specify who receives the funds awarded for this program.
-
An individual applicant
-
Any organization
Tip: Applicants can search all organizations registered in YourCause. When selected, you'll have access to two additional options: Allow applicants to add organizations not found in the database and Make government tax ID optional when adding organizations (client-processed only). If Allow applicants to add organizations not found in database is selected, new organizations can be added when applying.
-
Organizations based on charity bucket
Note: Charity buckets are managed through YourCause CSRconnect. After choosing your charity bucket, you can enter custom text for Organization Search Guidelines that tells applicants about guidelines around organization search restrictions.

-
 Allow applicants to invite collaborators
-
In Collaboration, specify if applicants can invite collaborators with the Allow applicants to add additional applicants to aid in completing forms checkbox.
-
If turned off (default), there can only be one applicant tied to an application.
-
If selected, applicants can add others to the application.
Note: For more information, see Add and Manage Applicants in the Applicant Portal resources.

-
 Allow applicants to copy applications
-
In Ability to Copy, specify if applicants can create new applications by copying an existing application with the Allow applicants to copy applications checkbox.
-
If selected (default), applicants can create copies.
Tip: All field responses are automatically copied to the new application unless the form field has the Do not copy responses when copying applications setting enabled. If enabled, the field appears blank in a copied application.
-
If turned off, they must use the program link or an invitation to create a new application.

Note: This applies to the entire program - not just a program cycle.
-
 Reserve funds from budget and/or auto-decline applications based on funding
-
In Budget Reservation, specify if the amount requested should automatically be reserved from the assigned budget with the Reserve funds for submitted applications checkbox.
Note: If this is selected, you have the option to Automatically decline applications whose assigned budget does not have enough funds to cover the reserved amount. A custom declination comment can be sent to applicants (GC-69) if declined. For more information, see Automatically Decline Applications Based On Available Funds.

 Show or hide payment status in the Applicant Portal
-
In Payment Status, specify if the payment status should be shown to applicants with the Hide payment status in Applicant Portal checkbox.
-
If selected (default), applicants cannot see the status of payments. However, they can still see other payment information, like amount.
Note: You can enter a brief custom message in the Alternate payment status text field that's shown in place of the payment status in the Applicant Portal.
Tip: Hiding the payment status may be beneficial to clients who process their own payments since the status shows as Pending unless updated manually.
-
If turned off, payment status is included in the payment details.

-
 Set the program to Invitation only
-
In Invitations, specify if applicants are required to be invited to apply for the program with the Invitation only checkbox.
Note: Invitation-only programs require applicants to be invited. Program links cannot be used to create applications. For more information, see Send Program Invitations.

 Configure email settings for the logo and sender name
-
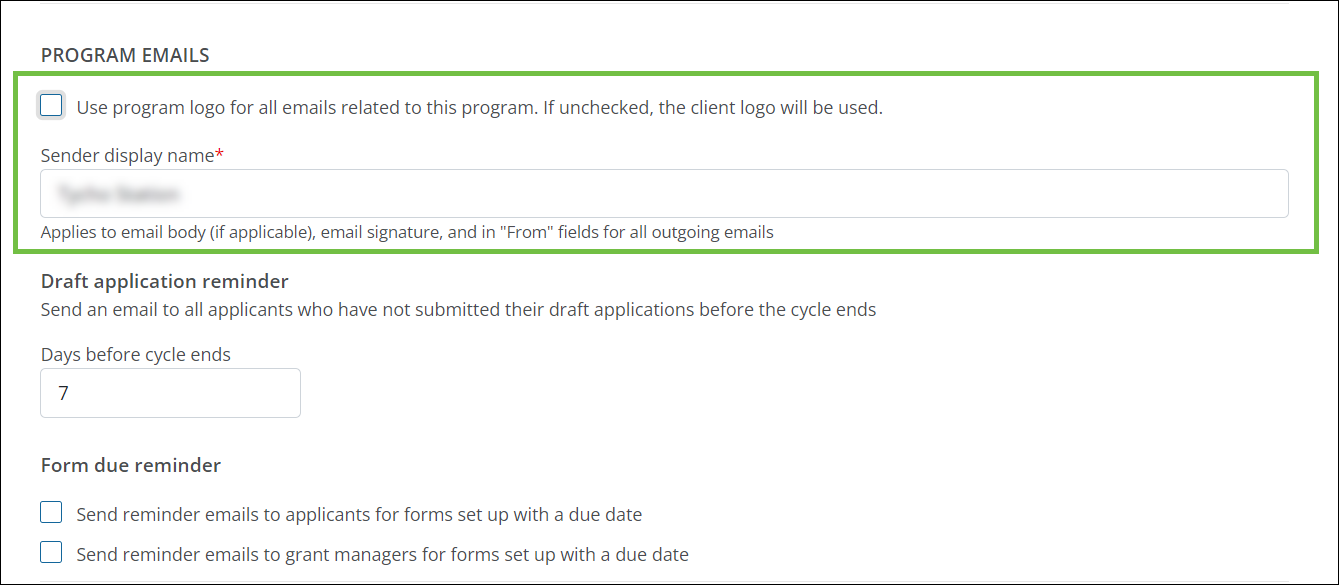
In Program Emails, specify if the unique program logo in Details should be used in emails instead of the client logo with the Use program logo for all emails related to this program checkbox.
-
Optional - Update the Sender display name text if it differs from the client name. This name is used in the email body, email signature, and the From field of all outgoing program emails.

 Send reminders for Draft applications
-
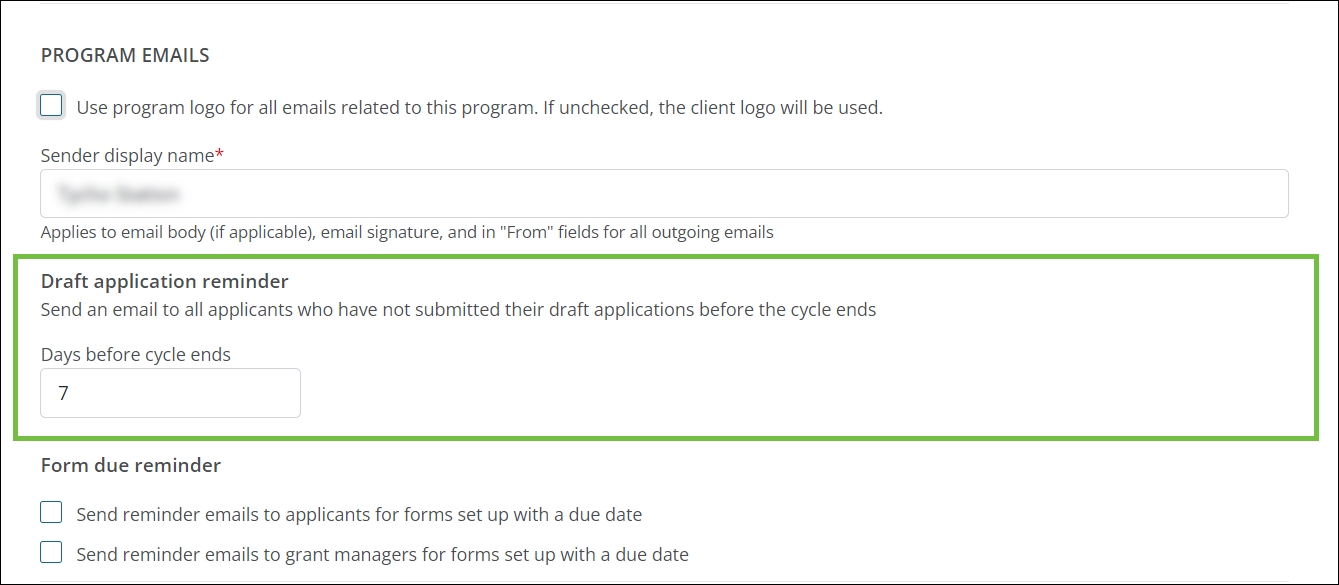
In Program Emails > Draft application reminder, specify when to send a reminder (GC-48) to applicants to submit their Draft applications. By default, this is sent seven days before the cycle closes.

Note: Don't see this setting? If the Do not show cycle dates in the Applicant Portal checkbox in Details is selected, reminders for Draft applications cannot be sent.
 Set team deadlines
-
In Team Deadlines, select New team deadline.

-
In the Program Deadline screen...
-
Specify a deadline date.
-
Provide a title for the deadline.
-
Include notes for the deadline.
-
-
Select Add deadline to save the deadline to the program.
Note: After adding the deadline, it can be edited or removed by selecting the ellipsis icon next to it.
-
-
Depending on the recipient of your program, you can also configure the following settings.
-
 Masking
-
In Masking, specify if applicant information should be hidden from Grant Managers with the Mask applicant information checkbox.
-
If turned off (default), they can see all applicant details.
-
If selected, applicant details are hidden from all Grant Managers unless...
-
They have the Grant Application - Can View Masked Data user permission, OR
-
The workflow level or sub-level has the Show masked applicant information checkbox selected.
Note: With this worklow level setting selected, any Grant Managers in the level can view masked applicant details regardless of the program setting or user permissions.
-

Note: For more information about masking, see How do I protect sensitive data in forms?.
-
-
-
 Allow applicants to add their own organizations
-
In Organization Options, specify if applicants can add their own organizations with the Allow applicants to add organizations not found in the database checkbox.
-
If turned off (default), applicants can only choose organizations returned when searching in the Select Your Organization screen. These organizations are all vetted by YourCause to determine their eligibility for giving.
-
If selected, applicants can select Add organization if they cannot find their organization by searching in the Select Your Organization screen.
Note: Depending on how grant payments are processed, the organization may be required to be vetted before it can receive funds OR it may be added to GrantsConnect as a Private Organization that can only be disbursed to by the client.

-
 Specify eligible organization locations
-
In Organization Locations, specify which countries and regions are eligible for the program by selecting Manage locations and choosing them from the dropdowns. By default, all locations are supported.
Note: Only organizations in eligible locations appear when searching in the Select Your Organization screen. If applicants add their own organization, they will only be permitted to do so if it's in the locations specified.

 Limit recurring applications
-
Specify if organizations should be limited to how many applications they can submit for the program. This includes:
-
Allow multiple applications (default)
-
Limit to one application for this program
-
Limit to one application per cycle
-
Limit to one application in the current cycle if there was not an approved and awarded application in the previous cycle
Note: If applications are limited, you can add a custom error message that's shown to applicants who choose an ineligible organization.
-
-
-
Organizations based on charity buckets
Note: The Eligibility of Recurring Applications setting is available for this recipient.
-
-
Select Next to continue to Cycles or click on another tab to finish setup.
Note: To exit Program Detail, select Save as draft. If you've configured all required components and are ready to take the program live, click on Save and publish.
