Automate Workflow Level Routing Using Custom Data Tables
Custom data tables allow you to provide a list of acceptable responses on your forms. You can use these data tables to automate routing for applications, defining the workflow level a submission can be routed to based on the response chosen from the list.
Tip: This method is beneficial if you need to include a long list of responses in a routing rule. It can be used in place of the OR statement in a rule.
Before you begin
You must have the following permissions to create workflow level automations.
-
System - Can Manage Workflows
-
System - Can Configure Workflow Automations
-
System - Can Manage Forms
Note: You must have this permission to create or edit custom data tables. It is not required for automations in general.
Tip: The System - All permission allows you to create custom data tables as well as workflow level automations.
Add a custom data table
This automation method requires that you already have a custom data table that can be connected to a routing rule. You can either use a standard product template or create your own.
Note: For more information, see Custom Data Tables.
Set up workflow level automation
-
Navigate to the Program Setup > Workflow Level Automation area.
-
From the Routing tab, select the Create routing rules button.
-
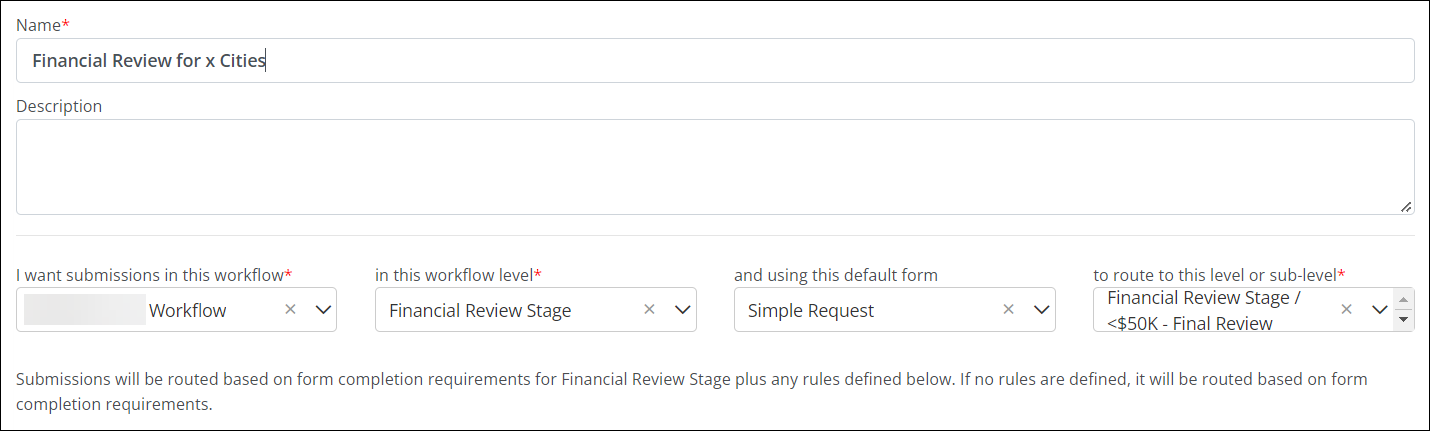
On the Create Routing Rules page, provide the following information.
-
Enter a name for the automation.
-
Optional - Provide a brief description.
-
Select the workflow to begin with from the I want submissions in this workflow dropdown.
-
Specify the workflow level that the application must be in from the in this workflow level dropdown.
-
Choose the form the application must use from the and using this default form dropdown.
-
Select the destination workflow level from the to route to this level or sub-level dropdown.
-
-
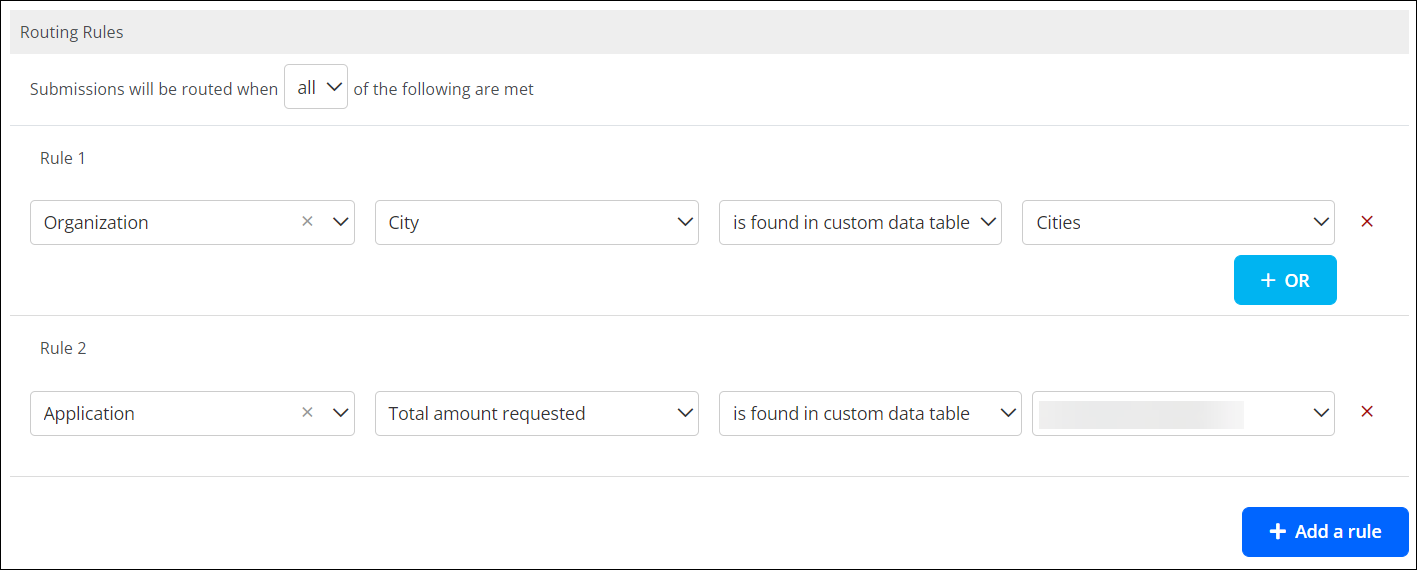
In the Routing Rules section, select the Add a rule button to create a new rule.
Note: All rules are built by defining the component (e.g., Organization, Application), field, comparison (i.e., is found in custom data table, is not found in custom data table), and custom data table.
Tip: If you want to compare against more than one custom data table in a single rule, select the OR button and specify the additional table. This can be repeated as needed.
-
Continue adding rules as needed.
-
Save the automation.
Frequently asked questions (FAQs)
 Does the custom data table in the routing rule have to be present on the form?
No, the custom data table is not required to be part of the form. You can create a new data table that only includes the responses that should be compared against the routing rule, allowing you to further customize the automation.