Select your user interface:
Exercise: Configure a New Page with Tabs with Shell Design
Let's learn more about the configuration capabilities within the Infinity shell. Let's configure a new page that includes some basic properties and two tabs.
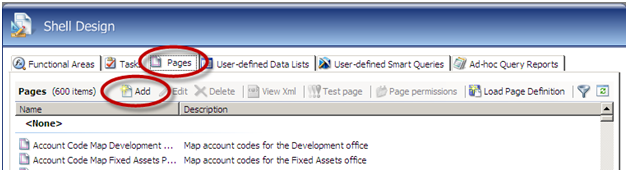
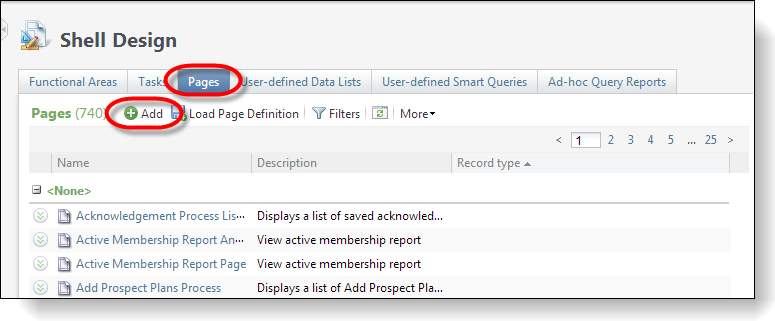
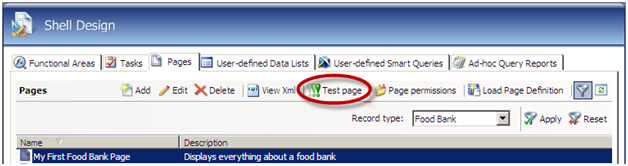
Step 1 - On the Shell Design page, select the Pages tab, and click the Add action above the Pages data list.
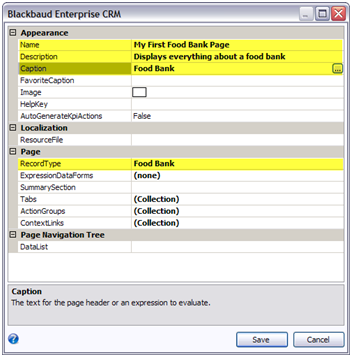
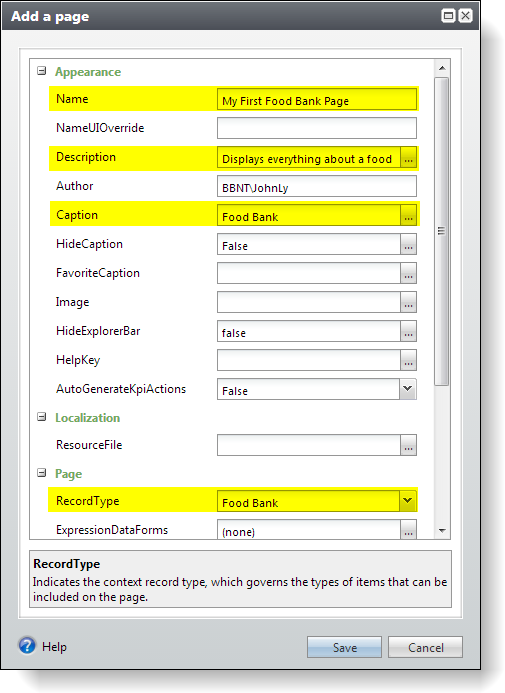
Step 2 - Configure page properties.
When you click the Add action, a properties dialog window appears. Enter the following values for the Name, Description, Caption, and RecordType properties.
|
Property |
Value |
|---|---|
|
Name |
My First Food Bank Page |
|
Description |
Displays everything about a food bank |
|
Caption |
Food Bank |
|
RecordType |
Food Bank |
Step 3 - Configure tabs.
Leave the properties window open and click the ellipsis button within the Tabs property. If you already saved the page's properties, not to worry, simply filter based on the record type of "Food Bank" to find the page. After you find your page, click the Edit action to reopen the properties window.
Click the Add button on the Tabs dialog window to add two new tabs with the following captions:
|
Tab |
Caption |
|---|---|
|
Tab 1 |
Food Bank Transactions |
|
Tab 2 |
Food Items |
After you add the tabs, click OK to save the tabs and then click Save to save the page. In future exercises, we will configure the page further to include a section for each tab that includes data lists and actions.
Step 4 - Test the page.
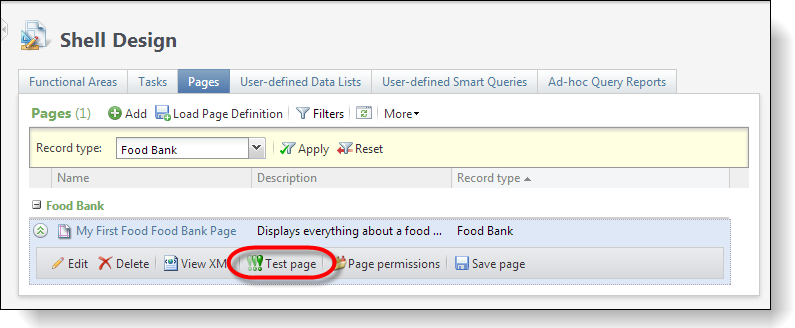
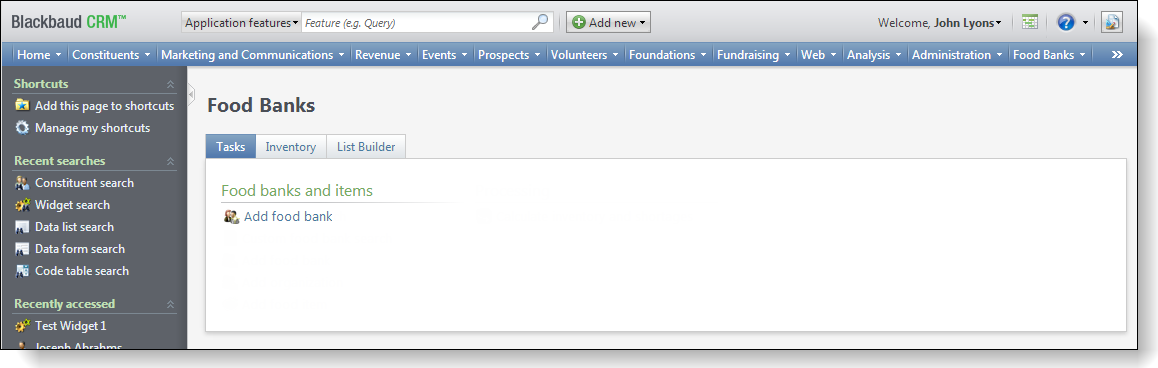
In the figure above, we filtered the data list for the Food Bank record type and can see our page. Click the Test page action to view the page. When you are prompted for a food bank, click Search to select the food bank that was added in the previous step. The Food Bank page appears for that new food bank.
Step 5 - Behind the scenes of your new page.
Navigate back to the Pages tab on the Shell Design page, and select our new My First Food Bank Page from the data list. Click the View XML action.

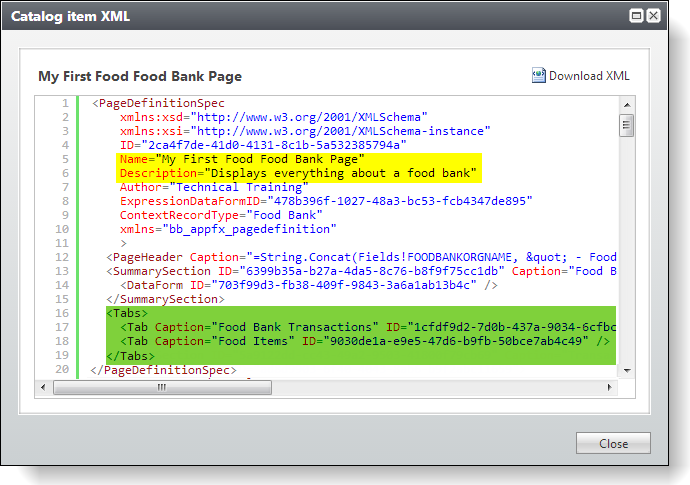
In the yellow highlight above, you can see how the Infinity shell translates the properties for the page into XML attributes within the PageDefinitionSpec element. In the green highlight, you can see how the tabs are translated into XML. The shell is essentially a WYSIWYG editor for Page Specs!
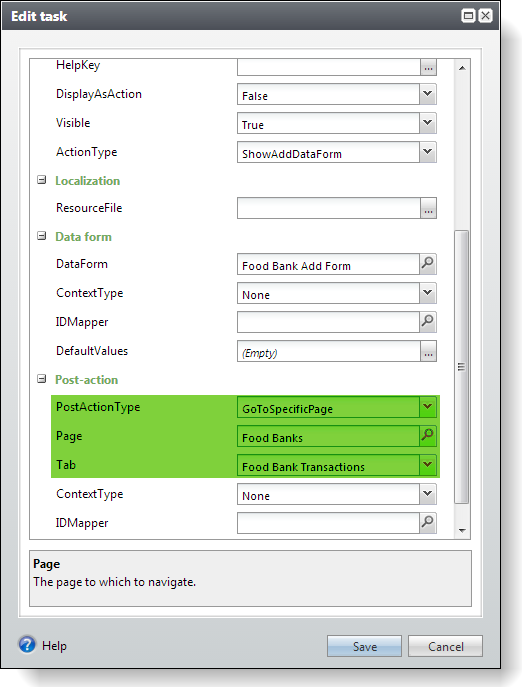
Step 6 - Modify the Add Food Bank task to navigate to the Food Bank page with a post-action event.
If you completed Exercise: Configure a Task within Our New Functional Area, go back and open the task that opens the Food Bank Add Data Form. We will modify the Task Spec to open the Food Bank page after the Add Data Form closes. We will configure the task's post-action event properties to open the page after a food bank is added to the database.
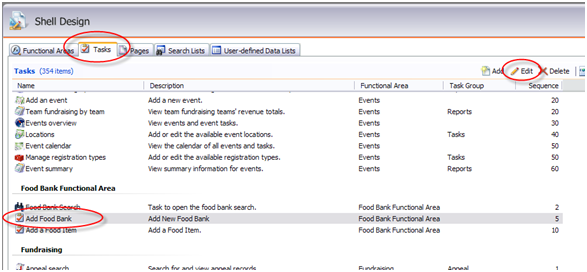
Within the Shell Design page, click the Tasks tab and locate the Add Food Bank task within the Food Bank Functional Area group.
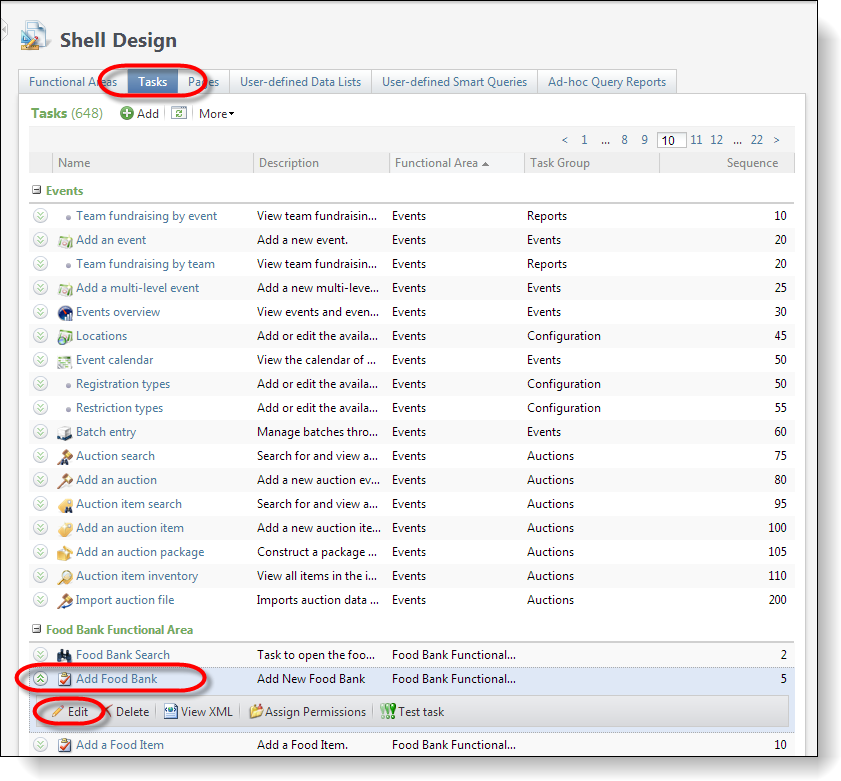
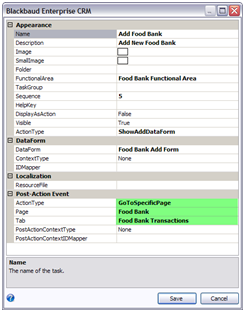
Click Edit to modify the task. On the properties dialog window, enter the following values for the ActionType, Page, and Tab properties:
|
Property |
Value |
|---|---|
|
ActionType |
GoToSpecificPage |
|
Page |
My First Food Bank page |
|
Tab |
Food Bank Transactions |
Step 7 - Test the task.
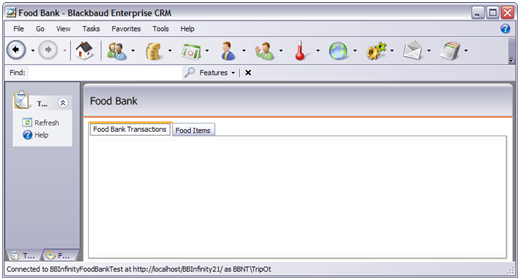
To refresh the shell navigation, click Refresh Shell Navigation under Tasks. Let's try out our new task one more time to make sure it opens our new page. Click the Add Food Bank task in the Food Bank functional area. After you add a food bank, the Food Bank page should appear. We can't see any details about the added food bank, at least not yet.

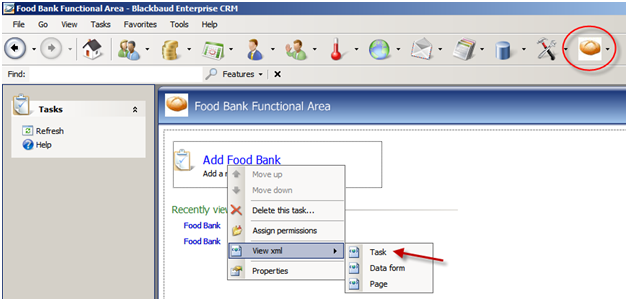
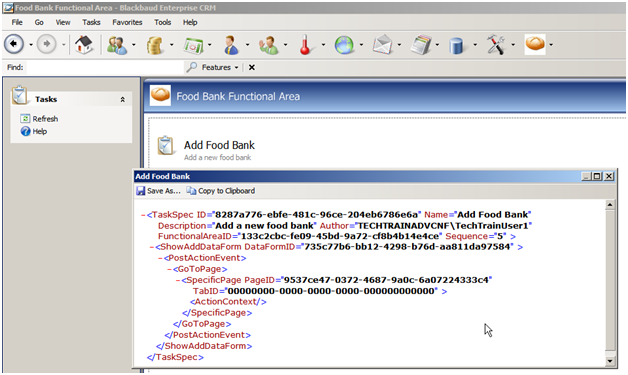
Step 8 - Let's look at some XML!
In Design Mode, navigate to the Food Bank functional area. Right-click the Add Food Bank task and select View xml\Task from the popup menu. A dialog window displays the XML for the Task Spec.
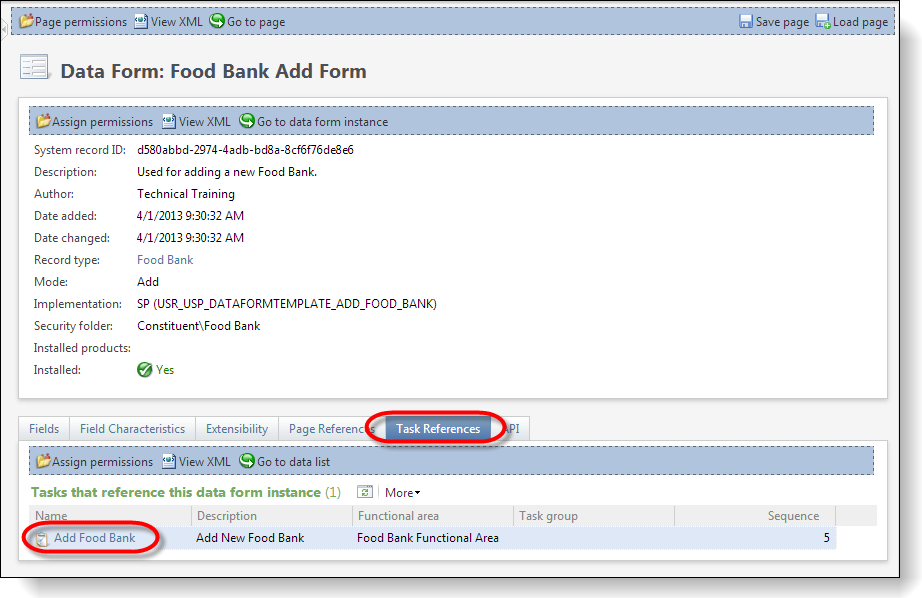
In Design Mode, navigate to the Food Bank functional area. Right-click the Add Food Bank task and select Go to data form instance from the popup menu. The Data Form page appears.
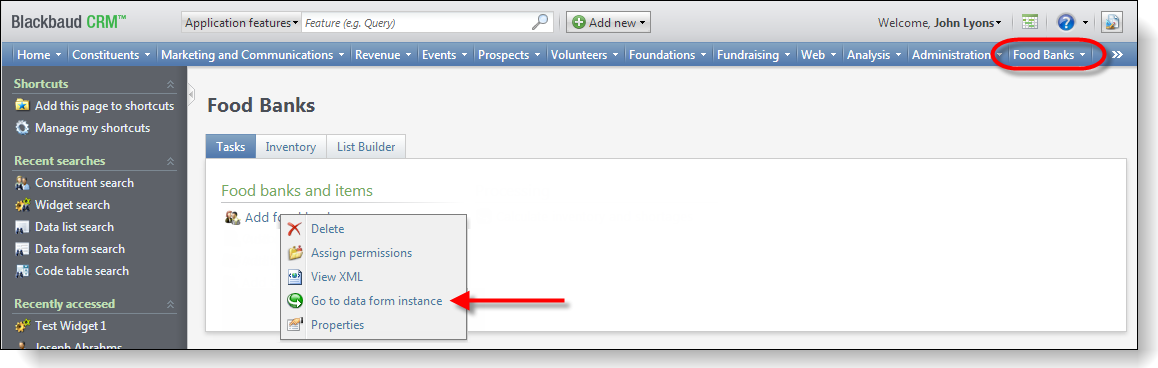
Select the Task References tab and click Add Food Bank in the grid. The Task page appears.
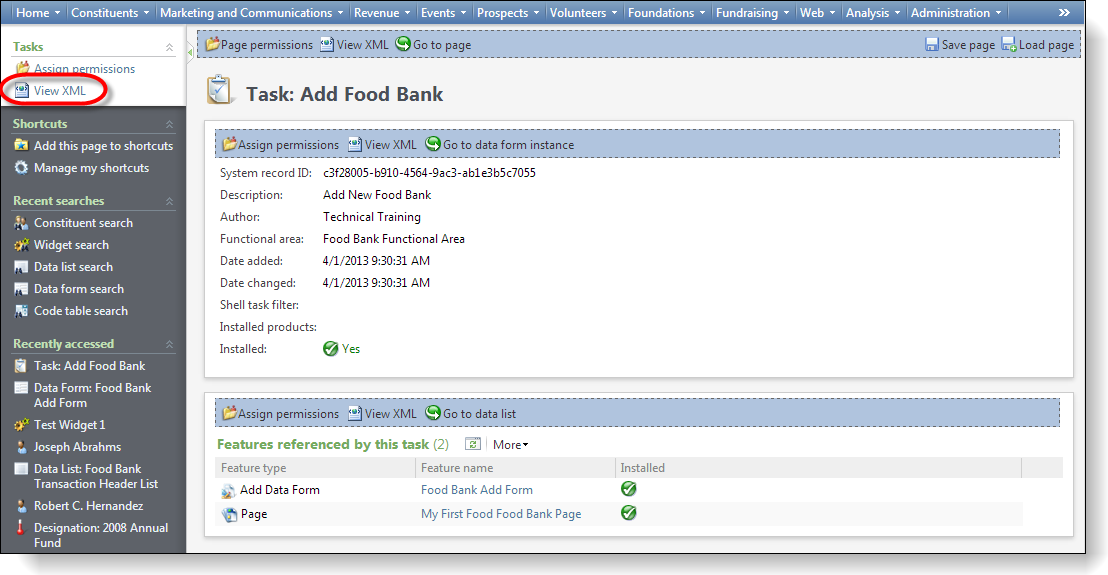
Under Tasks in the top left, click View XML. A dialog window displays the XML for the Task Spec.
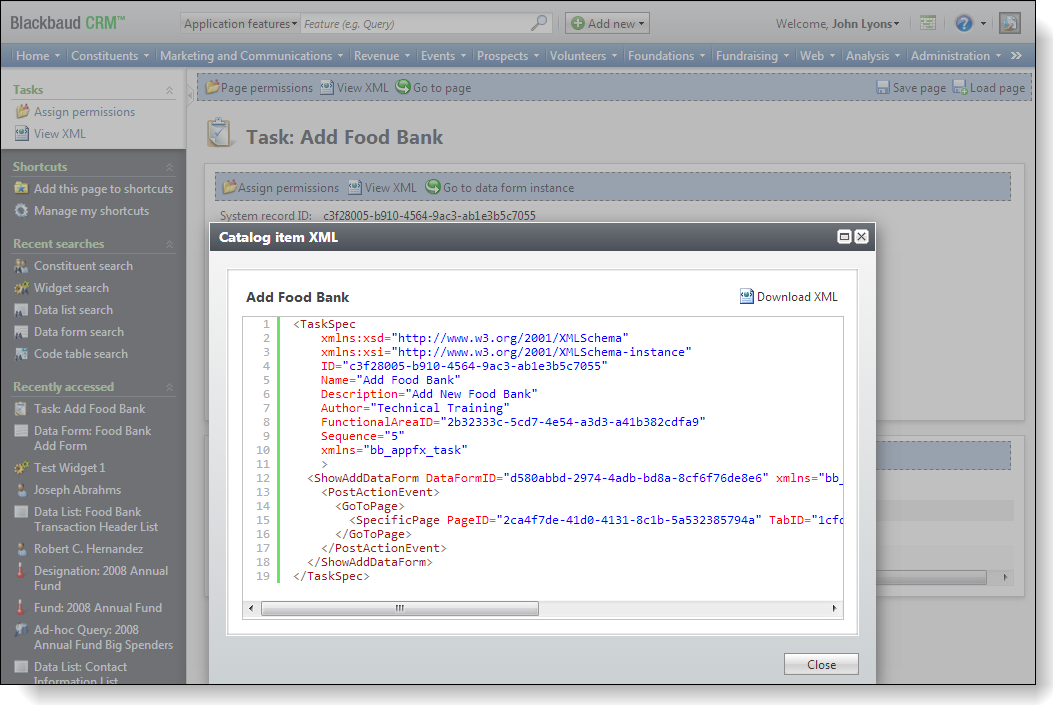
As you can see, when you configure the post-action event property, you change the XML that defines the Task Spec. Specifically, the PostActionEvent element opens a page after you save the Add Data Form. The Add Food Bank Add Form is opened first followed by the Food Bank page.