Customize User-facing Constituent Profile Pages
You can customize the pages that constituents use to register on your site as a new constituent or update their profile. When customizing these pages, you can choose the fields to display and which are required. You can also choose a wrapper for the header and footer.
Customize the constituent-facing Profile pages
(Optional) To make this page responsive, go to Setup and Site Options, and set CONS_USER_PROFILE_USE_RESPONSIVE_LAYOUT to TRUE.
Go to Setup > Standard Page Center to see the list of Standard Pages for your site.
For either Constituent Profile (User Registration) or Constituent Profile (User Update), select Customize.
On the Customize Page Header and Wrapper page that opens:
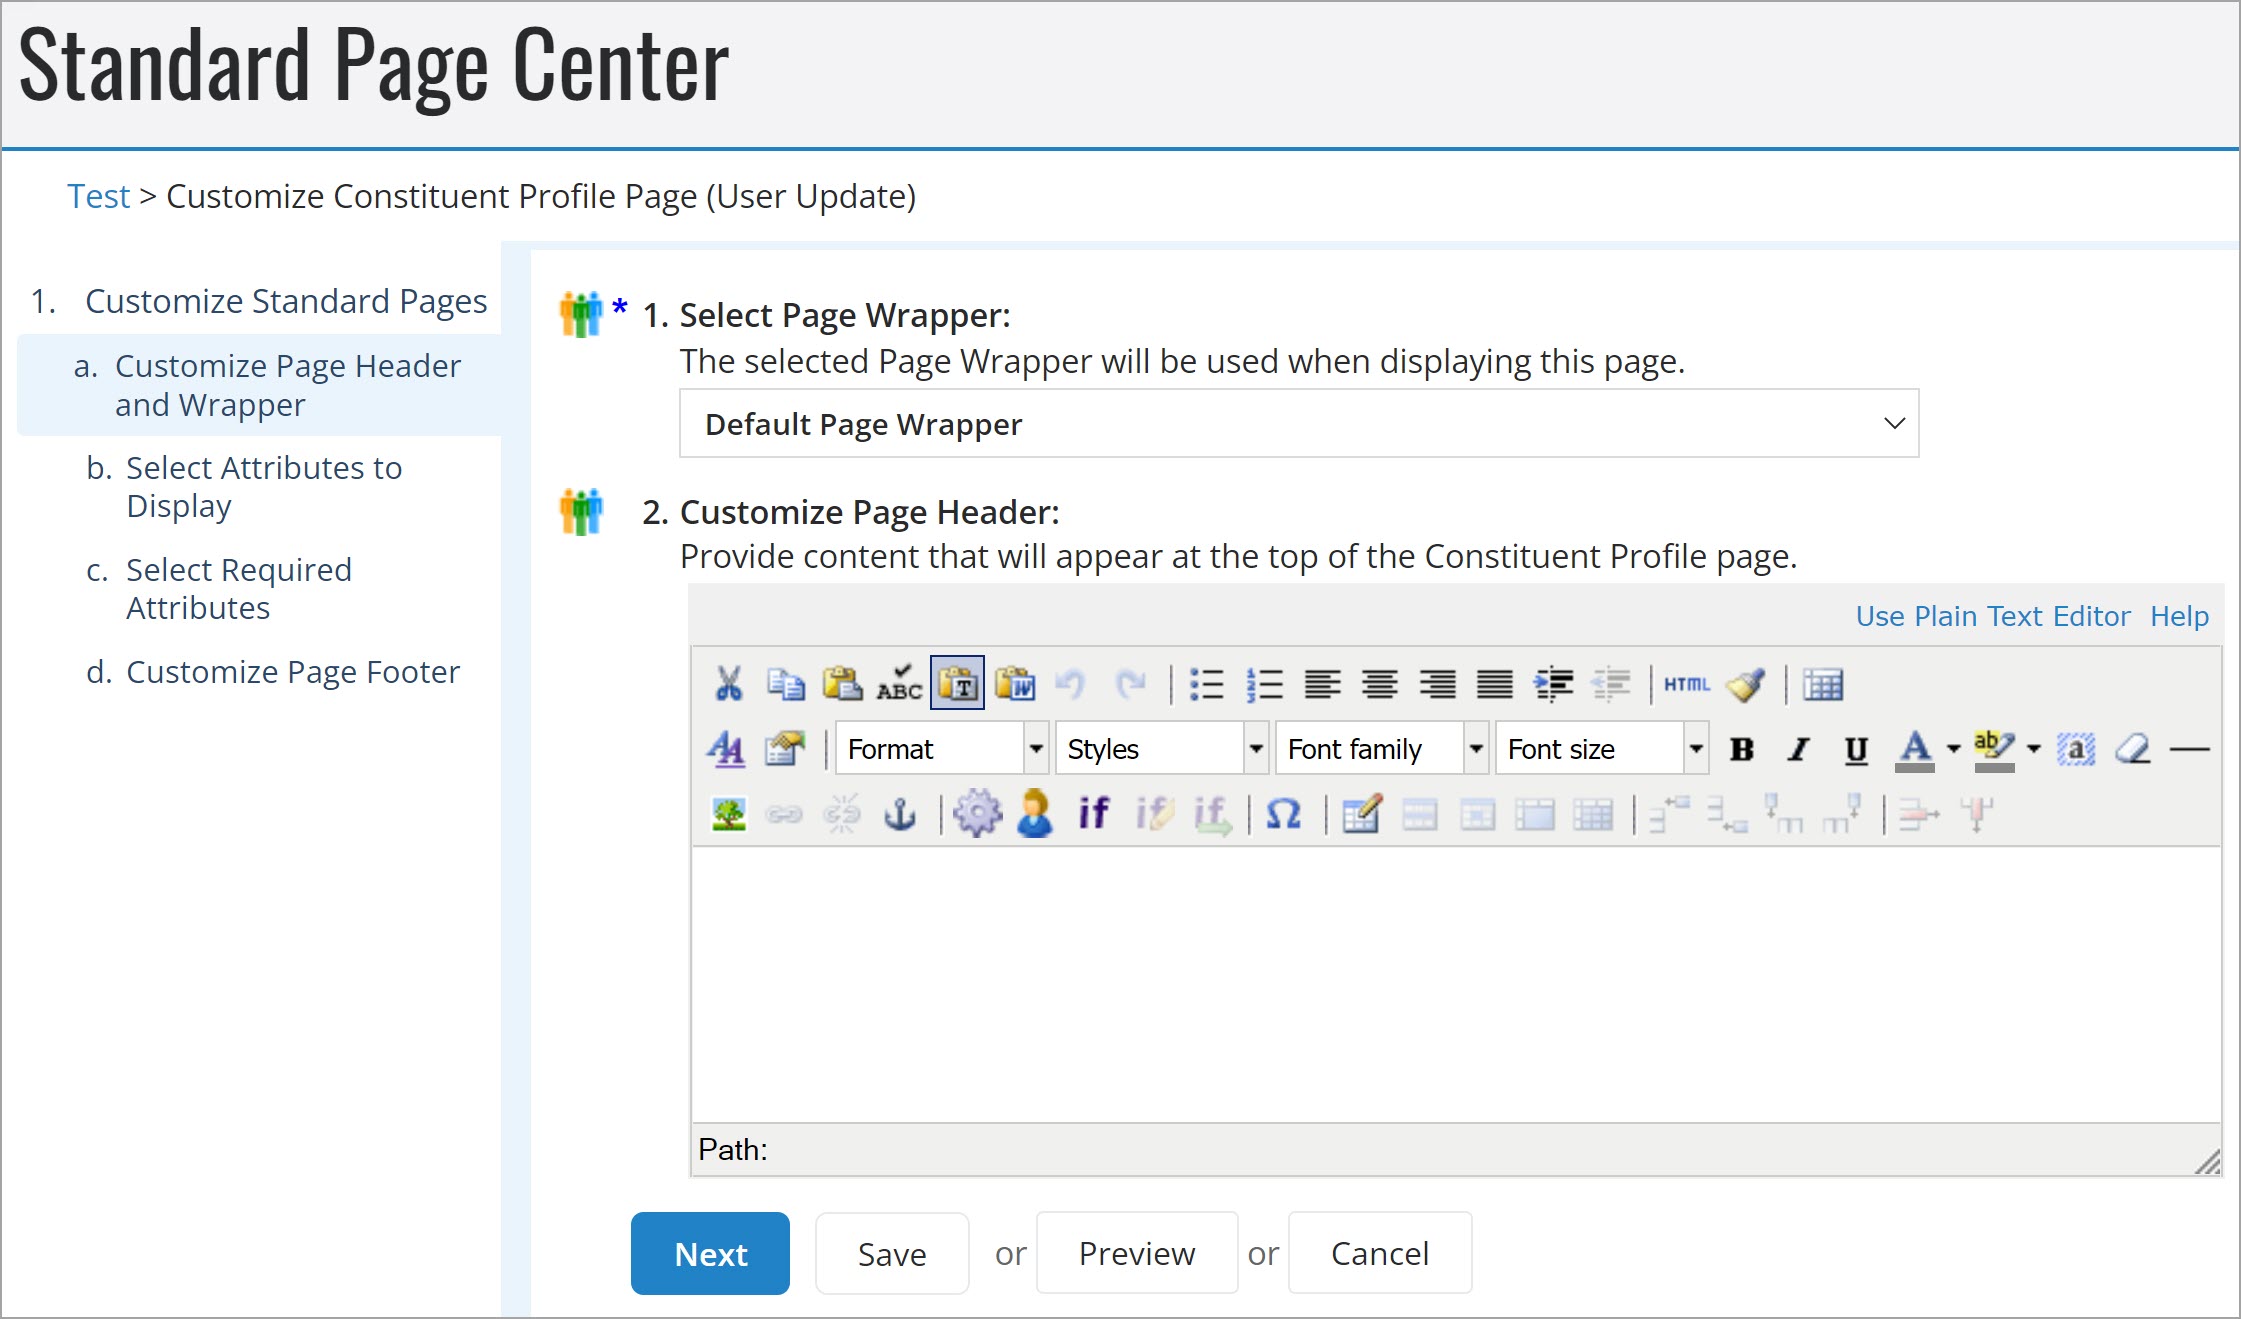
Select a Page Wrapper to use when displaying this page to the constituent, using the drop-down menu provided.
Use the WYSIWYG HTML editor to design the Header for this page. You can use images and text as well as other features that are available in the editor.
Select Preview to verify your changes. Close the preview when finished.
Select Next to save your changes and move to the next page.
On the Select Attributes page:
Check the fields that you wish to Show to the constituent, using the Check All link to check all the fields in any particular section, if you wish.
Note: Some fields must be included for any registration and will appear on this page as checked, but grayed so that they cannot be unchecked.
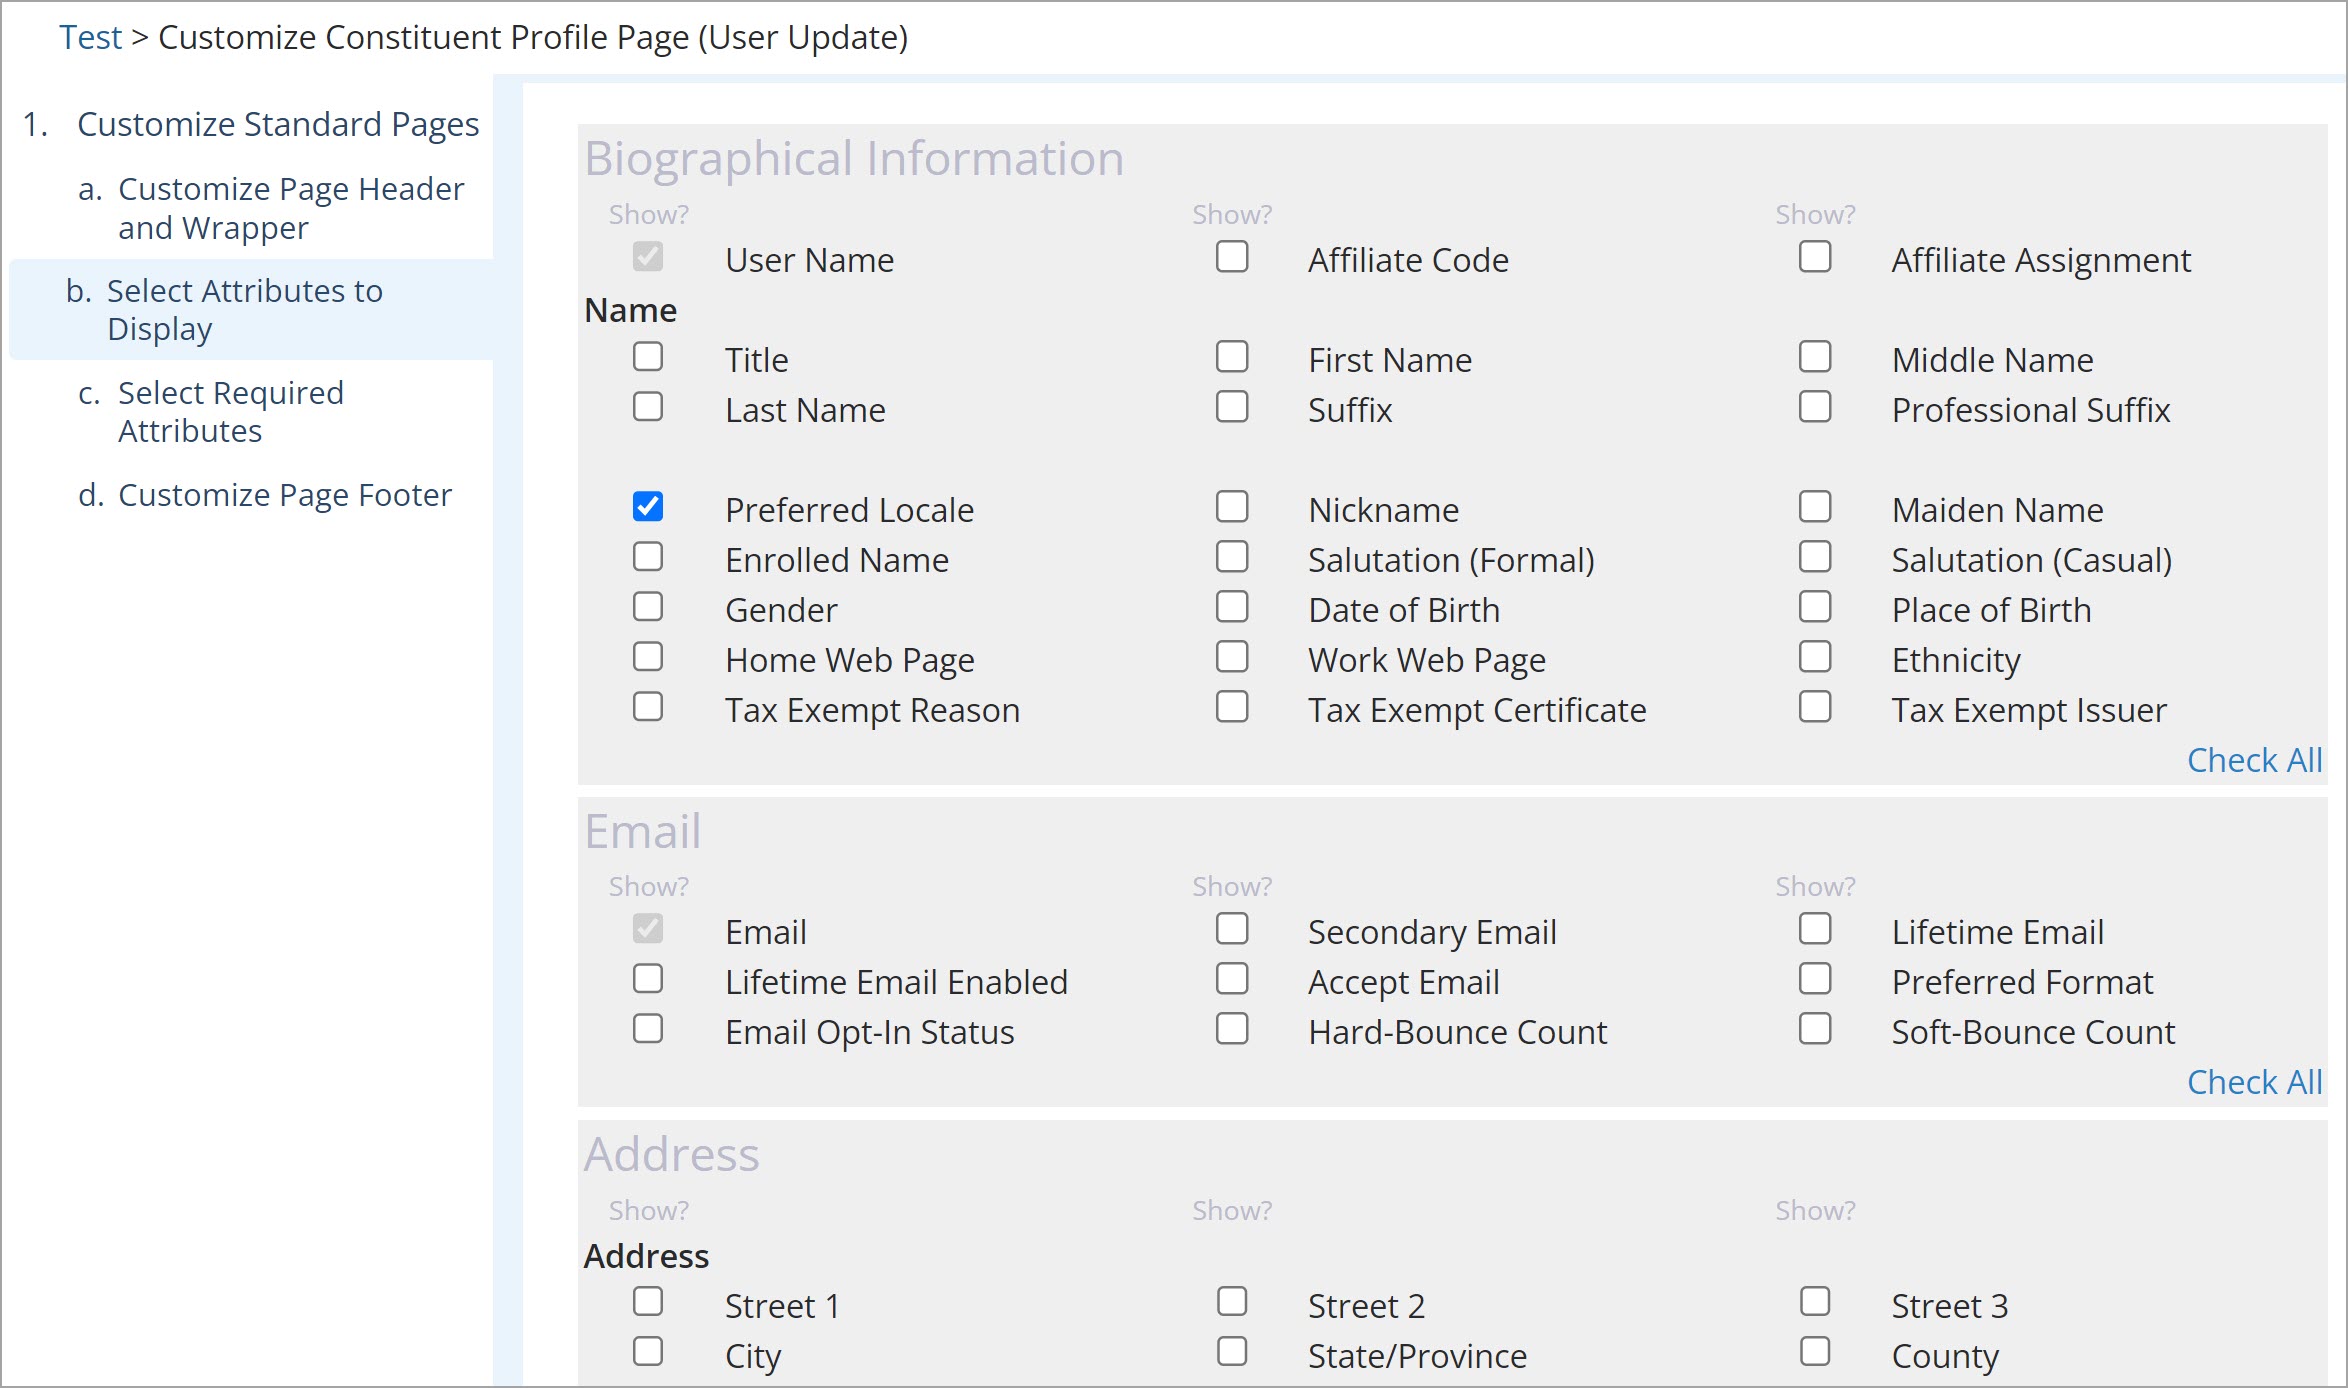
Select Preview to verify your changes. Close the preview when finished.
Select Next to save your changes and move to the next page.
On the Select Required Attributes page, you will see only the fields that you selected to include on the previous page.
Check those fields you would like to require.
Note: Checkbox and Read Only fields cannot be required. Checkbox fields provide a value when checked or unchecked, and Read Only is not intended for editing, such as Senate District.
Select Preview to verify your changes. Close the preview when finished.
Select Next to save your changes and move to the next page.
(For the User Registration page) On the Customize Email Opt-In page:
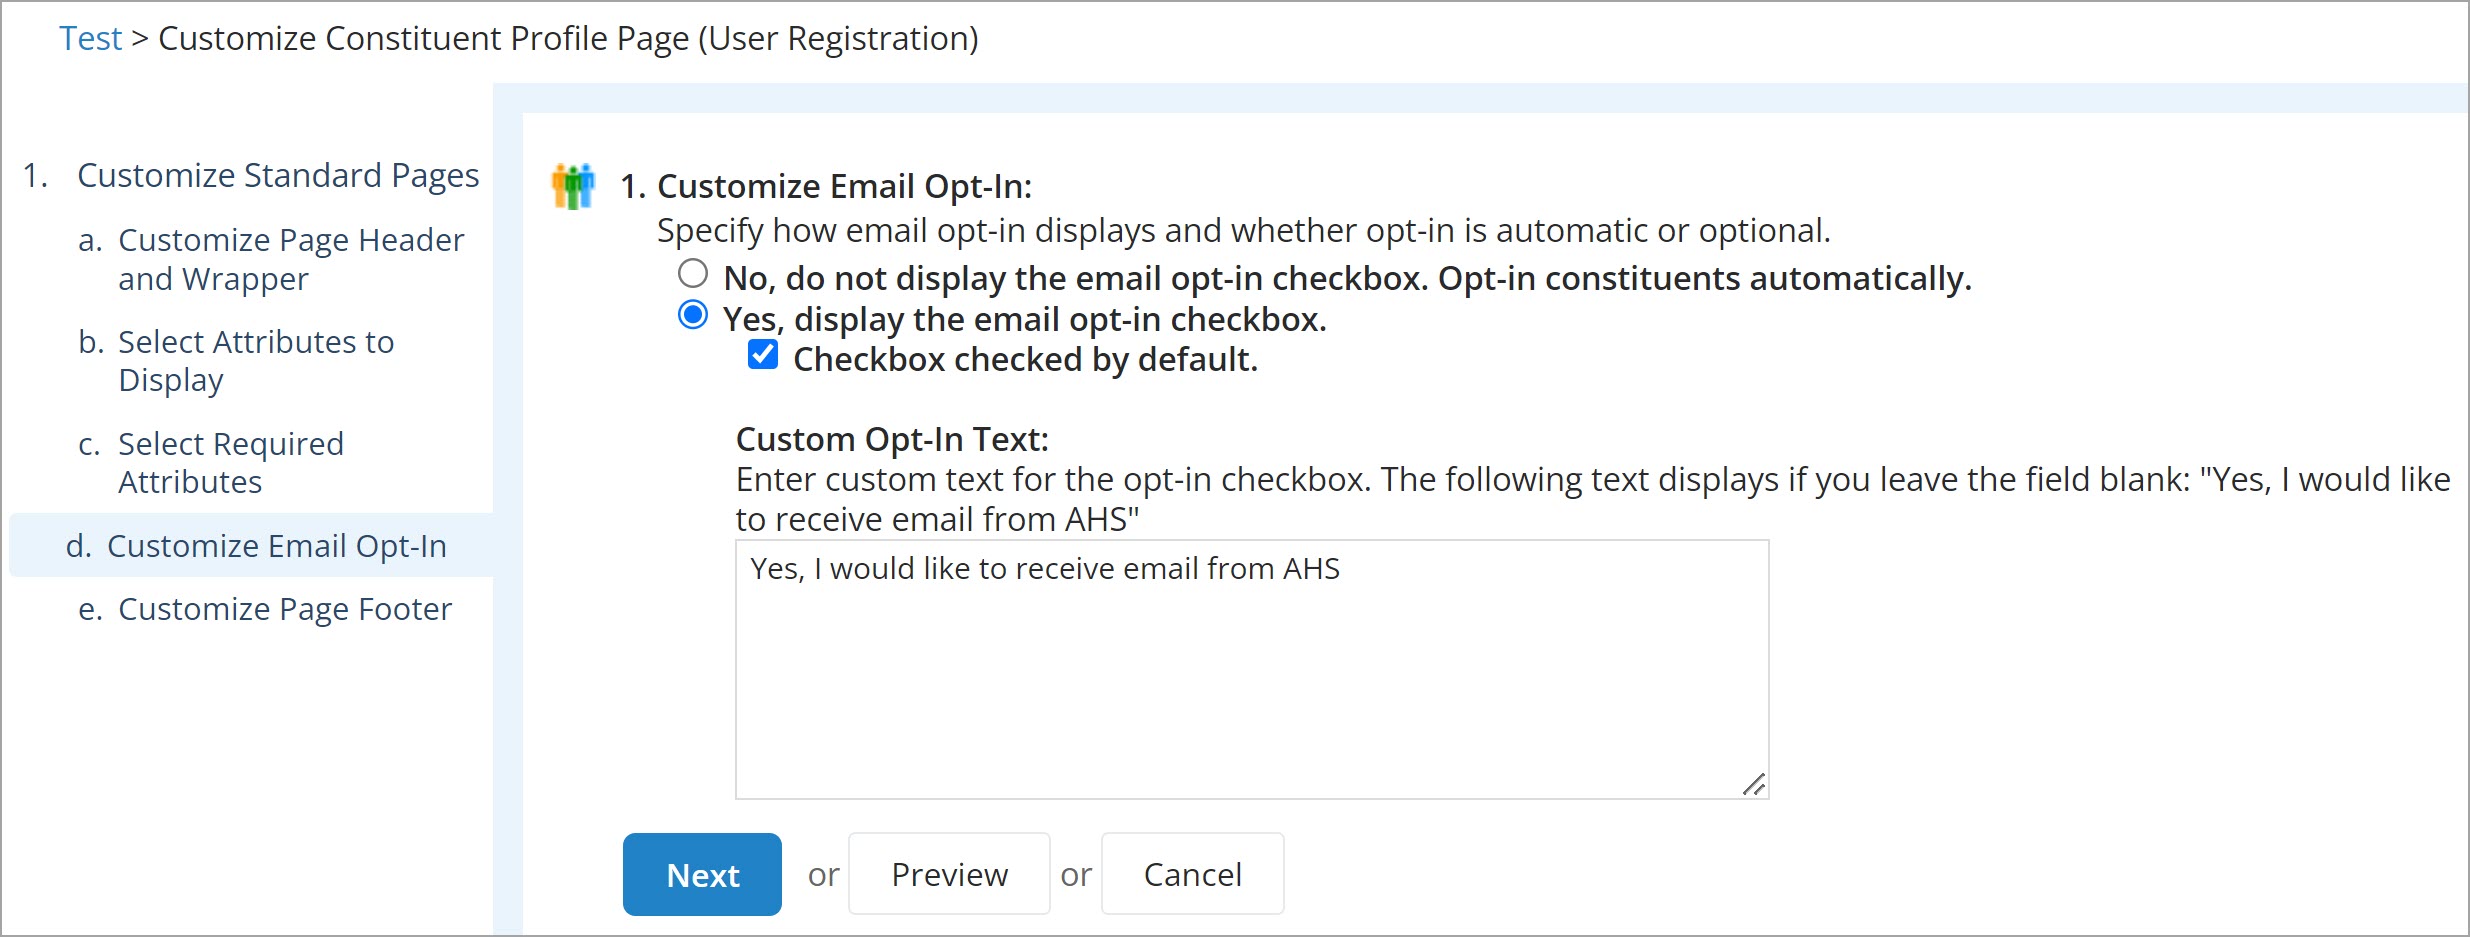
Choose to display or hide the email opt-in checkbox. When hidden, new constituents are opted into email automatically.
(Optional) Customize the opt-in checkbox label in theCustom Opt-In Text field.
Use the WYSIWYG HTML editor to design a Page Footer. You can add images and text as well as other features that are available in the editor.
Select Preview to verify your changes. Close the preview when finished.
Select Finish to save your changes.