Set up Blackbaud Checkout
You're just a few steps away from a simple, responsive donation experience.
Step One - Payment configuration
Your site must transact through Blackbaud Merchant Services (BBMS) in Luminate Online and use a Blackbaud Payment Services (BBPS) gateway.
If you don't currently have Blackbaud Payment Services (BBPS) set up with a Blackbaud Merchant Services account, or you aren't sure, contact Blackbaud. If you already transact with BBPS and BBMS in Luminate Online, see Set Up Payment Capabilities to add Blackbaud Checkout to your BBMS account in Luminate Online.
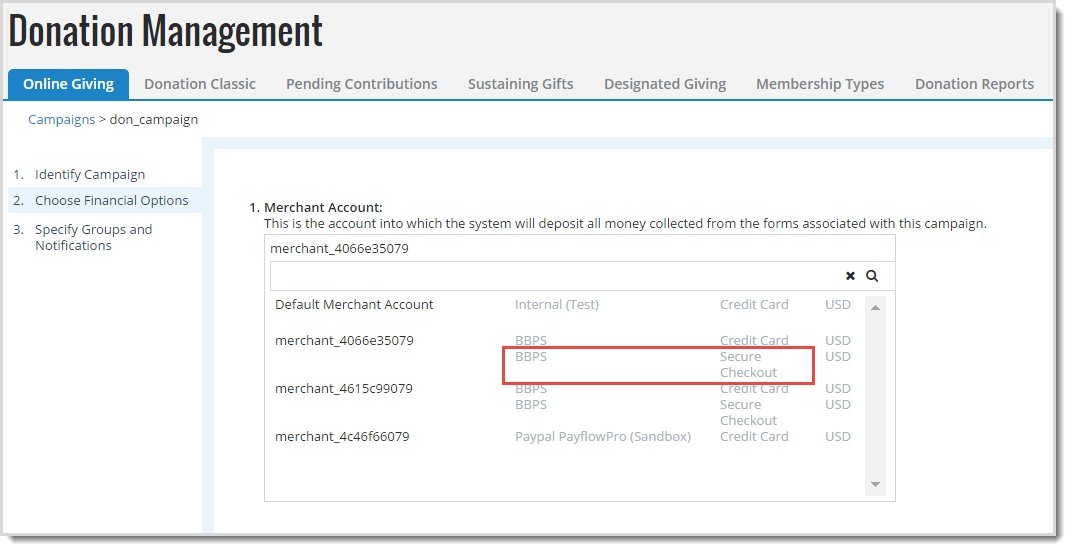
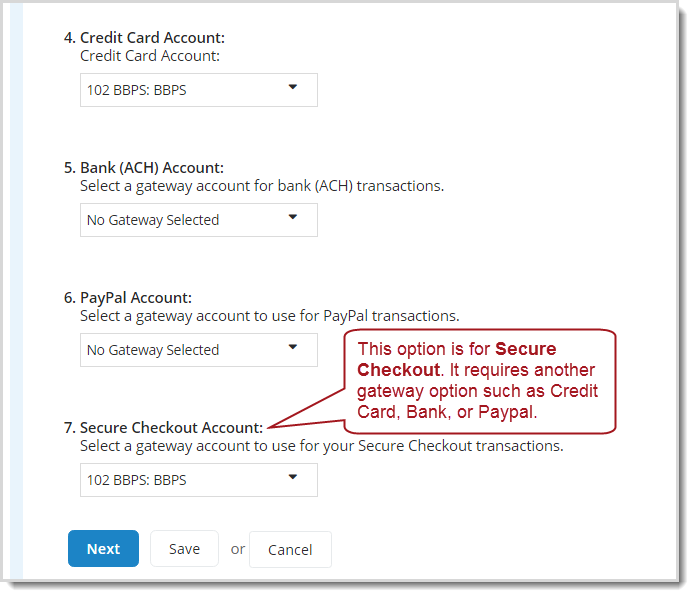
Next, make sure that your Donation Campaign is set up with a BBPS-configured merchant account.
Apple Pay
Apple Pay is automatically included with Blackbaud Checkout and requires no onboarding steps. When an Apple Pay-supported browser and operating system is detected, Apple Pay automatically displays as a payment option.
PayPal and Venmo
If you have a PayPal Business account, PayPal and Venmo are available as payment methods for one-time payments.
Note: When Donor Cover is enabled, PayPal and Venmo do not display as payment options. Support for these payment options is coming soon.
Your Blackbaud Merchant Services (BBMS) administrator can update your BBMS settings to support PayPal. After PayPal configuration, PayPal and Venmo display as payment options on the donation form. No updates are needed in Luminate Online. See Knowledgebase article 196074 for configuration steps to enable PayPal in Blackbaud Merchant Services.
See our Community announcement to learn more. To understand PayPal and Venmo options for Luminate Online, see PayPal and Venmo Options in Luminate Online and TeamRaiser .
ACH direct debit
ACH (Automated Clearing House), also known as direct debit, is available in Blackbaud Checkout for one-time and recurring payments. Complete the steps in Direct debit (ACH) in Blackbaud Checkout to offer ACH on your Blackbaud Checkout form.
Require First and Last names during checkout
To require First name and Last name in Blackbaud Checkout for Luminate Online, contact Blackbaud Support to enable the PAYMENT_BBCHECKOUT_IS_NAME_REQUIRED Site Option.
Step Two - Set a Luminate Online API Key
In Setup, Site Options, Open API Configuration, if you see a green checkmark by Configure API Keys, you can move on to the next step. If you see a red "X," select Edit API Keys and enter any value in the Luminate Online API Key field. Use any combination of letter and numbers as described here. Select Finish.
Step Three - Set up a Page Wrapper and Donation Form
-
Choose a responsive Page Wrapper to use with your PageBuilder page. To ensure that it's responsive, see Responsive Layouts.
Note: jQuery version 1.11.1 or higher is required in either the Page Wrapper or PageBuilder page. Place jQuery in the Page Wrapper or PageBuilder page, but not both. More than one version of jQuery can cause loading issues (spinner). Place jQuery in the Page Wrapper HEAD.
-
Choose (or create) the donation form in Fundraising > Donation Management.
Required: The donation form must be:-
An Online Giving form (not Donations Classic)
-
Published
-
Set to Online or Offline/Online Interaction Mode (can't be offline-only)
-
Configured with no more than one donor-entered donation level. Only the first donor-entered donation level displays, so instead, use additional fixed amount donation levels. For best practice, use no more than six donation levels on a form.
Optional: The donation form can include:
-
(New) Donor Cover - See Donor Cover for Blackbaud Checkout in Luminate Online
-
Dynamic Ask levels - See Create and Embed a Dynamic Ask Component
-
Recurring giving - To use recurring giving, you must use one of the following giving patterns on your donation form: Flexible Sustainer Donation Level, or Flexible Designated Giving Donation Level.
Note: Installment Plan Donation Level is not currently supported with Blackbaud Checkout.
-
TeamRaiser gifts - Use the form ID of the donation form that is associated with your TeamRaiser. Also see (Optional) Step Five - Create a URL for TeamRaiser Gifts
-
Honor Gift fields - Add Honor Gift data elements to the donation form to display the options to a donor. See Honor Gift Data Element

-
-
Get the donation form Form ID so you can use it with the S1300 S-Tag.
Tip: For MultiCenter, use a uniquely identifiable donation form for each center so transactions are recorded in the correct center.
Step Four - Add S1300 to a PageBuilder page
Add the S1300 S-Tag to a secure PageBuilder page to show a donation form in a responsive and simple display.

-
Go to Content, PageBuilder.
-
Either create and publish a page, or open an existing published page to use as the donation form frame.
Note: Set the page to secure in Page Properties to render donation form content. See
Tip: For best results, use a new PageBuilder page with minimal content.
-
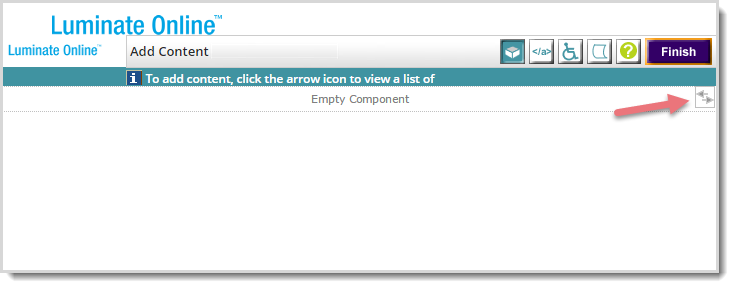
In page edit mode (Add or Edit Content) for the PageBuilder page, click the arrow icon in the upper-right and select HTML Content.
-
If the content editor opens to the WYSIWYG, click View Plain Text Editor to use the Plain Text entry.
-
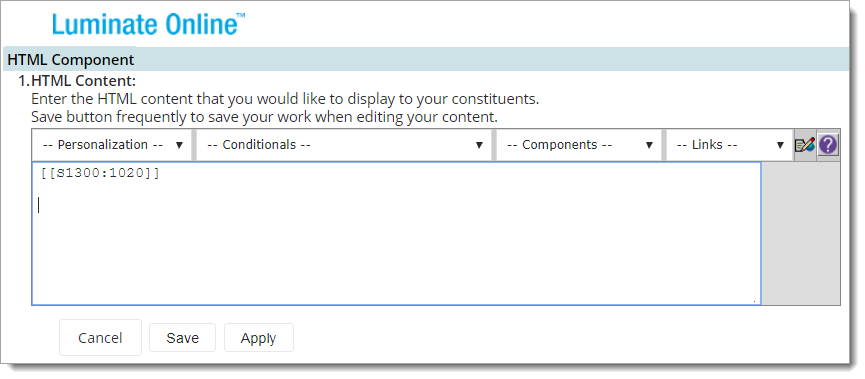
In the HTML Content field, type the S1300 S-Tag as [[S1300:donation form ID]] where donation form ID is your donation form number.
Alternatively, you can enter <convio:session name="1300" param="donation form ID"></convio:session> where donation form ID is your donation form number.
For a donation form with an ID of 1020, enter [[S1300:1020]] or <convio:session name="1300" param="1020"></convio:session>
 - or -
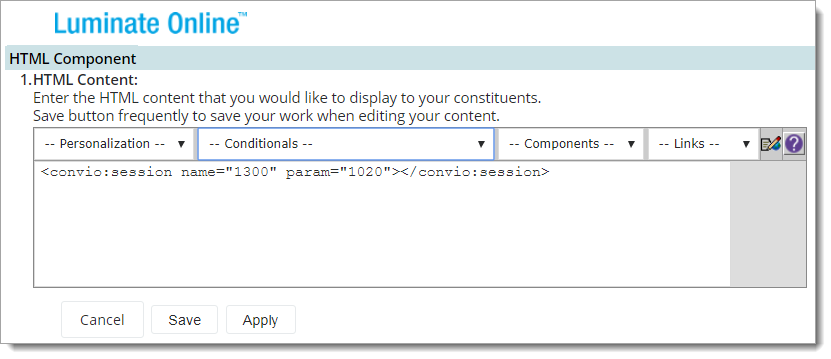
-
Click Save.
-
Verify that the page is Published. If not, publish the page.
(Optional) Step Five - Create a URL for TeamRaiser Gifts
Note: Use a subset of donation form fields for Blackbaud Checkout in TeamRaiser. See Knowledgebase article 194792. Replace TeamRaiser links on a standard donation form with updated URLs created below to credit TeamRaiser gifts. This update requires web development skills.
Although optional, to properly credit TeamRaiser gifts, you must create a URL for donors that includes three identifiers: event ID, soft credit ID, and soft credit type.
When donors transact through the form accessed by the URL, the donor gets credit for the donation, and TeamRaiser totals for the event, participant, or team also get credit.
-
Locate the URL of your published PageBuilder page.
-
At the end of the URL, add a question mark (?), then three required TeamRaiser identifiers, separated by an ampersand (&):
-
fr_id=value - The numerical ID of the TeamRaiser
-
soft_credit_id=value - The numerical ID of the Participant, Team, or Event, depending on which you are crediting
-
soft_credit_type=TR_PARTICIPANT | TR_TEAM | TR_EVENT - Type that corresponds with the soft_credit_id, either TR_PARTICIPANT, TR_TEAM, or TR_EVENT
https://localhost/site/SPageNavigator/BBSecureCheckoutDonationForm.html?fr_id=1000&soft_credit_id=1001002&soft_credit_type=TR_PARTICIPANT
-
-
Using JavaScript, replace all URLS on TeamRaiser pages or emails to use the new URLS so you can direct donors to the TeamRaiser donation form with Blackbaud Checkout.
Test Blackbaud Checkout
Check your published PageBuilder page on a personal computer and mobile device to ensure that it displays properly.
You can use the Preview function in PageBuilder, but Page Wrapper CSS customizations will not display.
To see transactions through this experience end-to-end, you'll need to use a real credit card or use a device that supports Apple Pay. Refund test transactions through the refund process. See Refund a Transaction.
Tip: Problems with your form? See Troubleshooting.
Optional: Customizations
For customization options and tips, see Customize Blackbaud Checkout.
Following a successful transaction, a Thank You with the donation amount displays on the PageBuilder page. To customize or make your own page, key off the JQuery event. See Blackbaud Checkout jQuery Event Information Objects
To customize the look and feel of the donation levels, see the S1300 S-Tag for the HTML and CSS.
Optional: Source Codes
To track how donors get to a page with the S1300 S-Tag, use the subsource code (s_subsrc=) argument in the page URL link to identify when the page is accessed or used. See Track Site Interactions with Source Codes.
Note: Do not add the source code (s_src=) argument to any link inside of an email message. Use the Subsource (s_subsrc=) parameter instead.