National Student Loan Data System (NSLDS) Lists Guide
Education Lists can save significant time when your higher ed institution needs to gather data for the National Student Loan Data System (NSLDS).
You'll need to be a platform manager or list manager (the Manage list category task) .
For details about NSLDS, visit the official website of the U.S. Department of Education's Federal Student Aid.
Configure Access to NSLDS Lists
A platform manager who is is an Environment admin or or is a Organization (site) administrator should create roles.
-
Select Analysis from the top navigation menu.

Alternatively, from your Home dashboard in Core, select Go to Education area under Tasks.
-
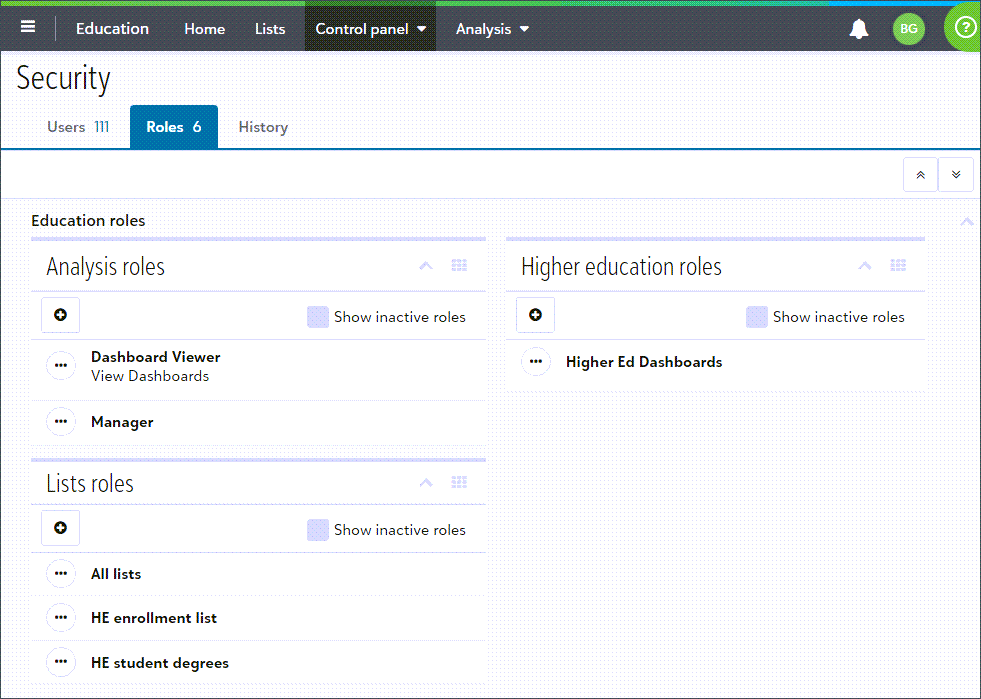
Next, select Control panel, select Security, and then select Roles.
-
Under Higher Education roles, select + Create role. Next, enter a Role name and Description. You can also copy an existing role to create a new role. Then select Show permissions and choose which dashboards users with this role should be able to access. Select Save.
-
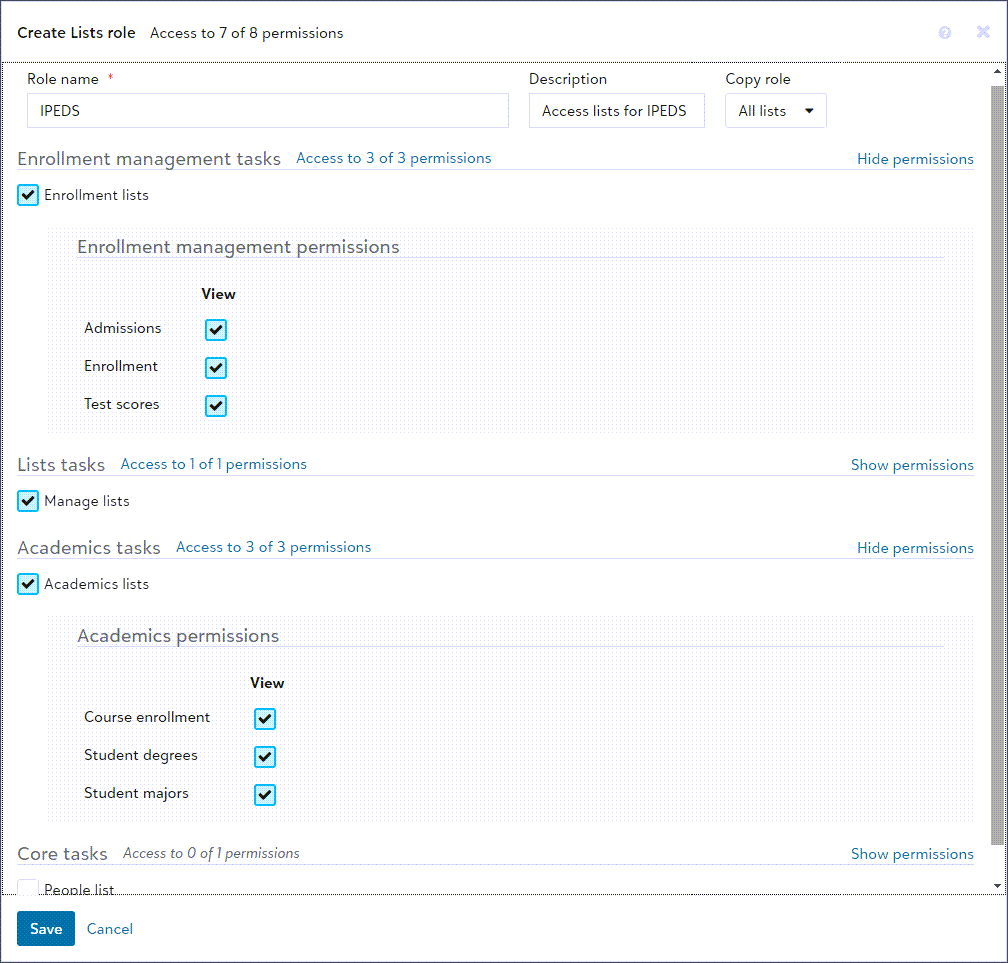
Under List roles, select + Create role. Next, enter a Role name and Description. You can also copy an existing role to create a new role. Then select Show permissions and choose which lists and data users with this role should be able to access. Select Save.
-
Then add users as members of the roles.
-
From Control panel, select Security and then select Users.
-
Find a existing user. On their row, select (...) and then select Manage Roles.
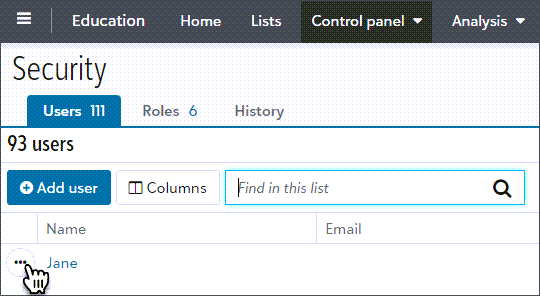
Alternatively, select + Add user. Next enter First name, Last name, and Email address. Then select to Link to an existing user from Core or elseCreate a new user.
-
Select which Lists, Higher education dashboards, or other features the user should have a security role to access.
-
Select Save or Send invite.
-
Navigate to Lists
To go the Education Area, as a platform manager who
-
is an Environment admin
-
or is a Organization (site) administrator
select Go to Education area from your Home dashboard in Core. Then select Lists.
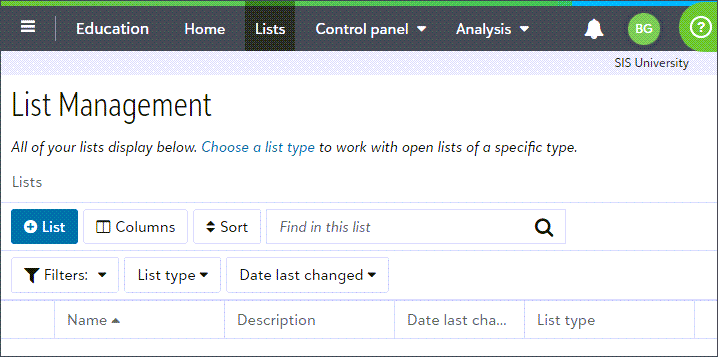
Alternatively, as a user who has been granted access to lists, select Analysis from the top navigation menu and then select Lists.
Tip: If you’re familiar with Raiser’s Edge NXT, this is like going to “web view.” The top navigation menu for the Education area will be a gray color (and is sometimes call an "omnibar").
List features
Similar to other SKY lists, you can:
-
Search for a record in the list
-
Select which columns of details to view
-
Reorder columns (drag and drop the column headers)
-
Sort by a column (select the column header, select twice to reverse the sort)
-
Filter based on criteria
-
Create a new list by duplicating an existing list and restrict who can change the new list
-
Save the filters to view the list later
-
Rename or delete lists you've saved
-
Export data to a spreadsheet application (such as Microsoft Excel) and use that application to print
List types
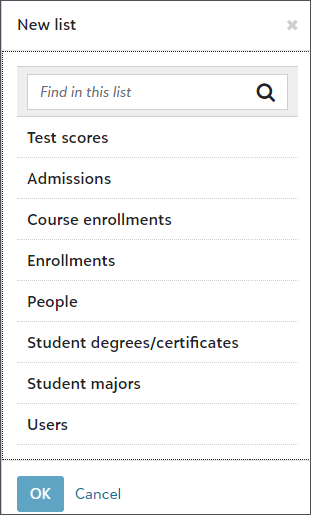
Some lists types correspond to multiple NSLDS components. Thus, you'll use those lists types multiple times to report data:
|
Enrollments Student degrees/certificates Student majors People Admissions Test scores Course enrollments |
|
User Profiles
Students' user profiles are the source of some NSLDS specific data fields for these lists.
To update the data for a student in the list, go to their user profile in Core and select Contact card. Then select Edit under General information.
-
Enter the user's Anticipated completion date, which is an estimate of when the student will complete their degree.
You'll likely enter additional information, similar to IPEDS Lists Guide as well, such as the:
-
Anticipated completion date (enter an estimate of when the student will complete their degree.)
-
Cohort year (year students begin attending college)
-
First-time student (yes or no)
-
Entering enrollment status (full or part time)
-
Started in fall term (yes or no)
-
U.S. Nonresident (yes or no)
-
Entering FIPS code (geographic region with numeric code)
The system will automatically update the following fields based on when relevant updates are made.
-
Address last modified date - indicates when an address was last updated.
-
Email last modified date - indicates when an email was last updated.
Tip: Consider entering Pell grant status as an admin-only field on each student's profile. For more information on creating admin-only fields, see the help topic Custom user fields . You can also set up sub-cohorts as custom user fields, if desired.
Degrees and concentrations
Considering using the optional field CIP code for more flexibility when you configure programs. Add this value when you create or edit a degree.
For details about CIP codes, see The Classification of Instructional Programs (CIP) on the National Center for Education Statistic's website.
NSLDS Integration Mapping
Since some fields of data in Blackbaud Education Management may not exactly match those required by NSLDS, you should also configure how you want the data from Core and Academics to map to corresponding fields for NSLDS.
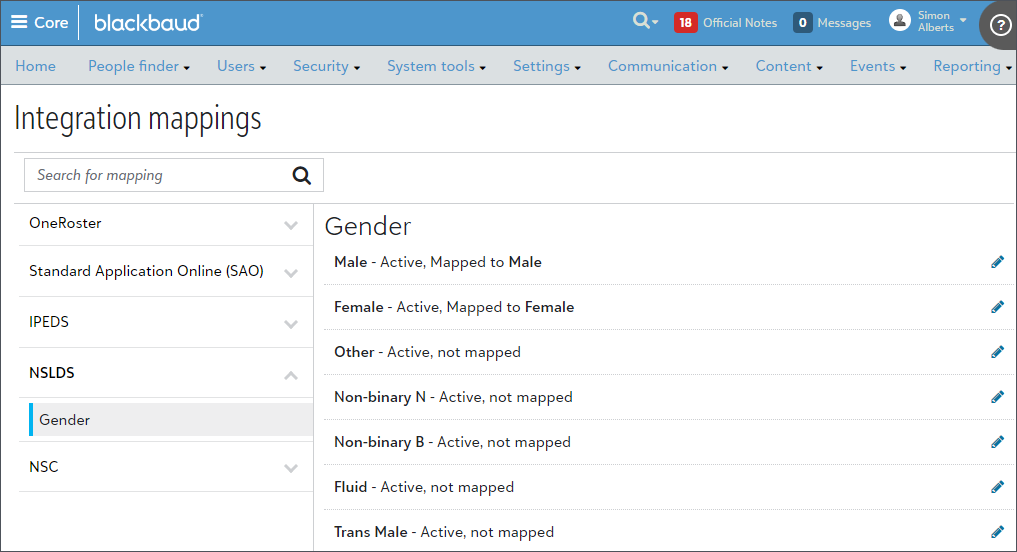
For example, your school might use more options for Gender than NSLDS requires. To complete NSLDS reporting, you'll match your school's unique values to the closest appropriate NSLDS option.
-
As a platform manager, go to Core, select Settings, and then select Integration Mappings.
-
Select NSLDS to view the NSLDS fields you'll need to map.
-
For each NSLDS field, you'll the values available at your school. Find which of your school's values that are Not Mapped and on it's row, select Edit.
-
For Mapping, select a corresponding NSLDS field. Data from your school's value will appear as this mapped value in NSLDS lists and reports.
-
Select Save.
Note: After you configure Integration Mappings for NSLDS, wait 24 hours to take further action. The mapped data is updated in the lists overnight.
The students' user profiles are the source of some NSLDS specific data fields for these lists. To update the data for a student in the list, go to their user profile in Core, select Contact card, and then select Edit under General information.
System Mapping
The following data is automatically mapped or converted from Blackbaud Education Management to the proper outputs for NSC, NSLDS and IPEDS.
-
state codes
-
country codes
-
enrollment statuses:
-
F (full-time),
-
Q (three-quarter-time),
-
H (half-time)
-
and L (less-than-half-time)
-
-
Degree-seeking is Yes for a student who has a Degree with an Award level of 1, 2, 3, 4, or 5.
Tip: The Award level menu of options on the Degree matches IPEDS program values. For details, review the Common Education Data Standards website.
List fields with calculated values
In education lists, columns whose names begin with NSC or NSLDS rely on integration mapping, as well as the fields named below to perform a logical calculation.
-
NSC Race/Ethnicity - This checks for:
-
US Nonresident,
-
Is Latino/Hispanic,
-
and Races.
Then it assigns the appropriate category to the student. Be sure to configure the NSC Integration mapping and wait 24 hours for the mapped data to flow into the list.
-
-
NSC/NSLDS Enrollment status - This checks the:
-
deceased date,
-
enrollment rows,
-
and enrollment status.
It provides the enrollment status and its associated date.
-
-
Pell Grant recipient - This value is assigned to students who have a financial aid type that includes the phrase “Pell Grant” with an Awarded decision type for the given session.
-
Program fields – Determines the:
-
program credential,
-
program CIP,
-
program name,
-
and program begin date
by first checking for CIP in the following order (or hierarchy):
-
Concentration on major
-
Major
-
Concentration on degree
-
Degree
and then selecting the:
-
credential,
-
name,
-
and declared on date
for that CIP code.
-
Tip: The data used to perform each of these calculations is also included as individual columns in the lists. You can review them to confirm the math
Coming soon: export formatted data
The next phase of our Enrollment Reporting initiative for NSLDS and National Student Clearinghouse (NSC) will provide organizations with an export that takes data previously discussed in this tutorial and delivers it in the file and data format required for the National Student Clearinghouse Enrollment Reporting.
Details about the data
Can't wait for the export? View a spreadsheet for more nitty-gritty details about the fields included in the first phase of our Enrollment Reporting initiative for NSLDS and National Student Clearinghouse (NSC).
