Schedule Reports
You can schedule reports to be sent to specific users or audiences at a frequency you define.
Note: Data in the report is updated at the time it sends. All recipients receive the report based on the creator's current data permissions.
-
Navigate to the Reporting > Ad Hoc and Data Feeds area.
-
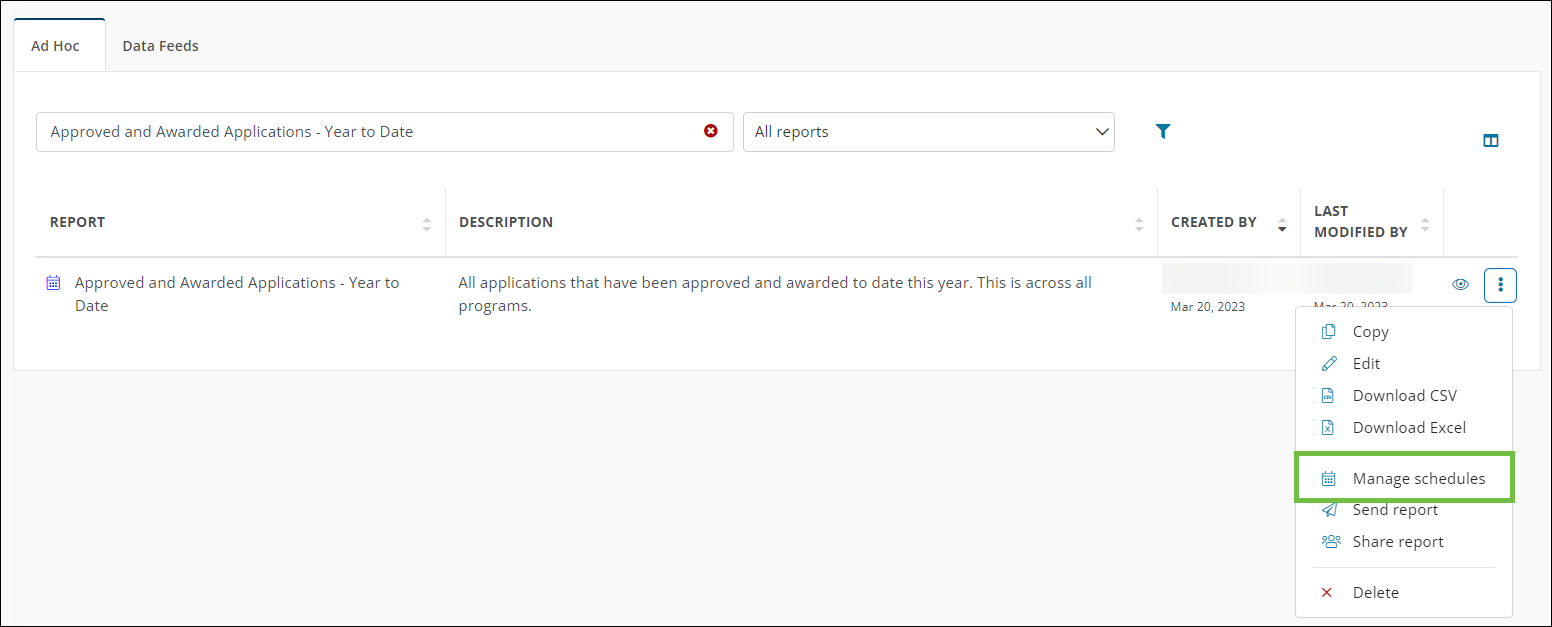
From the Ad Hoc tab, select the ellipsis icon next to the report and then Manage schedules.
-
On the Manage Schedules page, click on Create schedule.
-
From the Schedule Report screen, take the following actions to schedule a new report based on how recipients will access it.
 Downloadable file in email
-
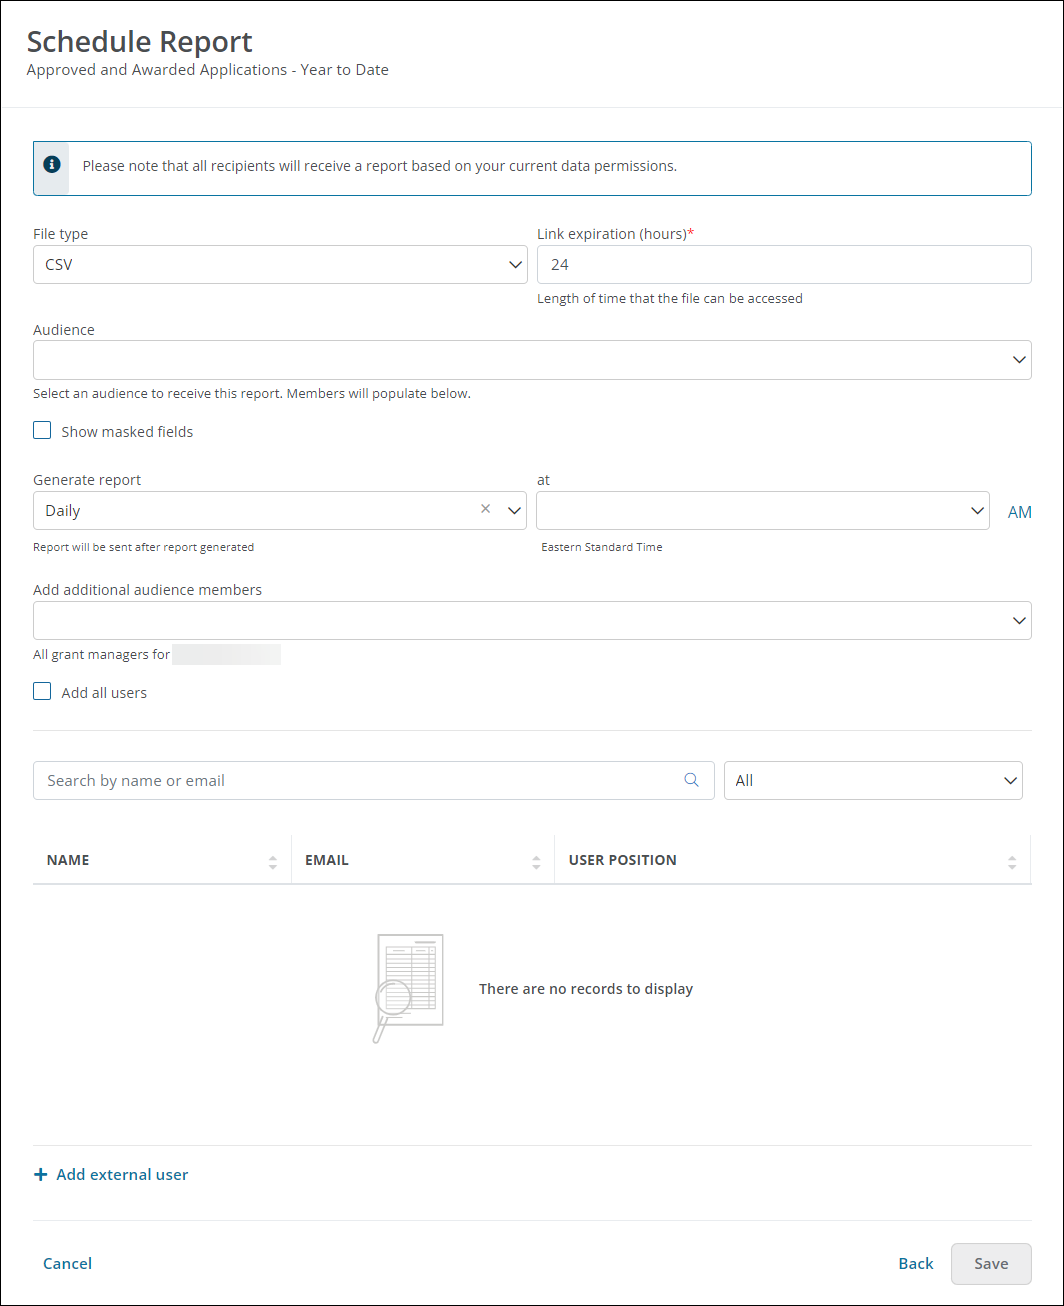
Select Downloadable file in email.
-
Click Next to continue.
-
Optional - Specify the file type (
CSVorExcel) to be sent. -
Determine the length of time that the file can be accessed. For example, the link expires in 24 hours.
-
Specify the recipients of this report by selecting an audience, adding Grant Managers from your organization, searching for users by name and email, or manually adding external users.
Note: External users are individuals who are not in GrantsConnect. This allows you to send them a report without requiring they sign in to a GrantsConnect account.
-
Optional - Specify if masked fields should be shown to the recipients by selecting the Show masked fields checkbox.
-
Define the frequency for the report by selecting Daily, Weekly, or Monthly and the appropriate options in the Generate report field.
-
Click Save to schedule the report.
 Data feed (i.e., SFTP connection)
Note: At least one SFTP connection is required to use the Data feed option.
-
Select Data feed.
-
Click Next to continue.
-
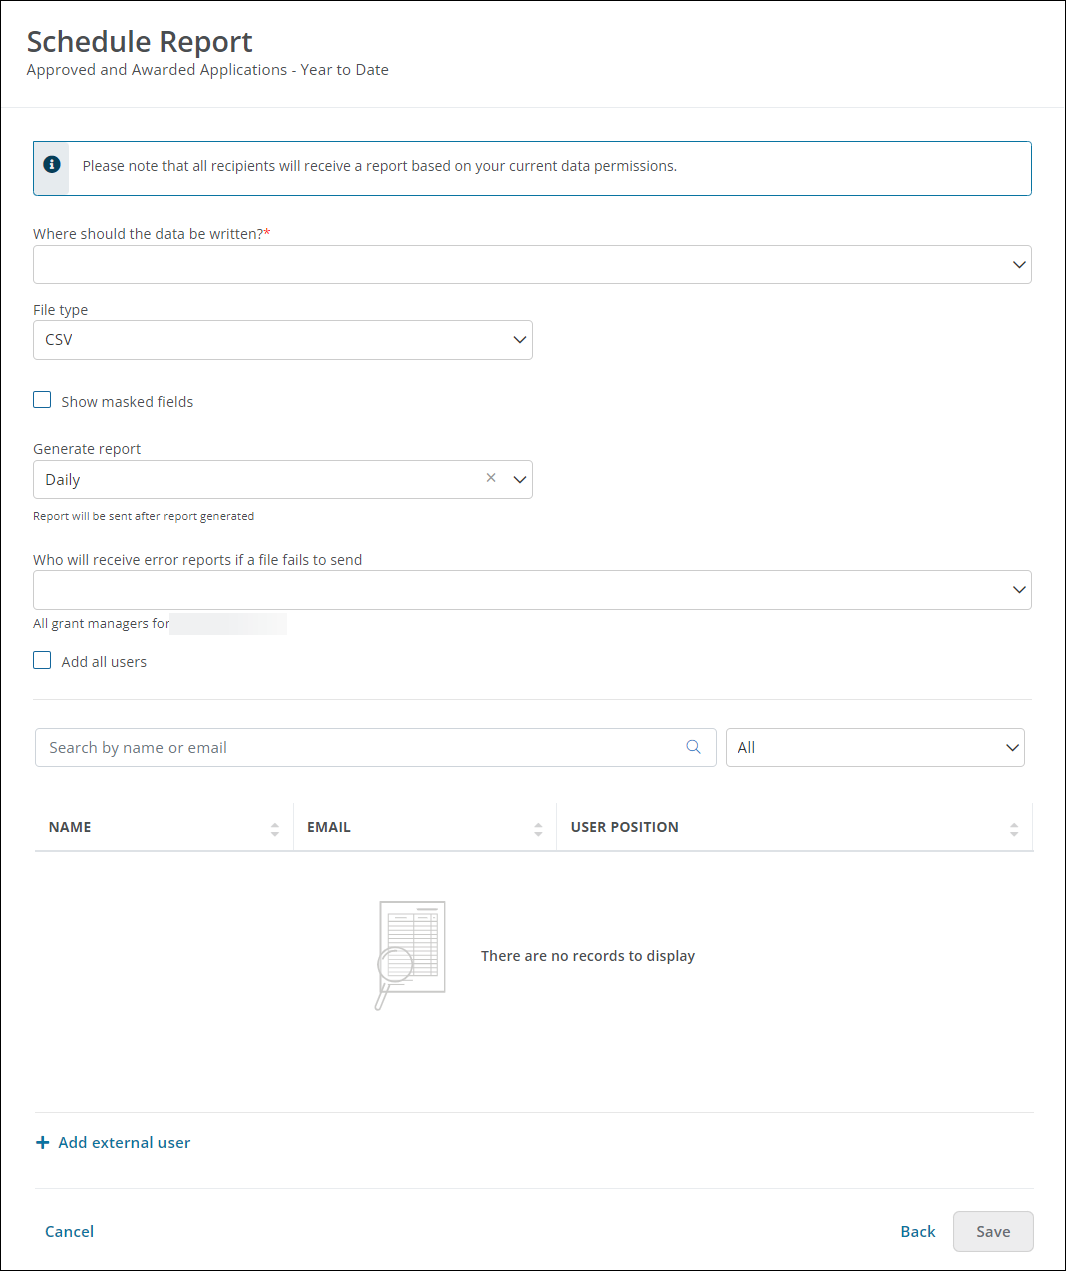
Specify the SFTP connection where the report will be sent.
-
Optional - Specify the file type (
CSVorExcel) to be sent. -
Optional - Specify if masked fields should be shown to the recipients by selecting the Show masked fields checkbox.
-
Define the frequency for the report by selecting Daily, Weekly, or Monthly and the appropriate options in the Generate report field.
-
Specify who will be notified if the scheduled report fails by selecting Grant Managers from your organization, searching for users by name and email, or manually adding external users.
Note: External users are individuals who are not in GrantsConnect. This allows you to send them a report without requiring they sign in to a GrantsConnect account.
-
Click Save to schedule the report.
-
After saving, you will return to the Manage Schedules page. From here, you can manage your existing schedules or return to the main Reporting > Ad Hoc and Data Feeds area. In this area, you will now see an icon next to the report name with the number of schedules shown on hover.
![]()
Note: Reports scheduled as a data feed will also appear in the Data feed tab of the Reporting > Ad Hoc and Data Feeds area.
Frequently asked questions
 How do I edit a schedule?
-
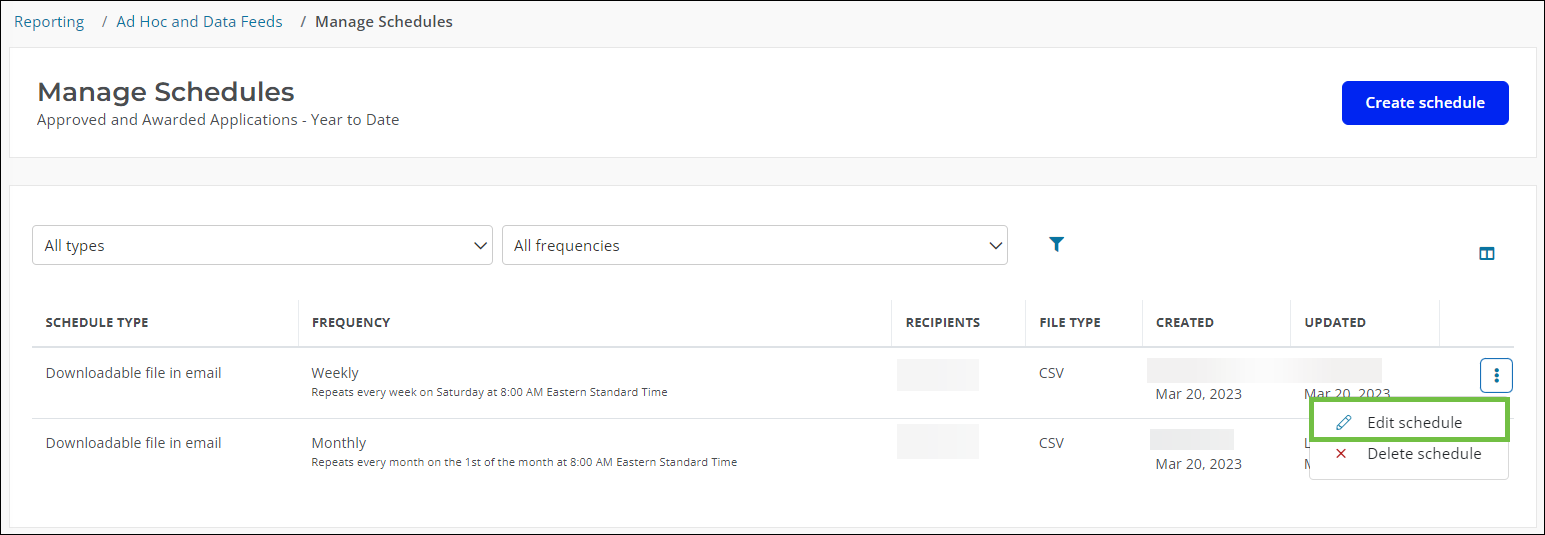
From the Manage Schedules page, click on the ellipsis icon next to the schedule and then Edit schedule.
-
Confirm the schedule type (Downloadable file in email or Data feed) and click Next to continue.
-
Modify your schedule as needed, including its frequency and recipients.
-
Save your changes.
 How do I delete a schedule and cancel a scheduled report?
-
From the Manage Schedules page, click on the ellipsis icon next to the schedule and then Delete schedule.
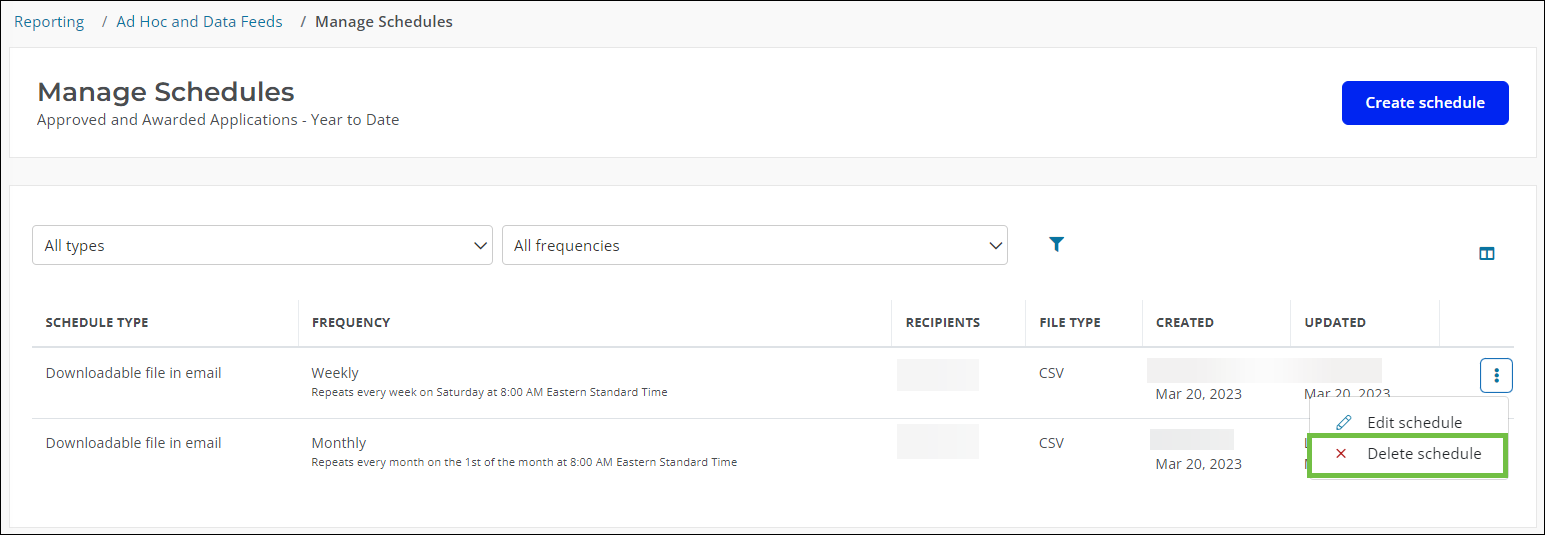
-
Click on Delete schedule to confirm.