Create New Address Fields
Address fields capture location information, including geocoded Community Reinvestment Act (CRA) details. When filling out the field, it autocompletes the address and verifies that it's correct.
Note: This field can be used in both Applicant and Grant Manager forms.
-
Navigate to the Grant Manager Portal by going to yourcausegrants.com or your client URL. Sign in with your Blackbaud ID (BBID) or Single Sign-On (SSO) credentials.
-
After signing in, select Program Setup in the side navigation and then Custom Forms. Select the Form Fields tab.
-
Select the Manage form fields button and then Add new.
-
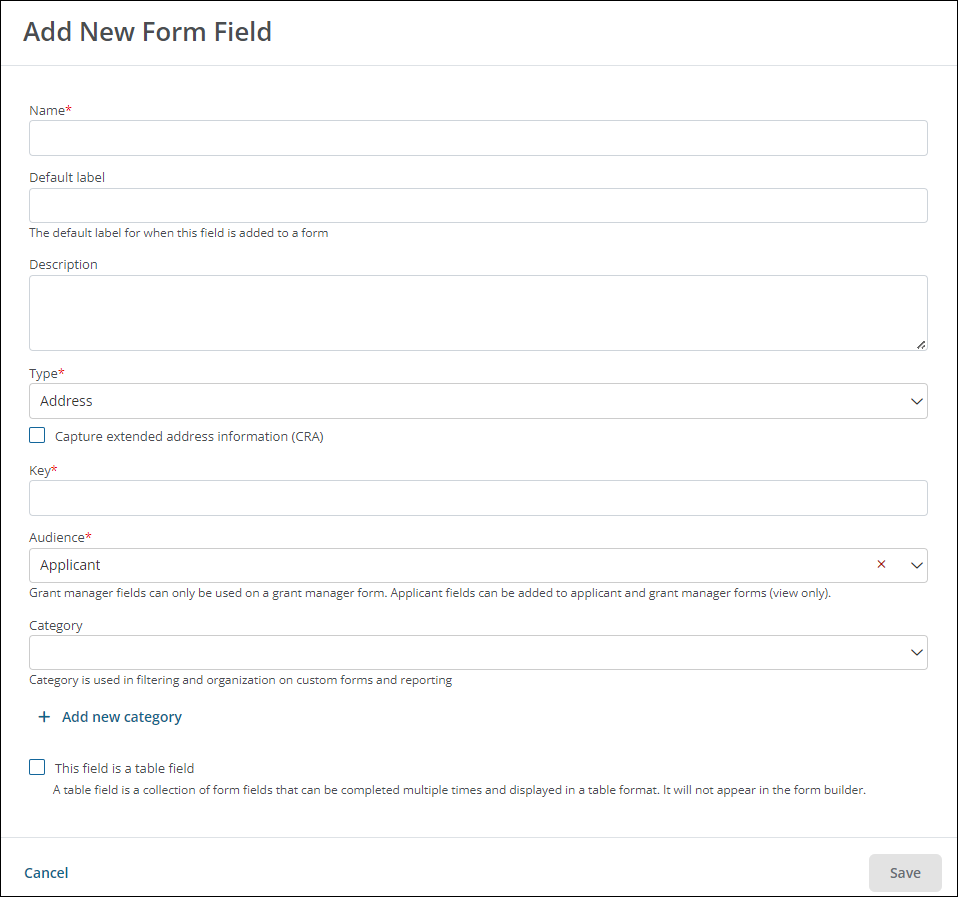
In Add New Form Field, enter your field's details as outlined below.
 Add field name and default label
-
Enter the field name.
-
Optional - Enter the default label. This is automatically used as the label when the field's added to a new form.
Tip: If Default label is left blank, the field name is used as the label. This can be updated at any time. For more information, see Update Labels and Descriptions.
Enter field description (Optional)
-
Optional - Enter a brief description. This is only used for reference and does not appear in the form.
Set field type to Address
-
Select Address as the Type.
Tip: To set this field to collect Community Reinvestment Act (CRA) details, see the Capture extended address information (CRA) checkbox.
Enable Community Reinvestment Act (CRA) data collection (Optional)
-
Optional - Select the Capture extended address information (CRA) checkbox to collect Community Reinvestment Act (CRA) details for each address.
Note: This information will be visible to Grant Managers in the Application View and will not be shown to applicants.
Tip: If this option is enabled, only addresses that appear in the field's search results can be used. New addresses cannot be added using the Can't find your address? option.
Update key (Optional)
-
The system automatically creates a unique key based on the field name. To update it, edit the value in the Key field or reset it by selecting Generate unique key.
Tip: The key's used to connect fields to an API. It also helps to distinguish between fields with similar names when managing fields in bulk, configuring custom data tables, creating reports, and more.
Specify audience
-
The audience determines which forms the field can be used on - Applicant or Grant Manager forms. Specify which audience this field applies to by selecting one of the following options.
-
Applicant - This field can be added to both Applicant and Grant Manager forms. On Grant Manager forms, it'll be read-only.
-
Grant Manager - This field can only be added to Grant Manager forms.
Tip: Should you select Field will store one answer per application? By default, Grant Manager fields are multi-response to accommodate multiple reviewers. Select this option to enforce storing one response only. If enabled, multiple users can complete the field but may overwrite each others' responses.
-
Select category (Optional)
-
Optional - Assign the field to a category.
Tip: Categories can be used for filtering and organizing the field on forms and reports. If no custom category is selected, the field is automatically saved under the Other category.
Note: To create a new category, select the Add new category link below the Category dropdown.
Set as a Table field (Optional)
-
Optional - To use this field in Table fields, select the This is a table field option.
Note: If enabled, this field will not appear as a standalone field in the Form Builder. Instead, it will be available to include in Table fields. Table fields are a collection of form fields that're displayed in a table format. They can also be completed multiple times.
Tip: If an Address field is configured to capture extended address information (CRA) and is pulled into a Table field, you can view these attributes by clicking on the View icon next to the address in the form.
-
-
Select Save to create the new field.
Preview the field
After creating the Address field and adding it to a form using the Quick Add tool, Form Builder toolbox, or Import tool, it's recommended to configure its form component settings. This ensures it's set up properly before you begin collecting responses. You can then preview the form to see how the field will appear to your users, as shown below.
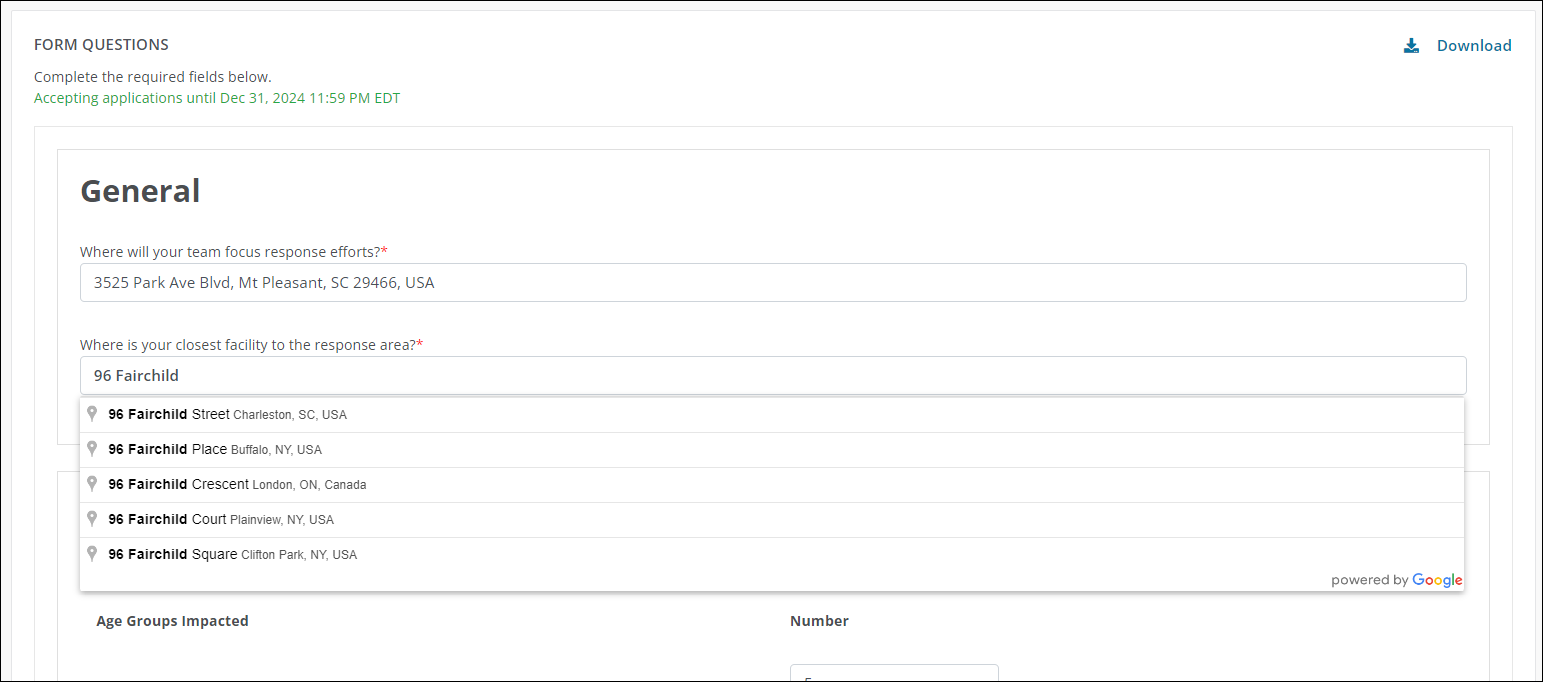
Note: Fields that do not have CRA enabled will have a Can't find your address? link below it. This allows users to manually add their address - such as a PO Box - if it does not appear in the search results.
View CRA details
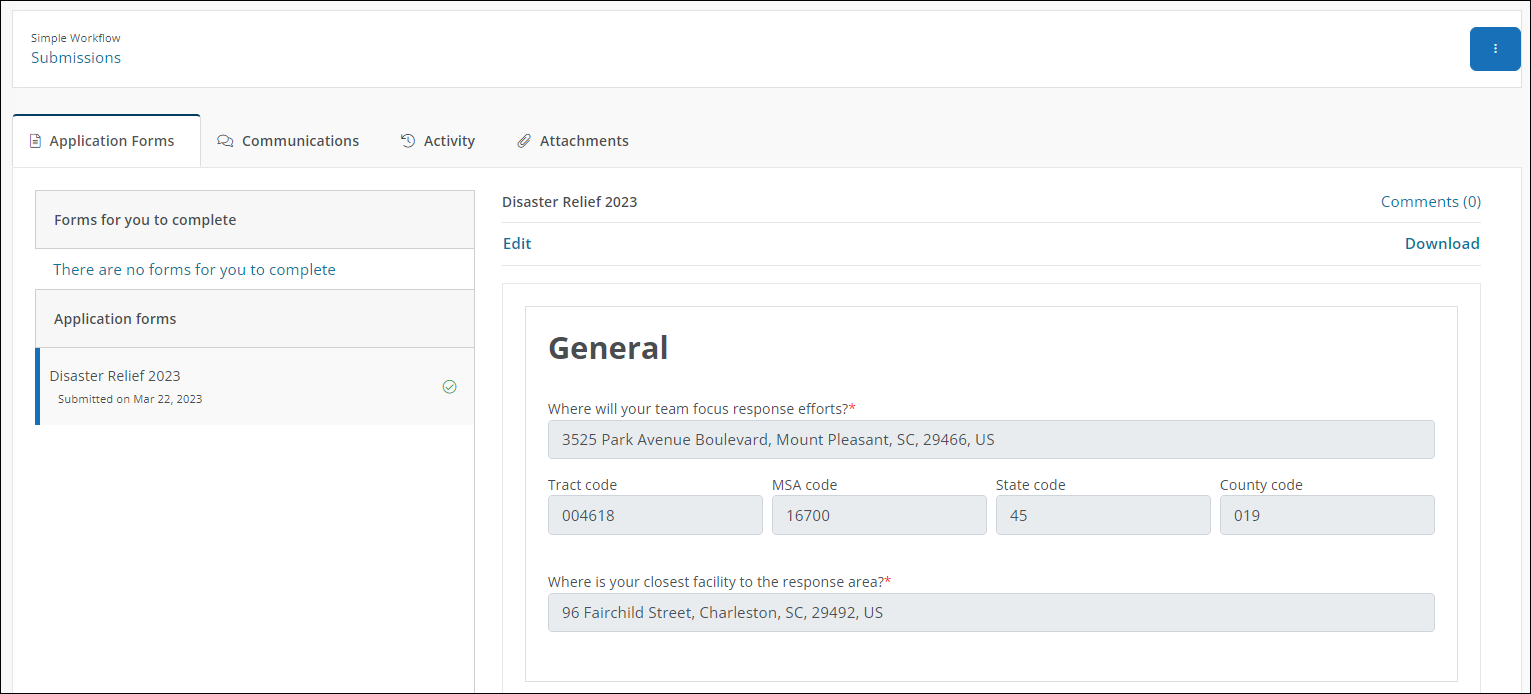
If you enabled the Capture extended address information (CRA) option for this field, this information will be visible in the Application View. It includes the following attributes for the address provided:
-
Tract code
-
MSA code
-
State code
-
County code
Tip: To learn how to include Address fields in Ad Hoc reports, see How do I report on Address fields and CRA information?.
Frequently asked questions (FAQs)
Are multiple values supported?
No, this field displays a single value.
Can this field be used in Budget Automation and Workflow Automation?
No, this field cannot be used for automation.
What validation options are available for this field in the form?
The only configuration option available for Validation is setting the field to Required within the form and providing a Custom error message.