Conditional Logic Based on Specific Values
You can configure conditional logic in fields using specific values - text or numeric - for comparison.
Tip: Specific value is also available when comparing Date fields. This includes comparison types like after, before, etc. For more information, see Conditional Logic with Custom Data Tables.
Supported comparisons
-
contains
-
ends with
-
equal to
-
not equal to
-
starts with
Tip: These comparisons also support Value from another component. For more information, see Conditional Logic Based on Values From Other Components.
Configure conditional logic
-
Access the Grant Manager Portal - Navigate to yourcausegrants.com or your client URL. Sign in using your Blackbaud ID (BBID) or Single Sign-On (SSO) credentials.
-
Open the Form Builder - From the side navigation, select Program Setup > Custom Forms. Click the ellipsis next to the form and choose Edit.
-
Edit a Form Component - In the Form Builder, hover over the field and select Edit component.
-
Configure the Component - Choose a tab based on what you want to configure:
-
Validation: Under Advanced Validation, click Manage custom validation to define when the component is valid.
-
Display: Select Manage conditional logic to set rules for when the component is shown.
-
Set Value: Select Add new rule to define the field's value.
-
-
Build Conditions and Rules - In the Manage Custom Validity or Manage Conditional Logic modal:
-
Select Add condition.
-
Choose the field to base the condition on.
Tip: If using a Date field as your conditional field, see Conditional Logic with Custom Data Tables.
-
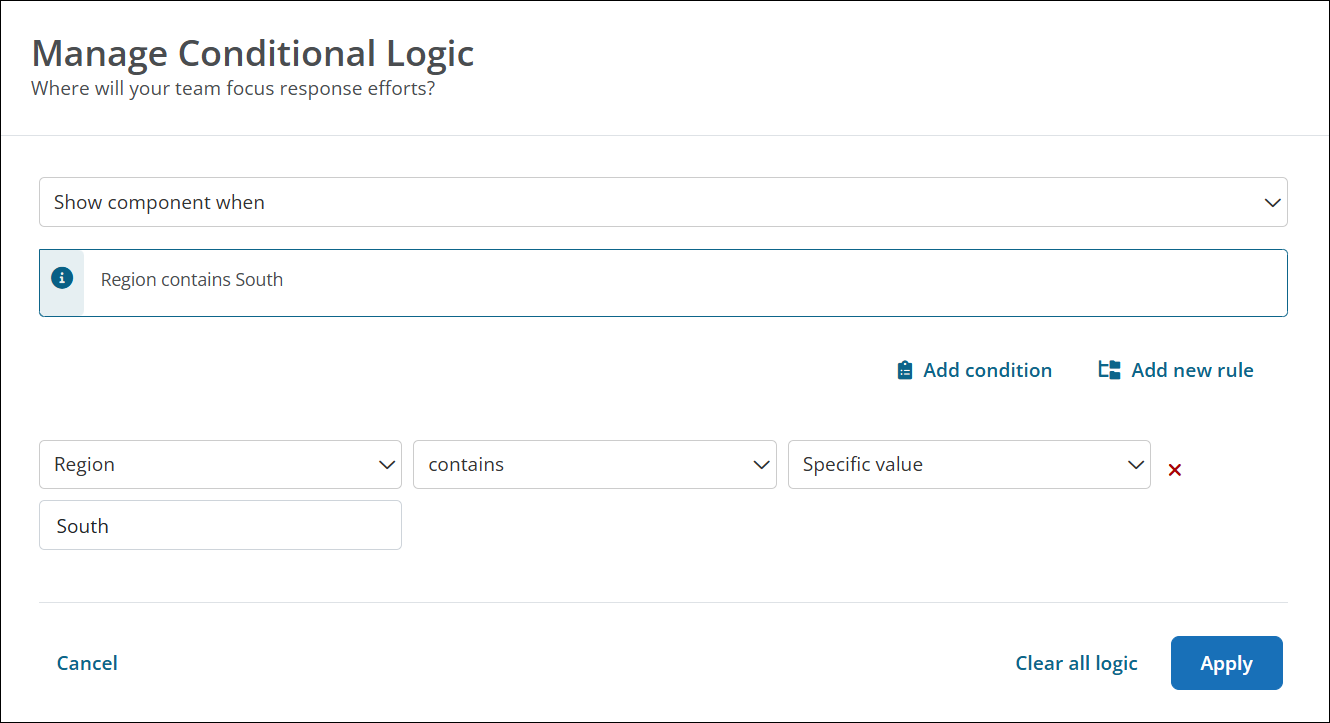
Select a comparison - such as contains, ends with, etc. - and then Specific value.
-
Enter the value (text or numeric) in the empty field that appears.
-
Add more conditions as needed.
Tip: Toggle ANY or ALL in the rule to define how conditions are evaluated. For more complex logic, select Add new rule before creating conditions.
-
-
Save Your Changes - Select Save in the Configuration modal and then save the form to finalize your changes.