Add and Manage Applicant Forms in Workflow Levels
Workflow levels can be configured to automatically send a form to an applicant when their application is added to that level. The system automatically checks that the form is the most recent revision - and if not, it will be updated automatically.
-
Navigate to the Grant Manager Portal by going to yourcausegrants.com or your client URL. Sign in with your Blackbaud ID (BBID) or Single Sign-On (SSO) credentials.
-
After signing in, select Program Setup in the side navigation and then Grant Programs.
-
In Grant Programs, select the ellipsis icon next to the program and then Edit program.
-
In Program Detail, select Workflow.
-
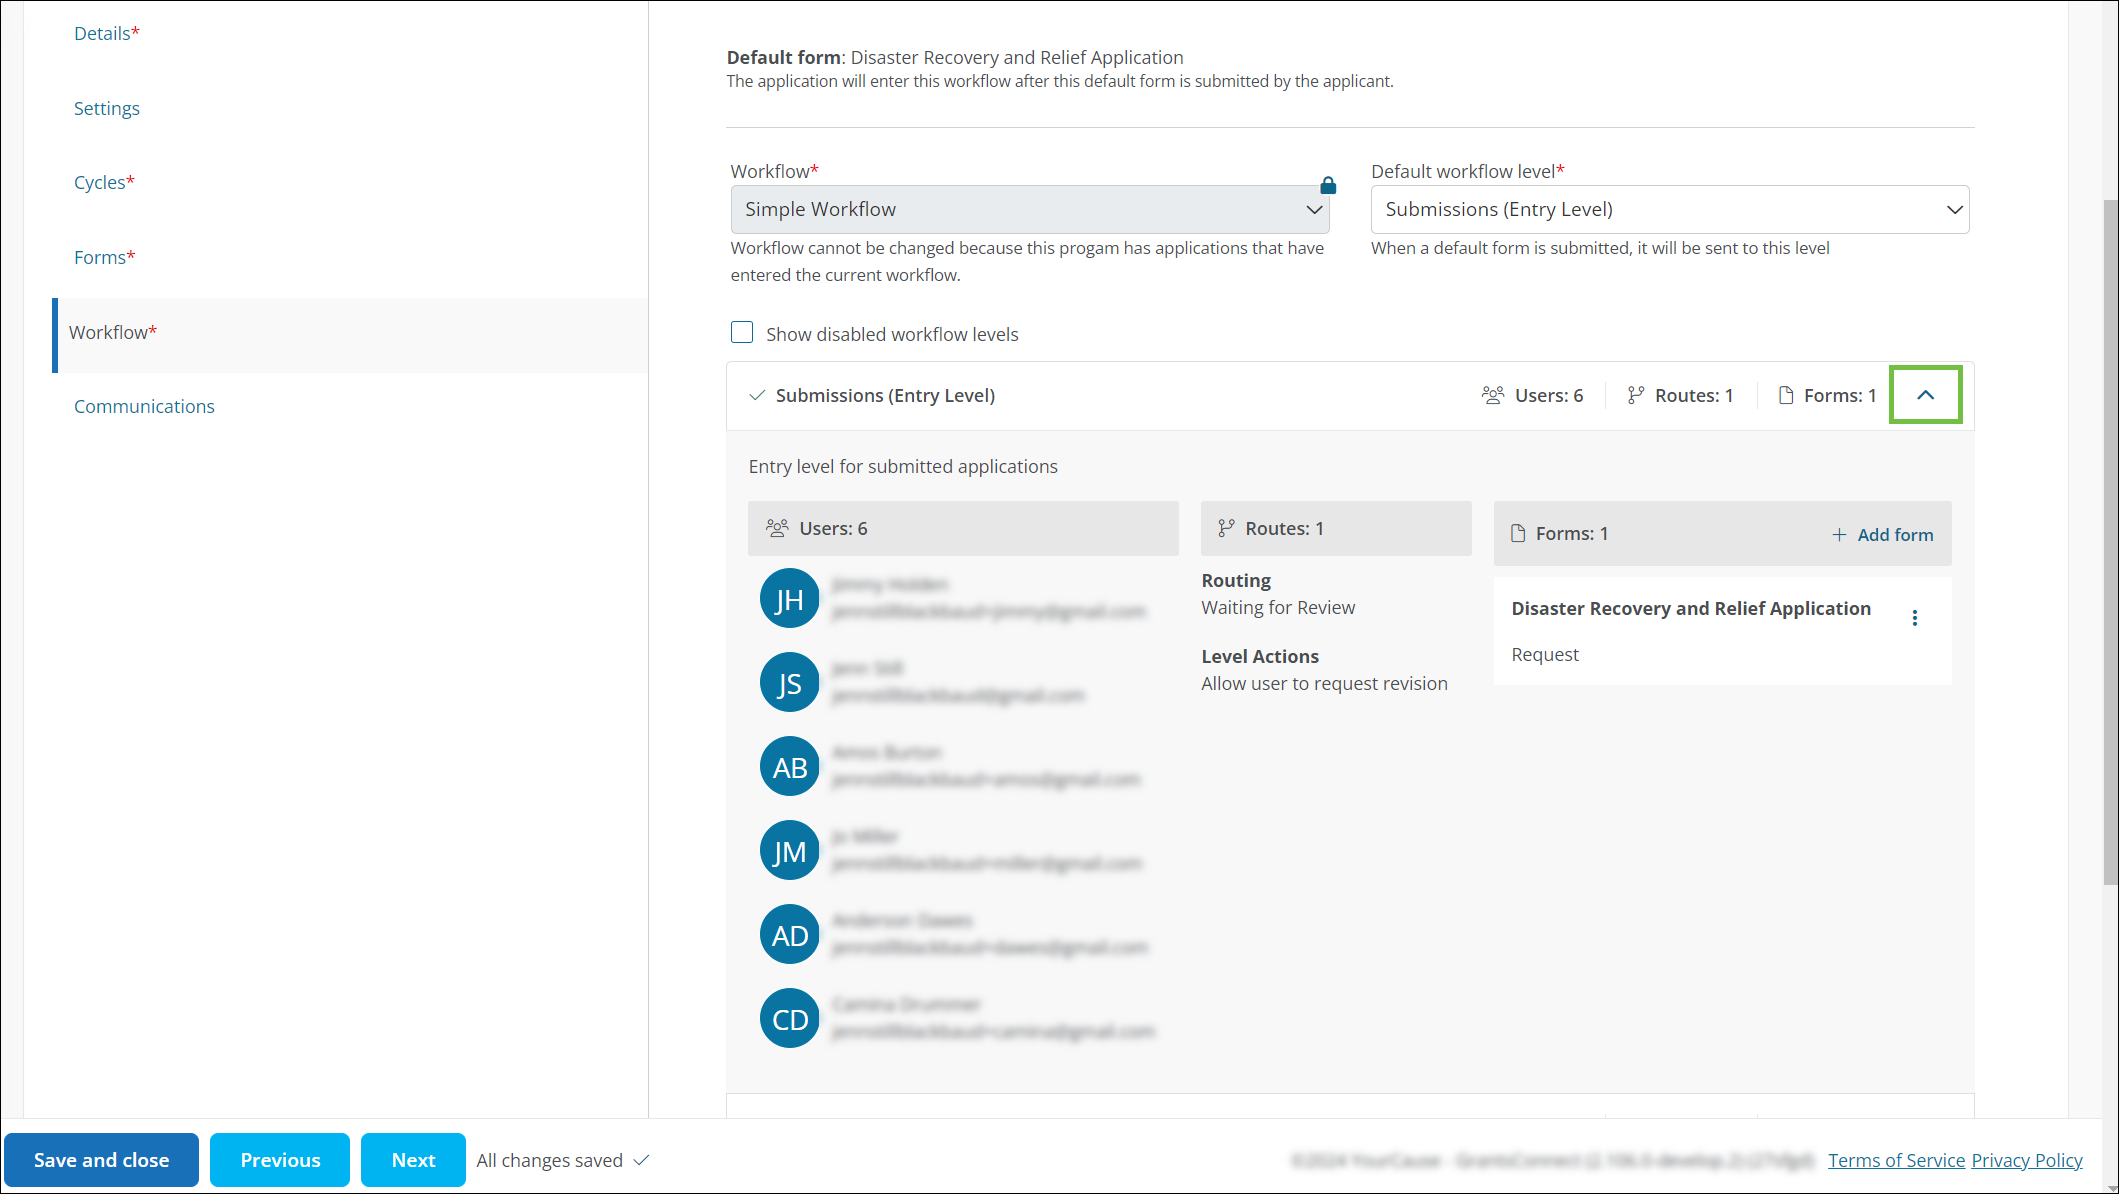
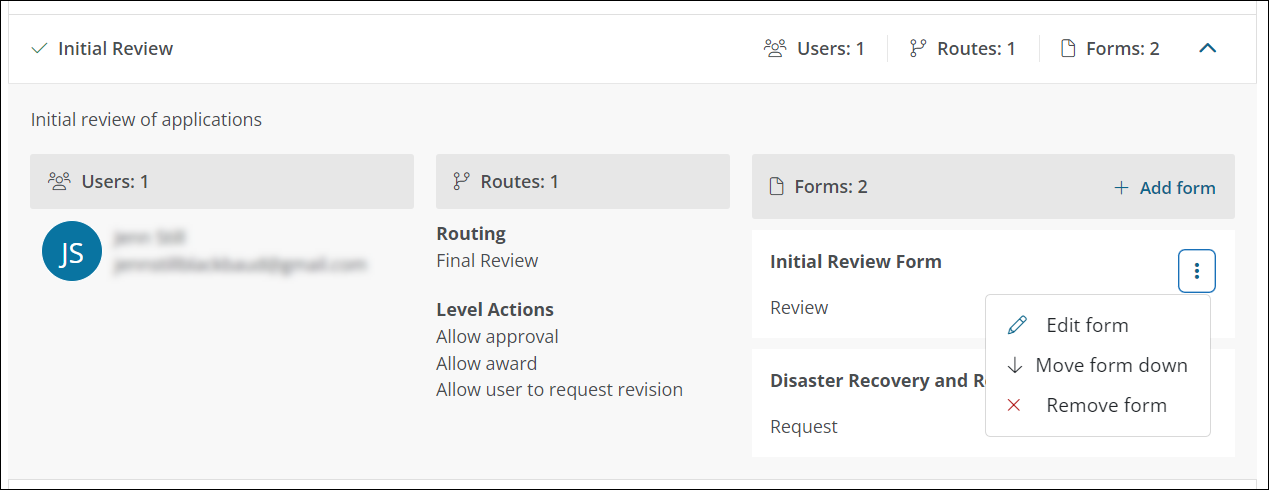
Select the arrow next to the workflow level to see an expanded view- including users assigned to the level, routes, and forms.
-
In the Forms section of the expanded view, select Add form.
-
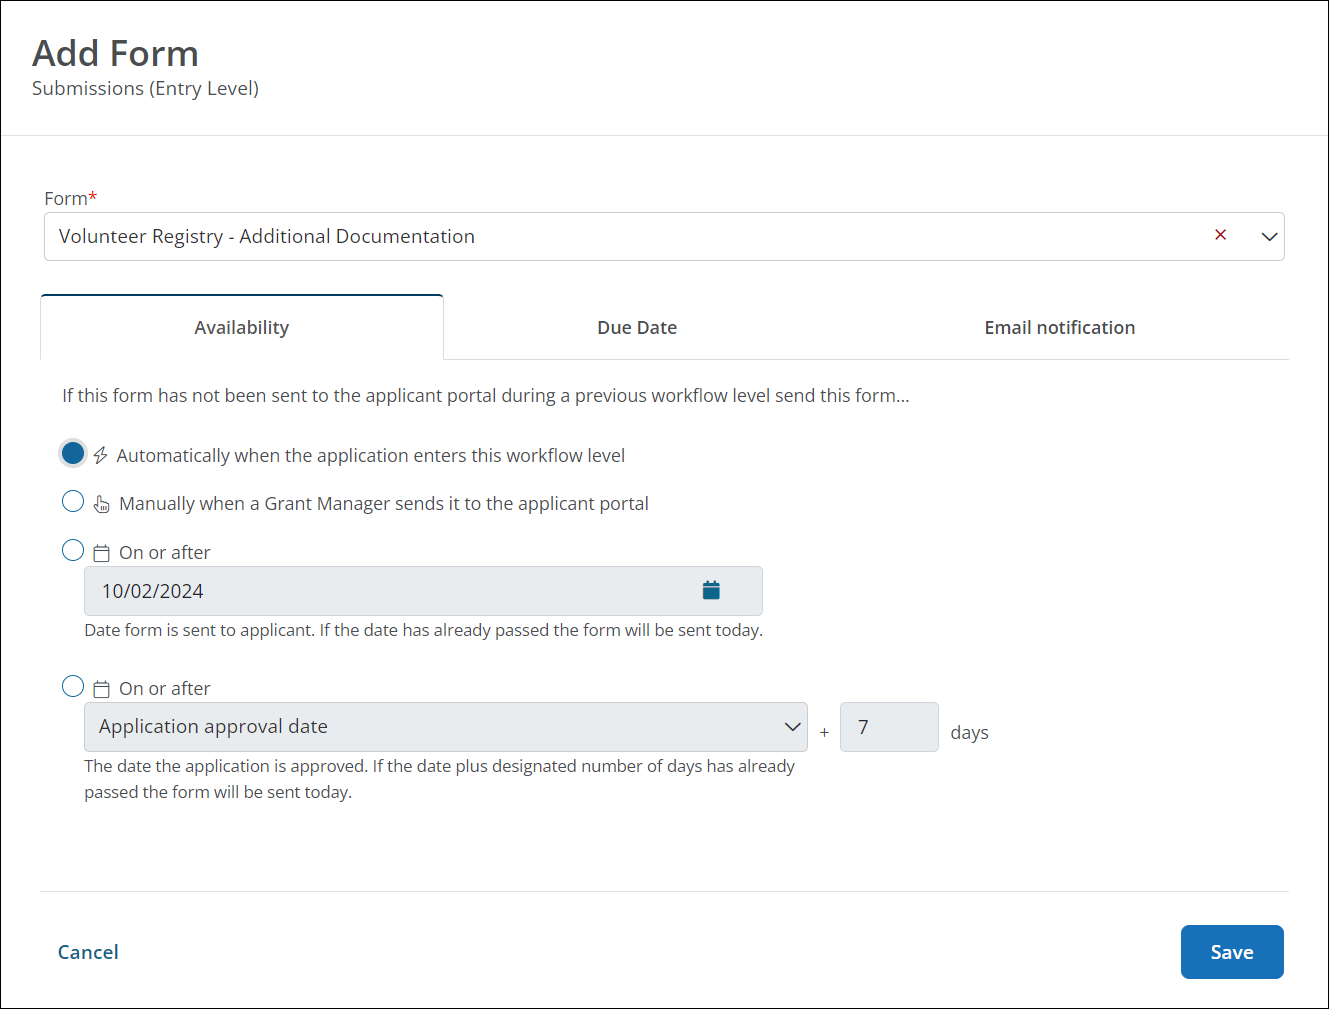
In Add Form, select the form with an Applicant audience in the dropdown and then configure the form settings.
 Availability
-
In the Availability tab, specify when the form will be sent to the applicant. Options include:
-
Automatically when the application enters this level
Warning: If selected, the form will automatically be sent to all existing applicants in this level upon adding it. Moving forward, it will then be sent to applicants whenever their application enters the level.
-
Manually when a Grant Manager sends it to the applicant portal
-
On or after [DATE]
Note: You can choose a calendar date the form will be sent to the applicant. If the date has already passed, the form will be sent today.
-
On or after [ACTION] + [NUMBER] days
Note: The [ACTION] can be Application approval date or any other triggers listed in the FAQ. For example, On or after Application approval date + 7 days means the form will be sent 7 days after the date the application is approved. If the date and the designated number of days has already passed, the form will be sent today.
Tip: The value for days can be set to 0 if you want to send the form on the date this action (Application approval date, etc.) occurs.
-
-
Continue to the Due Date tab.
Due Date
-
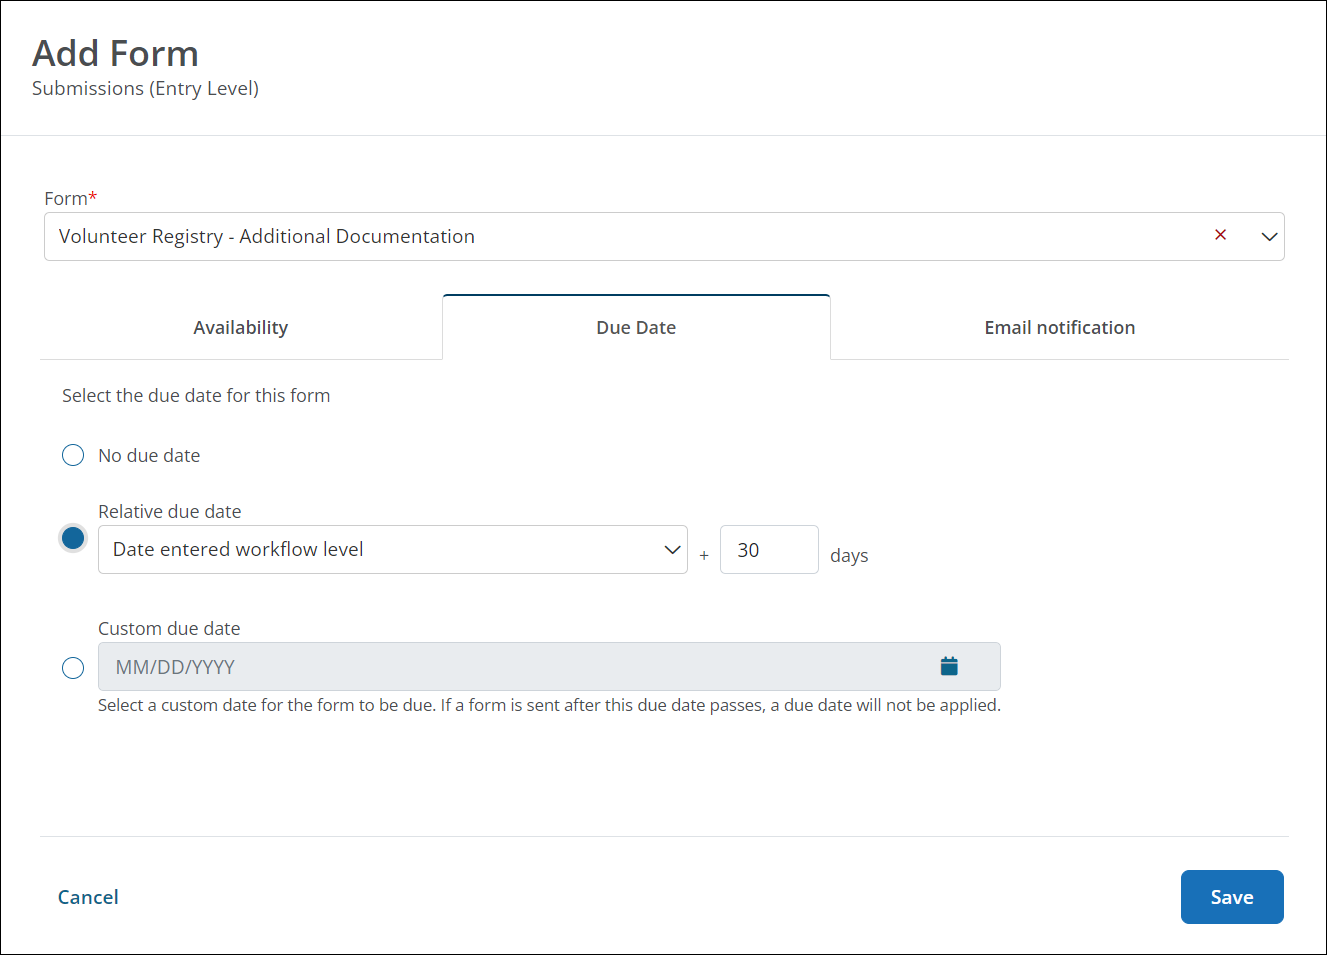
In the Due Date tab, specify when the applicant will be required to complete the form. Options include:
-
No due date
-
Relative due date - This is [ACTION] + [NUMBER] days.
Note: The [ACTION] can be Date entered workflow level or any other triggers listed in the FAQ. For example, Date entered workflow level + 30 days means the form will be due 30 days after the date the application enters this level. If the date and the designated number of days has already passed, the form will be sent today.
-
Custom due date
Note: You can choose a calendar date the form will be due. If the form is sent to the applicant AFTER this date passes, a due date will not be applied.
-
-
Continue to the Email notification tab.
Email Notification
-
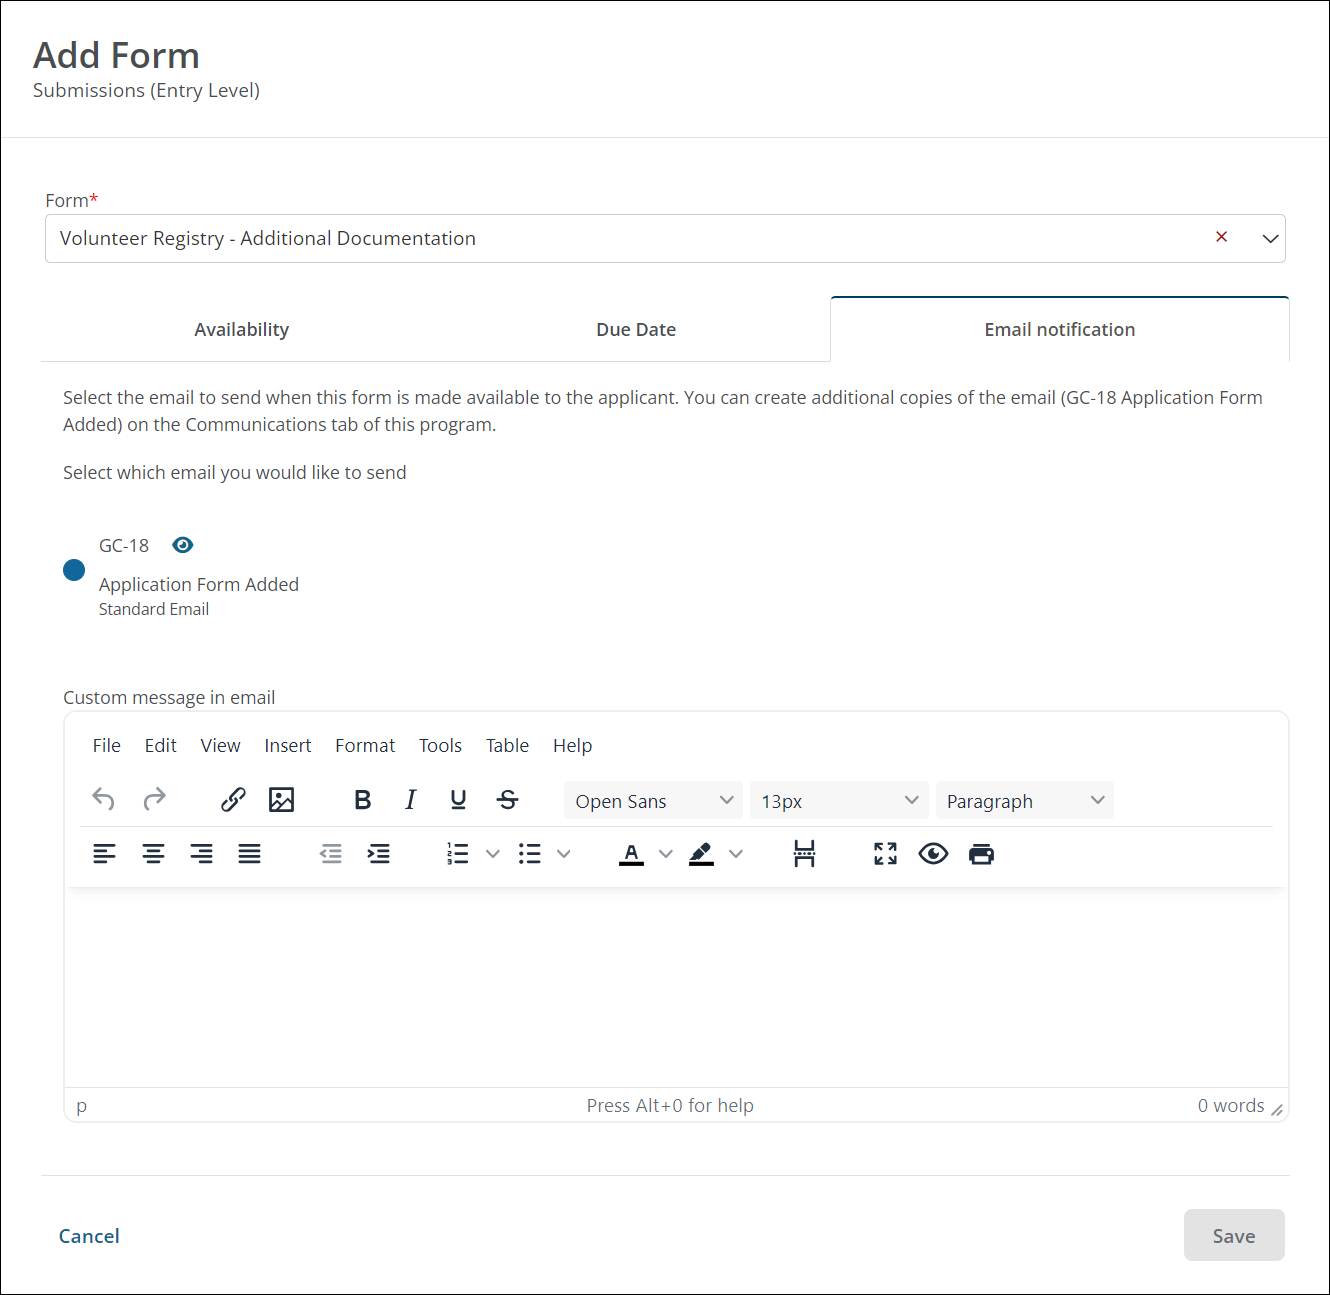
In the Email notification tab, select the email template to send to the applicant when the form is available as well as a custom message to include in the email (optional).
Note: The GC-18 Application Form Added (Applicants) template will be sent. You can use the standard version of it or create custom copies in Program Detail > Communications or Settings > System Emails.
-
-
Select Save to add the form and return to Program Detail.
Frequently asked questions (FAQs)
What actions can be used for relative availability?
When setting up Availability, the relative availability - On or after [ACTION] + [NUMBER] days - can be configured based on any of the following actions or dates:
-
Application approval date
-
Application submitted date
-
Last award date
-
Workflow level entry date
What actions can be used for the relative due date?
When setting up Due Date, the Relative due date - [ACTION] + [NUMBER] days - can be configured based on any of the following actions or dates:
-
Approval date
-
Award date
-
Cycle close
-
Cycle open
-
Date entered workflow level
-
Date form sent
-
Last payment date
-
Status change date
-
Submitted date
How do I change the order of forms?
-
In the Forms section of the expanded workflow view, select the ellipsis next to the form.
-
Select Move form down or Move form up, depending on the placement.
-
Save your changes.
What time do forms show as overdue?
Forms become overdue at the end of the due date in the recipient’s time zone.
Can overdue forms still be submitted?
Yes. Applicants can submit forms after the due date. The due date appears to applicants and grant managers and in reminder emails, but it does not prevent submission.