Manage Workflow Level Forms
The custom form that is selected as the Nomination Form is automatically added to the Forms section shown for each workflow level. Based on how you expect to use the level, you can add additional forms, change the Nomination Form, etc.
Note: For more information about workflow levels, see Configure Workflows.
 Change the Nomination Form
The custom form that is selected for the Nomination Form can be changed at any time before the program has accepted nominations. It cannot be changed to a different form if nominations have already been submitted. If updates do need to be made to the existing form, you can edit the current version or create a new revision.
Note: For more information, see Manage Published Forms.
Add Applicant Forms to Workflow Levels
Forms can be added to a workflow level, requiring Applicants to complete them when their application has reached that particular level.
Note: These steps are only applicable to forms with an Applicant audience.
-
Navigate to the Workflow tab in Program Details.
-
Select the workflow level to expand its details.
-
In the Forms section, select the Add form button.
-
Take the following actions in the Add Form screen to select the form and define its settings.
-
Select the form to add in the Form field.
-
In the Availability tab, specify when this form will be available to the Applicant if it has not been sent to the Applicant Portal during the previous workflow level. These options include:
-
Send it automatically when the application enters this workflow level.
-
Send it manually when a Grant Manager sends it to the Applicant Portal.
-
Send it on or after a specified date.
Note: If this date has already passed, the form will be sent today.
-
Send it on or after the date the application is approved. Additionally, you can specify a number of days after this date.
Note: If this date has already passed, the form will be sent today.
-
-
In the Due Date tab, select the due date for this form. For example, the Date entered workflow level + 30 days.
-
In the Email Notification tab, select the email to send when this form is made available to the Applicant.
-
Select Save to add the form and its settings to the workflow level.
Note: GC-18 Application Form Added (Applicants) is the system email that will be sent. You can either use the email template or create a copy in Program Details > Communications.
-
-
Save your changes to the Program Details.
Add Grant Manager Forms to Workflow Levels
Forms can be added to a workflow level, requiring Grant Managers assigned to the level to complete them when an application has reached that particular level.
Note: These steps are only applicable to forms with an Grant Manageraudience.
-
Navigate to the Workflow tab in Program Details.
-
Select the workflow level to expand its details.
-
In the Forms section, select the Add form button.
-
Take the following actions in the Add Form screen to select the form and define its settings.
-
Select the form to add in the Form field.
-
In the Grant Manager Optionstab, select the number of users who must complete the form at this workflow level. Available options include:
-
All users
-
Majority of users
-
None. The form is optional to complete.
-
View only
-
Provide a specific number of users.
-
-
Specify if a Grant Manager can see responses from other Grant Managers. Available options include:
Note: These selections only apply to the users and Grant Managers that are assigned to this workflow level.
-
No
-
Yes, they can see responses added at this workflow level.
-
Yes, they can see all responses from this and previous workflow levels.
-
-
In the Due Date tab, select the due date for this form. For example, the Date entered workflow level + 30 days.
-
Select Save to add the form and its settings to the workflow level.
Note: GC-18 Application Form Added (Applicants) is the system email that will be sent. You can either use the email template or create a copy in Program Details > Communications.
-
-
Save your changes to the Program Details.
Change Order of Forms in Workflow Levels
If there are multiple forms assigned to a workflow level, you can change their order to determine which form a Nominator or Grant Manager will need to complete first.
-
Navigate to the Workflow tab in Program Details.
-
Select the workflow level to expand its details.
-
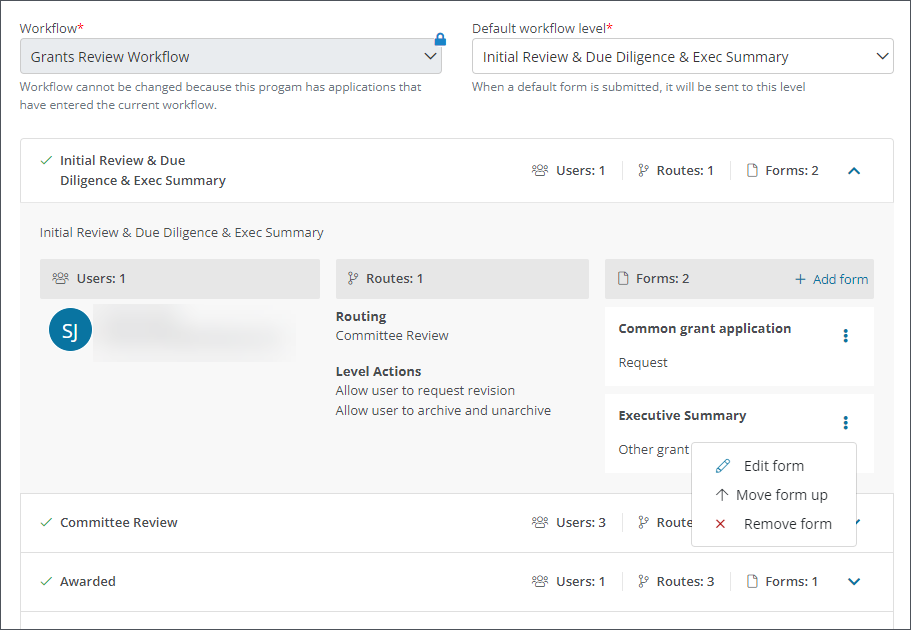
In the Workflow section, select the ellipsis icon next to the form.
-
Choose either Move form down or Move form up depending on the placement.
-
Save your changes.
Remove Forms From Workflow Levels
-
Navigate to the Workflow tab in Program Details.
-
Select the workflow level to expand its details.
-
In the Forms section, select the ellipsis icon next to the form.
-
Choose the Remove form option.
-
Save your changes.