What's New - GrantsConnect Release 2.96.0
This release is scheduled for May 17, 2024 with UAT updated at 5 PM ET and Production at 8 PM ET.
Custom forms
 Fields can now be given a default label to use for all instances of the field across forms
A default label can now be assigned to form fields, allowing you to keep labeling consistent for all instances of a field across forms. This can be defined by adding a value for Default label when creating or editing a field. When the field's added to a form, this label will automatically be used instead of the field name.
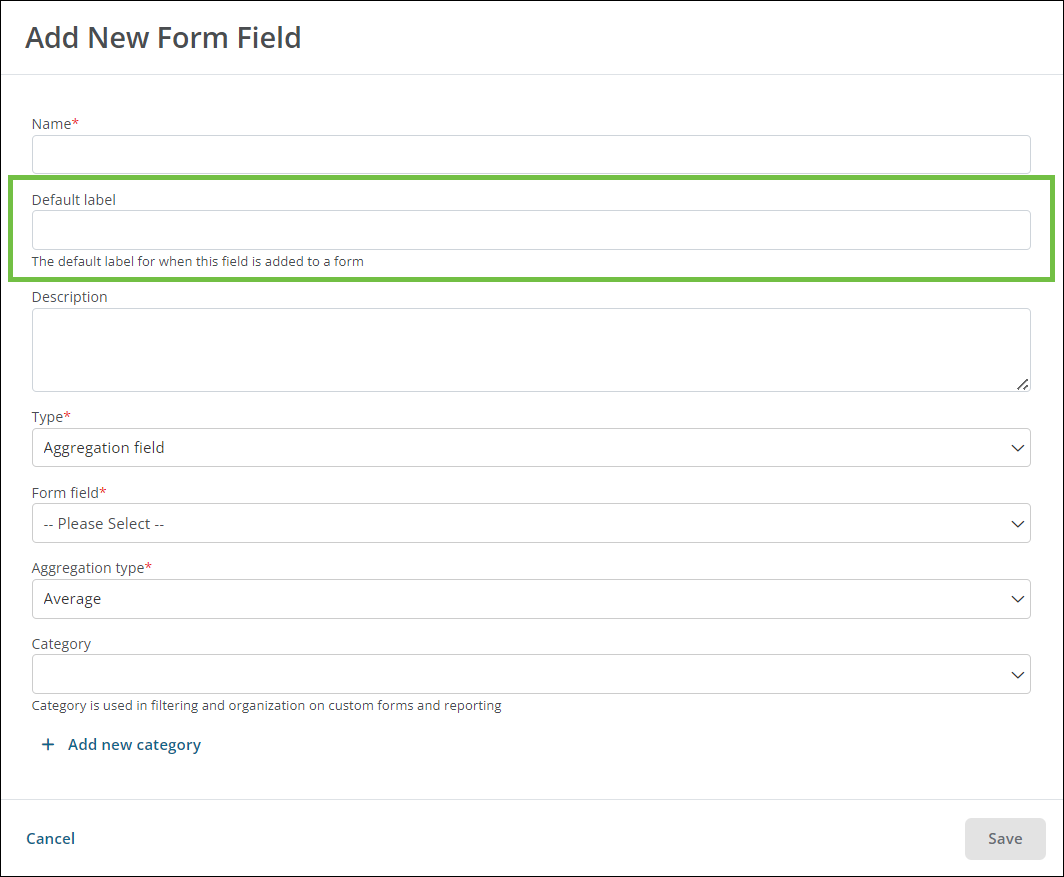
Note: The default label is only applied when a field is first added to a form. Any changes made to the default label are not persisted to fields currently on a form. If you need to update existing fields, it's recommended to change the field component label to match the default label or remove the field and add it back to the form. For more information, see Update Field Labels and Descriptions.
Workflows
Workflow level users can be added and managed in bulk using audiences
You can now assign audiences to a workflow level or sublevel, allowing you to bulk manage users and their permissions. When managing users for the workflow level, select the audience whose members you want to grant access to followed by the permission to assign them. From there, you can click on Select another to continue adding audiences as needed.
When using this feature, keep in mind:
-
All users in the audience will be assigned the same permission – workflow level only or workflow passthrough. If users need to have different permissions, they should be added to another audience.
-
Any users that are in more than one audience with differing permissions will be automatically assigned the most permissive permission (i.e., workflow passthrough).
-
All internal members of the audience will be added to the workflow level. If any members should not be granted access, either remove the user from the audience or create a separate audience that contains only those allowed members.
Note: External users in an audience will be ignored as they cannot be assigned to a workflow level.
-
The audience a user belongs to can be seen by hovering over the icon next to the user’s name in the Manage Users screen.
In addition to controlling access through audiences, you can continue to add users individually by selecting them from the Select users to add to this workflow level dropdown. You can also click on Add all users to add all remaining Grant Managers to the workflow level. If using Add all users, you'll be prompted to confirm you want to take this action before users are added to the level.
Note: For more information, see Manage Workflow Level User Permissions.
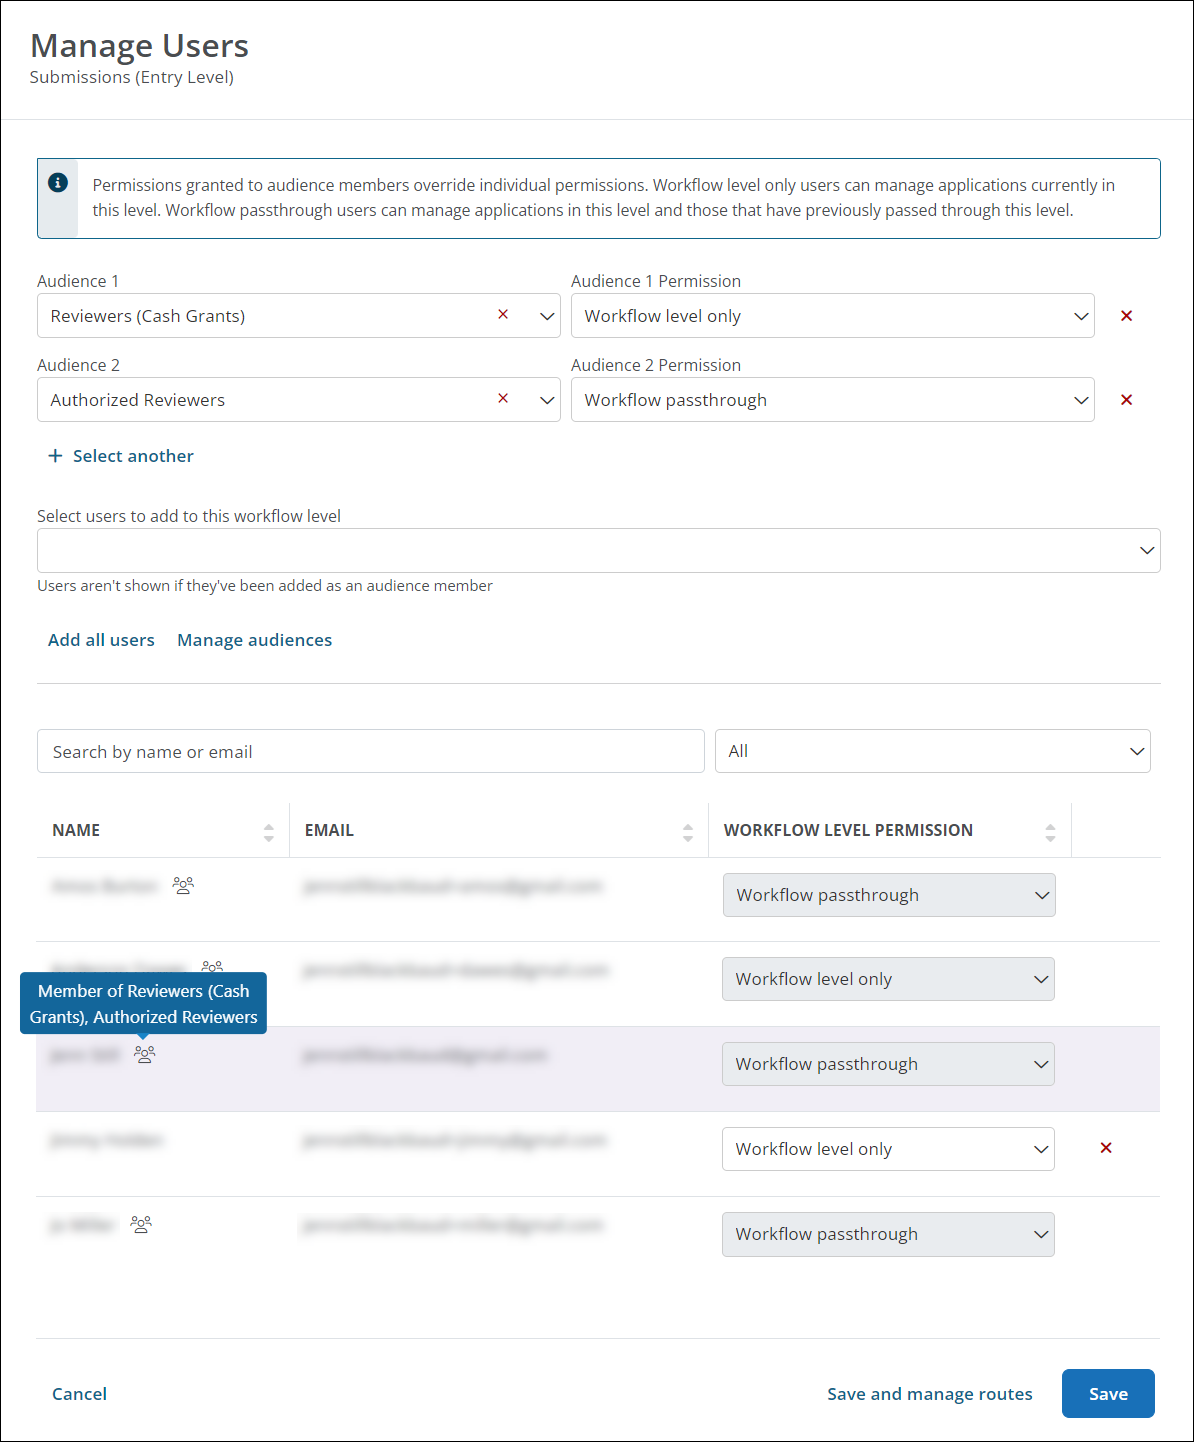
Tip: You can use existing audiences or create new ones based on your needs. Click on Manage audiences to easily add and manage your audiences without having to exit out of the Manage Users screen.
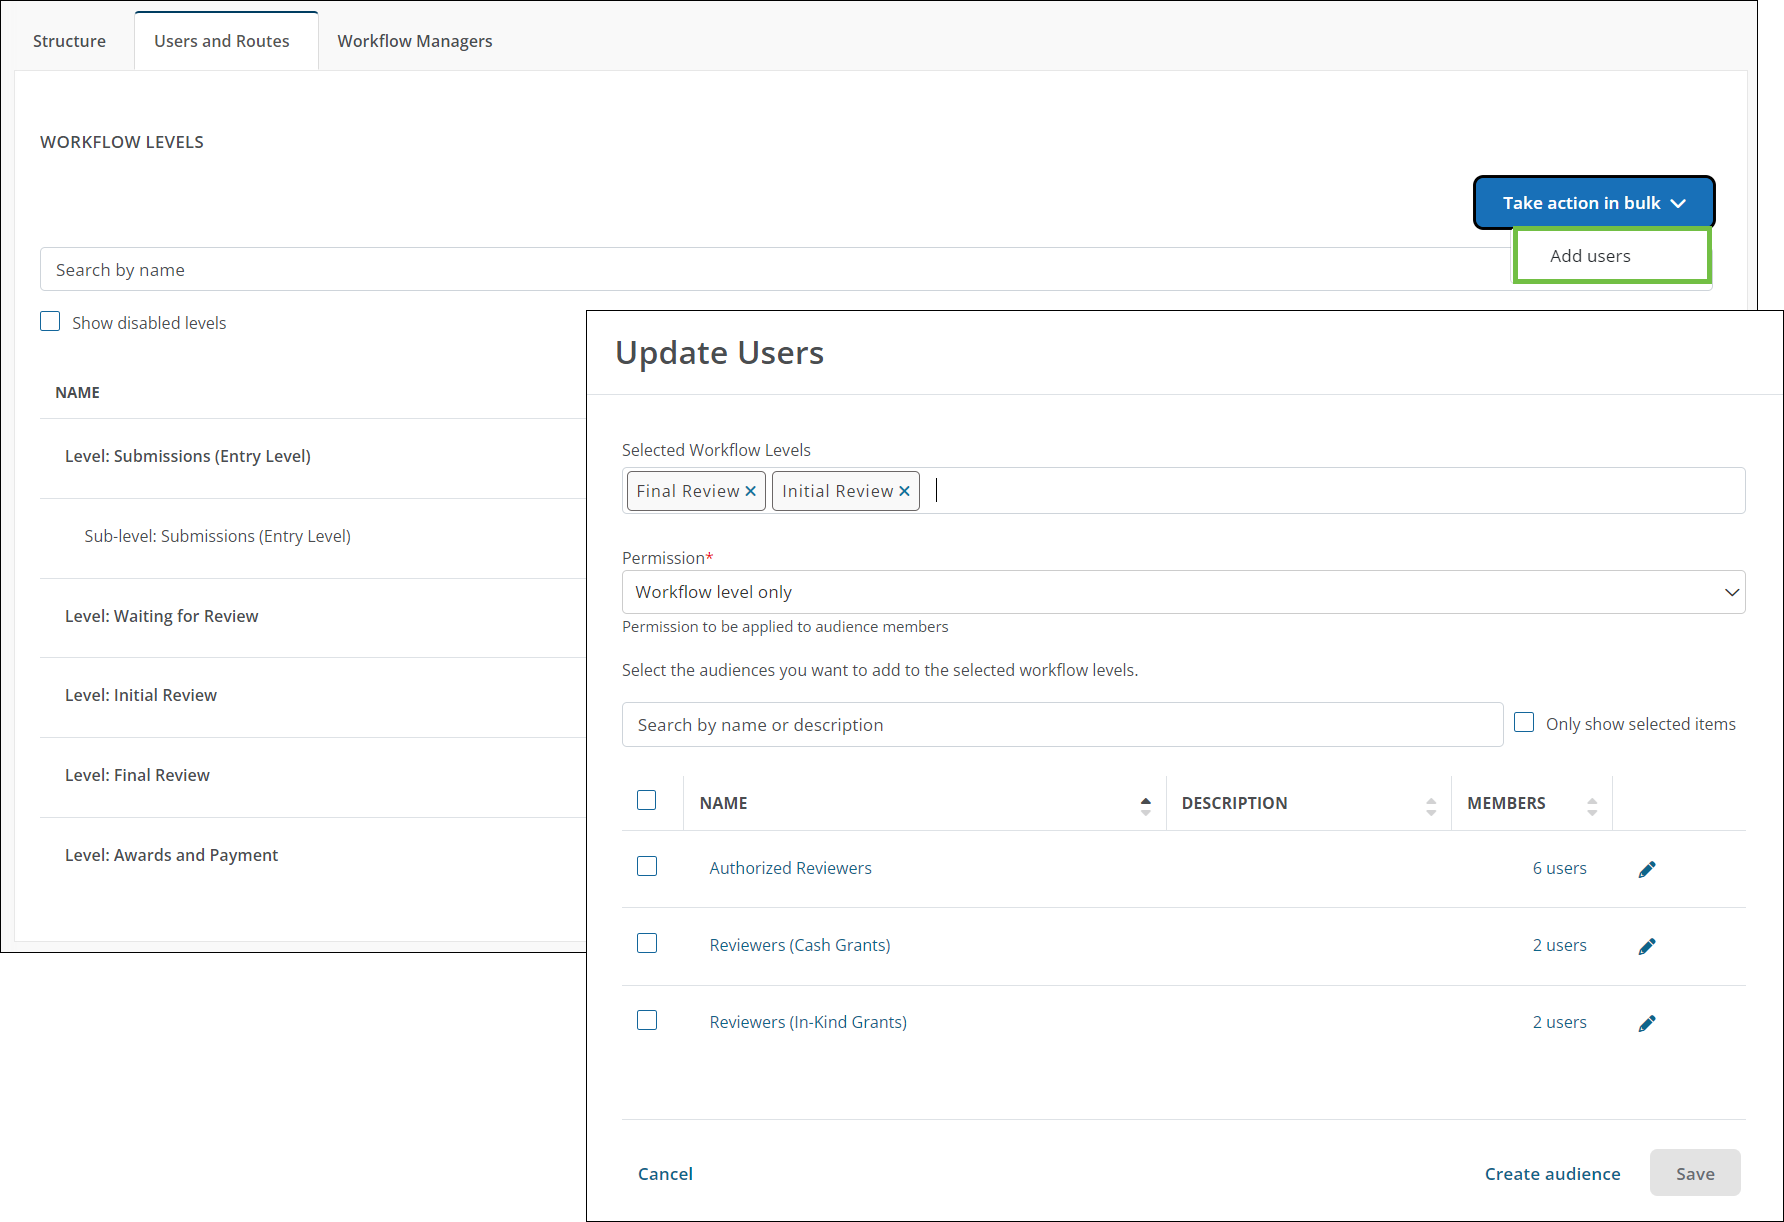
Update permissions for multiple workflow levels at a time using the new Add Users bulk action tool
You can now manage the user permissions for multiple workflow levels in bulk using the Add Users tool. In the Users and Routes tab of your workflow, click on Take action in bulk > Add users and then select the workflow levels you want to modify. From the Update Users screen, you can change the permission applied to all selected audience members, view the users assigned to each audience, and even edit the audience itself.
Audiences
New flyout for audiences provides a quick look at assigned users and audience usage
A new flyout component that shows audience details is now available in the Settings > Audiences area. When you click on the audience name, the flyout displays the following information:
-
Audience name
-
Assigned users
-
Audience usage
Note: Similar to the new See usage option, this shows all areas the audience is referenced.
In addition, you can take the following actions from this flyout:
-
Edit audience
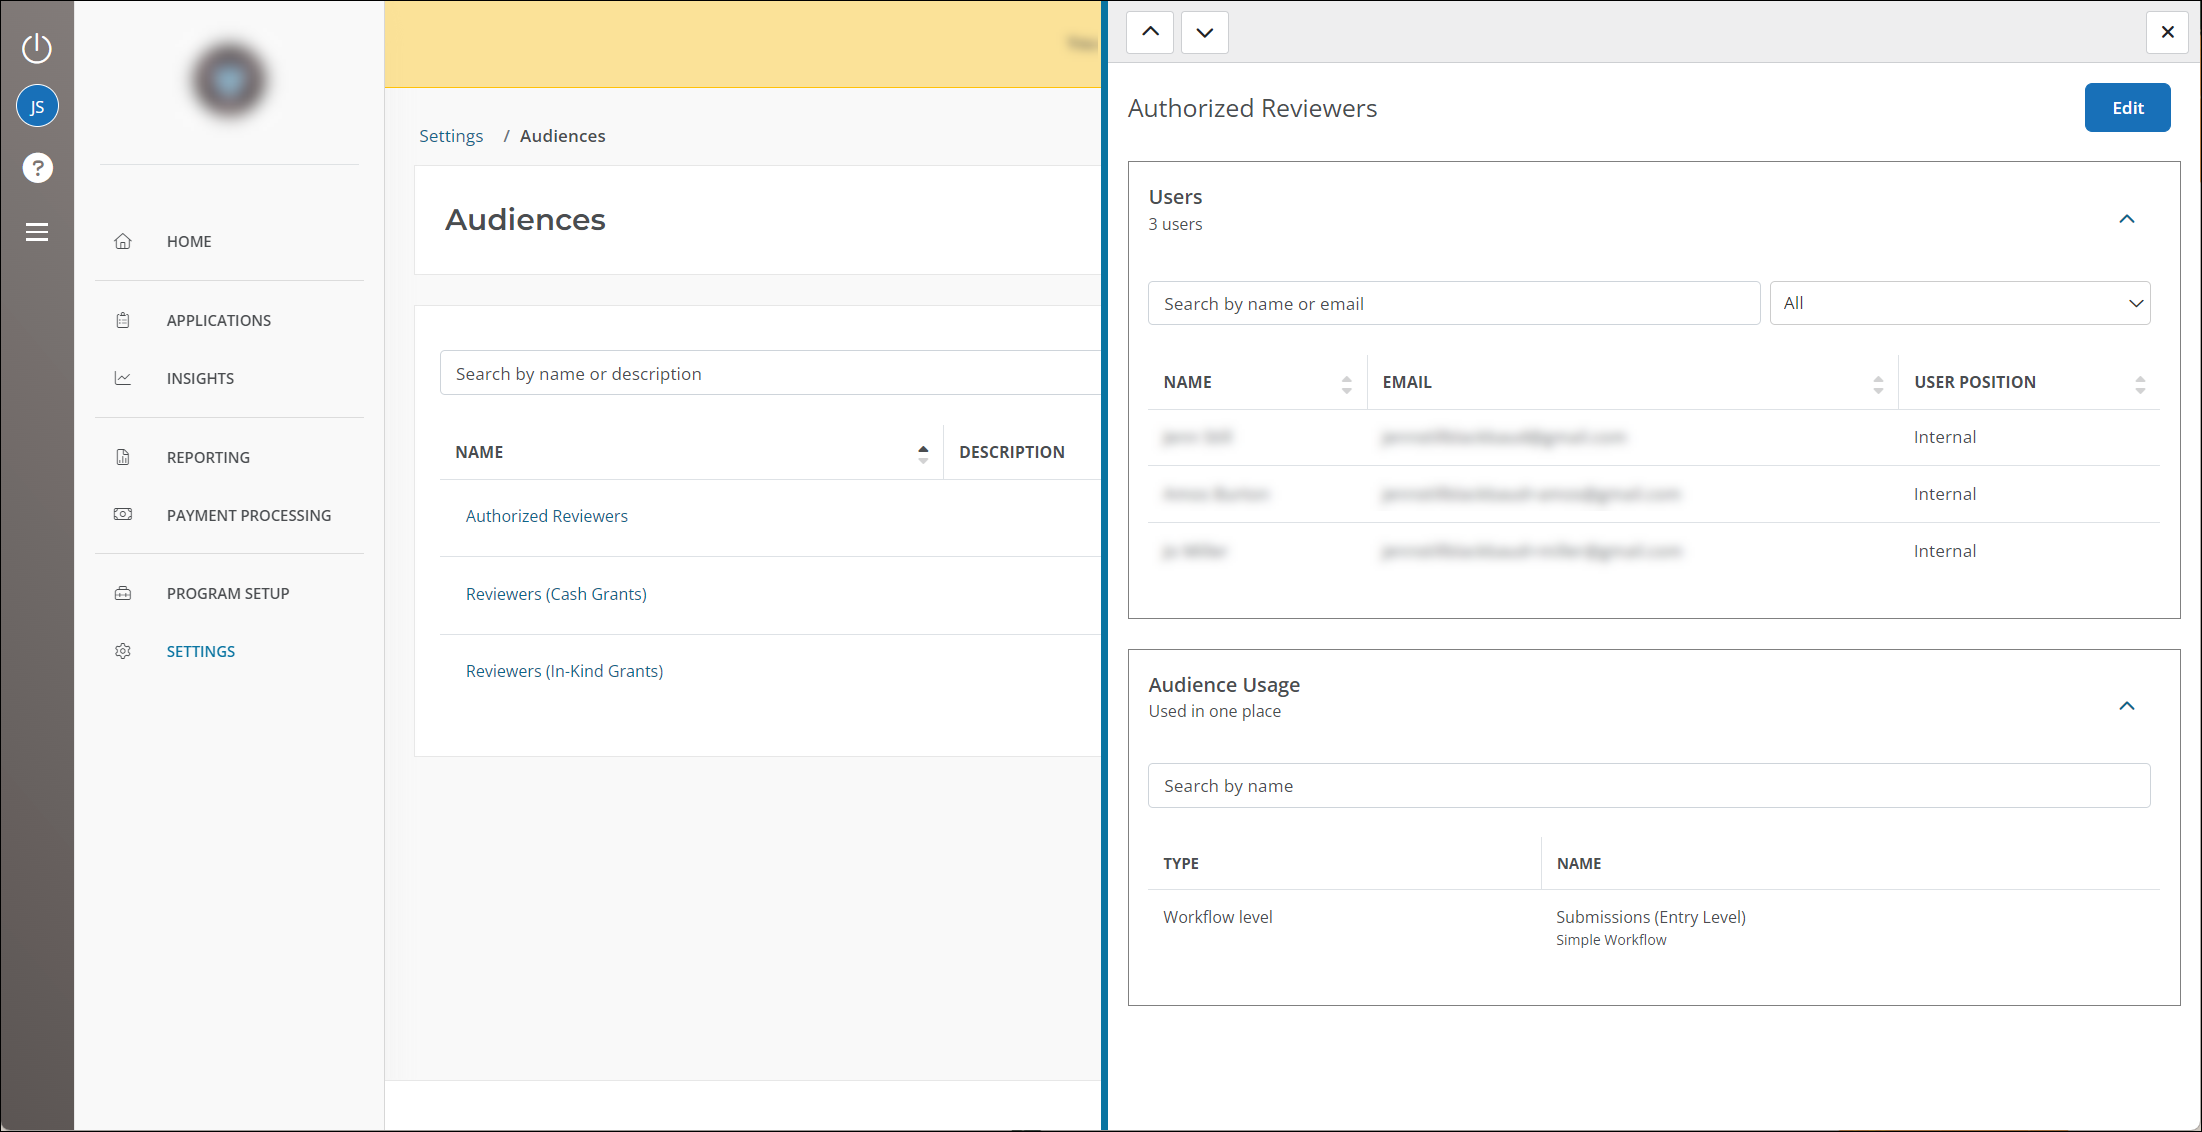
Tip: Click on the up/down arrows to quickly move between users.
New option to view all areas where an audience is used
When editing an audience, you can now view a list of all areas where it is being referenced – including workflow levels. Click on the See usage link to view this information in a new modal.
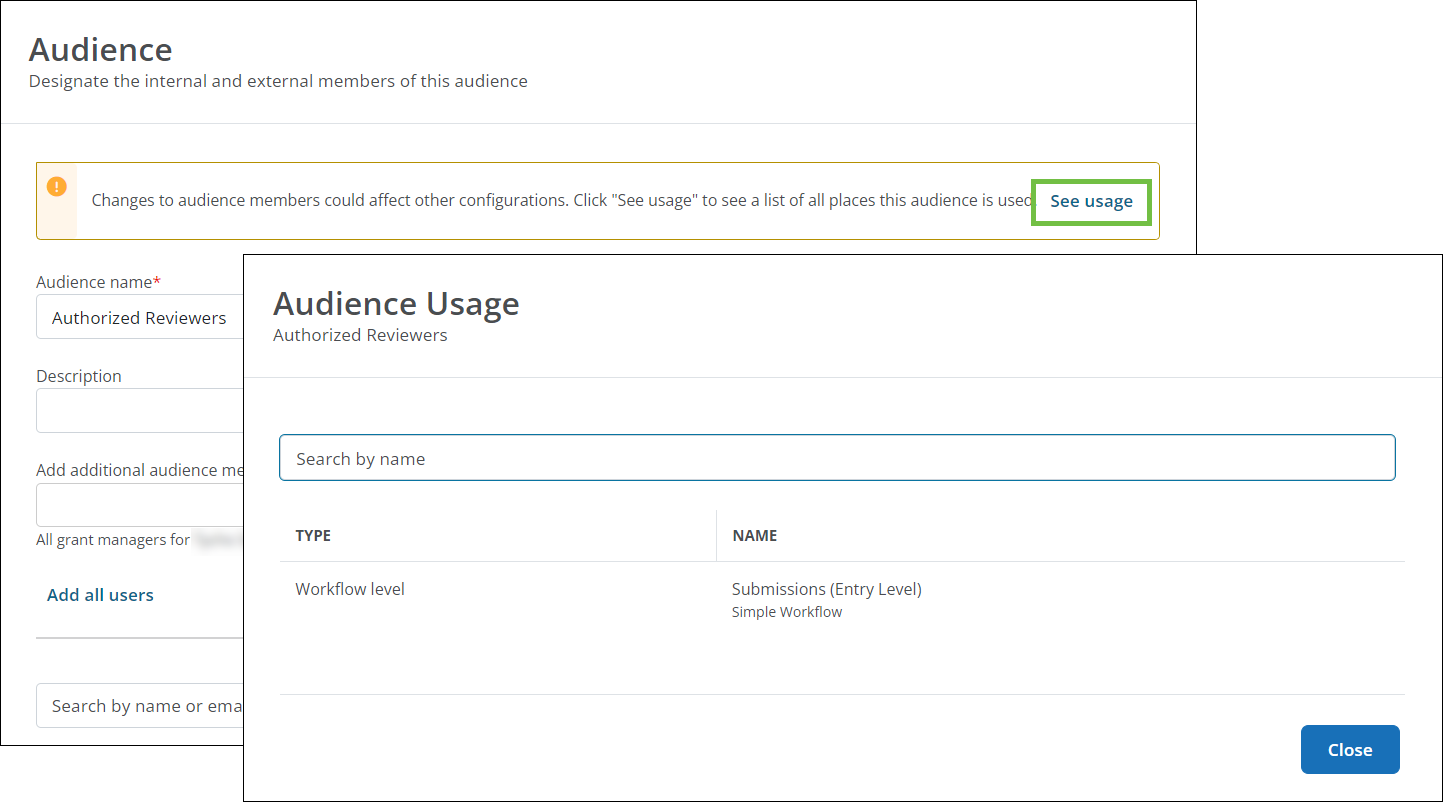
Note: This information can also be seen in the Audience Usage section of the audience flyout.
User management
New flyout for users provides a more efficient way to view user roles as well as workflows and audiences they're assigned to
A new flyout component that shows user details is now available in the Settings > Users area. When you click on the user's name, the flyout displays the following information:
-
Name
-
Email
-
Job title
-
Roles
-
Workflows
-
Audiences
Tip: If you have the System – Can Manage Users or System – All permission, you can remove the user from any assigned audiences.
In addition, you can take the following actions from this flyout:
-
Edit user
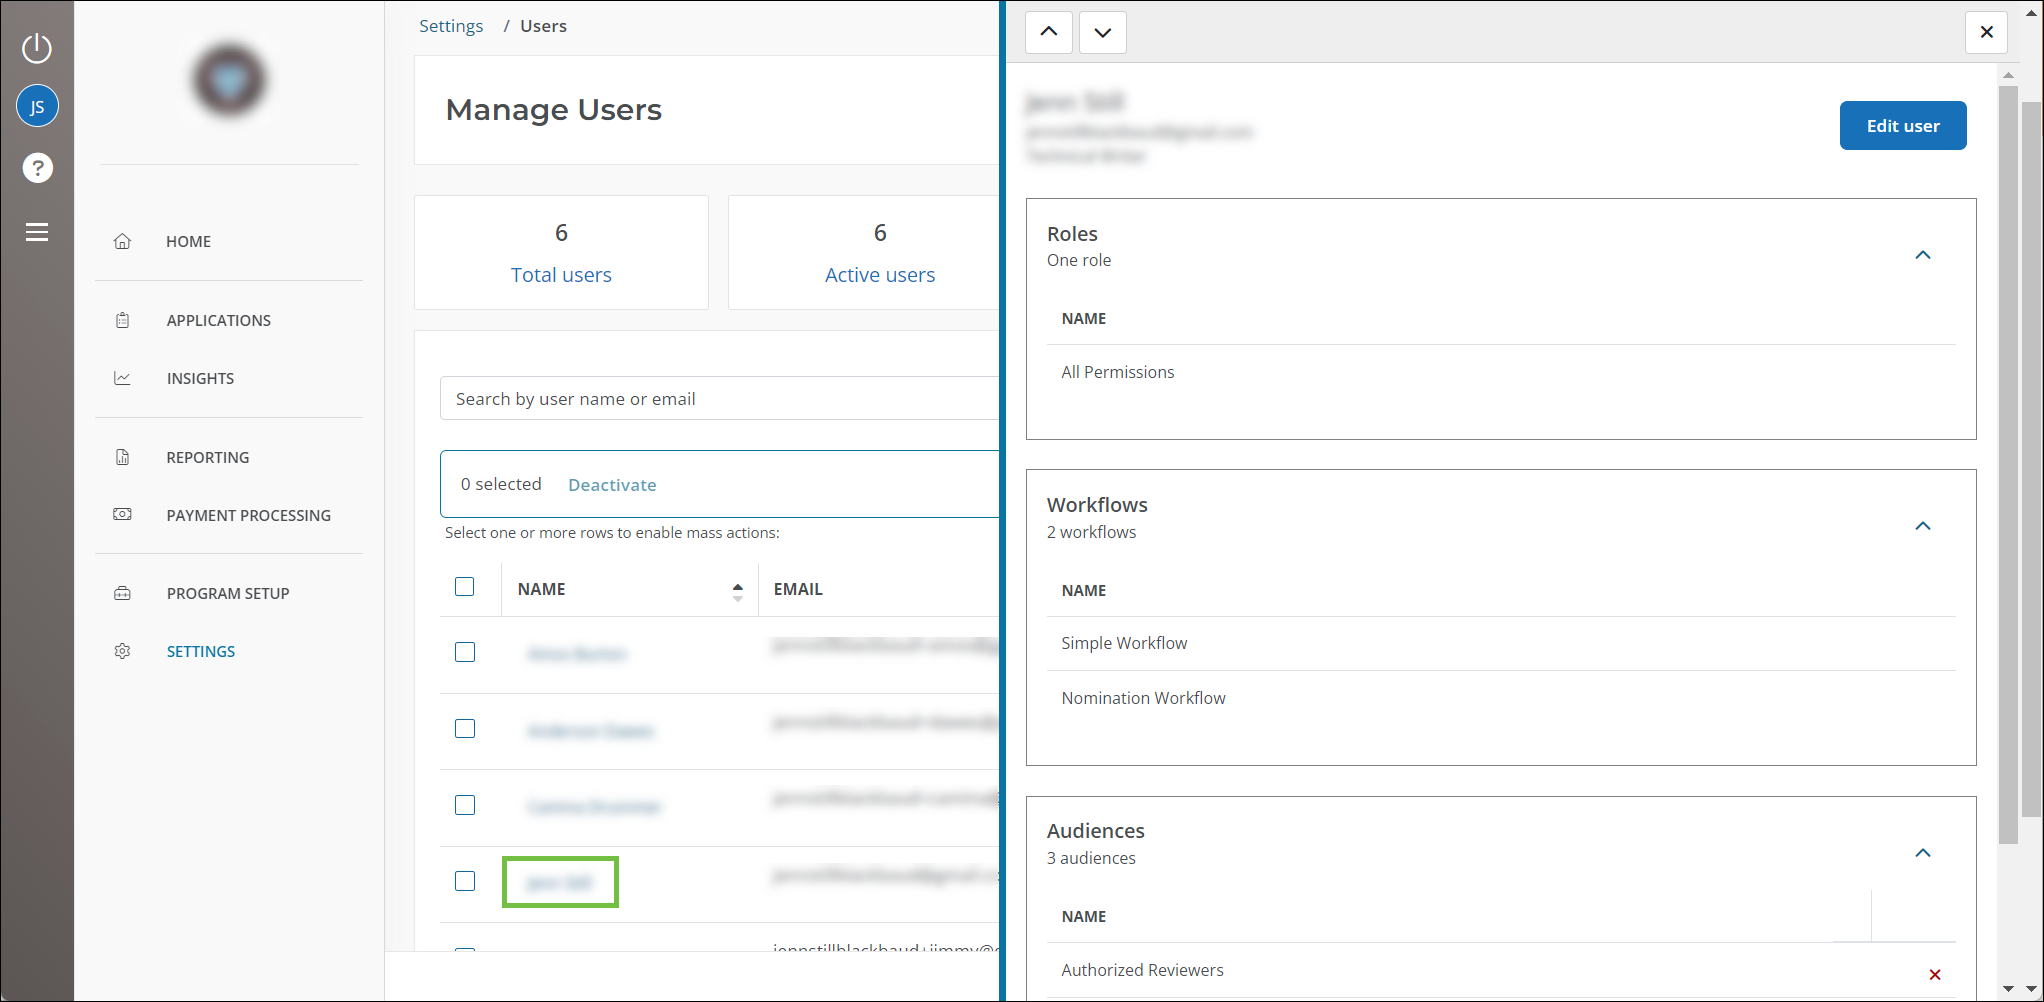
Tip: Click on the up/down arrows to quickly move between users.
Other
Performance and security updates
-
We’ve made enhancements to the file upload process in system emails and the rich text editor to provide more helpful error messaging if an upload fails.