The Checkout embedded data element presents the new checkout payment experience inline, rather than in a pop-up modal.
Tip: Using the checkout data elements for the first time? Check out our tutorial.
The Checkout modal and Checkout embedded elements both provide a responsive experience, but modal opens in an iFrame when prompted, whereas embedded is integrated into your form with no iFrame popup. The embedded element also allows more style customizations than the modal version.
Add the Checkout embedded data element
-
Select Fundraising and Donation Management.
-
Select Online Giving.
-
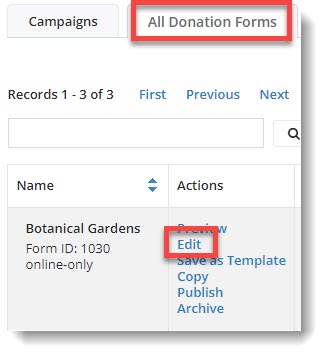
Select All Donation Forms, find a form in the list, and select Edit.

-
On the left, select Design Donor Screens.
-
Select Checkout embedded under Select data elements to include in this form and select Add.
-
Position the element where you want it in the form by selecting the element name and using the Order arrows.
Do not remove the Payment Type element.
-
Select Save Order and Edit Selected.
-
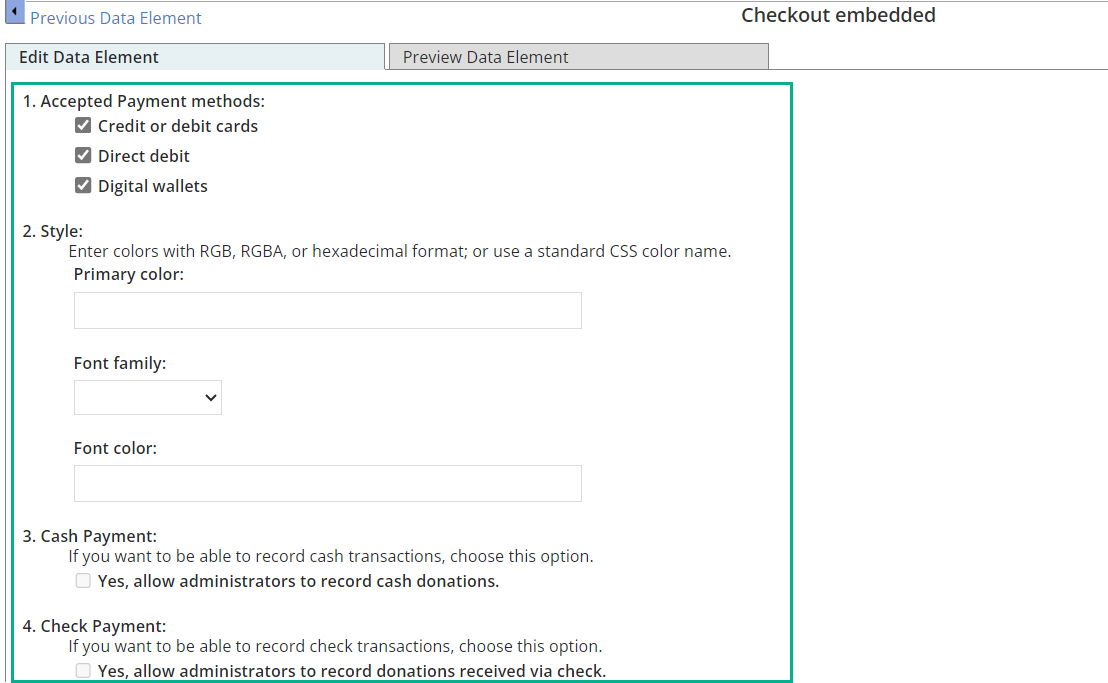
Select your checkout configurations.

-
Accepted Payment methods - By default, checkout provides all available payment types.
-
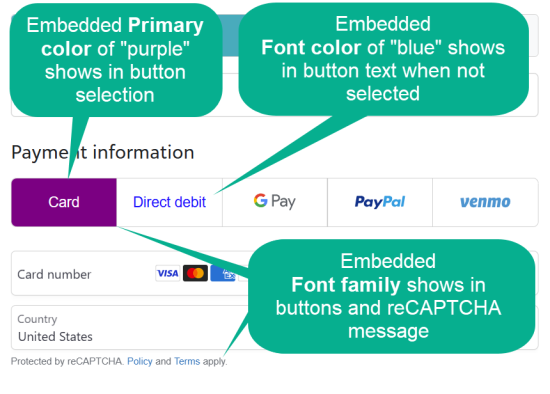
Style - Optionally enter a color, font family, and font color. For example, in the following image:
-
Primary color is set to "purple" which is reflected in the button color
-
Font color is set to "blue" which is reflected in the unselected button
-
Font family is set to "arial" which is reflected in the button text and reCAPTCHA message.

-
-
Cash Payment - Select to allow administrators in your organization the ability to record offline cash donations on this form.
-
Check Payment - Select to allow administrators in your organization the ability to record offline check donations on this form.
-
-
Preview, then Finish or Save your form.