Add Chapter Organizations
Nonprofit Administrators and Managers can add new chapters for an organization in My Nonprofits. As many chapters as needed can be created. Chapter requests must be reviewed and approved by Blackbaud Verified Network Support before it's available across the YourCause platform.
Tip: You must be a registered Administrator or Manager for your organization to add chapters. If you aren't, you can be added by an existing user or register using the instructions in Become a Nonprofit Administrator.
-
Navigate to https://nonprofit.yourcause.com. Sign in to Blackbaud Verified Network by entering your email and then log in with your Blackbaud ID (BBID) account.
-
You should be automatically taken to the My Nonprofits area. If not, select it from the side navigation.
-
In My Nonprofits, select the ellipsis icon next to the parent organization and then Add a chapter/affiliate.

-
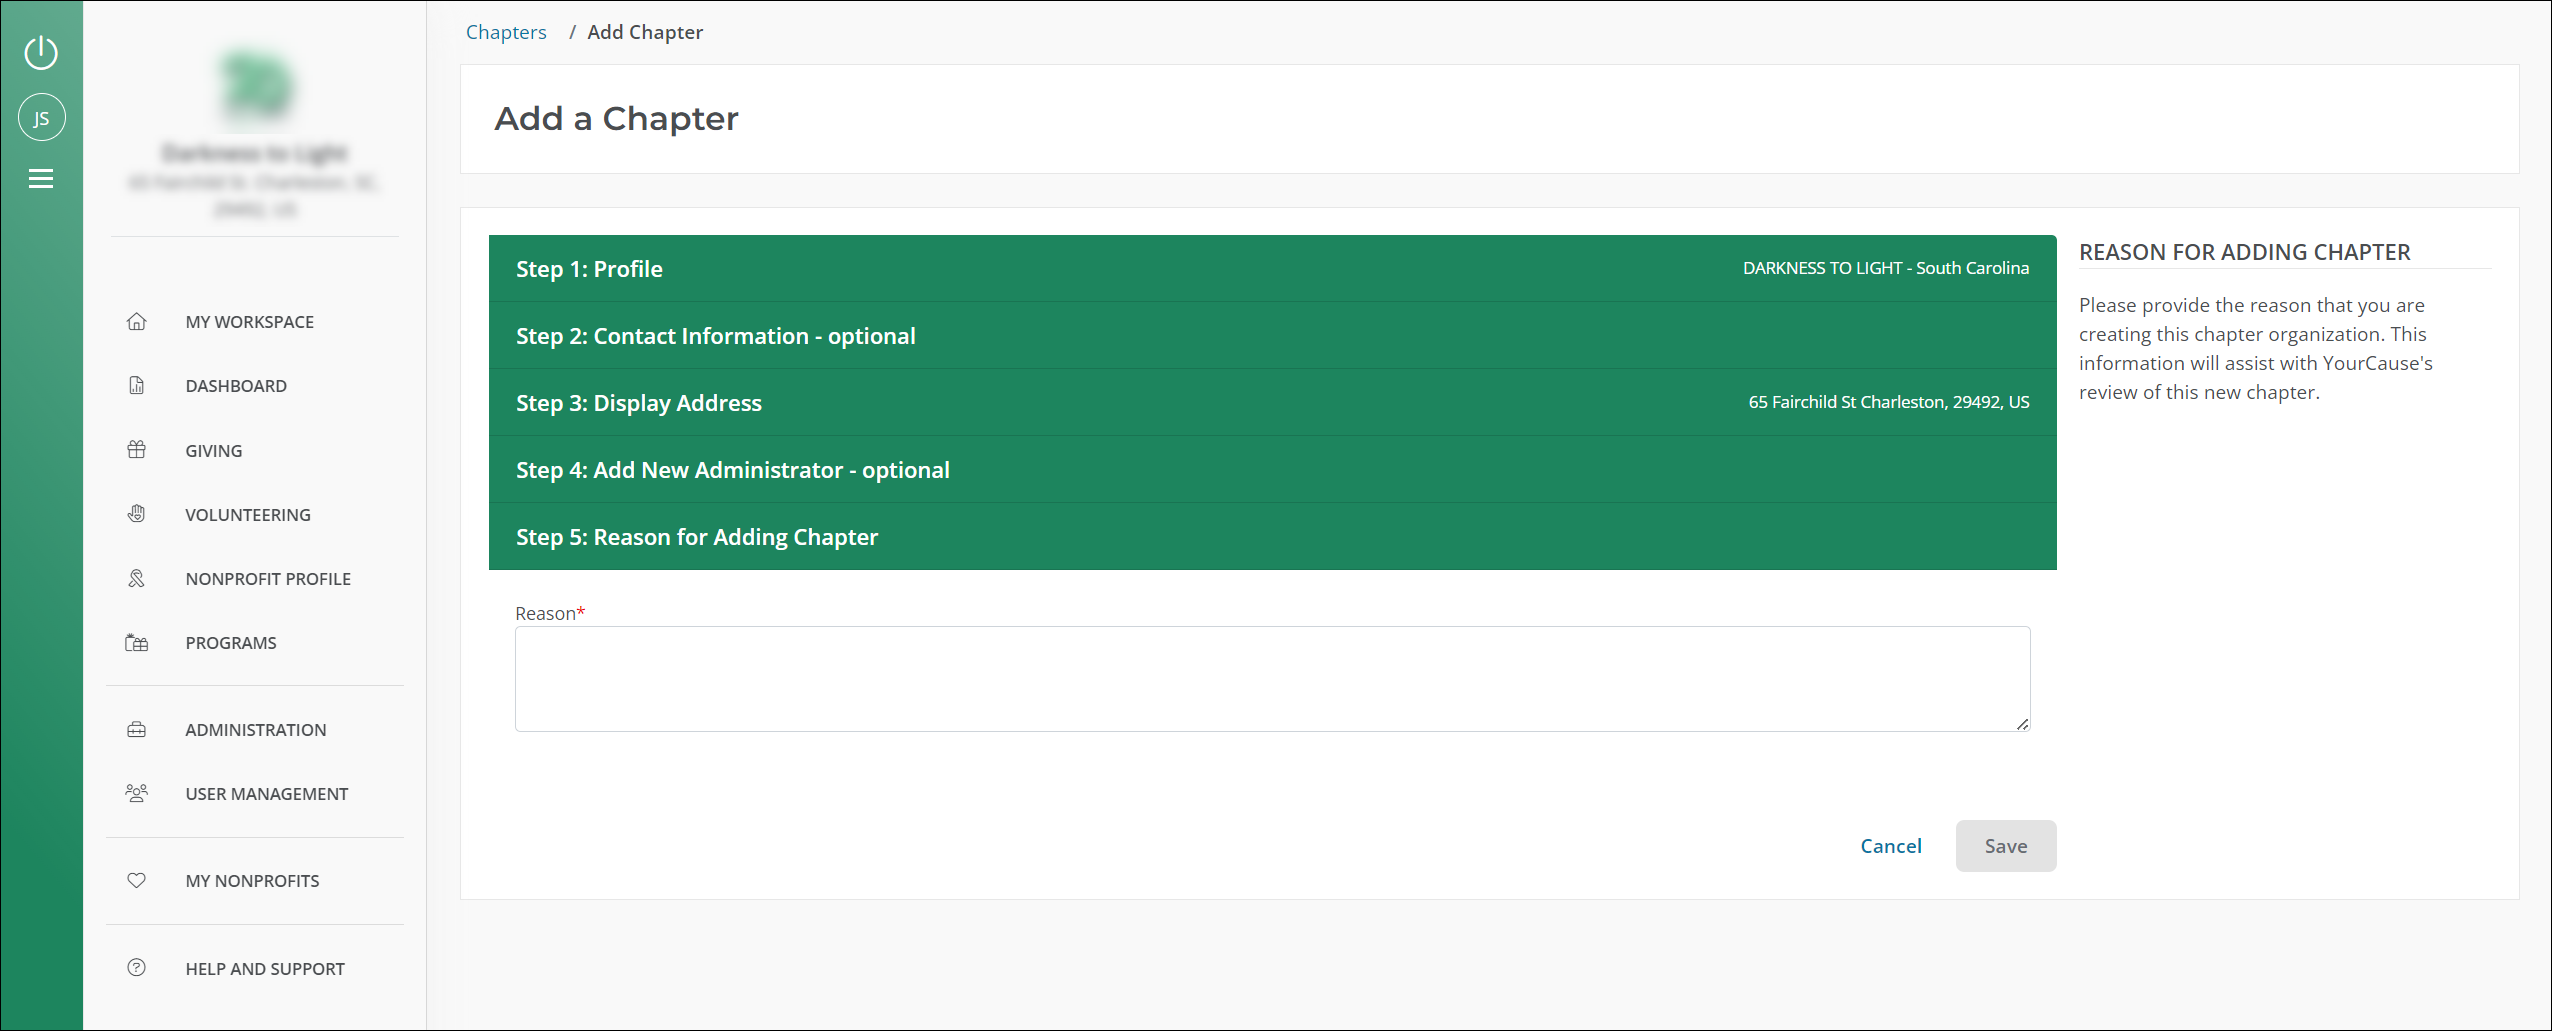
In Add a Chapter, follow the steps to set up your chapter.
 Step 1: Profile
-
Update your chapter's display name. This is the name shown to the public in your Nonprofit Profile.
Tip: We recommend prefixing the chapter name with the parent name. For example - If YourCause was a nonprofit organization with a chapter based in Charleston, SC, the chapter name would be YourCause - Charleston in Blackbaud Verified Network. This helps standardize chapter names and make them easily recognizable to potential donors.
-
Optional - Update your chapter's mission statement.
Tip: We suggest mentioning the parent organization in the mission statement. For example - Payments will be sent to the {Parent Nonprofit Name} to then be distributed to the {Chapter Name}.
-
Optional - Enter any tags and keywords associated with your chapter. To add multiple tags, separate each one with a comma or press Enter.
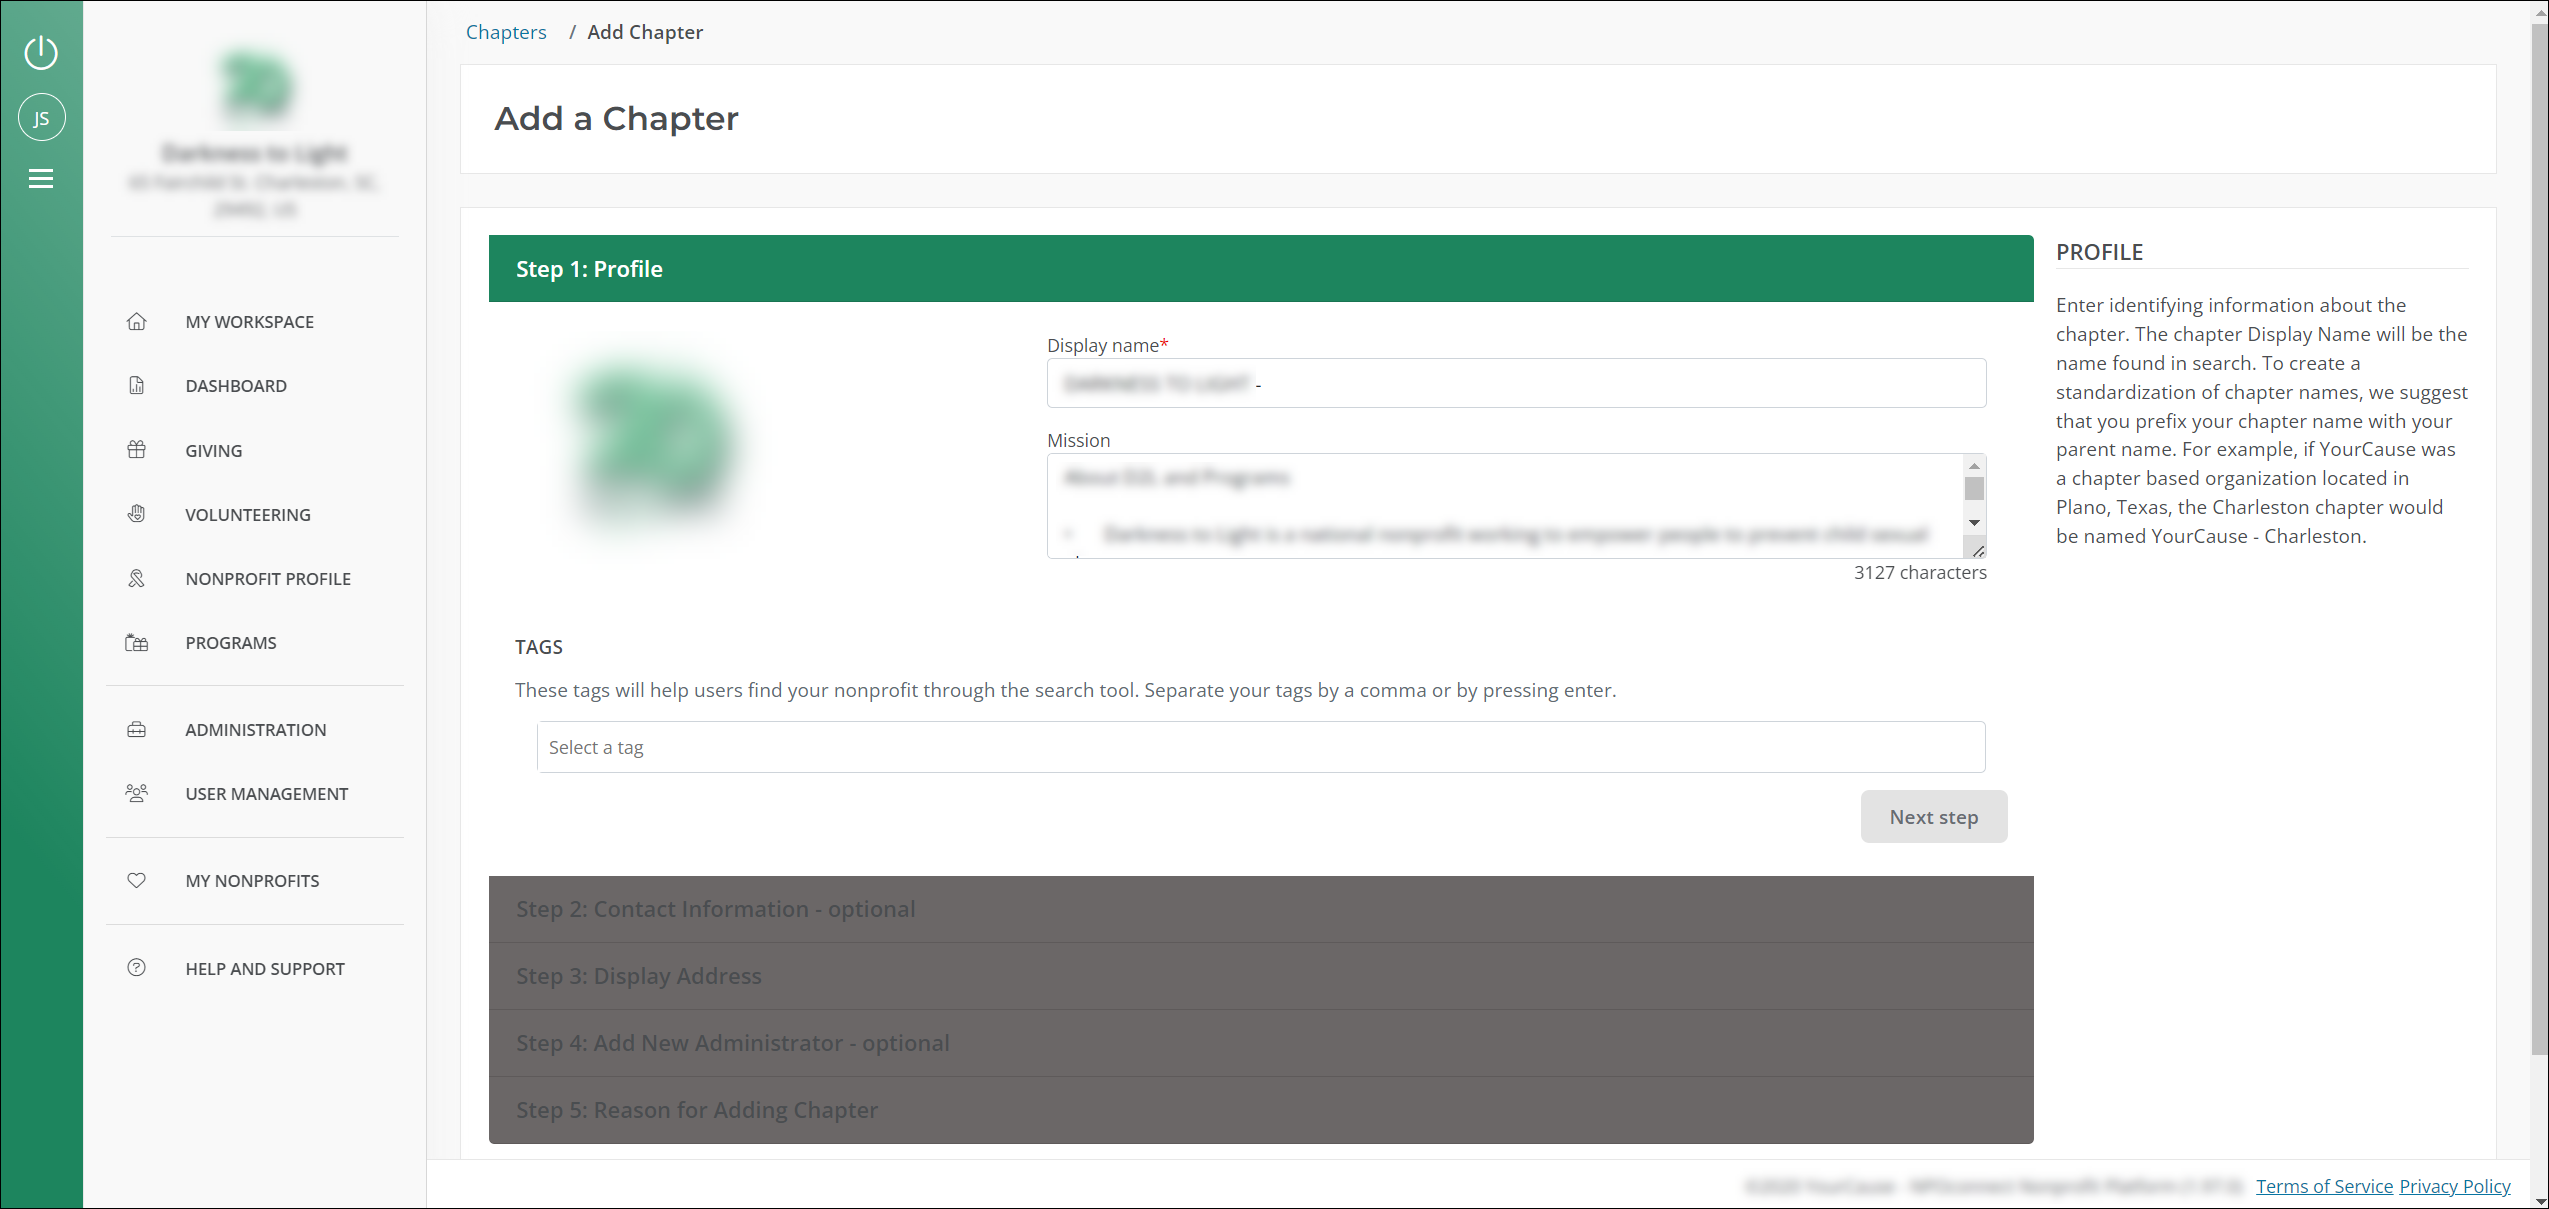
Note: The new chapter automatically inherits the parent's logo. After the chapter's approved, you can go to your Nonprofit Profile and edit it.
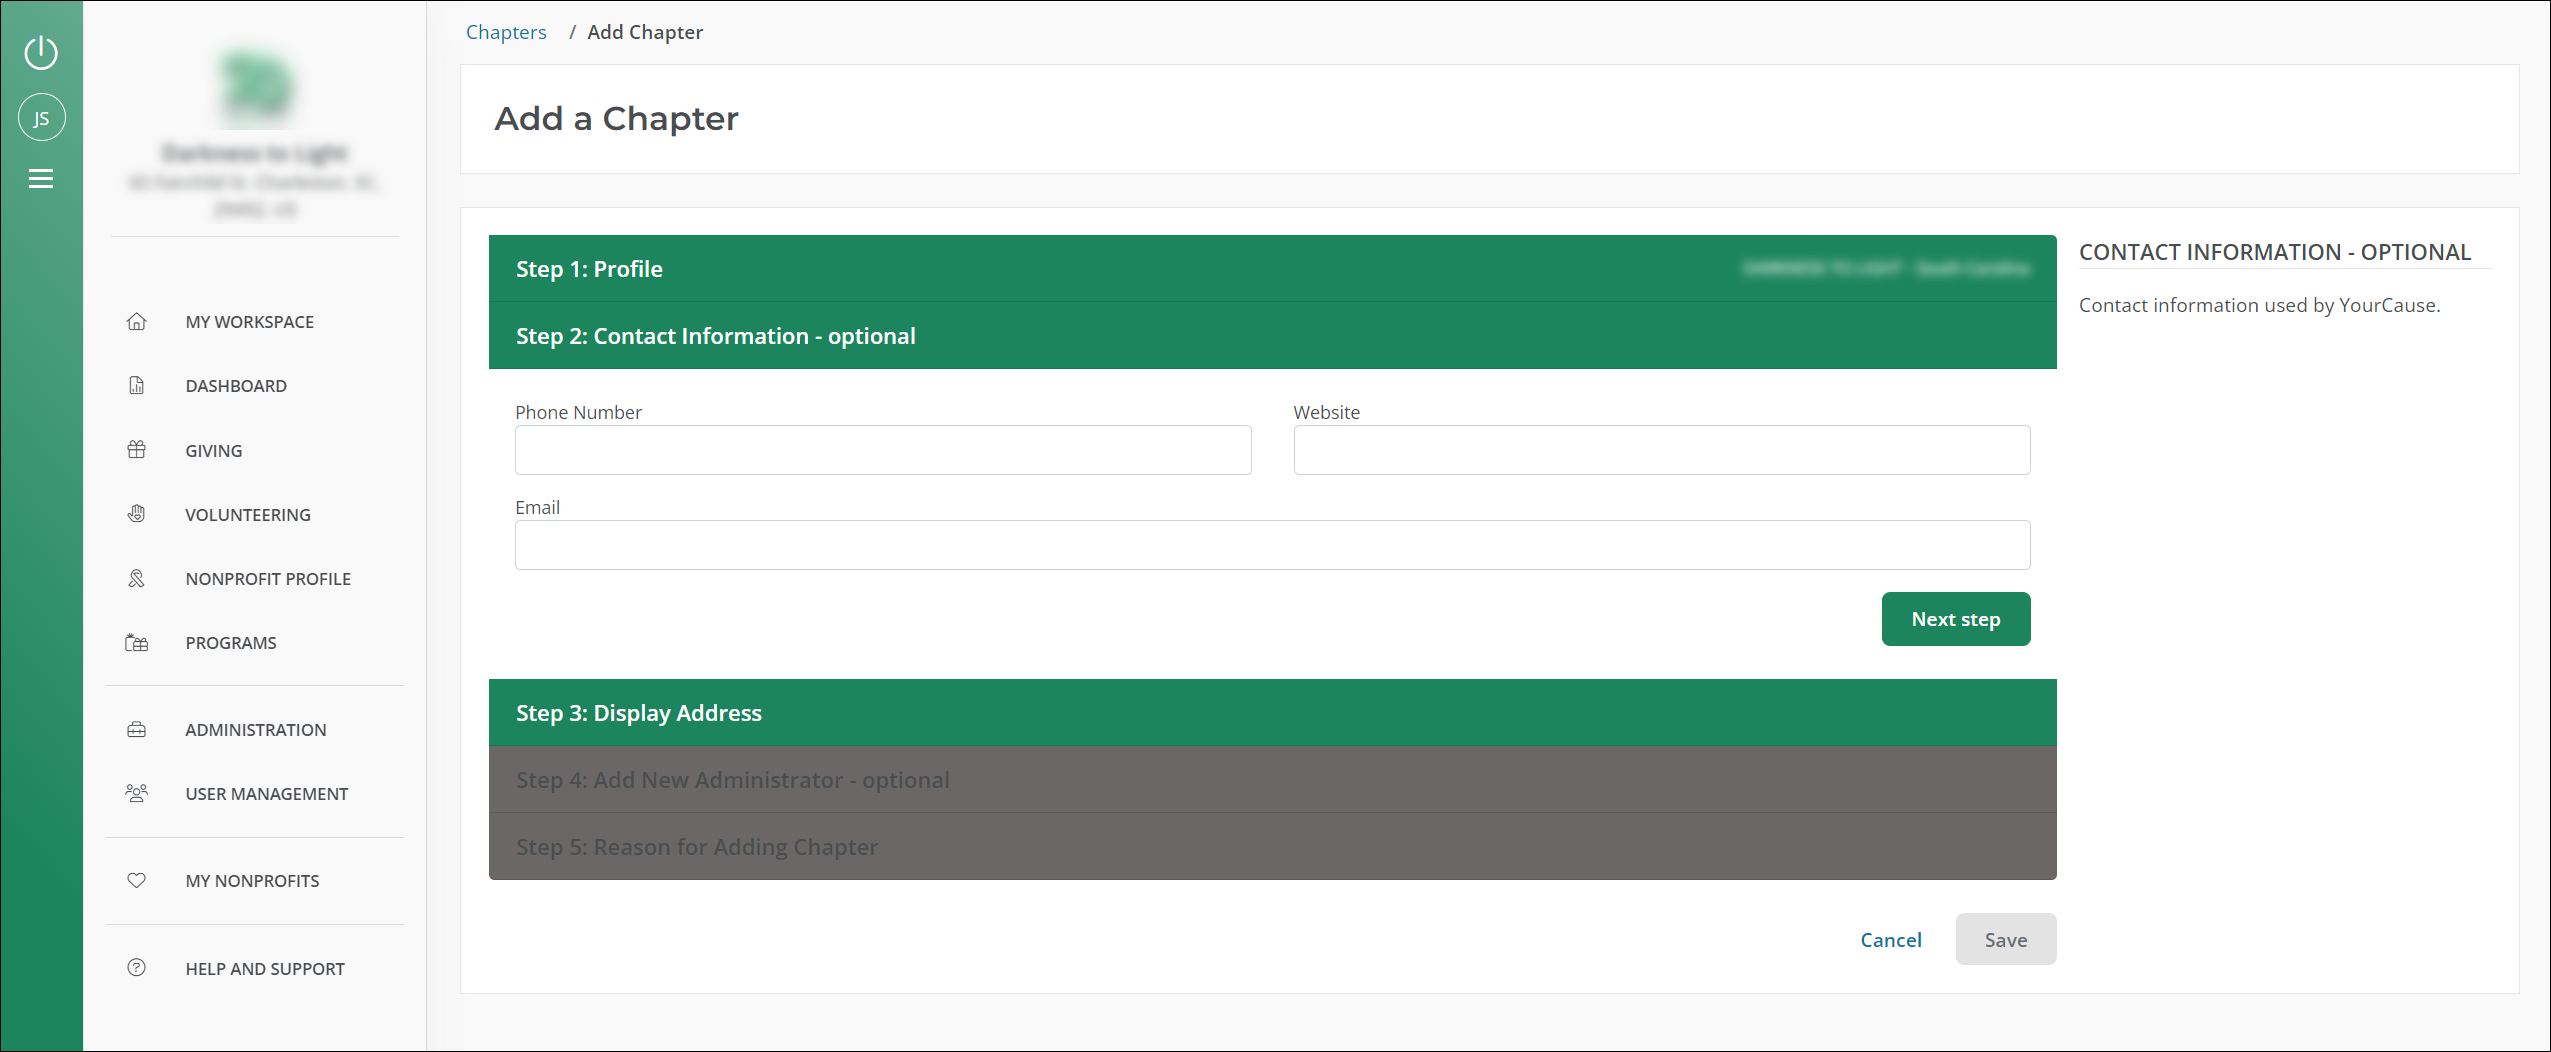
Step 2: Contact Information (Optional)
-
Optional - Enter the contact information for your chapter if it differs from the parent's information.
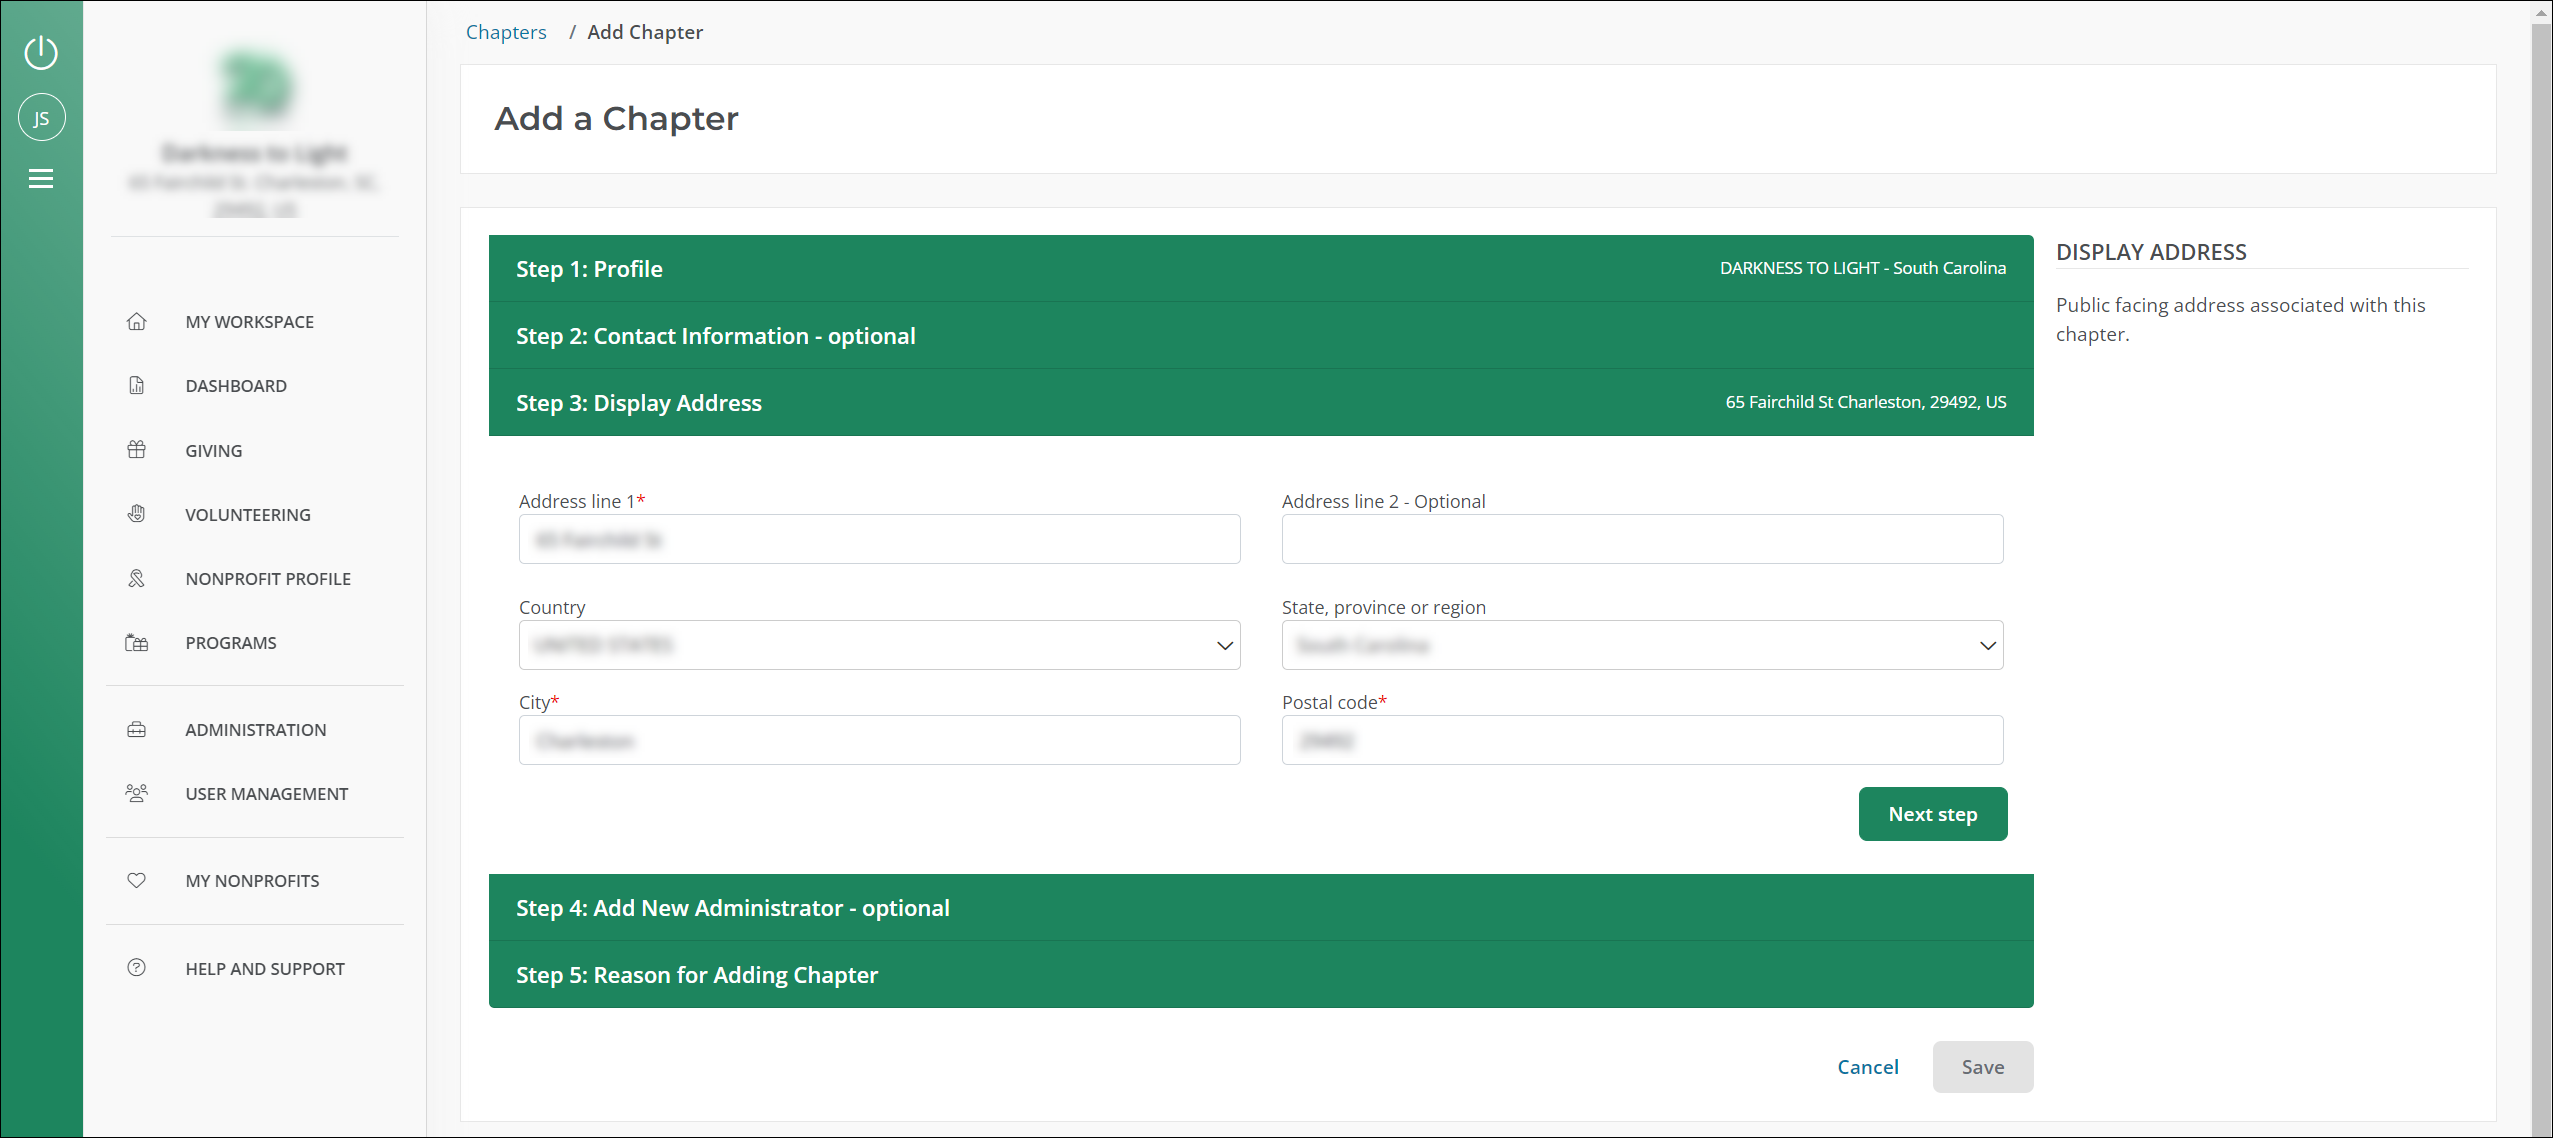
Step 3: Display Address
-
Enter the display address. This is the public-facing address for your chapter and will be shown on your Nonprofit Profile.
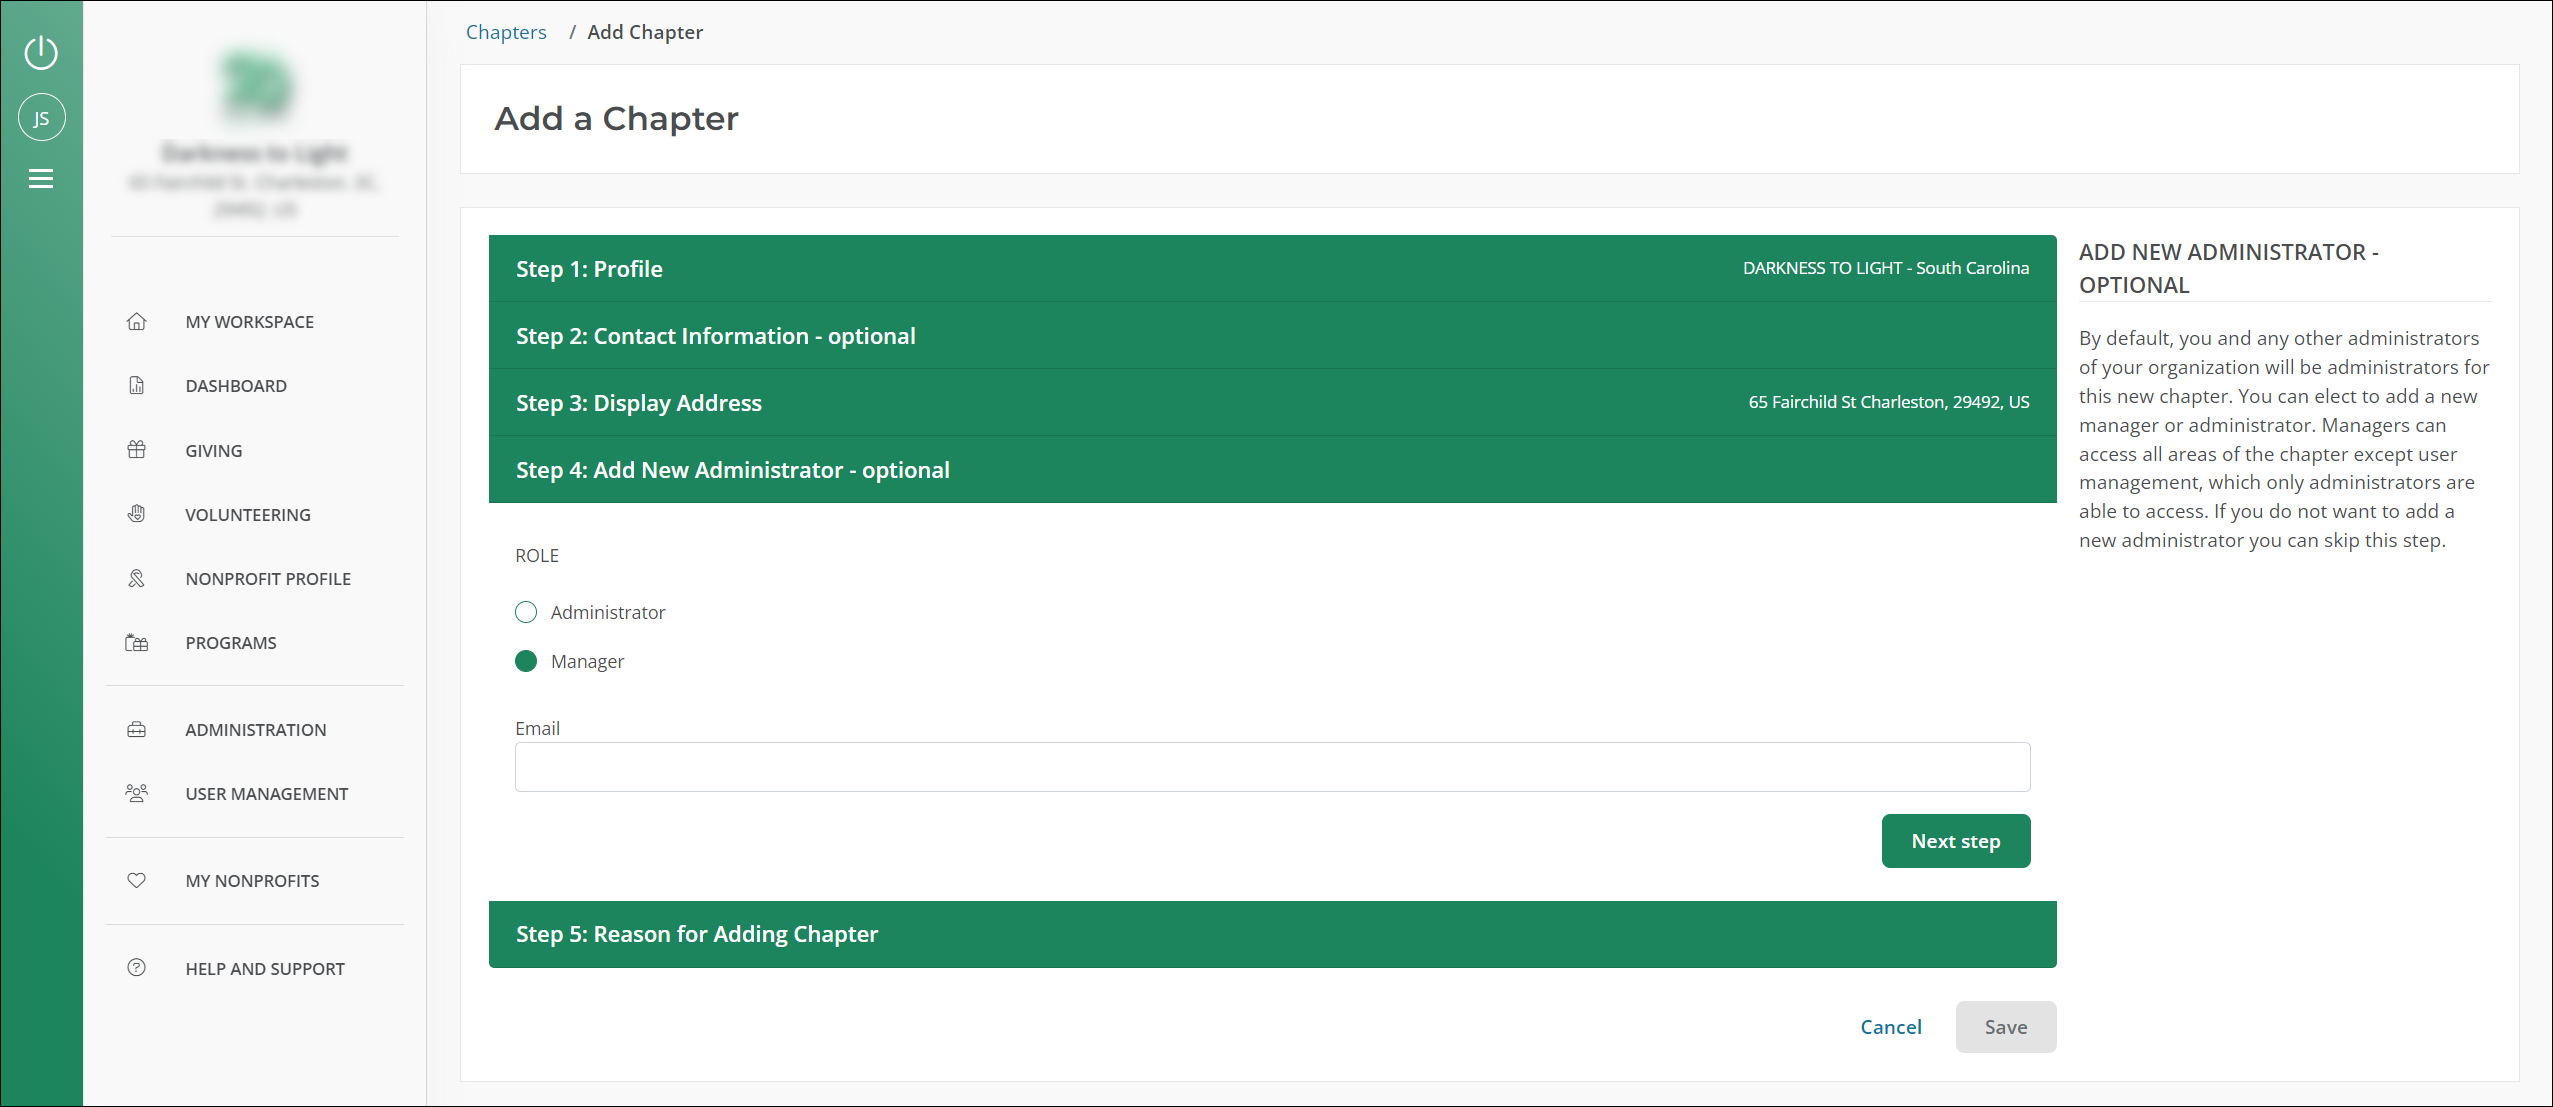
Step 4: Add New Administrator (Optional)
-
Optional - Add a new Nonprofit Administrator or Nonprofit Manager for the chapter. We'll send a notification to the email listed with instructions for creating an Blackbaud Verified Network account.
Tip: By default, all active Administrators for the parent organization will automatically be added as Administrators for any chapters created.
Note: For more information on Administrator and Manager permissions, see About User Roles and Permissions.
Step 5: Reason for Adding Chapter
-
Provide a reason that you're creating this chapter organization. This information is to assist Blackbaud Verified Network Support in reviewing your request and will not be shared publicly.
-
-
Select Save to submit the request.
Note: Ensure the information you've provided is correct and complete before submitting. Pending requests cannot be edited.
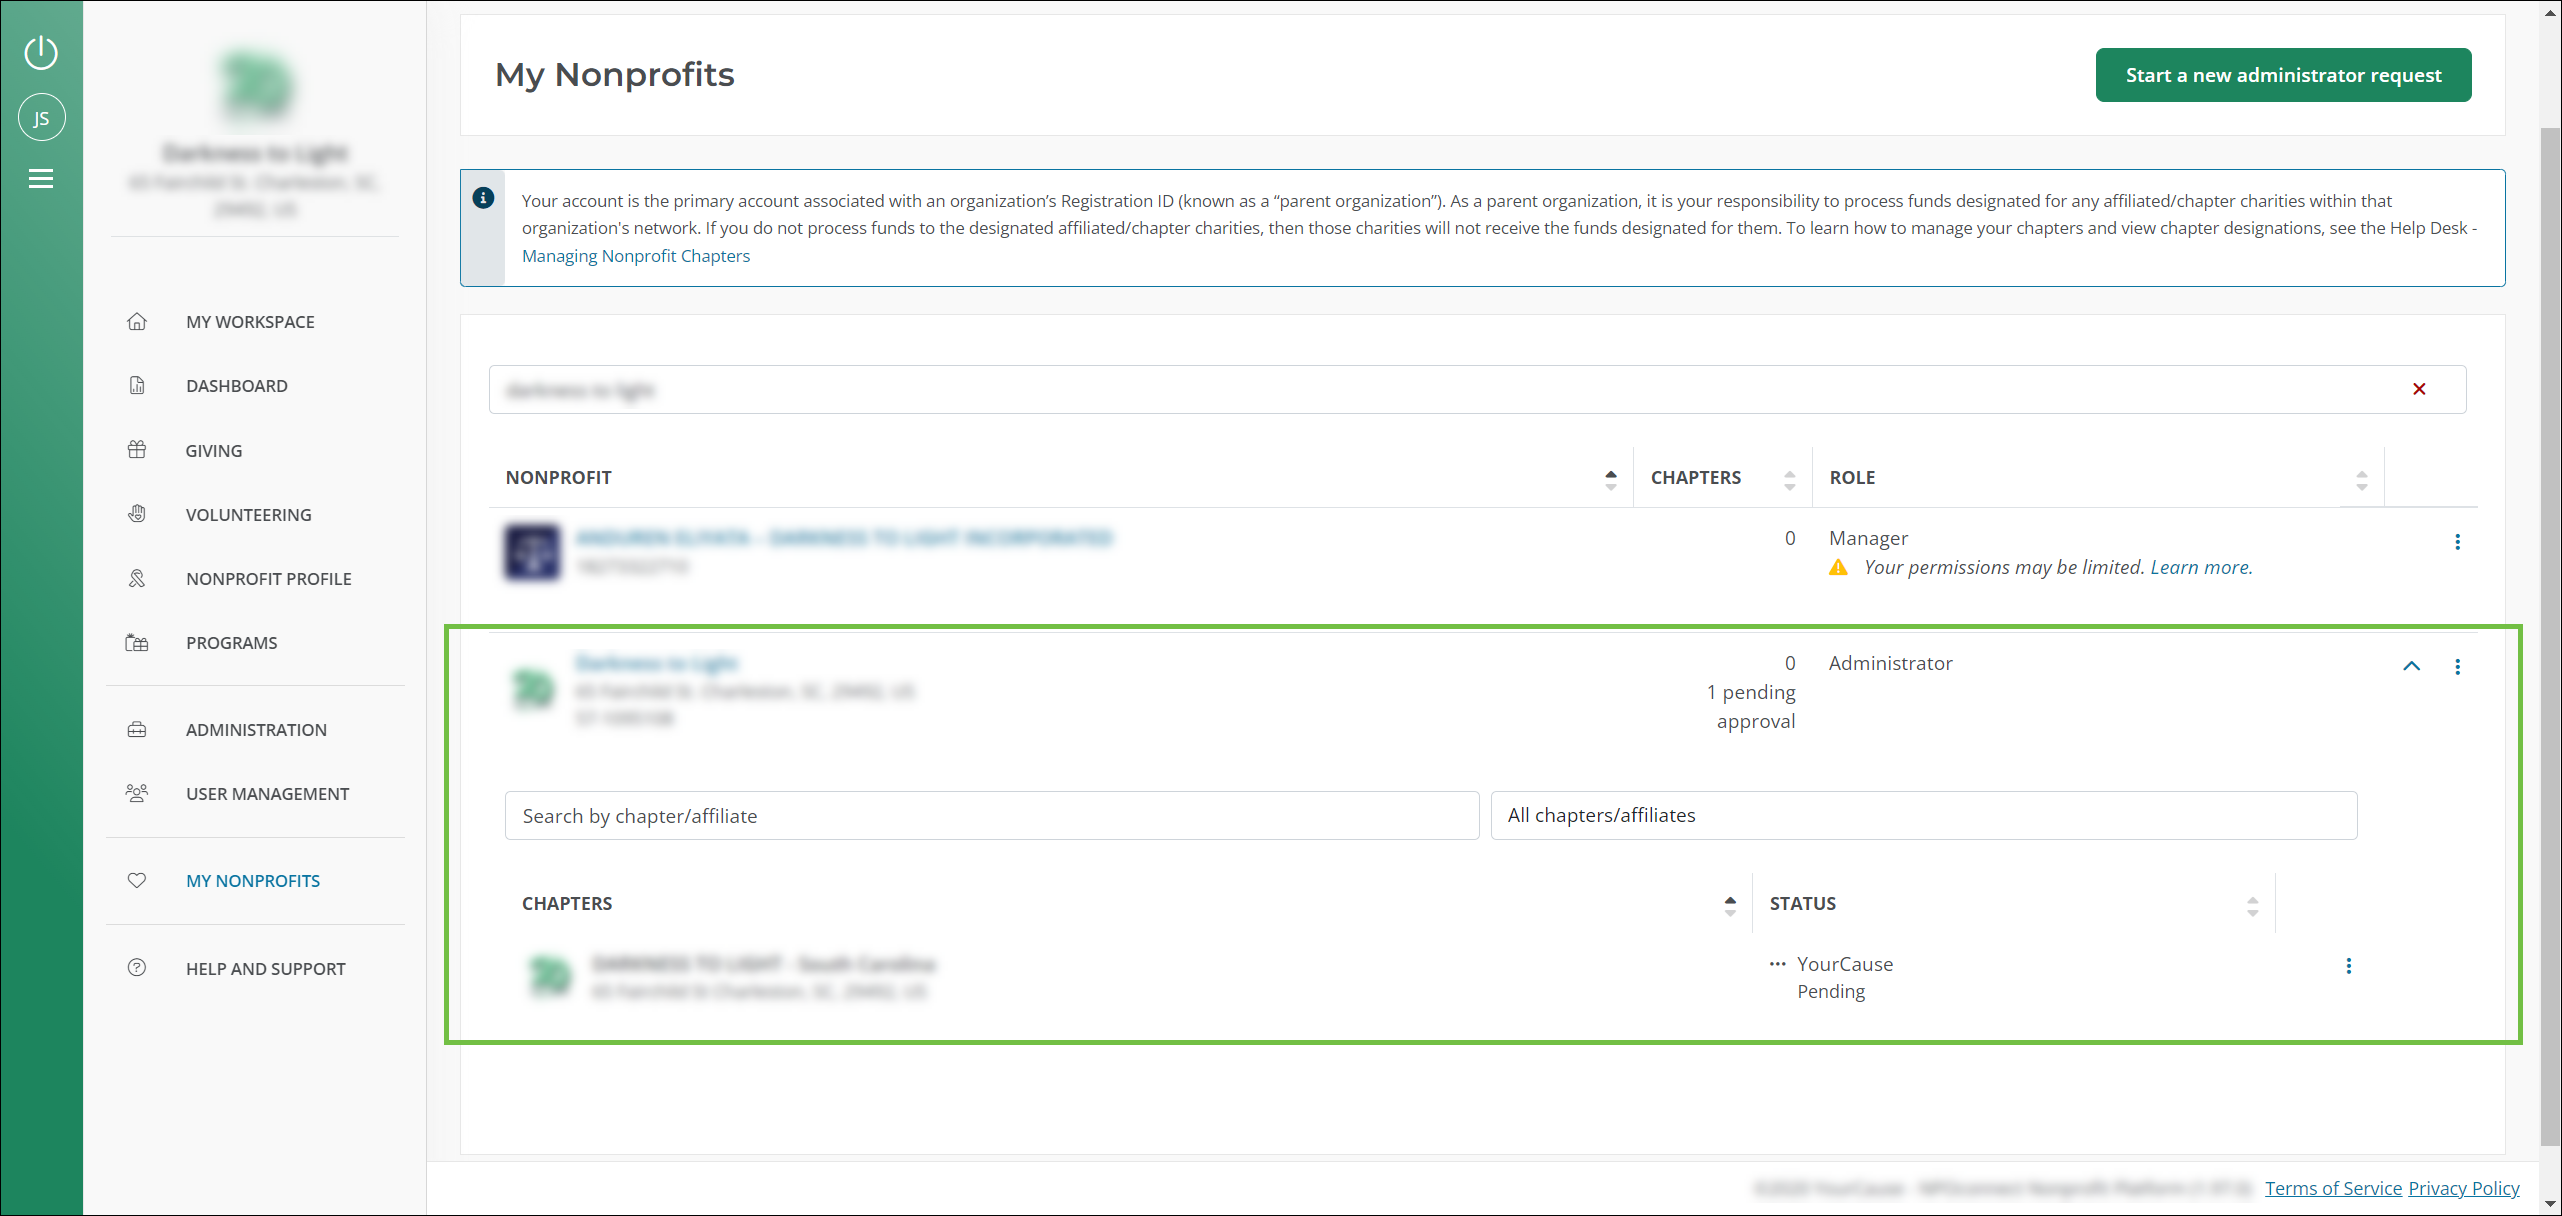
You can view your request and track its status in My Nonprofits. As shown in the image below, # pending approval is displayed in the Chapters column next to the parent organization. You can select the arrow to expand the view, see the request's status, and manage it (View chapter request or Cancel chapter request) as needed.
Frequently asked questions (FAQs)
Can I add a new logo or image for the new chapter?
After your chapter request has been reviewed and approved, you can update the logo used for your Nonprofit Profile if it differs from the parent organization's logo. For more information, see Manage Your Nonprofit Profile.
How are users and information managed across parents and chapters?
For more information, see How are users, profiles, and donations managed across parent and chapter accounts?.